
Loading ...
Loading ...
Loading ...
WWW.SENIXTOOLS.COM 13 - EN
USING THE FLOWER
PROTECTION
6ZLWFKWKHÀRZHUSURWHFWLRQWRWKHZRUNLQJVWDWHE\SXOOLQJ
GRZQDQGFODPSLQJLWLQWRVORW:KHQWKHÀRZHUSURWHFWLRQLV
not in use, reset it upside (Fig.8).
EDGING TRIMMING
WARNING:
Risk of Eye Injury. Use Safety Glasses or Similar
Eye Protection.
Stretch the pipe sleeve and rotate 180° clockwise.
It will be automatically locked when arrives at the angel of
180°. Then you can begin edging trimming.
On the contrary, pull the pipe sleeve again and rotate 180°
counterclockwise back to normal trimming (Fig.9).
GENERAL TRIMMING
INSTRUCTIONS
Stand in the operating position. Stand up straight. Do not
EHQGRYHU.HHSIHHWDSDUWDQG¿UPO\SODQWHG
Move the trimmer left and right, keeping it well away from
the body. Cut all grass from top to down.
Inspect the working area and remove all debris that may
be entangled in the trimmer head. Also remove any objects
that product may throw during cutting.
If the trimmer head is wrapped around with grass, stop the
trimmer and clean up.
$YRLGWUHHVÀRZHUVVWRQHVZDOOVDQGRWKHUREMHFWVZKLFK
can cause the line to break.
Check and feed the line regularly to maintain full cutting
width and performance.
Some line breakage will occur from:
• Entanglement with foreign matter
• Normal line fatigue
• Attempting to cut thick vegetation
• Forcing the line into objects such as walls or fence posts
LINE FEEDING
1) Semi-automatic Line Feeding
The trimmer is equipped with a semi-automatic feeding
system. The system feeds line with every press of the
switch trigger.
2) Manual Line Feeding
Press the line-feed button and adjust the line to desired
length (Fig.10).
CHARGING THE BATTERY PACK
WARNING:
This Lithium-Ion battery pack is shipped partially
charged. Fully charge the battery pack before
using it for the first time.
NOTE:
Charge batteries at a ambient temperature of 32°F-104°F
(0°C-40°C) and always store batteries at a ambient
temperature of 32°F-77°F (0°C-25°C).
1. Charge the Lithium-Ion battery pack only with the correct
charger.
2. Connect the charger to a power supply, the light indicator
of the charger turns red.
3. Align the raised ribs of the battery pack with the slot in
the charger (Fig.11).
4. Insert the battery pack into the charger, the light indicator
of the charger turns green and it flashes.
5. The charger will communicate with the battery pack to
evaluate the condition of the battery pack.
6. It is fully charged that the four lights of the battery turn
on. Disconnect the power supply from the charger.
Remove battery pack from the charger.
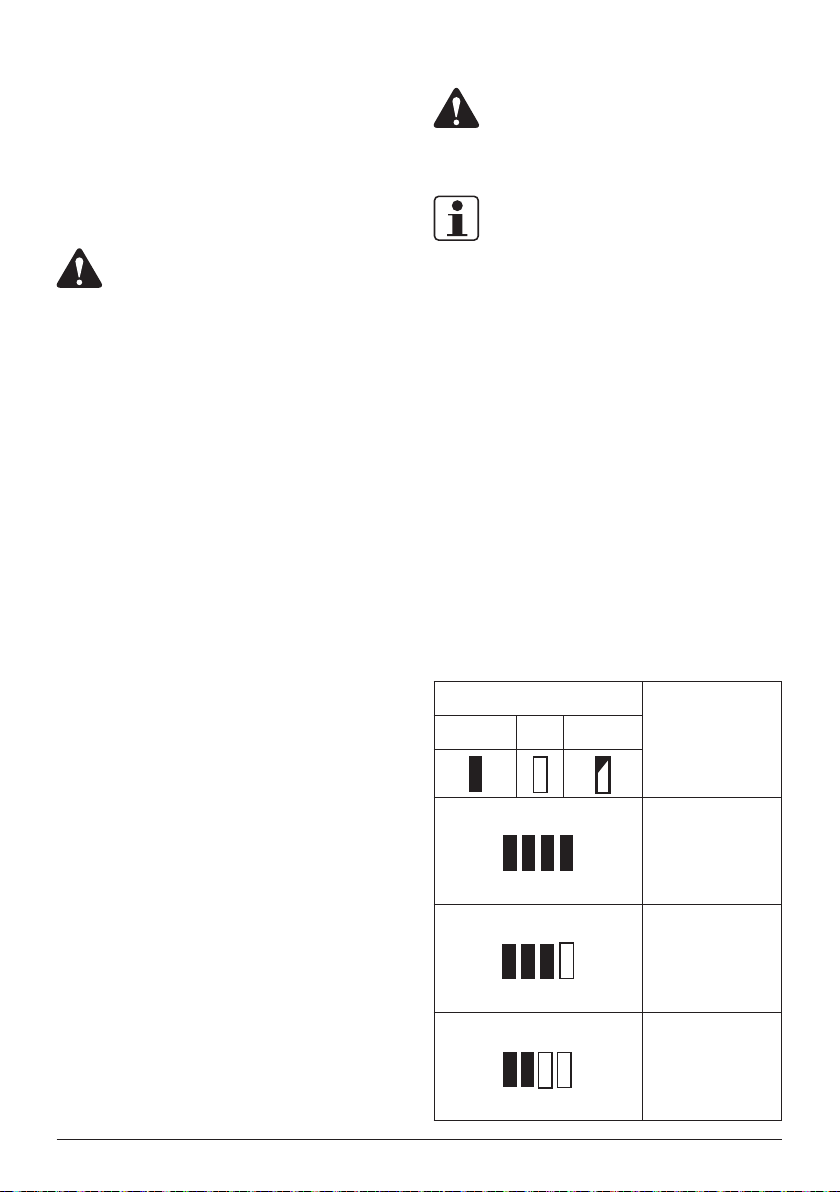
CHARGING INDICATOR
Press the light button on the battery pack to check whether
it needs to charge (Fig.12) .
Lights
Status
Lighted Off Blinking
The battery is at full
capacity.
The battery is at 75%
capacity.
The battery is at 50%
capacity and requires
charging.
Loading ...
Loading ...
Loading ...