Loading ...
Loading ...
Loading ...
SERVICING - WARNING
Disconnect from electricity and gas before servicing. Check appliance is safe when you have nished.
15
23. Remove a Gas Burner Thermocouple
Disconnect the appliance from the electricity Supply
Disconnect from the Gas Supply – Remove any
Safety Chains that may be present.
a. Each Hotplate burner has a Thermocouple device
which will shut the gas o in the event of a ame
failure. There are two parts to the safety circuit:
• The Thermocouple
• The Mag Valve (Mounted to the gas Tap) – The Mag
Valve cannot be replaced as an item, the whole gas
tap has to be replaced.
b. Remove the Side Panels (4. Remove the side panels)
c. Remove the Facia – (5. Removal Facia Assembly)
d. Remove the Gas Hotplate – (6. Removal of the Gas
Hotplate)
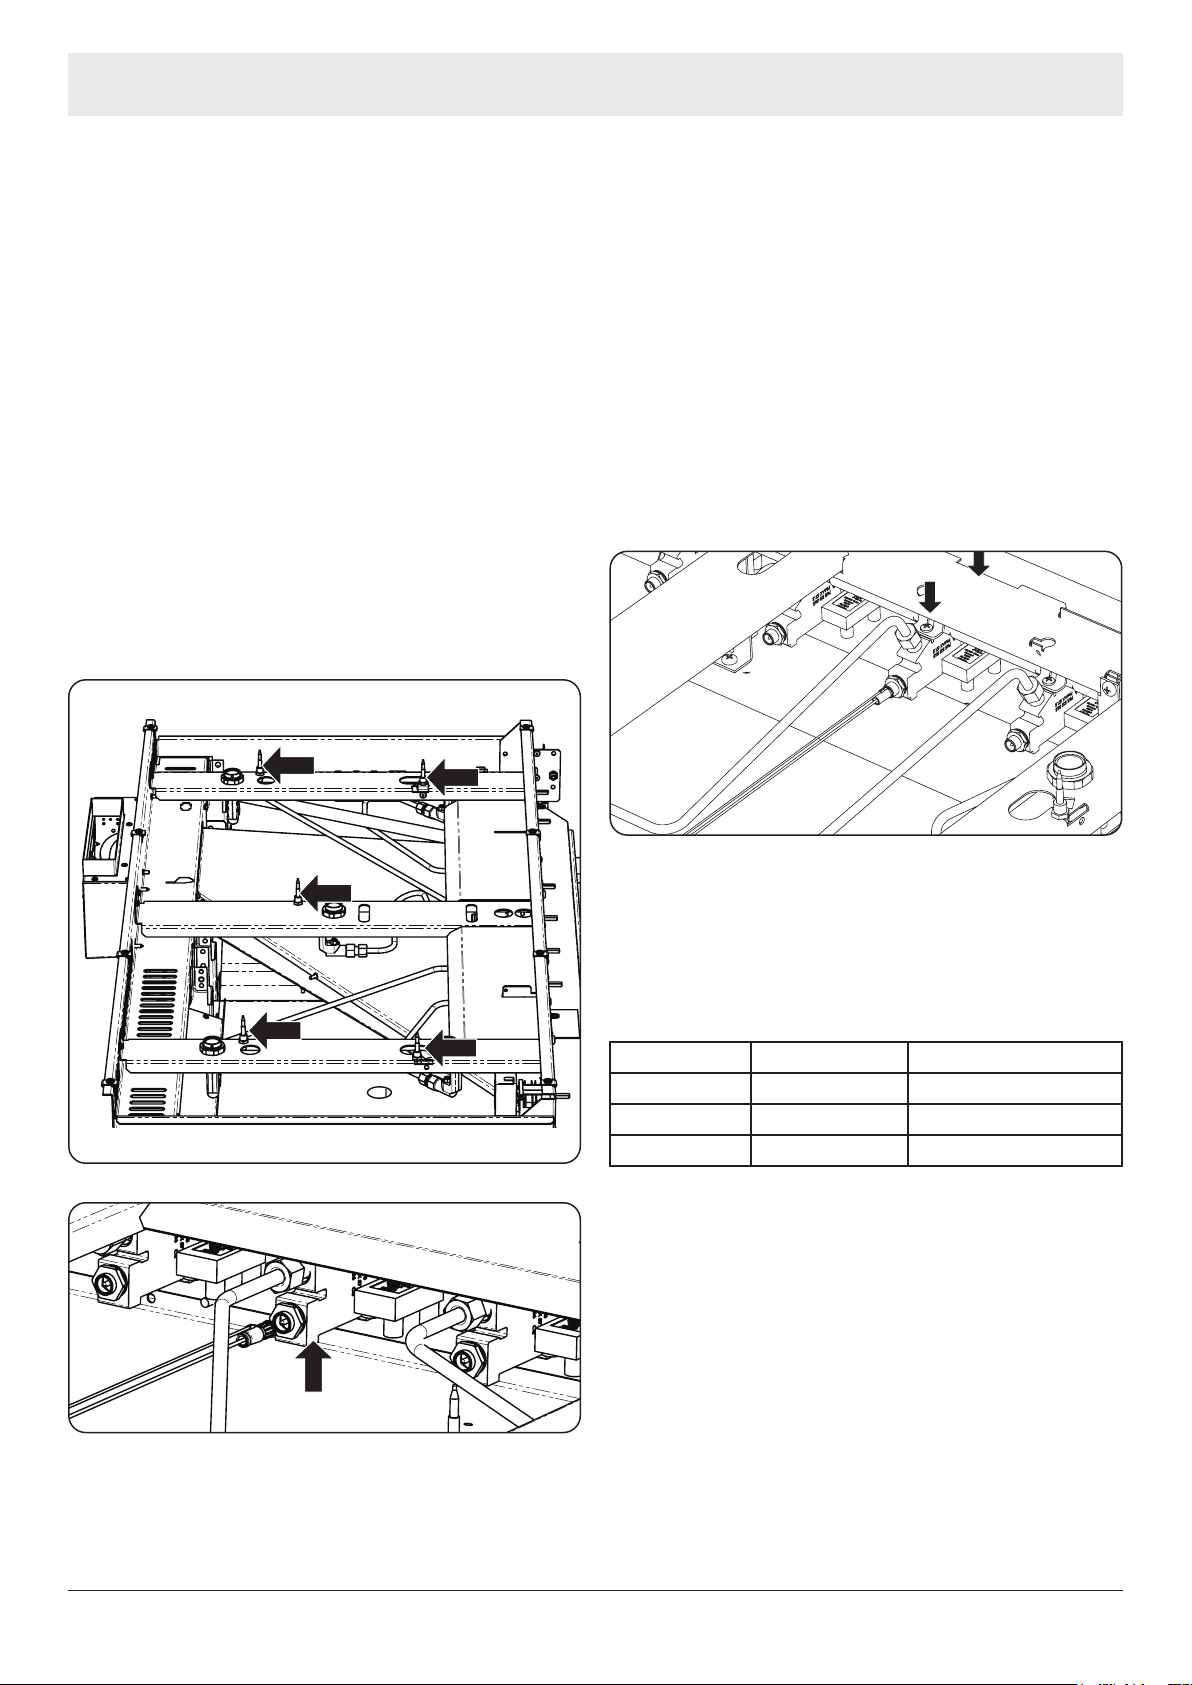
e. Locate the thermocouples mounted to the
support rail. Remove from the rail and unplug the
thermocouple from the gas tap.
f. Re- Assembly: Reassemble in the reverse order, take
care to ensure any electrical connections are securely
mated and if any gas joints have been broken, the
whole appliance must be checked for gas soundness
(no Leaks)
g. Check the electrical safety of the appliance by
carrying out the appropriate electrical safety
checks, earth bond and high Voltage Hi Pot tests.
24. Remove a Gas Tap
Disconnect the appliance from the electricity Supply
Disconnect from the Gas Supply – Remove any
Safety Chains that may be present.
a. Remove the Side Panels (4. Remove the side panels)
b. Remove the Facia – (5. Removal Facia Assembly)
c. Remove the Gas Hotplate – (6. Removal of the Gas
Hotplate)
d. Locate the gas tap on the gas rail. The gas tap is
secured with (x2) screws.
e. Remove the two screws, taking care not to lose the
rubber seal. A new seal should be provided with the
new gas tap.
f. If more than one gas tap is faulty, only remove one
gas tap at a time and make sure that each gas tap
is correct for the burner kW rating. Each gas tap is
colour coded to be aligned with each burner.
Part Number Burner Colour Code
P050262 Large Brown/Blue
P050264 Centre Yellow/Green
P050263 Front Right Hand Brown/Green
g. Re- Assembly: Reassemble in the reverse order, take
care to ensure any electrical connections are securely
mated and if any gas joints have been broken, the
whole appliance must be checked for gas soundness
(no Leaks)
h. Check the electrical safety of the appliance by
carrying out the appropriate electrical safety
checks, earth bond and high Voltage Hi Pot tests.
Loading ...
Loading ...
Loading ...