
Rechargeable self-tting hearing aid
CRE-E10
User Guide

2
Content
Intended use 5
Your hearing aids 7
How to use QR codes
*
8
What you’ll nd in the box 11
Get to know your hearing aids 12
Get to know your charger 13
Start here 14
Activate and charge before r use 16
Charging 16
Turning on and o 17
Inserting and removing the hearing aids 18
* QR Code is registered trademark of DENSO WAVE INCORPORATED.

3
How to change Click Sleeves 23
Charging 26
Charge devices while on the go 26
Charging via electrical outlet 27
Check charging atus 28
Low power indication 31
Charging tips 32
How often do I need to charge the hearing aids? 32
How long does charging take? 32
What happens if I forgot to charge? 33
Switch o the hearing aids for long term orage 33
Daily use 35
Adjuing the volume 35
Audio reaming with iPhone 36
Airplane mode for hearing aids 37


5
Fully charge your hearing aids before using them for the first
time.
Intended use
The self-tting hearing aid is intended to amplify sound for
individuals 18 years of age or older with perceived mild to moderate
hearing impairment. It is adjued by the user to meet the user’s
hearing needs through software tools. The device is intended for
direct-to-consumer sale and use without the assiance of a hearing
care professional.
The charger is intended to charge our specic hearing aids with
built-in power cells (lithium-ion rechargeable batteries).
The Sony | Hearing Control app is intended to support self-tting
and ne-tuning of the hearing aid.

6
NOTICE
XIt is necessary to use the Sony | Hearing Control app to
set up the device.
XThe left and the right hearing aid are intended to be worn
together. They operate as a set.
CAUTION
Read this user guide and the safety and maintenance
information thoroughly and completely to avoid damage and
injury.

7
Your hearing aids
A power cell (lithium-ion rechargeable battery) is permanently
built into your hearing aid. This enables easy charging with your
charger.
The wireless functionality enables advanced audiological features
and synchronization between your two hearing aids.
Your hearing aids feature Bluetooth
®
Low Energy* technology
allowing for easy data exchange with your smartphone, and for
seamless audio reaming with your iPhone**.
* The Bluetooth word mark and logos are owned by the Bluetooth SIG, Inc., and any use of such
marks by Sony Corporation is under license. Other trademarks and trade names are those of their
respective owners.
** Apple, the Apple logo, iPhone, iPad, and iPod are trademarks of Apple Inc., regiered in the U.S.
and other countries and regions.

8
How to use QR codes
You will nd QR codes throughout the user guide. These QR codes
will help you to inall the Sony | Hearing Control app or to view
inructional videos.
Start now by scanning the QR code with your smartphone camera
or by typing the URL into your browser:
1. Open the QR Code reader or smartphone camera on your
phone.
2. Hold your device over the QR Code so that the QR code is
clearly visible within your smartphone’s screen.
3. The phone will automatically scan the QR code. When your
smartphone reads the QR code, a link will appear. Click the link
to go to the video.

9
NOTICE
XNot all smartphone readers work the same. Some may
require additional eps.
WARNING
In case you have any doubt whether this device is
appropriate for you, consult a licensed physician before
using this device.

10
For adults 18 years and older with mild to moderate hearing loss.
WARNING
Contact your primary care provider before using this product
if you currently experience any of these conditions as it may
not be appropriate for you:
Xsevere hearing loss or deafness in at lea one ear
Xa eep decline in hearing ability within the la 90 days in
one or both ears
Xactive discharge within the la 90 days
Xdizziness
Xa visible deformity of the ear
Xpain, or discomfort in the ear
Xsignicant ear wax accumulation

11
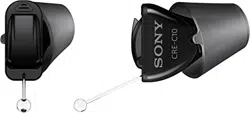
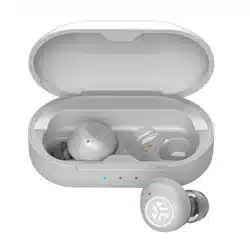
What you’ll nd in the box
Left and right hearing aid,
Click Sleeve S attached.
Charger + USB cable
Cleaning brush Cleaning cloth
Click Sleeves
sizes XS, M, and L
XQuick art card and user guide (this booklet)
XSafety and maintenance information
XLimited warranty
12
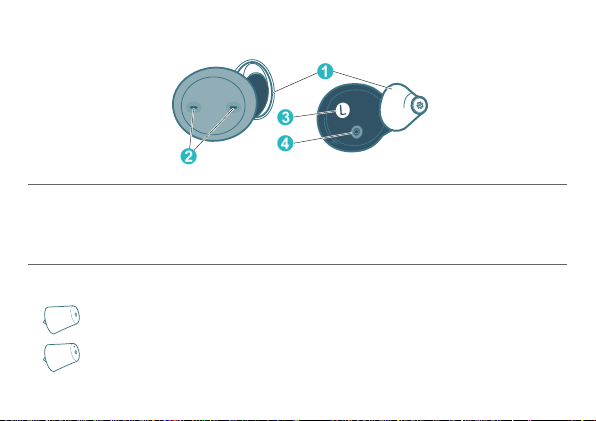
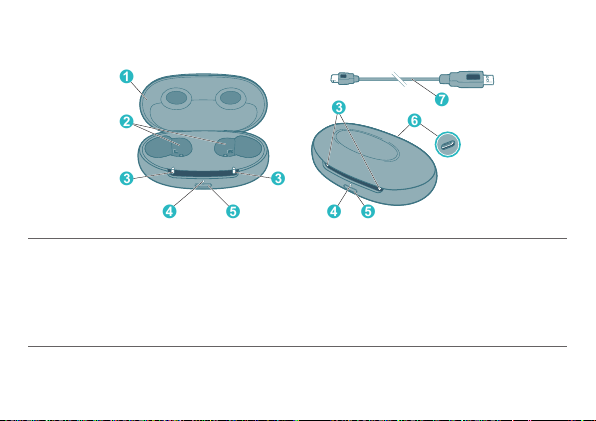
Get to know your hearing aids
➊
➋
➌
➍
➊ Click Sleeve
➋ Microphone openings
➌ Side indicator
(R = right ear, L = left ear)
➍ Charging contacts
You can use the following andard Click Sleeves:
Click Sleeve closed (andard)
Click Sleeve vented (optional)
13
Get to know your charger
➏
➊
➋
➐
➌
➍
➌
➎ ➎➍
➌
➊ Lid
➋ Charging cups
➌ LEDs – hearing aids
➍ LED – charger
➎ Push button
➏ USB power port
➐ USB power cable

14
Start here
It is required to complete all eps in the Sony | Hearing Control app
to setup the hearing aids for your needs. Start now by scanning the
QR code with your smartphone camera or by typing the URL into
your browser.
To receive guidance how to set up your hearing
aids, use the QR code or open the browser on your
smartphone and type in this address:
sony.net/hearing-e10-app
You will be guided through the process. It will take around 10
minutes.
Before arting the process, please do the following:
XEnsure rong internet access (Wi-Fi or cellular) throughout the
cuomization process
15
XFind a place where you are not diurbed by other loud sounds
XUnmute your smartphone
XSet the volume for media sounds of your smartphone to a high
level (about 75%).
Download the Sony | Hearing Control app to personalize your
hearing aids.
Follow the Sony | Hearing Control app for inructions.
The following sections are for your reference only.
sony.net/hearing-e10-app
16
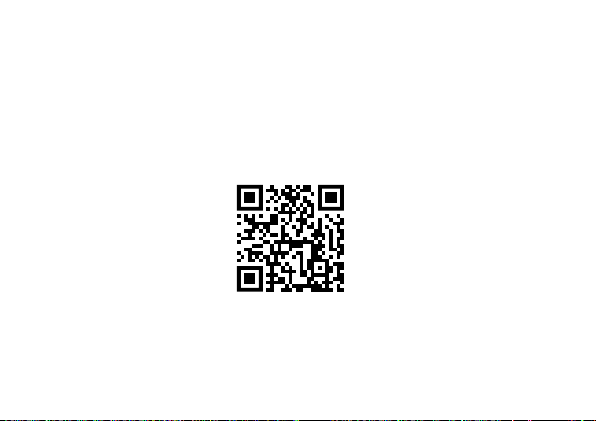
Activate and charge before r use
Charging
Connect the charger and a suitable
power adapter (not included) with
the USB cable. Use the cable which
came with the device.
Keep the hearing aids inside the
charger.
➊
➋
17
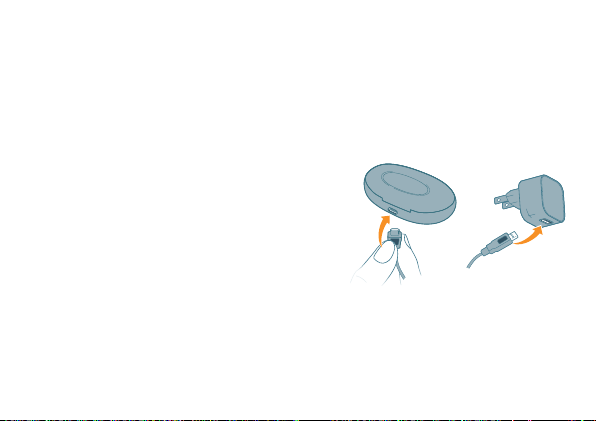
While charging, the lights are pulsing
orange. Your hearing aids are now
activated. The lights change to conant
green when the batteries are fully charged
Turning on and o
There is no on/o button on the hearing aids.
XTurning on: Take the hearing aids out of the charger.
XTurning o: Place the hearing aids in the charger.
18
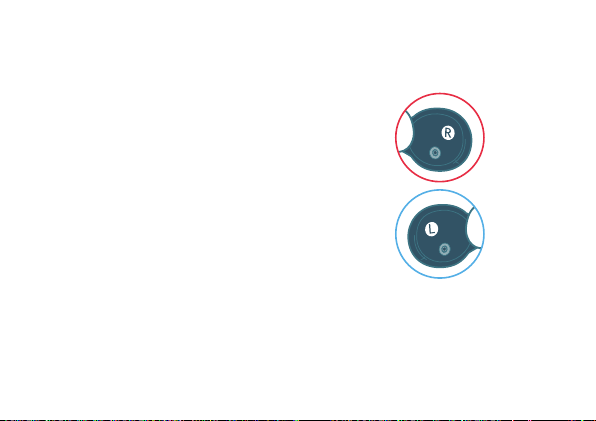
Inserting and removing the hearing aids
Inserting a hearing aid:
XIdentify right and left hearing aid so
that you insert it in the correct ear.
Letters R and L indicate the side:
R = right ear
L = left ear
w
19
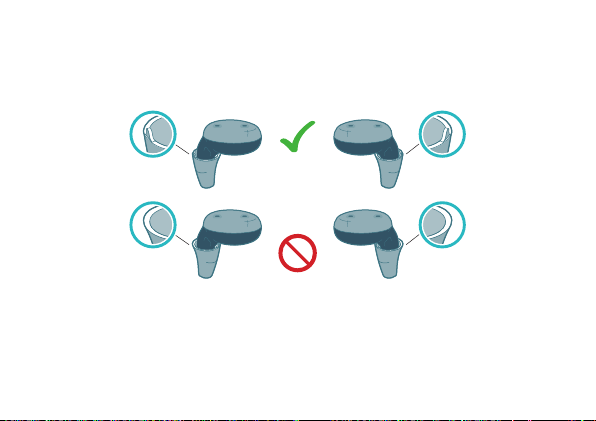
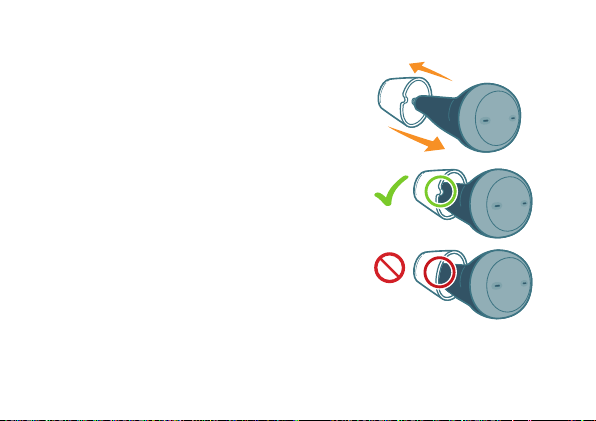
XMake sure the Click Sleeve is positioned correctly.
The shape should follow the shape of the hearing aid.
Turn the Click Sleeve so the little tab is on the outside.
20
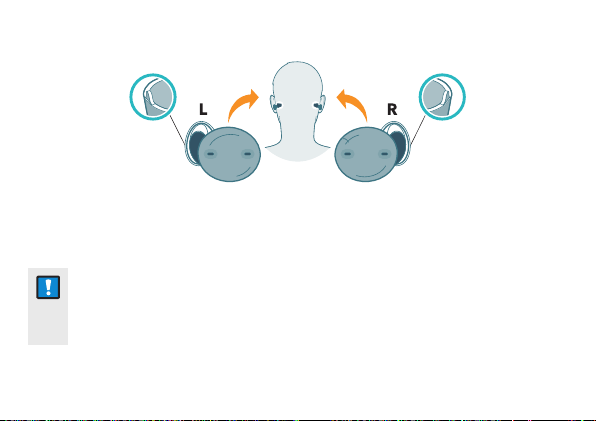
XHold the hearing aid correctly before inserting it.
NOTICE
XPush the device into the intended position, making sure
there is no discomfort/resiance.
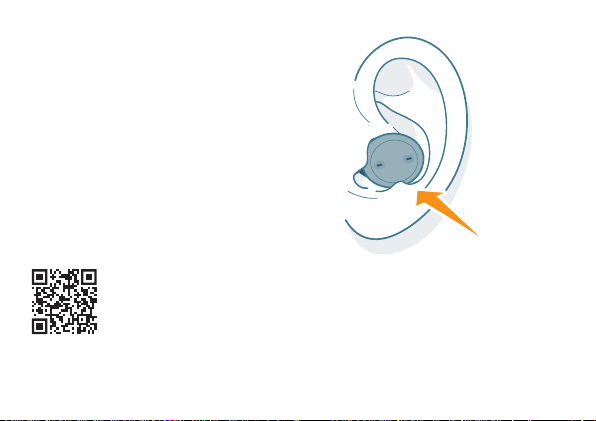

22
If you have problems inserting the hearing aid, use the other
hand to gently pull your earlobe downwards. This opens the
ear canal and eases insertion of the hearing aid.
Removing a hearing aid:
XGrip the hearing aid with
two ngers and pull it out.

23
Clean and dry your hearing aids after usage. Read more in the
Safety and maintenance information.
How to change Click Sleeves
The hearing aids come with the size S Click Sleeves pre-attached.
If you do not feel comfortable using this size, you can change the
Click Sleeves.
Keep in mind that left and right ear sizes may dier.

24
WARNING
Risk of injury!
Always wear the hearing aid with a Click Sleeve.
XMake sure that the Click Sleeve is completely attached.
You should feel that it snaps into place.
XEnsure that only a single Click Sleeve is attached to each
hearing aid.
XIn the very rare case that the Click Sleeve gets uck in
the ear canal and you cannot remove it yourself, please
contact a physician.
XDo not insert the Click Sleeves in your ears without the
hearing aid attached.
25
Choose a smaller size if the hearing aid
feels tight in your ear.
Choose a larger size if the hearing aid
feels loose or makes whiling noise.
Removing Click Sleeve
Grab and pull o the Click Sleeve.
Click Sleeves are designed to be
discarded after removal from device.
Inalling new Click Sleeve
Make sure that the little tab of the
Click Sleeve is on the outside of
the hearing aid. You will hear a click
when it is fully inalled.
*Shown for the left device

26
Charging
Charge devices while on the go
When fully charged, the charging base holds two portable charges
for on the go convenience.
Charging hearing aids
XPlace the right hearing aid in the
charging cup marked with an “R”,
and the left hearing aid in the
charging cup marked with an “L”.
XClose the charger’s lid.
27
XThe hearing aids are automatically turned o and art charging.
The charging atus is shown for 7 seconds.
XLED indicators pulsing orange: hearing aids are charging.
If not: see the Troubleshooting section arting on page 38.
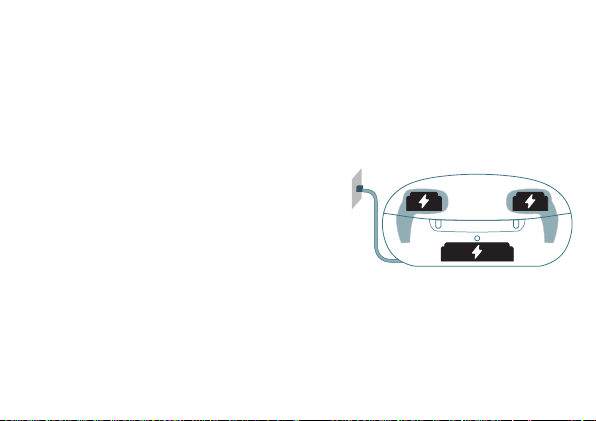
Charging via electrical outlet
XConnect the charger to the power
adapter and plug it into an electrical
outlet.
XOr place the charger on a wireless
Qi-charger.
XThe internal battery of the charger is charged.
XPut the hearing aids in the charger to also
charge the hearing aids.

28
XThe LEDs art pulsing orange to indicate that the hearing aids
and the charger are being charged. If not: see troubleshooting
section.
XWhen the charger is plugged into the wall, conant-on green
LEDs indicate that charging is completed.
XFor wireless Qi charging, the LEDs will turn o when charging is
completed.
Check charging atus
●
The hearing aids are in the charger.
Disconnect the charger from the electrical outlet.
●
Check the charging atus of the hearing aids and the charger
either
- by opening the lid, or
- by briey pressing the button

29
If the atus LED does not light up when you press the button,
check the following:
●
The charger is o. Press and hold the button for 5 seconds to
turn on the charger.
●
The charger’s internal battery is too low to display the atus.
Connect the charger to an electrical outlet, wait several minutes
and try again.
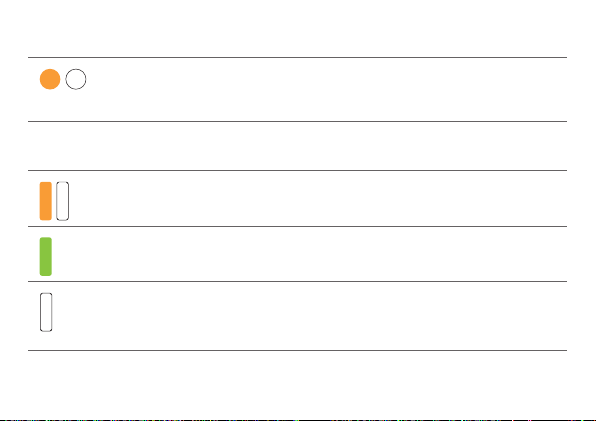
LED Behavior of LED lights when using portable charging
Solid green
Internal battery has enough capacity to fully charge two
hearing aids.
Solid orange
Internal battery does not have enough capacity to fully
charge two hearing aids.
30
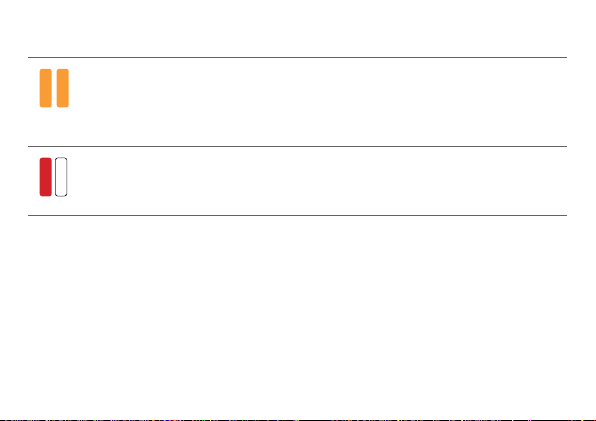
LED Behavior of LED lights when using portable charging
Blinking orange
Internal charger battery empty. Charging of hearing
aids is not possible.
LED Hearing aid LED
Pulsing orange
Hearing aid is being charged.
Solid green
Hearing aid is fully charged.
LED is o
No hearing aid is in the charger, hearing aid is not
placed correctly, or charger is o.
31
LED Hearing aid LED
Blinking twice orange
Cooling phase. Charging is resumed when the device
has cooled down. Refer to section "Troubleshooting for
hearing aids and charger".
Blinking red
Hearing aid error. Refer to section "Troubleshooting for
hearing aids and charger".
Low power indication
An audible alert signal to indicate the hearing aid power cell is
running low will be played. The signal will be repeated every 20
minutes. Depending on the usage of your hearing aids, you have
approximately 1.5 hours to charge your hearing aids before they
op working.

32
Charging tips
You may have some queions on how to be charge your
hearing aids. Read the queions and answers below. For further
information, visit https://www.sony.net/hearing-e10.
How often do I need to charge the hearing aids?
Hearing aids are meant to be charged daily, even if the power cell
is not empty. Charge them overnight so you can be sure to art
your day with fully charged hearing aids.
How long does charging take?
A full charging cycle takes approximately 4 hours (+/- 10 mins).
After 30 minutes, it is possible to use your hearing aids for up to 6
hours. Charging times may vary due to the use of the hearing aids
and the age of the power cell.

33
What happens if I forgot to charge?
Your hearing aids will automatically switch o when the power cell
is empty. Charge the hearing aids as soon as possible.
Hearing aids which have not been charged for over 6 months may
be damaged due to an unrecoverable deep-discharge of the power
cell. Deep-discharged power cells cannot be charged anymore and
have to be replaced.
Switch o the hearing aids for long term orage
XPut the hearing aids in the charger and close the lid.
XDisconnect the charger from the electrical outlet.
XPress and hold the button for 5 seconds to turn the charger and
the hearing aids o.
XThe LEDs light up green and fade out.

34
XTo turn on the hearing aids and the charger again:
- press the button for 5 seconds, or
- connect the charger to an electrical outlet, or
- put the charger on a wireless Qi-charger.
XKeep the hearing aids inside the charger.

35
Daily use
Adjuing the volume
Your hearing aids automatically adju the volume to the liening
situation.
XIf you prefer manual volume adjument, use the
Sony | Hearing Control app.
An optional signal can indicate the volume change.

36
Audio reaming with iPhone
Your hearing aids are Made for iPhone hearing aids. This means
you can get phone calls and lien to music from your iPhone
directly into your hearing aids.
For more information about compatible iOS devices, pairing, audio
reaming and other useful functions, consult the Sony CRE-E10
website or contact cuomer service.
“Made for iPhone”, “Made for iPad”, and
“Made for iPod” mean that an electronic accessory has been
designed to connect specically to iPhone, iPad, or iPod,
respectively, and has been certied by the developer to meet
Apple performance andards. Apple is not responsible for the
operation of this device or its compliance with safety and regulatory
andards. Please note that the use of this accessory with iPhone,
iPad, or iPod may aect wireless performance.

37
Airplane mode for hearing aids
Airplane mode is when Bluetooth of your hearing aids is turned
o. In areas where the use of Bluetooth technology is not allowed
(e.g. on some airplanes), you can deactivate Bluetooth mode. This
turns Bluetooth in your hearing aids o temporarily. The hearing
aids ill work without Bluetooth, however direct audio reaming
will not be possible and other functions will not be available.
XTo deactivate or activate the Bluetooth mode, use the
Sony | Hearing Control app.
An alert tone indicates when Bluetooth mode is deactivated or
activated.

38
Troubleshooting for hearing aids and
charger
If the atus LEDs do not light up when you insert the hearing aids,
check the following:
XThe hearing aids are not correctly placed. Push them slightly
into their charging cups or close the charger’s lid.
XThe charger is turned o. Press and hold the button for 5
seconds to turn on the charger or connect the charger to an
electrical outlet.
XThe charger’s internal battery is too low for mobile charging
Connect the charger to an electrical outlet.
39
LED
Hearing aid LED
Blinking red
An error in the hearing aid has occurred.
●
Take the respective hearing aid out of the charger
and disconnect the charger from the power supply.
●
Contact your cuomer service for support.
LED is o
No hearing aid is in the charger, hearing aid is not
placed correctly, or charger is o.
Blinking twice orange
Cooling phase. Charging is resumed when the device
has cooled down.
40
LED
Charger LED
LED is o (wireless charging).
Charger is fully charged
Blinking twice orange
●
Charger has reached the temperature limit and is
now in a cooling phase. Charging is resumed after
cooling down (about 15 minutes).
●
Do not touch the hearing aids while the LEDs are
blinking twice orange. The hearing aids may be hot.
●
In case the charger enters cooling phase multiple
times during charging, make sure to place the
charger in an environment that complies with the
recommended operating conditions.
41
LED
Charger LED
Blinking red
An error in the charger has occurred.
●
Take the hearing aids out of the charger and
disconnect the charger from the power supply.
●
Reconnect the charger to the power supply and
re-insert the hearing aids in the charging cups.
If the LEDs are ill blinking red.
●
Take the hearing aids out of the charger and
disconnect the charger from the power supply.
●
Contact your cuomer service for support.
For an overview of the hearing aids’ charging atus, refer to the
section “Charging”.

43
Technical information
Output 2cc coupler
OSPL 90 (Peak) 118 dB SPL
HFA-OSPL 90 110 dB SPL
Fitted OSPL 90 110 dB SPL
Frequency range and noise
Frequency range 100 – 9500 Hz
Equivalent input noise 17 dB SPL
Total harmonic diortion
500 / 800 / 1600 / 3200 Hz
1% / 1% / 1% / 1%
Latency 14 ms

44
Battery
Battery runtime (without
reaming)
up to 26 h
Battery runtime (incl. 2 h
reaming)
up to 23 h
All measurements performed according to ANSI S3.22:2014 with
2 cc coupler, except for latency performed to ANSI/CTA
2051:2017.
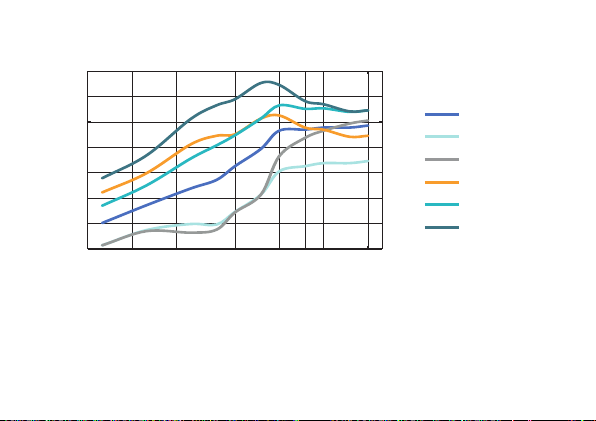
45
Pre-congured sound proles
Insertion gain
N+]
G%
Precongured
sound proles
prole 1
prole 2
prole 3
prole 4
prole 5
prole 6
f

46
Country/region specic information
Certication information for hearing aids with wireless functionality:
Sony CRE-E10
●
DBIF1
●
FCC ID: 2AXDT-DBIF1
●
IC: 26428-DBIF1

47
Conformance information for charger
This device complies with EN60601-1-2.
This device complies with Part 18 of the FCC Rules.
Operation is subject to the following conditions:
●
This device may not cause harmful interference,
●
this device mu accept any interference received, including
interference that may cause undesired operation, and
●
the user shall keep a minimal diance of 20 cm (8 in) during the
charging process.


49

50

51
Document No. 05175-99T01-7600 EN
Order/Item No. 210 224 65
Master Rev01, 08.2022
Printed in Singapore.
Manufactured for:
Sony Electronics Inc.
115 West Century Road
Suite 250
Paramus, NJ US 07652