Loading ...
Loading ...
Loading ...
10
12 13
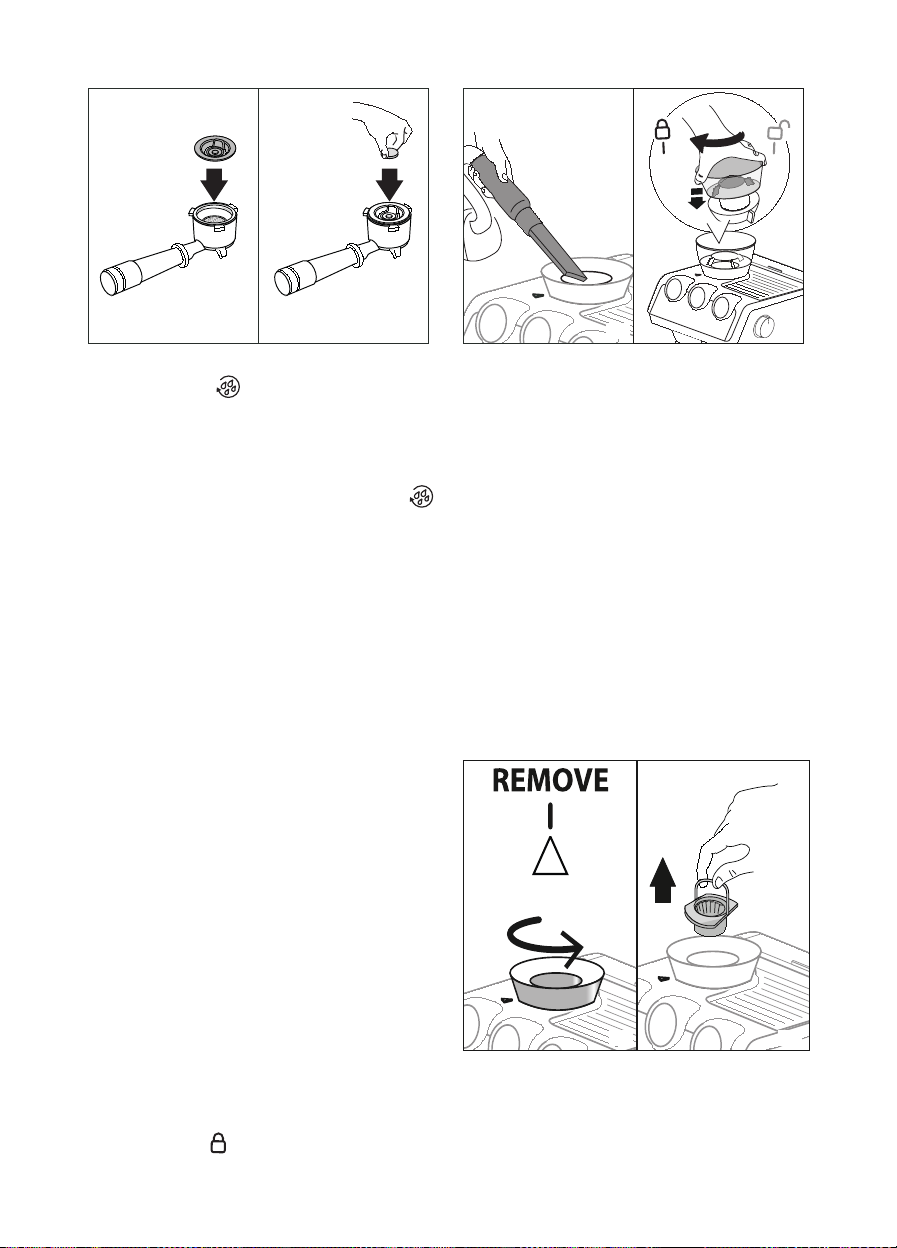
5. Fill the water tank (A15);
6. Keep pressed the
button, until the related light start
blinking (orange);
7. After few minutes the cleaning stops automatically;
8. Remove the portalter;
9. Remove and empty the drip tray.
After the cleaning cycle, make a rinse by pressing the
button.
5.6 Cleaning the water tank
1. Remove the softballs pack (*if present) and rinse with run-
ning water.
2.
Clean the water tank regularly (about once a month) with
a damp cloth and a little mild washing up liquid, then rinse
thoroughly.
3.
Replace the softballs (*if present), ll the tank with fresh
water and replace the tank.
Danger!
While cleaning, never immerse the coee maker in water. It is an
electrical appliance.
5.7 Cleaning the beans container
Without extracting it, clean the beans container regularly with
a cloth.
For more thorough cleaning, proceed as follows:
1. Make sure the beans container (A1) is empty. If necessary,
operate the coee mill without beans to empty it:
2. Release the beans container by turning it anticlockwise and
extract from the appliance;
3. Wash the container and lid (A2) with warm water. Do not
wash the components in a dishwater or use washing up
liquid! Dry all accessories thoroughly before using again.
4. Remove coee residues (g. 14) using a vacuum cleaner;
5. Clean the beans container housing with a damp cloth and
dry;
6. Put the container back inserting it in the coee mill (g.
15). The container is correctly inserted when the arrow is
lined up with the
symbol and you hear a “click”.
14 15
5.8 Cleaning the burrs
When cleaning the beans container, clean the container housing
and upper burr with a damp cloth. The burr can be removed and
replaced by an authorised customer services centre.
You may also need to remove the burr if it becomes blocked with
foreign matter. If this occurs, clean as follows:
1. Empty the beans container (if necessary, using a vacuum
cleaner to remove any remaining beans).
2. Attach the portalter and operate the mill without beans
to free the coee guide, then attach the portalter to the
outlet of the coee mill (A18), lining it up with “INSERT”,
then turning it to the right. Grinding begins when the por-
talter reaches the CLOSE position and stops automatically;
3. Turn the appliance o;
4. Release the beans container by turning it anticlockwise and
extract from the appliance;
5. Turn the grinding selector anticlockwise as far as it will go
to the “REMOVE” position (g. 16).
16 17
6. Extract the upper burr, gripping it by the handle (g. 17).
7. Clean the burr with a brush (not included) (g. 18) and re-
move the coee residues using a vacuum cleaner (g. 14).
8. Put the upper burr back in place:
Loading ...
Loading ...
Loading ...