Loading ...
Loading ...
Loading ...
7
ENGLISH INSTRUCTIONS
SAFETY GUARD INSTALLATION
MOUNTING INSTRUCTIONS
MEASURING TAPE APPLICATION INSTRUCTIONS
1. Position the Arrowsaw on
a at and level work surface.
2. Clean the top of the Base
with alcohol or a damp
soapy cloth to remove any
grease or oils that remain
from the assembly process.
NOTE: Make sure the
surface is completely dry
before trying to install the
Measuring Tape.
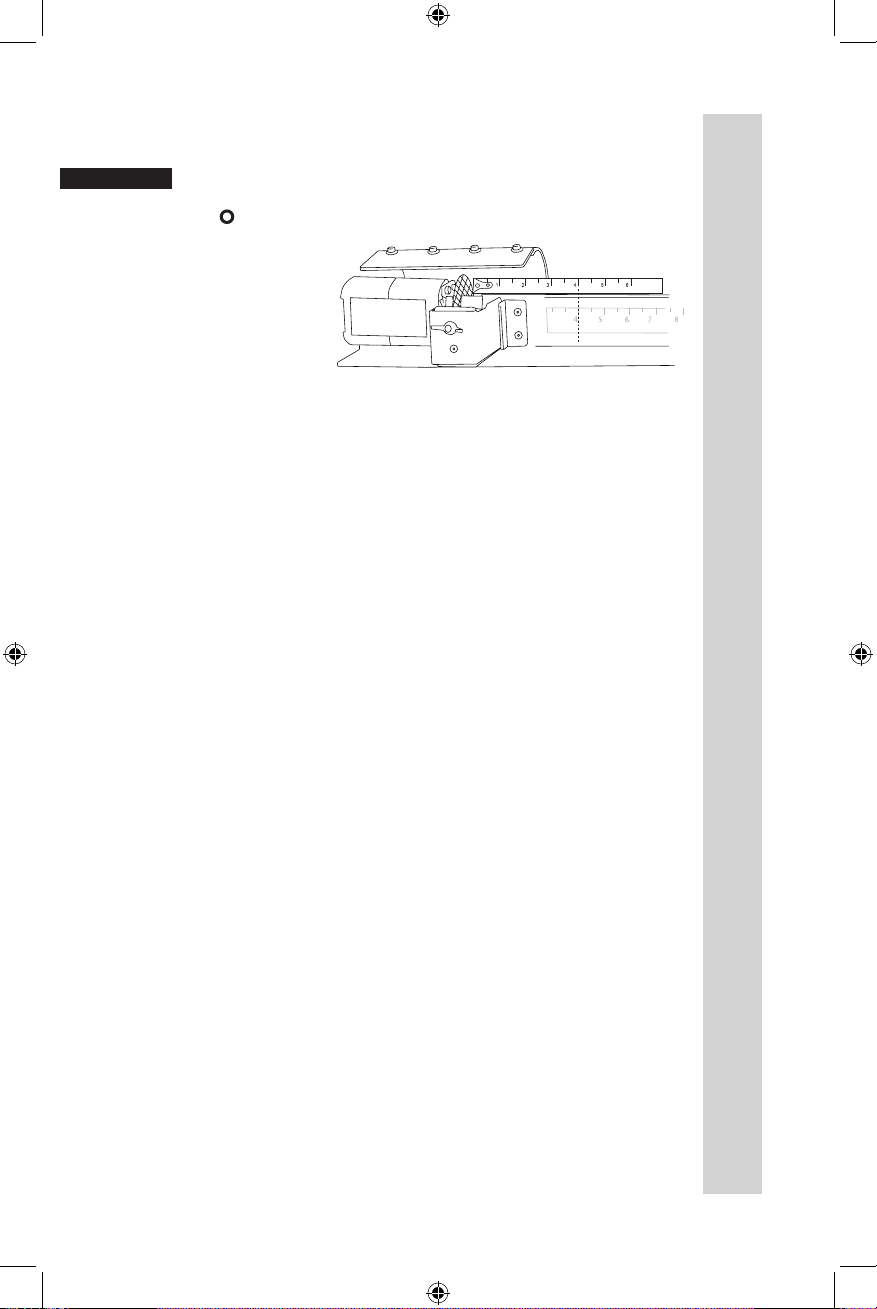
3. Using a tape measure, position the end of the tape measure rmly against the
right side of the Blade (opposite side of the Motor) (gure 2).
4. Along the top of the Base, make a mark at exactly the 4” line of the tape
measure. NOTE: Use a pencil or a piece of tape to mark the 4” line. Do not use
anything that will scratch the surface and damage the paint.
5. Un-roll the Measuring Tape that was supplied with the Arrowsaw. Gently
remove any creases or folds on the Measuring Tape.
6. At the beginning of the Measuring Tape, peel approximately 4” of the backing
off exposing the adhesive surface. NOTE: Peeling a few inches at a time will
result in a smoother application.
7. Line up the 4-3/8” mark on the Measuring Tape with the 4” mark made at the
top of the Base in Step 4. NOTE: The 3/8” offset is required because there is a
3/8” deep notch in the Shaft Support Bracket.
8. Carefully apply the rst few inches of the Measuring Tape to the Base.
NOTE: Make sure the Measuring Tape is level and does not have any air bubbles
or creases when being applied. Failure to follow these guidelines will result in an
inaccurate or damaged Measuring Tape.
9. With the rst few inches of the Measuring Tape properly applied, with no
creases, folds and positioned level, gently peel the remainder of the backing off,
and adhere the full length of the Measuring Tape.
10. Once the Measuring Tape is completely installed, use a soft cloth or paper
towel, and wipe over the Measuring Tape, which will remove all air bubbles and
securely adhere it to the Base.
11. Erase or remove the 4” guide mark on the top of the Base.
12. The Measuring Tape has now been properly applied.
13. Read the Instruction Manual for additional assembly instructions and tips on
how to use the Arrowsaw.
FIGURE 2
Electrical Shock Hazard. Before cleaning, assembling, or
disassembling the appliance, make sure the appliance is
OFF( ) and the plug is removed from the outlet/power source.
w WARNING
Loading ...
Loading ...
Loading ...