Loading ...
Loading ...
Loading ...

17 - English
CROSSPIECE
OUTER
STAND
SUPPORT
BRACKET
INNER
STAND
SUPPORT
BRACKET
BOLT
Fig. 10
Fig. 12
INSTALLING THE CROSSPIECE
See Figure 10.
Locate the following parts:
Lock Nut (M5) ............................................................. 4
Bolt (M5 x 35 mm) ...................................................... 4
Crosspiece ..................................................................1
Place the crosspiece in position as shown, aligning the
holes in the crosspiece with the holes in the lower part
of the stand.
Slide each of the four bolts through the holes in the
crosspiece and the holes in the legs.
Place a lock nut over each bolt. Securely tighten the nut
using an 8 mm wrench and socket.
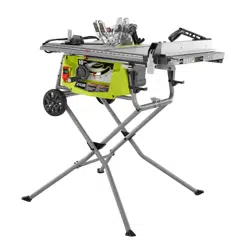
INSTALLING WHEELS ONTO THE STAND
See Figure 11.
Locate the following parts:
Wheel .......................................................................2
Washer (OD16 x ID8 x 2t) .........................................4
Lock Nut (M8) ...........................................................2
Slide a washer, a wheel, and another washer onto each
axle.
Thread a lock nut onto the axle and securely tighten,
using a 13 mm wrench.
Fig. 11
ASSEMBLY
AXLE
WHEEL
BOLT
HANDLE
WASHER
WASHER
NUT
HANDLE
END CAP
WASHER
HANDWHEEL
INSTALLING THE HANDLE ASSEMBLY
See Figure 12.
Locate the following parts:
Handle Assembly ........................................................ 1
Handle End Cap.......................................................... 1
Remove the hex nut from the bolt in the handle but do
not remove the bolt or washer.
Place the hex nut into the recessed hole on the back of
the height/bevel adjusting handwheel and hold in place.
Insert the handle, bolt, and washer into the hole on the
height/bevel adjusting handwheel.
Using a flathead screwdriver, turn the bolt clockwise and
tighten in place.
Cover the end of the handle with the cap.
LOCK
NUT
LOCK
NUT
Loading ...
Loading ...
Loading ...
