Loading ...
Loading ...
Loading ...
18E
OVEN USE
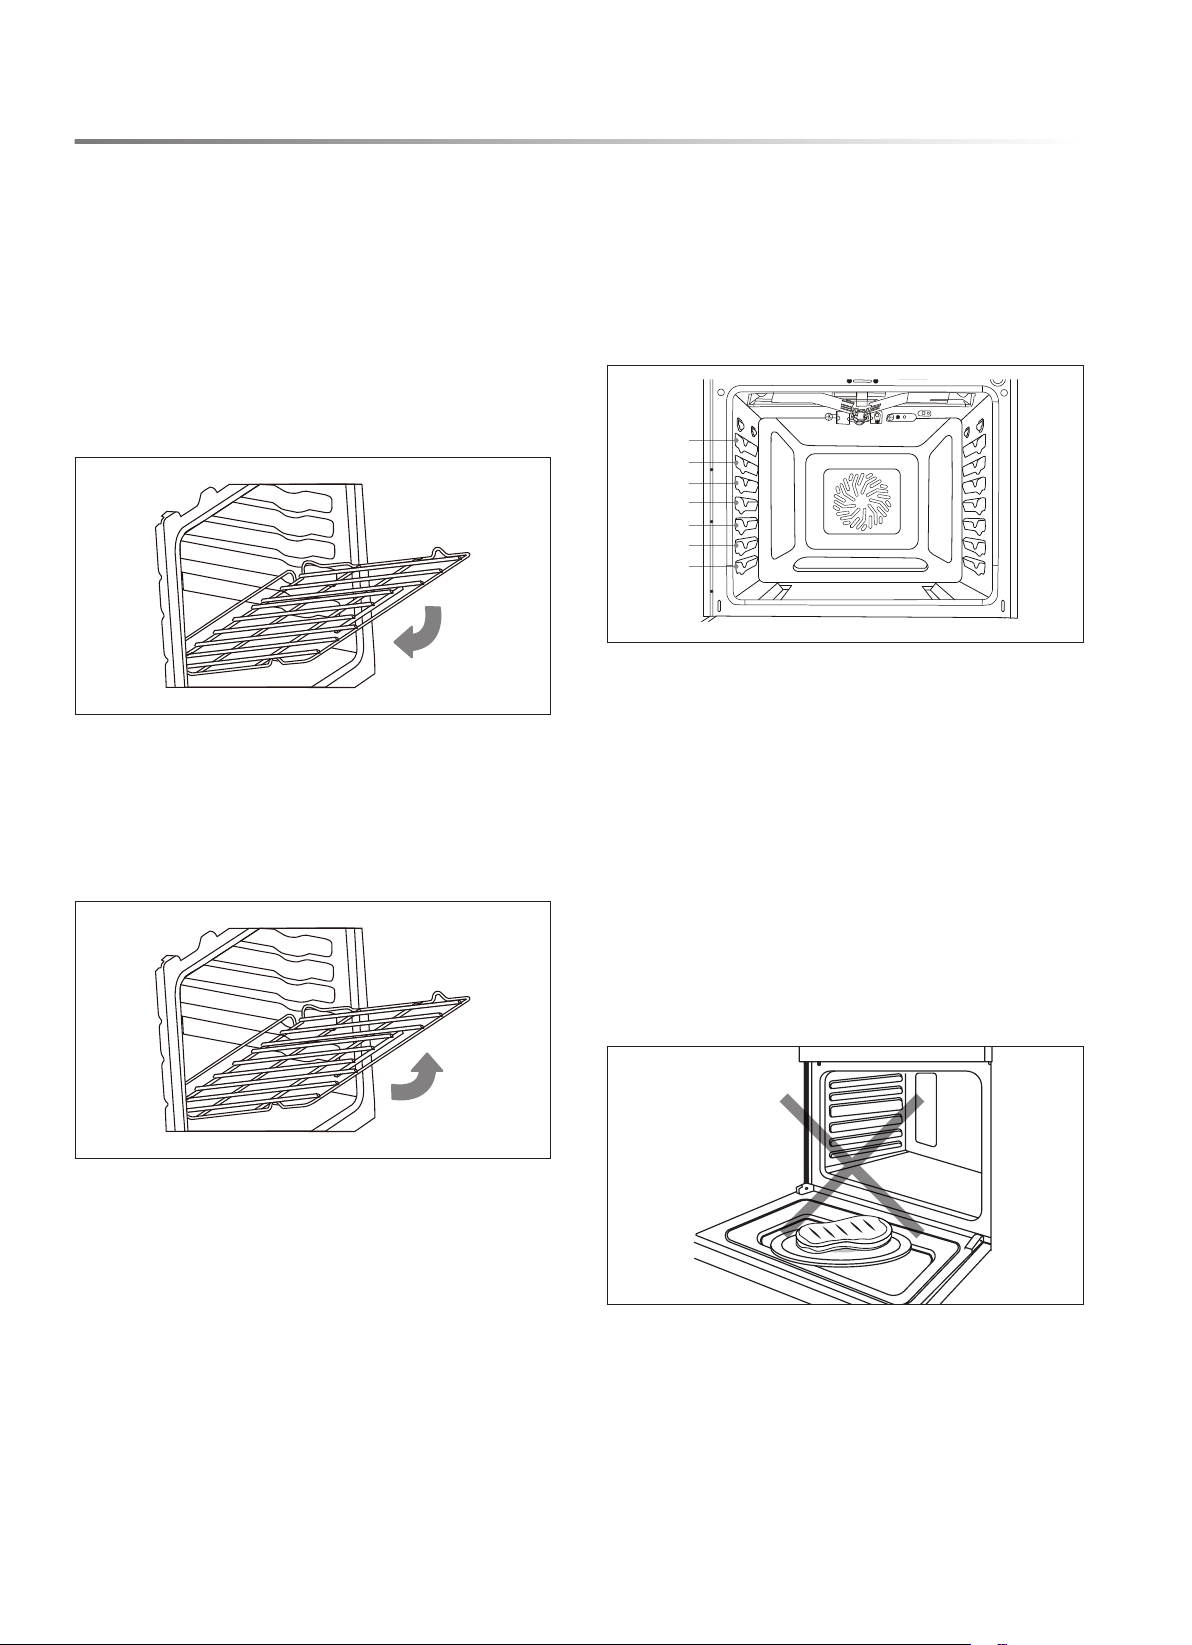
INSERT/REMOVE RACKS
TO INSERT RACK
NOTE: The rack ca
n be installed in only one direction.
1 Orient the rack so the handle is toward the front and the
interlock features are on the top.
2 Tip the rack so the front is several inches higher than the back.
3 Slip the interlock features under the stop position on the
rack guides.
4 Lower the rack front while pushing back until completely
inserted.
TO REMOVE RACK
1 Remove all food and utensils from rack.
2 Firmly grasp rack from both sides.
3 Pull rack out until it reaches the stop position.
4 Lift up on the front of the rack and pull outward.
RACK POSITIONS
For best performance, adjust racks so food is positioned at the
center of the oven. For most foods, the best rack position is the
center position, the fourth from the bottom. For larger foods,
such as roasts or turkeys, use a lower position. When broiling,
food should be close to the broil burner in one of the top two
rack positions. When using multiple racks simultaneously, space
out the food out around the oven center.
7
6
5
4
3
2
1
COMPONENT COOLING FAN
The cooling fan activates during any cooking mode to cool
inner components and outer door surfaces. This air is exhausted
through the vent located above the oven door. It continues to
run until components have cooled sufciently. The cooling
fan operates at double speed (or RPM’s) whenever the inner
components' temperature becomes too high.
OVEN DOOR
To avoid oven door glass breakage:
• Always ensure racks are fully inserted and no bakeware
extends past the front edge of an oven rack before closing
the oven door.
• Do not set objects on the glass surface of the oven door.
• Do not hit glass surfaces with bakeware or other objects.
• Do not wipe down glass surfaces until the oven has com-
pletely cooled.
Loading ...
Loading ...
Loading ...