Loading ...
Loading ...
Loading ...
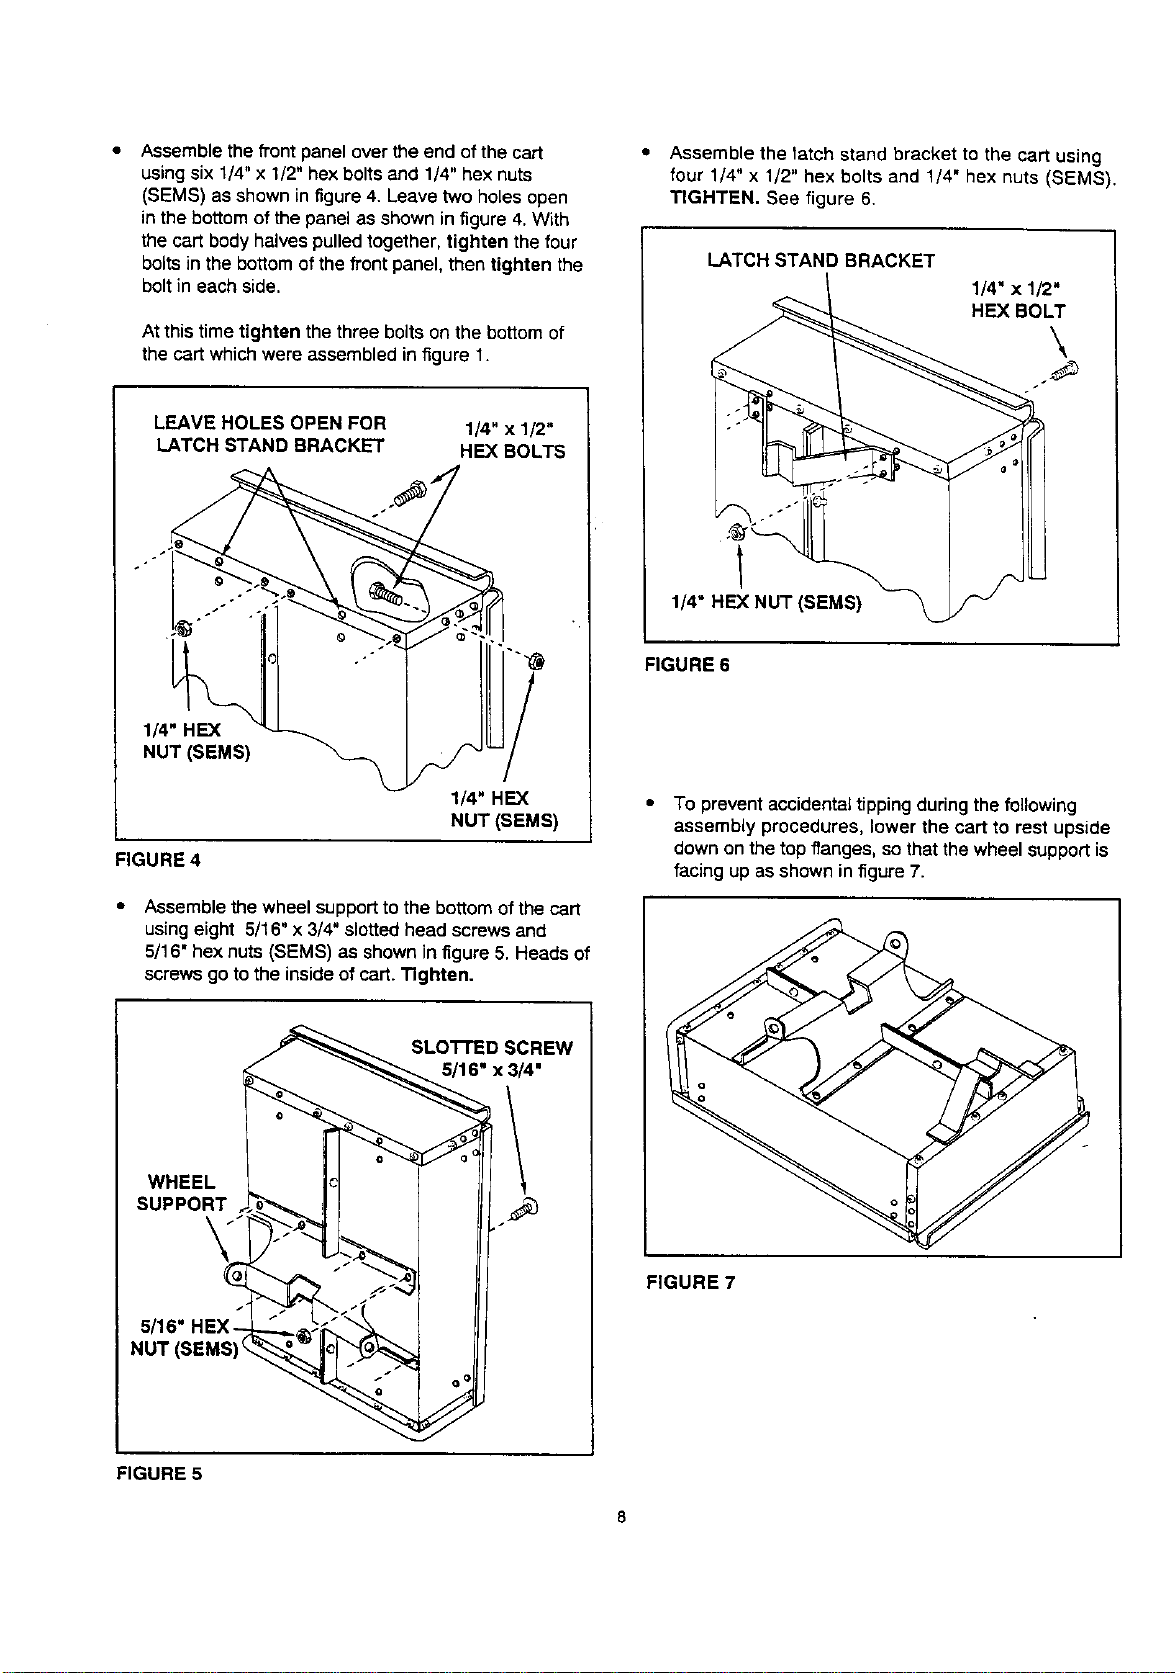
Assemble the front panel over the end of the cart
using six 1/4" x 1/2" hex bolts and 1/4" hex nuts
(SEMS) as shown in figure 4. Leave two holes open
in the bottom of the panel as shown in figure 4. With
the cart body halves pulledtogether, tighten the four
bolts in the bottom of the front panel, then tighten the
bolt in each side.
At this time tighten the three bolts on the bottom of
the cart which were assembled in figure 1.
LEAVE HOLES OPEN FOR
LATCH STAND BRACKET 1/4" x 1/2"
HEX BOLTS
1/4" HE](
NUT (SEMS)
FIGURE 4
1/4" HEX
NUT (SEMS)
Assemble the wheel supportto the bottom of the cart
using eight 5/16" x 3/4" slottedhead screws and
5/16" hex nuts (SEMS) as shown in figure5. Heads of
screws go to the inside of cart. Tighten.
Assemble the latch stand bracket to the cart using
four 1/4" x 1/2" hex bolts and 1/4" hex nuts (SEMS).
TIGHTEN. See figure 6.
LATCH STAND BRACKET
1/4" x 1/2"
HEX BOLT
\
1/4" HEX NUT (SEMS)
FIGURE6
To prevent accidental tipping during the following
assembly procedures, lower the cart to rest upside
down on the top flanges, so that the wheel support is
facing up asshown in figure7.
SLO'n'ED SCREW
5/16" x 3/4"
WHEEL
SUPPORT
\
5/16" HEX-
NUT (SEMS)_
FIGURE 7
FIGURE 5
Loading ...
Loading ...
Loading ...