
Loading ...
Loading ...
Loading ...
6
Electrical Requirements
Observe all governing codes and ordinances.
Ensure that the electrical installation is adequate and in
conformance with National Electrical Code, ANSI/NFPA
70 (latest edition), or CSA Standards C22.1-94, Canadian
Electrical Code, Part 1 and C22.2 No. 0-M91 (latest edition)
and all local codes and ordinances.
If codes permit and a separate ground wire is used, it is
recommended that a qualified electrician determine that the
ground path is adequate.
A copy of the above code standards can be obtained from:
National Fire Protection Association
One Batterymarch Park
Quincy, MA 02269
CSA International
8501 East Pleasant Valley Road
Cleveland, OH 44131-5575
• A 120 volt, 60 Hz., AC only, 15-amp, fused electrical circuit
is required.
• If the house has aluminum wiring, follow the procedure
below:
1 Connect a section of solid copper wire to the pigtail leads.
2 Connect the aluminum wiring to the added section of
copper wire using special connectors and/or tools
designed and UL listed for joining copper to aluminum.
Follow the electrical connector manufacturer’s
recommended procedure. Aluminum/copper connection
must conform with local codes and industry accepted
wiring practices.
• Wire sizes and connections must conform with the rating
of the appliance as specified on the model/serial rating
plate. The model/serial plate is located behind the kit on
the rear wall.
• Wire sizes must conform to the requirements of the
National Electrical Code, ANSI/NFPA 70 (latest edition),
or CSA Standards C22. 1-94, Canadian Electrical Code,
Part 1 and C22.2 No. 0-M91 (latest edition) and all local
codes and ordinances.
INSTALLATION INSTRUCTIONS
Prepare Location
• Before making cutouts, make sure there is proper
clearance within the ceiling or wall for the exhaust vent.
• When cutting or drilling into the ceiling or wall, do not
damage electrical wiring or other hidden utilities.
• Check that all installation parts have been removed from
the shipping carton.
NOTE: For the correct performance of your In-Line Blower
System you must remove the Range Hood Internal Motor
Blower.
Remove Range Hood Internal Motor Blower
1 Remove grease filters from range hood.
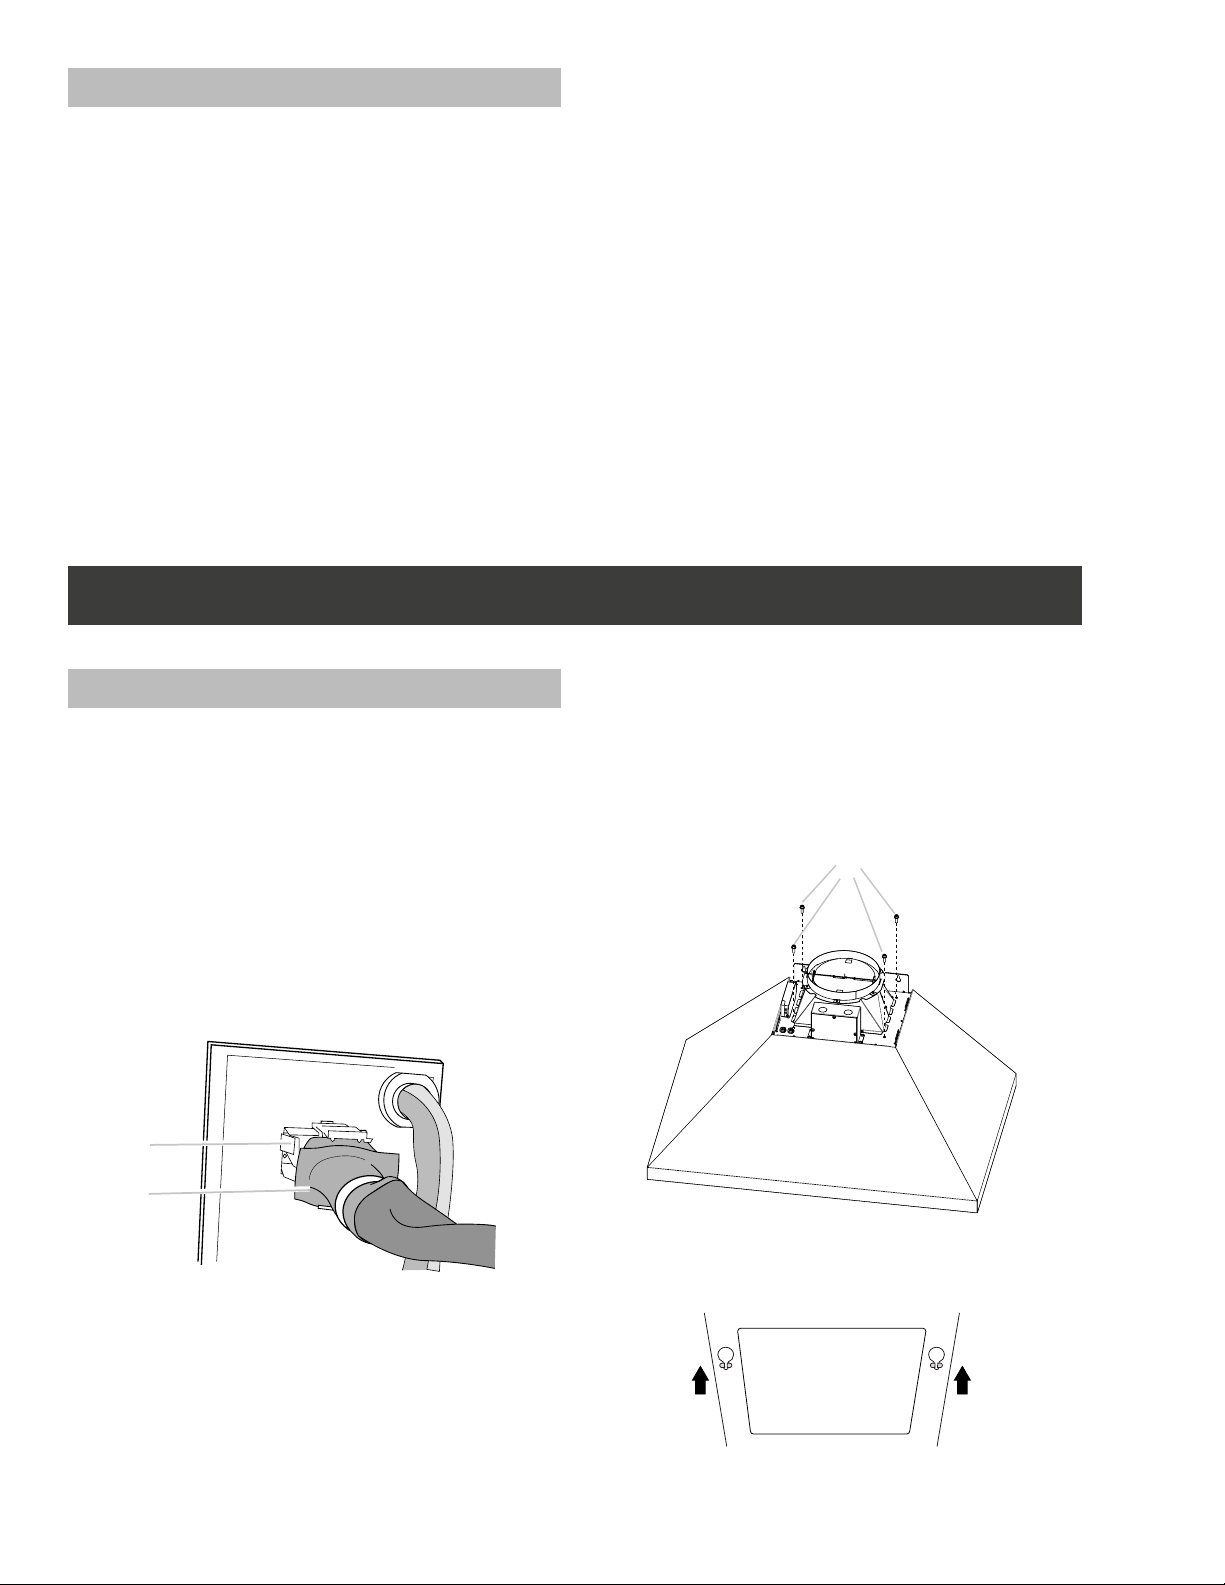
2 Disconnect the blower power cord from de wire box.
B
A
A. Wire box connector
B. Power cord
A. For single Blower Motor Models (ECL630S4, EVV636S1,
EVV648S1, EVI642S1, EVI648S1, ELN630S2, EAR628S4)
1 Remove the blower mounting screws.
NOTE: for ELN630S2 range hood model you have to
remove the blower mounting screws from the top of the
hood housing.
A
A. Blower screws
2 Set free the two blower springs from the top of the range
hood housing.
Loading ...
Loading ...
Loading ...