Loading ...
Loading ...
Loading ...
4 5
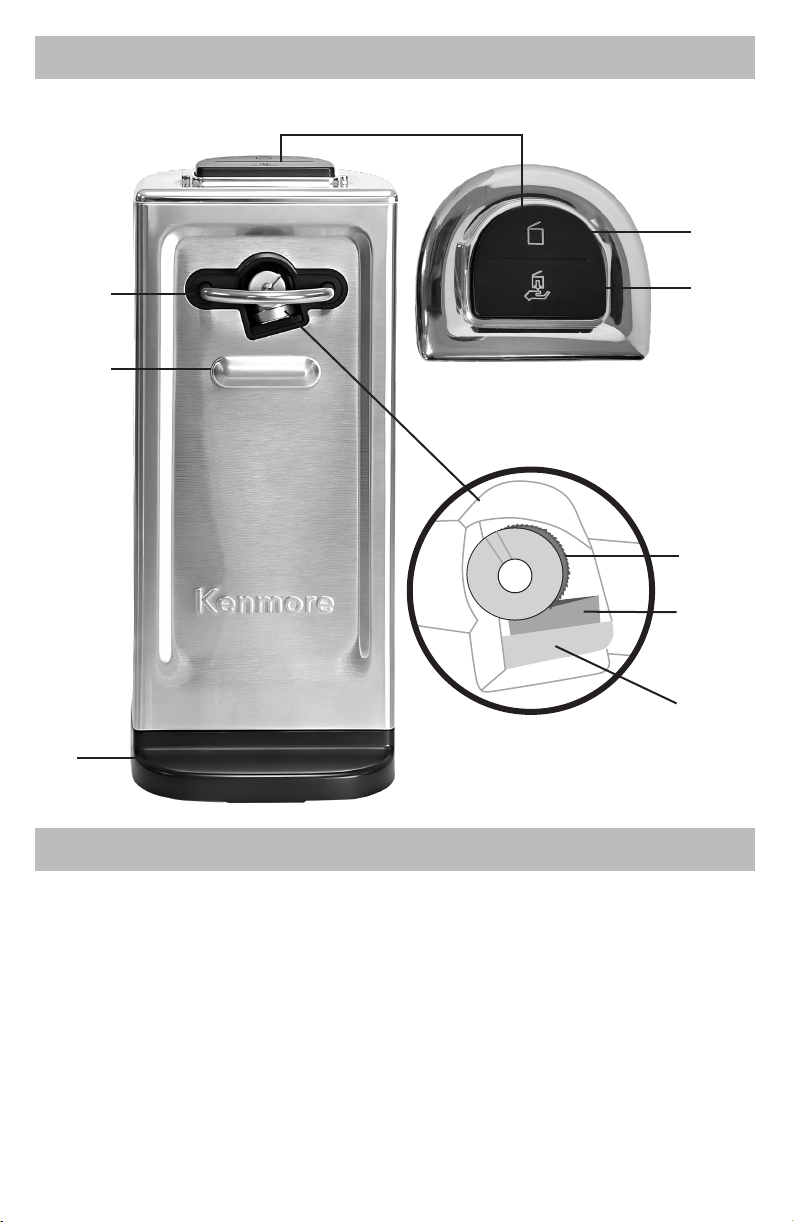
PARTS AND FEATURES
BEFORE FIRST USE
USING YOUR CAN OPENER
OFF POSITION OPEN CAN CAN RELEASE
1. Read these instructions thoroughly and save for future reference.
2. Carefully unpack the appliance from its packaging and check that all parts are present. Remove
any promotional labels or stickers and safely dispose of plastic bags or small pieces that could
present a suocation or choking hazard.
3. Wipe the can opener base and cutting mechanism with a clean, damp cloth to remove any dirt
or dust. Do not immerse any part of the can opener, power cord, or electrical plug in any liquid. Do
not use abrasive cleansers or scouring pads.
1. Place the can opener on a at, dry surface. Check that the control switch on top is in the OFF
position and then plug the power cord into the electrical outlet.
NOTE - You can pause operation at any time without releasing the can at any time by pressing
lightly on the CAN RELEASE icon. Press the OPEN CAN icon again to restart.
NOTE - The can opener WILL NOT stop automatically when the can is open. Do not leave the can
opener unattended while operating.
2. Position the top of the can under the guide
bar with the rim on the lid rest, making sure
the can is aligned with the cutting mecha-
nism.
3. Press down on the OPEN CAN icon on the
control switch to start the can opening opera-
tion. The drive wheel will start rotating
counterclockwise and move inwards to grip
the can (Figure 1). Once the drive wheel stops
moving inwards (2-3 seconds) you no longer
need to hold the can.
4. When the can has completed one full
rotation, hold it rmly with one hand and
press and hold the CAN RELEASE icon with the
other hand. The drive wheel will rotate
clockwise and move outwards to release the
can (Figure 2). Release the control switch to
return it to the OFF position.
5. Carefully lift the lid to remove it from the
can.
guide bar
can rest
CUTTING MECHANISM
drive
wheel
cutting
blade
lid rest
CONTROL SWITCH
base
open
can
release
can
Loading ...
Loading ...
Loading ...