Loading ...
Loading ...
Loading ...
12
Enclosure Configuration
Equipment Installation
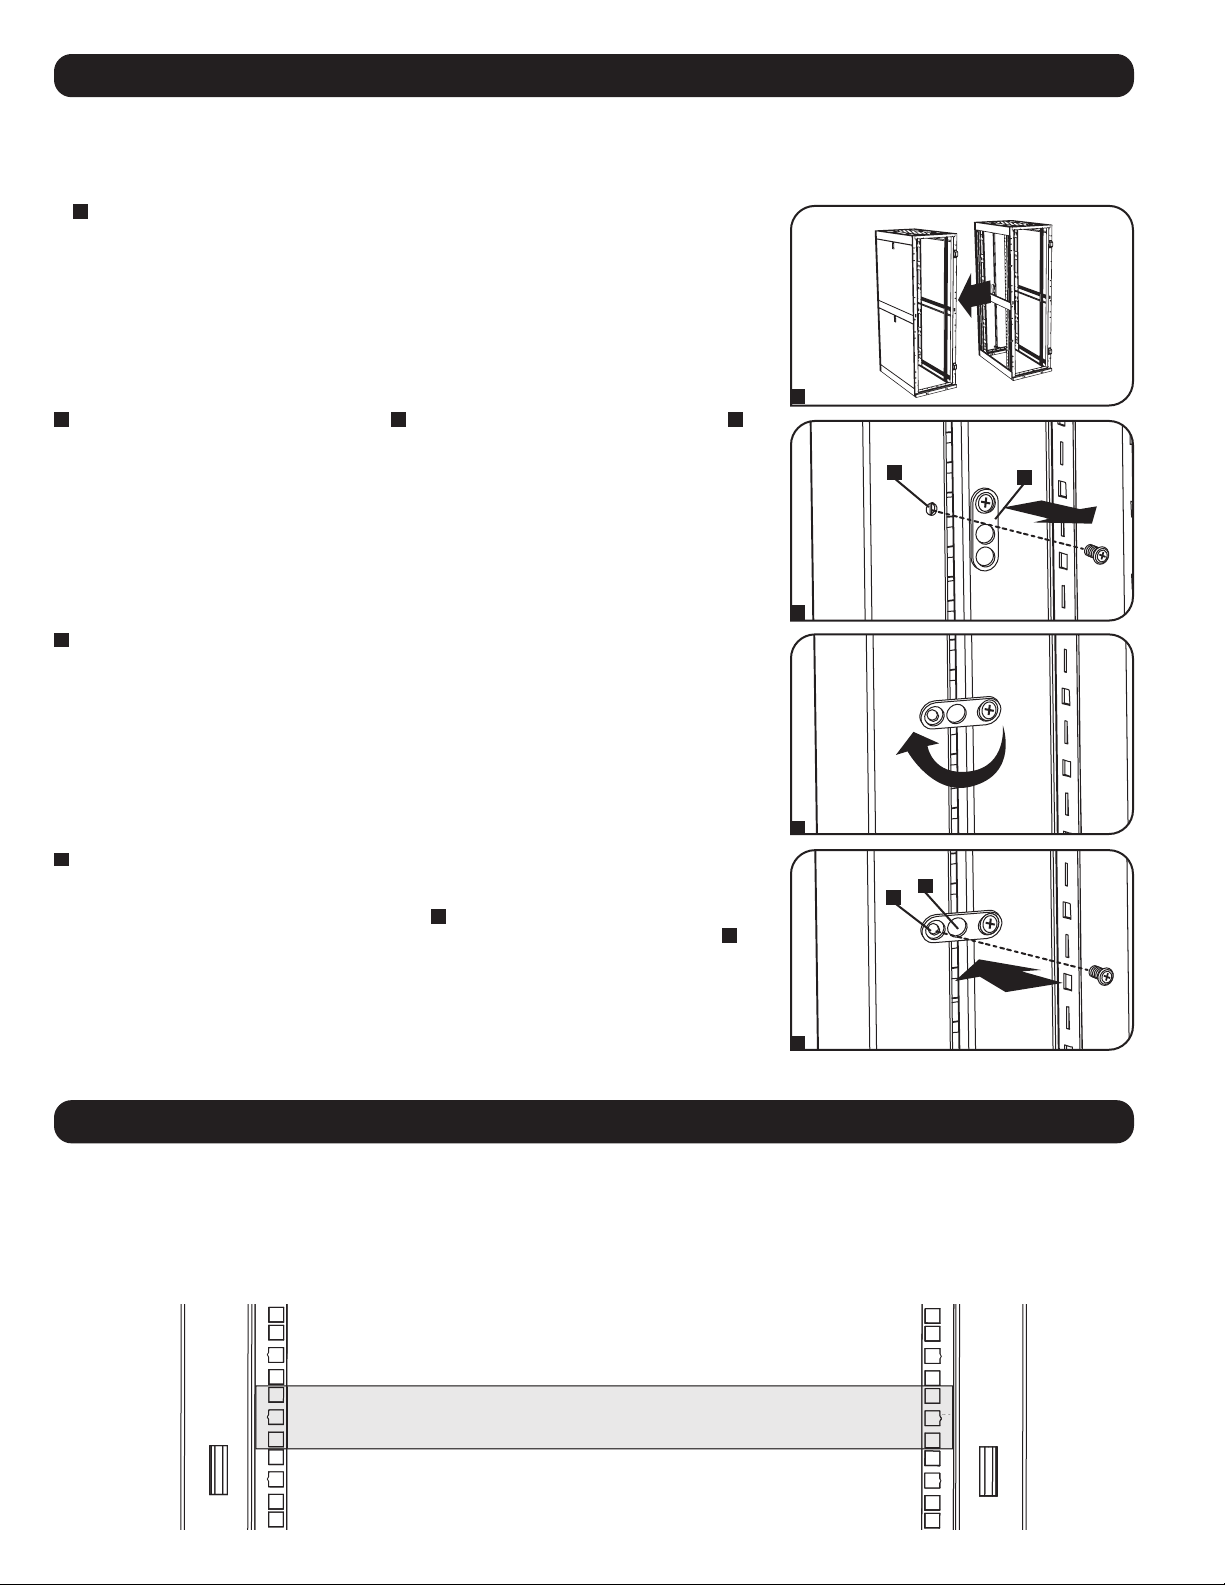
Combining (Baying) Enclosures
WARNING: Combining enclosures is not a substitute for stabilizing the enclosures. Each enclosure in a bay of combined enclosures
requires the same stabilizing measures as a standalone enclosure.
WARNING: Do not install equipment until you have stabilized the enclosure. Install heavier equipment first and install it toward the bottom
of the enclosure. Install equipment starting from the bottom of the enclosure and proceeding toward the top of the enclosure - never the
reverse. If using sliding equipment rails, be careful when extending the rails. Do not extend more than one set of sliding equipment rails at
one time. Avoid extending sliding equipment rails near the top of the enclosure.
Note: The square holes at the middle of each rack unit are numbered and also include a small notch to aid identification. A single rack unit includes
the space occupied by the numbered hole and the holes directly above and below.
90°
24
25
23
24
25
23
24
24
2
1 Rack Unit
3
4
2
1
C
D
A
B
1
Arrange the enclosures in the correct position for baying.
2
Each enclosure includes 4 baying brackets
A
that correspond to baying connection points
B
on
the adjoining enclosure. The baying connection points already contain screws. Remove the
screw from each baying connection point in the adjoining enclosure.
3
Loosen the screw in each baying bracket and turn each bracket 90 degrees toward the
adjoining enclosure, aligning each bracket with the corresponding baying connection point on
the adjoining enclosure.
4
Connect each bracket to the adjoining enclosure using the screws you removed in step 2, but
do not tighten the screws completely. Adjust the position of the enclosures as needed. If you
want the centers of the enclosures to be 24 inches (61 cm) apart/29.9 inches (76 cm) for the
SR42UBWD, use the outside hole of the bracket
C
. If you want the centers to be 60 cm (23.6
inches) apart/75 cm (29.5 inches) for the SR42UBWD, use the middle hole of the bracket
D
.
After connecting all brackets and confirming that the enclosures do not need further adjustment,
tighten all screws.
Note: You may wish to remove the doors from the enclosures before combining them.
Reinstalling the doors afterward is optional. Remove the interior side panels before baying
enclosures if you wish to enable access between enclosures.
Loading ...
Loading ...
Loading ...