Loading ...
Loading ...
Loading ...
9. Maintenance and Troubleshooting
– 17 –
EN
Important: Read all the Health and Safety information in
this manual before attempting to maintain this product.
All maintenance should be carried out ONLY by
authorised and suitably qualied personnel.
WARNING! ALWAYS ensure that the tools are
disconnected from the air supply and that the
adjust or maintain this product.
9.1 General Maintenance
• Keep the spray guns clean and dry when not in use.
• Protect the product from adverse weather conditions,
both when in use and when stored.
CAUTION! NEVER lubricate the spray gun or its
based product.
9.2 Cleaning the Spray Gun
Important: ALWAYS ensure that the brushes are clean
before use on each part of the spray gun. DO NOT use
sharp objects to clean any openings on the spray gun as
this may damage the internal parts.
CAUTION! DO NOT soak parts in solvents or
exposure may cause damage to the seals and
other components.
1. Use compressed air to clean inside the air line inlet.
2. Clean the paint cup and uid chamber:
a. Remove the paint cup lid and pour any remaining
uid into a suitable container.
b. Half-ll the paint cup with an appropriate thinners
and replace the lid.
c. Squeeze the trigger and spray all the liquid
through the tool.
Important: ALWAYS spray the cleaning uid safely
into a suitable container.
d. Repeat this process if the cleaning uid is not
completely clean when discharged.
e. Wipe the paint cup clean.
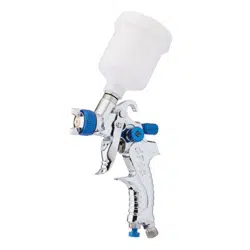
3. Clean the air cap and nozzle head:
a. Remove the air cap (1) and nozzle head (13)
(see 7.3 Setting the Nozzle Size).
b. Soak the parts in a solvent to clear clogged holes
or openings, then rinse clean.
c. Clean the inside and outside of the air cap and
nozzle head using the brush (G).
CAUTION! Take great care to avoid
damaging the openings in the air cap and
nozzle head during cleaning as this will
4. Clean the uid needle and chamber:
a. Remove the uid needle (4) and spring (14)
(see 7.3 Setting the Nozzle Size).
b. Soak the parts in the solvent and rinse clean.
c. Clean all parts of the uid needle using the brush.
5. Soak the spray gun body in the solvent, then rinse it
clean and brush it with the brush.
6. Reassemble the spray gun (see 7.3 Setting the
Nozzle Size).
7. Test the trigger to ensure smooth operation.
9.3 Storing the Product
When the spray gun and its accessories are not in use:
• Switch o and disconnect the air line and detach it
from the regulator.
• Remove the regulator from the tool.
• Clean the tool thoroughly before storage.
• Store the tool in a clean and dry location, out of the
reach of children.
Loading ...
Loading ...
Loading ...