Loading ...
Loading ...
Loading ...
– 11 –
EN
7. Preparation Instructions
3 Fig.
2 Fig.
7.2 Cleaning the Product and Accessories
Before First Use
Before rst use, the spray gun must be cleaned
thoroughly to remove any oil, grease and the protective
lm applied before shipment.
1. Disassemble the spray gun and immerse all parts and
accessories in spray gun cleaning uid.
2. Soak the parts for a few minutes.
3. Allow the parts to dry and then wipe them clean with
a damp cloth.
4. Assemble the spray gun (see 7.4) and half-ll the
paint cup (8) with thinners.
Important: DO NOT connect the spray gun to the
regulator or air line at this time.
5. Squeeze the trigger (12) to ush the thinners through
the spray gun until the paint cup is empty.
6. Immerse and soak the assembled spray gun in the
cleaning uid for a few more minutes.
7. Allow the parts to dry and wipe them clean.
7.3 Setting the Nozzle Size
The spray gun is supplied with two nozzle sizes. To
change the nozzle size, the installed nozzle assembly
must be removed and replaced with the appropriate
parts.
Important: ALWAYS ensure that matching air cap,
nozzle head and uid needle are used. DO NOT mix sizes.
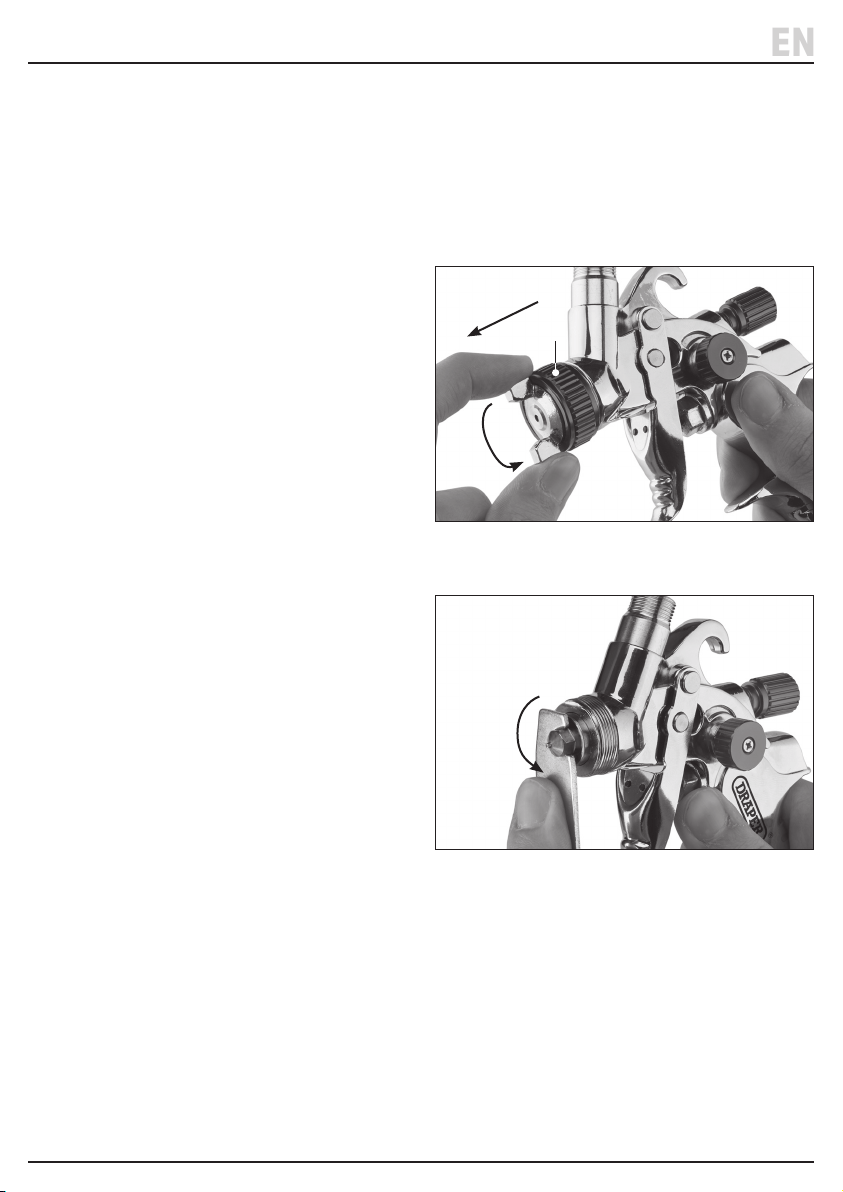
1. Unscrew and remove the air cap lock ring (2) (Fig. 2).
2. Use the M5 spanner (H4) to unscrew and remove the
nozzle head (13) (Fig. 3).
(2)
Loading ...
Loading ...
Loading ...