Loading ...
Loading ...
Loading ...
Page 8
Turntable Setup Guide
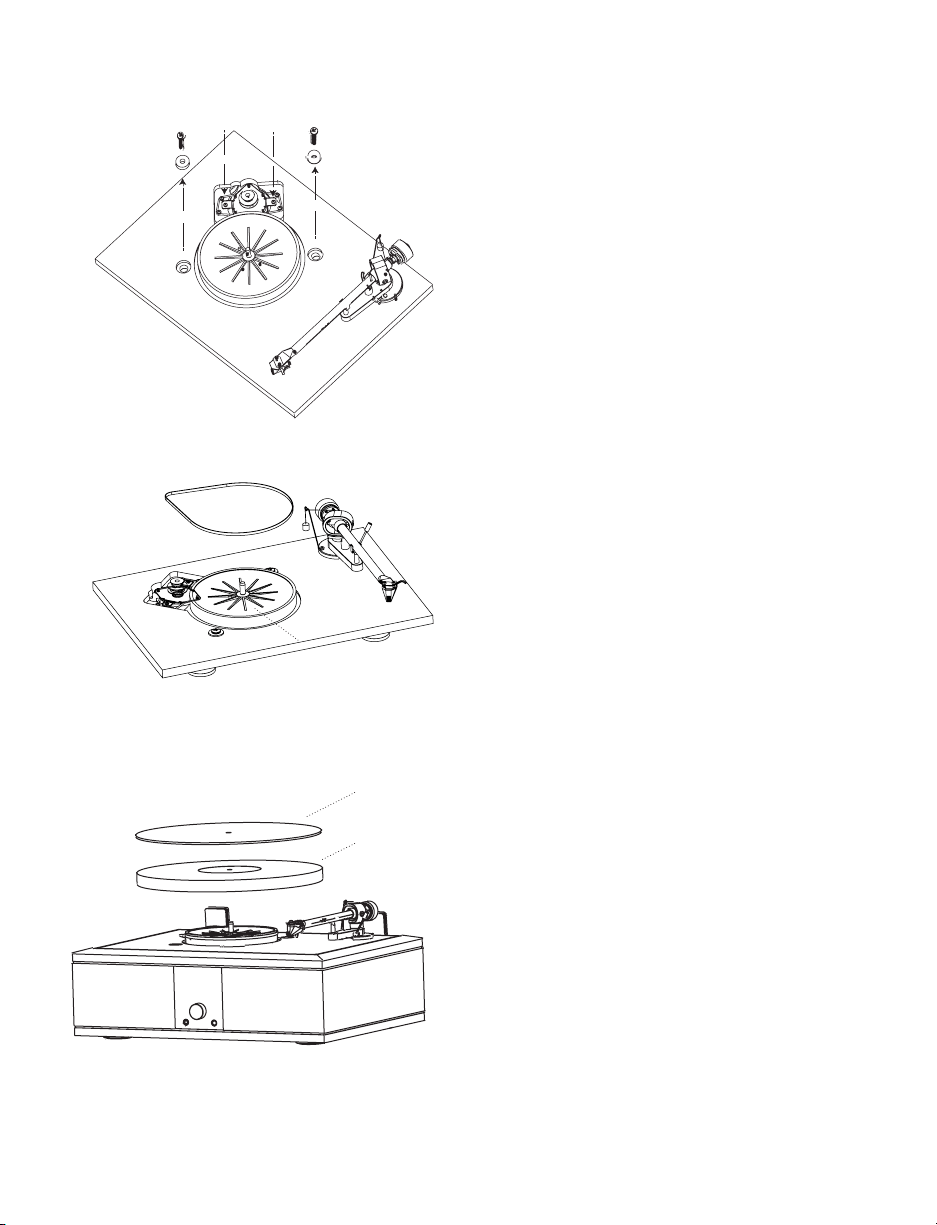
STEP 1 - Remove the Shipping Screws
• Loosen the TWO primary motor screws
a few turns with a screwdriver. They can
be left in place but left loose enough to
allow the motor to move freely. Leave
the rubber bumpers under these screws
to support the motor.
• Remove the TWO large Philips shipping
screws. A Philips screwdriver is
included in the accessory package.
• Save all the screws and reinstall them
whenever shipping or moving the unit to
prevent damage.
STEP 2 - Install the Drive Belt
• Install the at drive belt by stretching
it around the inner platter and over the
“top step” of the small motor pully to
use with 33 or 45RPM records.
• For use with 78RPM records: Install the
round drive belt on the large lower pulley
instead.
STEP 3 - Install the Platter
• With two hands, gently place the platter
on the spindle, followed by the felt
platter mat.
• Some users prefer to place the records
directly on the Acrylic platter. This will
be discussed later in the ‘Customizing
Your Vinyl Experience’ section at the end
of this manual.
Platter Mat
Platter
Drive Belt
Inner Platter
Motor Screws
Loading ...
Loading ...
Loading ...