Loading ...
Loading ...
Loading ...

9
EN
Operating Tips
• Use only new, high-quality, name brand AA batteries or specified
rechargeable DEWALT12V Li-Ion pack for best results.
• Ensure batteries are in good working condition. If the low battery
red indicator light is flashing, the batteries need replacement.
• To extend battery life, turn laser off when not working with or
marking the beam.
• To ensure the accuracy of your work, check to make sure your laser
is calibrated often. See Field Calibration Check.
• Before attempting to use the laser, make sure it is positioned
securely, on a smooth, flat surface.
• Always mark the center of the beam created by the laser.
• Extreme temperature changes may cause movement of internal
parts that can affect accuracy. Check your accuracy often while
working. See Field Calibration Check.
• If the laser has been dropped, check to make sure your laser is still
calibrated. See Field Calibration Check.
• Place the laser on a smooth, flat, stable surface that is level in
both directions.
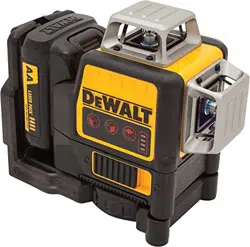
Low Battery Indication
The DW089LR, DW089LG, DW0811LR, DW0811LG lasers are
equipped with a battery gauge as shown in Figure 1B. The battery
gauge indicates remaining power with each LED representing 25%.
The bottom LED will illuminate and blink indicating that the level is
low (below 12.5%) and the batteries need to be replaced. The laser
may continue to operate for a short time while the batteries continue
to drain, but the beam(s) will quickly dim. After fresh batteries are
installed and the laser is turned on again, the laser beam(s) will
return to full brightness and the battery indicator level will indicate
full capacity. (A ashing laser beam is not caused by low batteries;
see Out of Tilt Range Indicator.) If all 4 LEDs on the battery meter
LEDs continuously ash this does not indicate a low battery; see “The
Battery Meter LEDs Flash” under Troubleshooting.
Operation
To Turn the Lasers On and Off
(See Figure
1
)
With the laser off, place it on a at level surface. Slide the Pendulum
Lock switch
B
to the Unlocked/ON position. The DCE089G/R model
has three ON/OFF buttons on the keypad
C
one for a horizontal laser
line
D
, one for a side vertical laser line
E
and one for a front vertical
laser line
F
(DCE089G/R only). The DCE0811G /R has two lines -a
horizontal line and side vertical line. Each laser line is powered on by
pressing its ON/OFF button on the keypad.
The laser lines can be powered one at a time or all at the same time.
Pressing the ON/OFF keys again turns the laser lines off. Slide the
Pendulum Lock switch to the OFF/Locked position when the laser is
not in use. If the pendulum lock switch is not placed in the lock position
all 4 LED’s will continuously ash on the Battery Meter.
Using the Lasers
Out of LEVEL Range Indicator
The lasers are designed to self-level. If the laser has been tilted so
much that it cannot self-level ( > 4° ), the laser beam will ash. There
are two ashing sequences associated with the out of level condition:
(i) between 4° and 10° the beams ash with a constant blink cycle; (ii)
at angles greater than 10° the beams ash with a three blink cycle.
When the beams ash THE LASER IS NOT LEVEL (OR PLUMB) AND
SHOULD NOT BE USED FOR DETERMINING OR MARKING LEVEL
OR PLUMB. Try repositioning the laser on a more level surface.
Using the Pivot Bracket (See gure
2
)
WARNING:
Position the laser and/or wall mount on a stable surface.
Serious personal injury or damage to the laser may result
if the laser falls.:
The laser has a magnetic pivot bracket
G
permanently attached to
the unit. This bracket allows the unit to be mounted to any upright
surface made of steel or iron. Common examples of suitable surfaces
include steel framing studs, steel door frames and structural steel
beams. The bracket also has a keyhole slot
H
allowing the unit to be
hung from a nail or screw on any kind of surface.
Using the Laser with the CEILING Mount
(See Figure
5
)
The laser ceiling mount
L
(if included) offers more mounting options
for the laser. The ceiling mount has a clamp
K
at one end which can
be xed to a wall angle for acoustic ceiling installation. At each end of
the ceiling mount is a screw hole
M
, allowing the ceiling mount to be
attached to any surface with a nail or screw.
Once the ceiling mount is secured, its steel plate provides a surface to
which the magnetic pivot bracket
G
can be attached. The position of
the laser can then be ne-tuned by sliding the magnetic pivot bracket
up or down on the wall mount.
Loading ...
Loading ...
Loading ...