Loading ...
Loading ...
Loading ...

tĂƌŶŝŶŐ
It must be
possible to disconnect
the
appliance from
the mains power
supply; the plug must
therefore be easily
accessible after
installation.
ůĞĐƚƌŝĐĂůĐŽŶŶĞĐƚŝŽŶ
Before plugging in, ensure that the voltage and
frequency shown on the rating plate correspond to
your domestic power supply. The appliance must be
earthed. The power supply cable plug is provided
with a contact for this purpose.
Daily use
hƐŝŶŐƚŚĞŽŶƚƌŽůWĂŶĞů
ƵƚƚŽŶƐ
Press to adjust temperature of freezer
compartment (left side) from 14 °C to 22 °C.
Press to adjust temperature of fridge
compartment (right side) from 2°C to 8°C and
“OFF”. If select “OFF", fridge compartment
will be turned off
Press to select running mode from
^D
Zd
K^hWZKK>/E'^hWZ&Z/E'and
USER’S SETTING (no symbol in display).
Press
ϯ^
button and hold for 3 seconds to
lock other three bottons.
Press it and hold for 1 second to unlock other
three bottons
ŝƐƉůĂLJ
^DZdmode, the refrigerator sets the
temperature of two compartments automatically
according to Ly internal temperature and ambient
temperature.
Kmode, the refrigerator runs in lowest energy
consumption setting.
^hWZKK>Ηcools the fridge compartment to
the l
owest temperature for approx. 2 hours.
Then Ly the temperature set before super mode is
automatically restored.
^hWZ&Z cools the freezer compartment to
the lowest temperature for approx. 6 hours. Then
the temperature set before super mode is
automatically restored.
>K<, the symbol will light on if buttons are
locked.
Display the setting temperature of freezer
compartment.
Display the setting temperature of fridge
compartment.
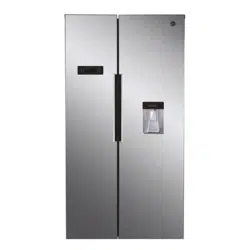
hƐŝŶŐƚŚĞtĂƚĞƌŝƐƉĞŶƐĞƌ;/ĨƉƌĞƐĞŶƚͿ
Before using the water dispenser for the first time,
remove and clean the water tank located inside the
fridge compartment.
1. Lift and take off tank balcony first, then take off
water tank with cover. Detach the cover to
wash and clean the tank and cover.
14
Loading ...
Loading ...
Loading ...