Loading ...
Loading ...
Loading ...
e. If engine idles too fast or too slow, adjust idle
with idle speed stop screw.
f . High speed is factory adjusted. DO NOT ADJUST
DAMAGE MAY RESULT.
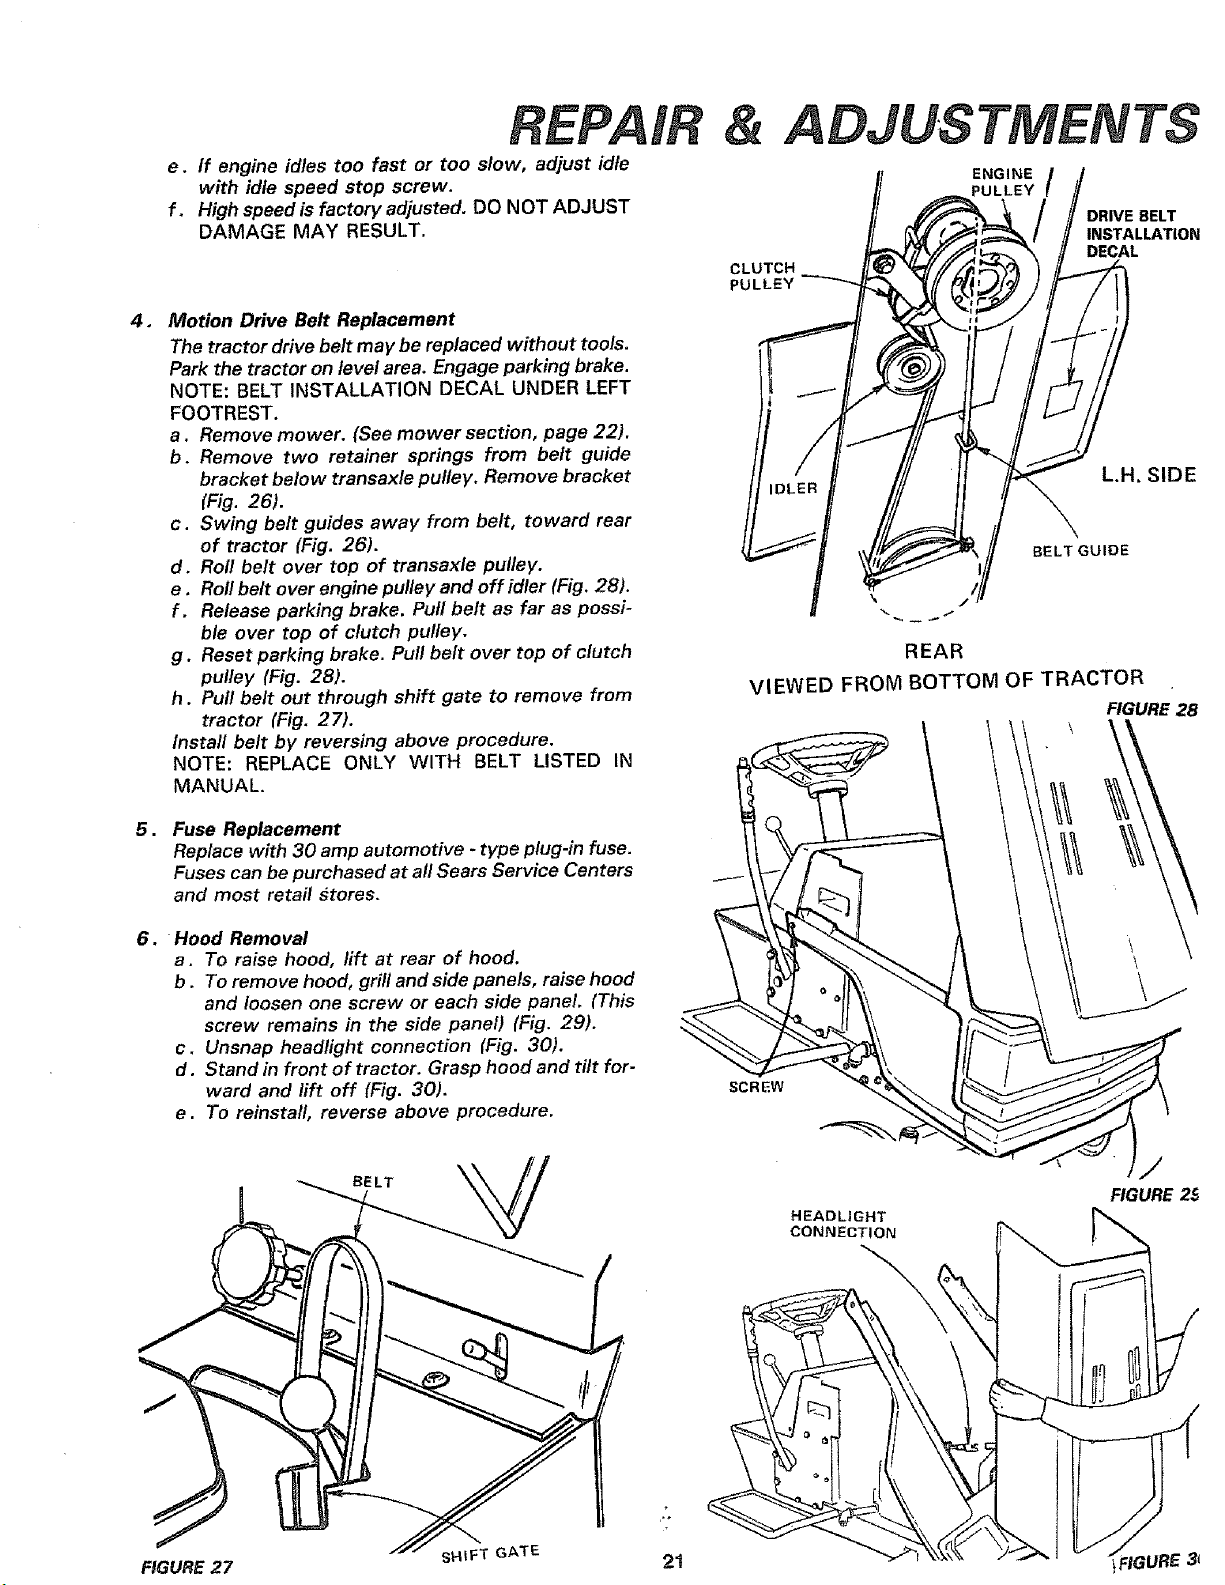
, Motion Drive Belt Replacement
The tractor drive belt may be replaced without tools.
Park the tractor on level area, Engage parking brake.
NOTE: BELT INSTALLATION DECAL UNDER LEFT
FOOTREST.
a. Remove mower. (See mower section, page 22).
b. Remove two retainer springs from belt guide
bracket below transaxle pulley. Remove bracket
(Fig. 26).
c. Swing belt guides away from belt, toward rear
of tractor (Fig. 26).
d. Roll belt over top of transaxle pulley.
e, Roll beit over engine pul/ey and off idler (Fig. 28).
f . Release parking brake. Pull belt as far as possi-
ble over top of clutch pulley.
g. Reset parking brake. Pull belt over top of clutch
pulley (Fig. 28).
h. Pull belt out through shift gate to remove from
tractor (Fig. 27).
Install belt by reversing above procedure.
NOTE: REPLACE ONLY WITH BELT LISTED IN
MANUAL.
5,
Fuse Replacement
Replace with 30 amp automotive - type plug-in fuse.
Fuses can be purchased at all Sears Service Centers
and most retail stores,
6. Hood Removal
a. To raise hood, lift at rear of hood.
b . To remove hood, grill and side panels, raise hood
and loosen one screw or each side panel. (This
screw remains in the side panel) (Fig. 29).
c. Unsnap headlight connection (Fig. 30).
d. Stand in front of tractor. Grasp hood and tilt for-
ward and lift off (Fig. 30).
e. To reinstall, reverse above procedure.
BELT
FIGURE 27
sHIFT GATE
21
ADJUSTMENTS
ENGINE
PULLEY /
DRIVE BELT
INSTALLATION
DECAL
CLUTCH
PULLEY
L.H, SIDE
BELT GUIDE
REAR
VIEWED FROM BOTTOM OF TRACTOR
FIGURE 28
\
\
\
SCREW
/
FIGURE 2_
HEADLIGHT
CONNECTION
Loading ...
Loading ...
Loading ...