Loading ...
Loading ...
Loading ...
Installation instructions
UNPACKING THE WASHER
WARNING: Dest,o ,thecarto,a.dplastic
bags _ff_er die washer is unpacl<ed. Children might use
them for play. Cartons covered with rags, bedspreads,
or plastic sheets can become airtight chambe,_
causing suffbcafion. Place all mamfiMs in a garbage
container or make mamriMs inaccessible to children.
1. Cut die shipping carton Mong die dotted line at the
base of the unit.
2. While it is in tile carton, careflflly lay die washer on its
back side.
3. Remove die styrofbam base.
4. Careflflly return the washer to an uptight position and
reII-tove die caitono
5. Careflflly move the washer to widfln 4 fe.et (122 cm) of
the final location.
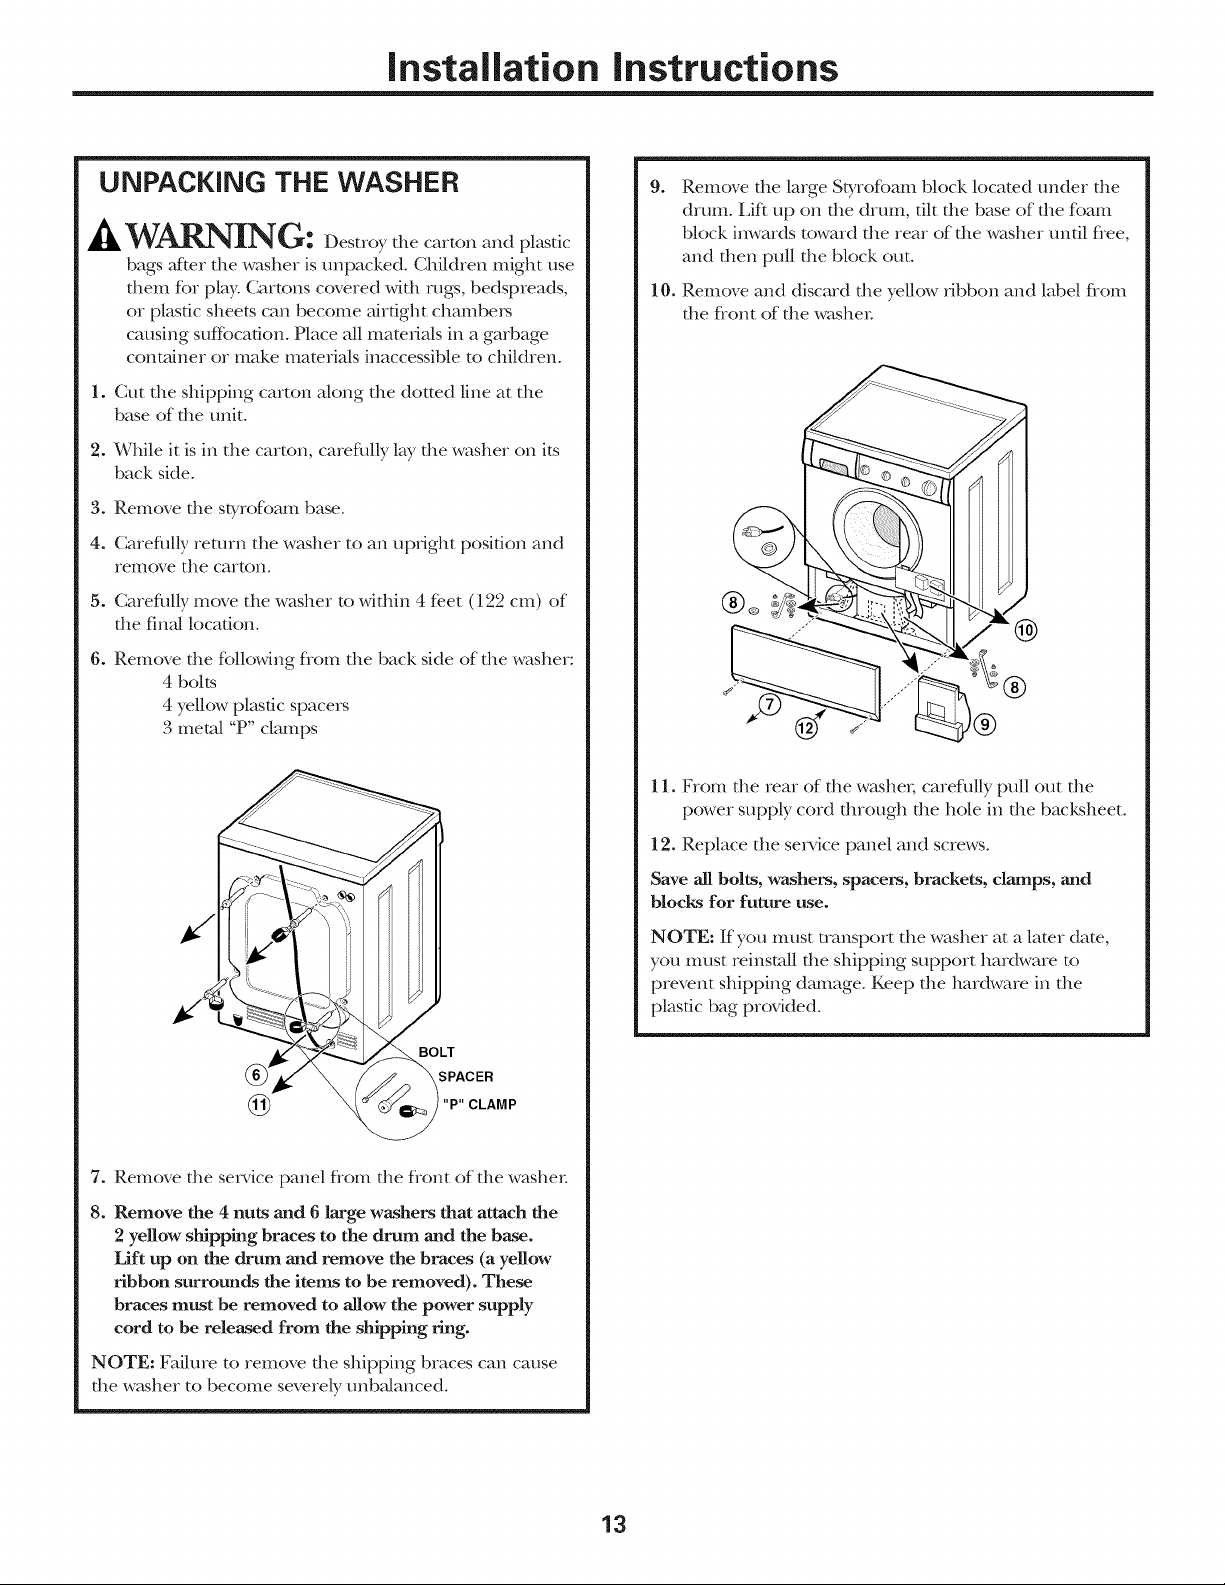
6. Remove die fbllowing flom die back side of die washer:
4 bolts
4 yellow plastic spacers
3 metal "P" clamps
7. Remove die service panel flom die flont of die washer
8. Remove the 4 nuts and 6 large washers that attach the
2 yellow shipping braces to the drum and the base.
Lift up on the drum and remove the braces (a yellow
ribbon surrounds the items to be removed). These
braces must be removed to allow the power supply
cord to be released from the shipping ring.
NOTE: Failure to remove die shipping braces can cause
the w_sher to become severely unbalanced.
9.
Remove die large Styrofbam block located under die
drum. i_if_ up on the drum, tilt the base of the foam
block inwards toward the rear of the washer until flee,
and then pull the block out.
10. Remove and discard file yellow ribbon and label from
the flont of the washer
@Q
.... ®
11. From die rear of die washe,; careflflly pull out die
power supply cord through the hole in the backsheet.
12. Replace the service panel and screws.
Save all bolts, washers, spacers, brackets, clamps, and
Mocks for future use.
NOTE: If you must mmsport the washer at a late, date,
you must reinstall the shipping support hardware to
prevent shipping dmnage. Keep tlle hardware in tlle
plastic bag provided.
13
Loading ...
Loading ...
Loading ...