Loading ...
Loading ...
Loading ...
CLEAN AIR INTAKE/COOLING AREAS
To ensure proper air circulation, make
sure the air intake screen, radiator,
cooling fins, and other external surfaces
of the engine are kept clean at all times.
Every 100 hours of operation (more often
under extremely dusty, dirty conditions),
remove the upper blower housing
assembly. Clean the cooling fins of the
radiator, external surfaces, and the air
intake screen and blower housing
assembly as necessary. The screen
assembly may be separated from the
upper blower housing to permit more
thorough cleaning if required (See
"CLEAN AIR SCREEN"). Make sure all
parts are reinstalled before starting the
engine. If the screen assembly was
separated from the blower housing, push
the upper retaining clips into the locked
position.
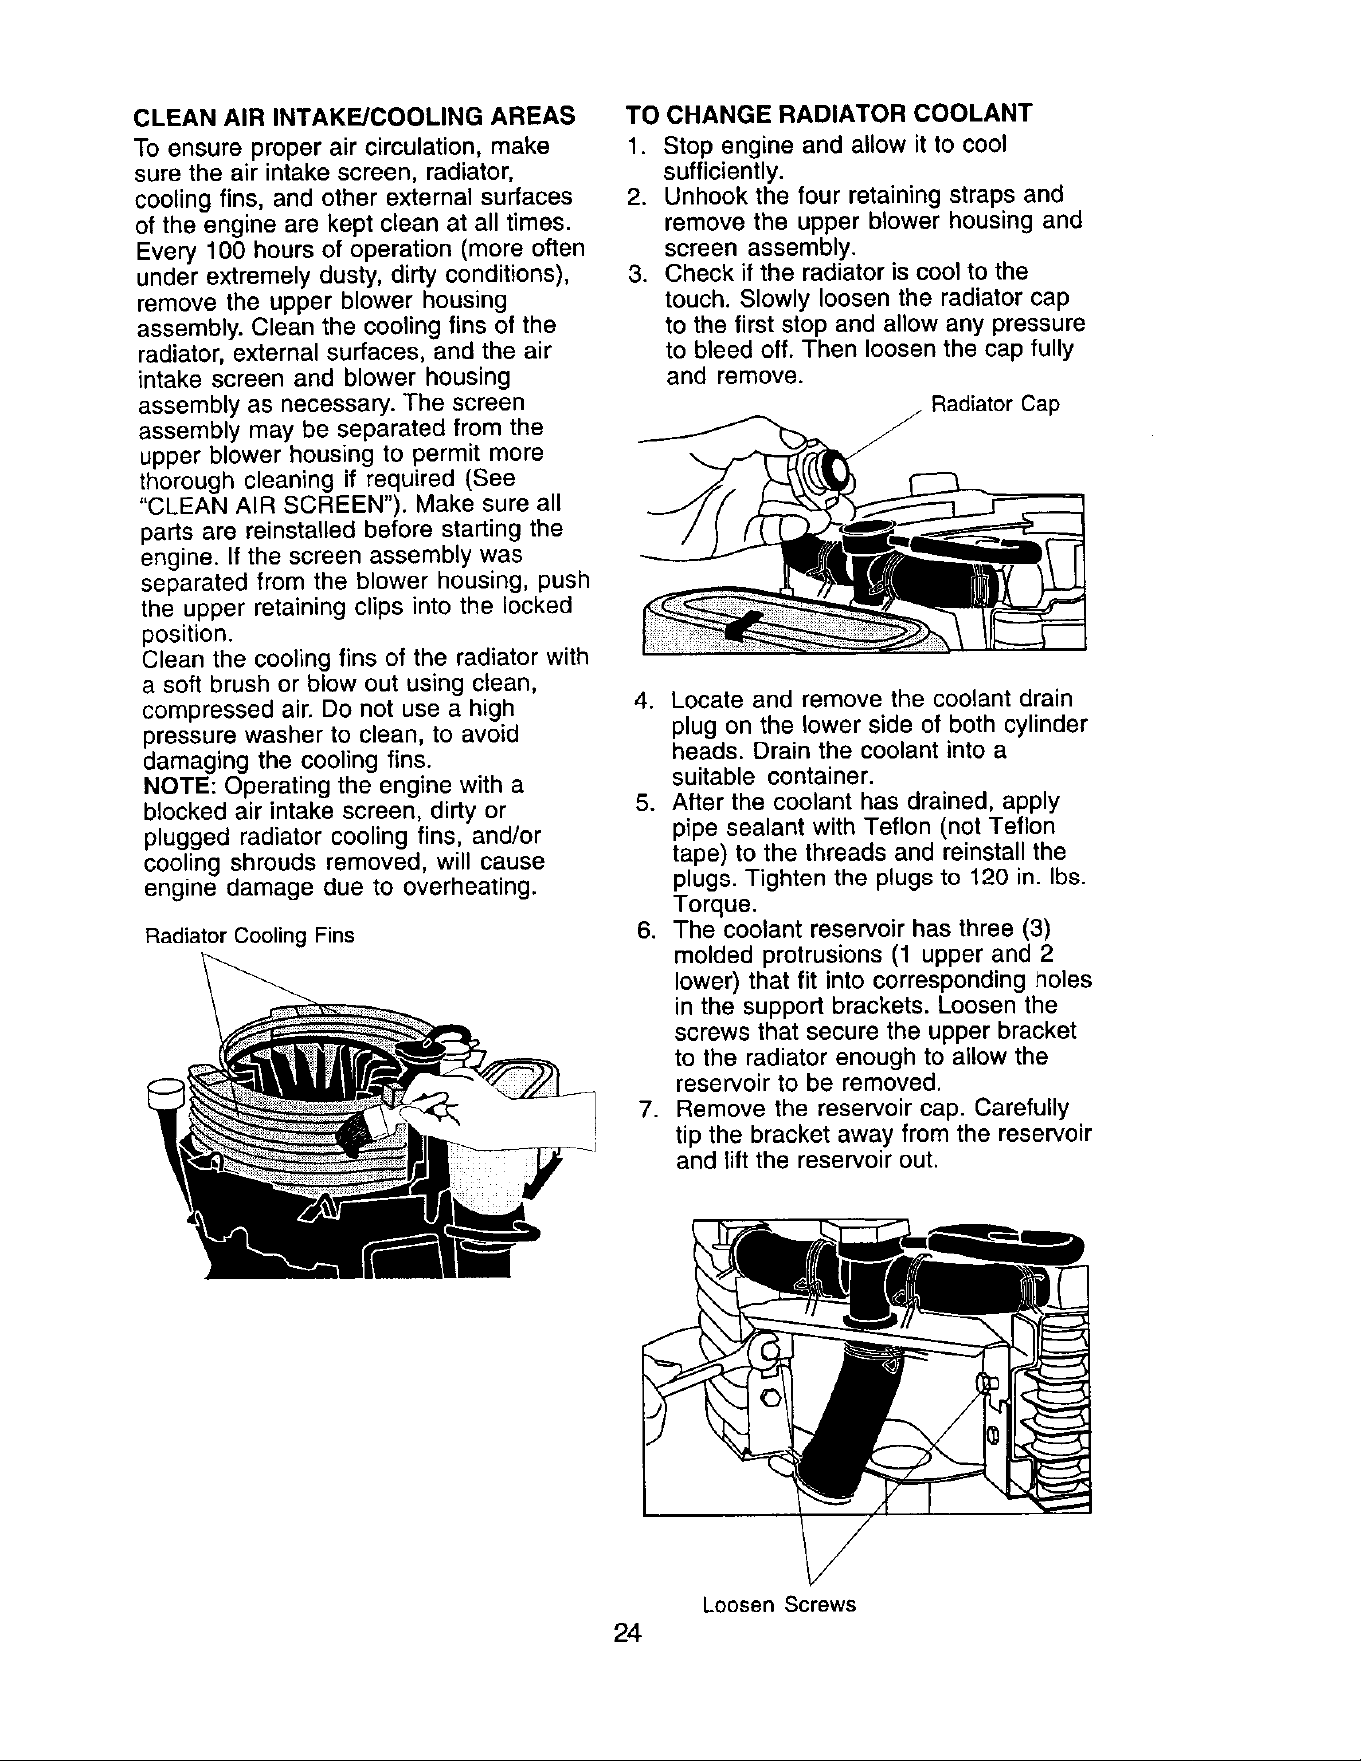
Clean the cooling fins of the radiator with
a soft brush or blow out using clean,
compressed air. Do not use a high
pressure washer to clean, to avoid
damaging the cooling fins.
NOTE: Operating the engine with a
blocked air intake screen, dirty or
plugged radiator cooling fins, and/or
cooling shrouds removed, will cause
engine damage due to overheating.
Radiator Cooling Fins
TO CHANGE RADIATOR COOLANT
1. Stop engine and allow it to cool
sufficiently.
2. Unhook the four retaining straps and
remove the upper blower housing and
screen assembly.
3. Check if the radiator is cool to the
touch. Slowly loosen the radiator cap
to the first stop and allow any pressure
to bleed off. Then loosen the cap fully
and remove.
Radiator Cap
4. Locate and remove the coolant drain
plug on the lower side of both cylinder
heads. Drain the coolant into a
suitable container.
5. After the coolant has drained, apply
pipe sealant with Teflon (not Teflon
tape) to the threads and reinstall the
plugs. Tighten the plugs to 120 in. Ibs.
Torque.
6. The coolant reservoir has three (3)
molded protrusions (1 upper and 2
lower) that fit into corresponding holes
in the support brackets. Loosen the
screws that secure the upper bracket
to the radiator enough to allow the
reservoir to be removed.
7. Remove the reservoir cap. Carefully
tip the bracket away from the reservoir
and lift the reservoir out.
Loosen Screws
24
Loading ...
Loading ...
Loading ...