
Congratulations on the purchase of your new
ladies dual foil wet/dry shaver. For maximum sat-
isfaction when using this quality product, please
take a minute to read the following operating and
care instructions. Thank you for choosing Conair,
the #1 brand in personal care appliances.
IMPORTANT SAFETY
INSTRUCTIONS
When using an electrical appliance, basic
safety precautions should always be taken,
including the following:
READ ALL INSTRUCTIONS
BEFORE USING
DANGER – To reduce the risk of death
or serious injury from electrical shock:
1. Do not place or store shaver where the stand
can fall or be pulled into a tub or sink. Do not
place or drop charging stand into water or
other liquids.
2. Except when charging, always unplug this
appliance from the electrical outlet immediately
after using.
3. Always turn this shaver off before cleaning.
4. Do not reach for an appliance that has
fallen into water.
WARNING –
To reduce the risk of burns,
fire, electrical shock, or injury to persons:
1. This appliance should not be used by, on,
or near children or individuals with certain
disabilities.
2. Use this appliance only for its intended
use as described in this manual. Do not use
attachments not recommended by the man-
ufacturer.
3. Never operate this appliance if it has a
damaged cord or plug, if it is not working
properly, if it has been dropped or dam-
aged, or if the stand has been dropped
into water. Return the appliance to a ser-
vice center for examination and repair.
4. Keep the cord away from heated surfaces.
5. Never drop or insert any object into any
opening.
6. Do not use outdoors or operate where
aerosol (spray) products are being used or
where oxygen is being administered.
7. Do not use this appliance with damaged or
broken foils, as injury may occur.
8. Always attach plug to appliance first, then to
outlet. To disconnect, turn all controls to OFF
position before removing plug from outlet.
For connection to a power supply not in the
U.S.A., use an attachment plug adapter of
the proper configuration for the power outlet.
This device complies with Part 15 of the FCC
Rules. Operation is subject to the following
two conditions: (1) this device may not cause
harmful interference, and (2) this device
must accept any interference received,
including interference that may cause unde-
sired operation.
Warning: Changes or modification to this
unit not expressly approved by the party
responsible for compliance could void the
user’s authority to operate the equipment
SAVE THESE
INSTRUCTIONS
WARNING
1. Women whose skin is sensitive to cosmetics
or easily irritated by shaving, or who suffer from
a skin allergy, should test one section of the leg
or arm before using the shaver.
2. The foils are thin and precisely finished
pieces. Do not press hard against the foils,
or drop foils. A warped or distorted foil will
produce poor shaving results. Also, a dam-
aged foil may cause skin injury. A dam-
aged foil should be replaced immediately.
3. When cleaning, use cold or warm water.
Do not use hot water, sea water, or cleaners,
as they can cause damage to the waterproof
seals.
4. Do not leave the entire unit submerged in
water for a long period of time.
5. To prevent possible damage to the foils and
the cutter, women who use underarm deodor-
ant must thoroughly clean and air-dry the foil
and cutter after each use. Failure to do this may
result in corrosion of the inner blades.
OPERATING
INSTRUCTIONS
IMPORTANT
This shaver has been engineered to give you a
clean, close, and smooth shave. If you are not
currently using a rechargeable shaver, it may
take some time to adapt to this new method.
Give yourself some time to determine the best
motion for the best shave.
Use your shaver exclusively for three to four
weeks so that your legs and underarms
adjust to the shaver. At first, your shave
might not be as close as you expect. However,
this is normal. It takes time for your skin and
hair to adjust to the new procedure and for you
to learn how the effectively use the shaver.
Caution: Most blade users will push too hard
and therefore not get a satisfactory shave. You
must press gently so the hair can get into the
holes of the foil; pressing too hard makes the
hair flat. Please be patient; use your shaver 10
to 12 times before you judge its performance.
CHARGING THE LWD375:
Shaver voltage: 100–240V 50/60Hz.
Before your first shave, charge the shaver for
16 hours or after six months of non-use. A
full charge should provide approximately 30
minutes’ run time. After initial charge, it should
take 16 hours to recharge your shaver. Then
recharge the shaver as needed.
To charge the LWD375, plug the cord with adapter
into an AC outlet (100–240V), then place shaver
into charging stand. Make sure shaver is in the
OFF position. The foils are extremely thin and
precisely crafted. Do not push on the foils when
inserting the shaver into the charging stand. For
extra protection, keep the blade guard on while
handling the unit in the charging stand as well
as when not in use.
1. Turn the shaver switch off. If the switch
is not in the OFF position, the shaver will not
charge and you can cause severe damage to
the shaver.
2. While holding the charging stand with one
hand, plug the shaver firmly into the charging
stand with the other hand. Make sure the shav-
er is completely inserted. The charging light
indicator will go on when the shaver is properly
inserted into the base.
3. Keep the shaver switch in the OFF position
while charging.
4. The charging indicator light will stay on
while the shaver is in the charging stand and
is charging.
5. A fully charged shaver will give approximate-
ly 30 minutes of shaving time.
Rechargeable Model LWD375
Congratulations! Satiny Smooth legs are just
a shave away with your new Conair wet/dry
rechargeable women’s shaver. This shaver can
be used with shaving cream, which provides a
smoother, closer shave, or it can be used dry
as a regular shaver. Because the shaver is fully
submersible, you can conveniently shave in the
shower or in the tub. And the shaver is easy to
clean; simply rinse the cutting heads under a
faucet, using warm or cold water (DO NOT USE
HOT WATER. IT CAN DESTROY THE SHAVER’S
SEALS.)
CAUTION
Do not immerse any part of the charging stand
or cord in water.
Do not try to plug the charging stand into an AC
outlet while your hands are wet.
The outer foils and inner blades are delicate
and must be handled very carefully.
BEFORE SHAVING
1. Before wet shaving, you may wish to
prepare your legs and underarms with shaving
cream or soap. If a soapy lather is applied to
the skin, the shaver will glide smoothly over
the skin and clean away oil residue, while at
the same time removing hair. Caution: DO NOT
use shaving gels, as these products can
clog your shaver foils.
2. When dry shaving, be certain that your skin
is clean. If you have sensitive skin, you may
want to apply talcum powder before and after
you shave.
3. Clean your shaver after each use. This will
ensure the best performance. (Please refer to
“How to Clean Your Shaver” section for further
instructions.)
4. Although the shaver is waterproof, do not
submerge it under water for extended periods
of time.
INSTRUCTIONS FOR USE:
1. Remove the plastic protection cap.
2. Slide the main switch up to the ON position.
3. After each shave, switch the unit off, clean,
and replace the protective cap.
4. Put the unit back on the charging stand for
storage and/or recharging.
HOW TO CLEAN YOUR SHAVER
1. Make sure unit is in the OFF position before
cleaning your shaver.
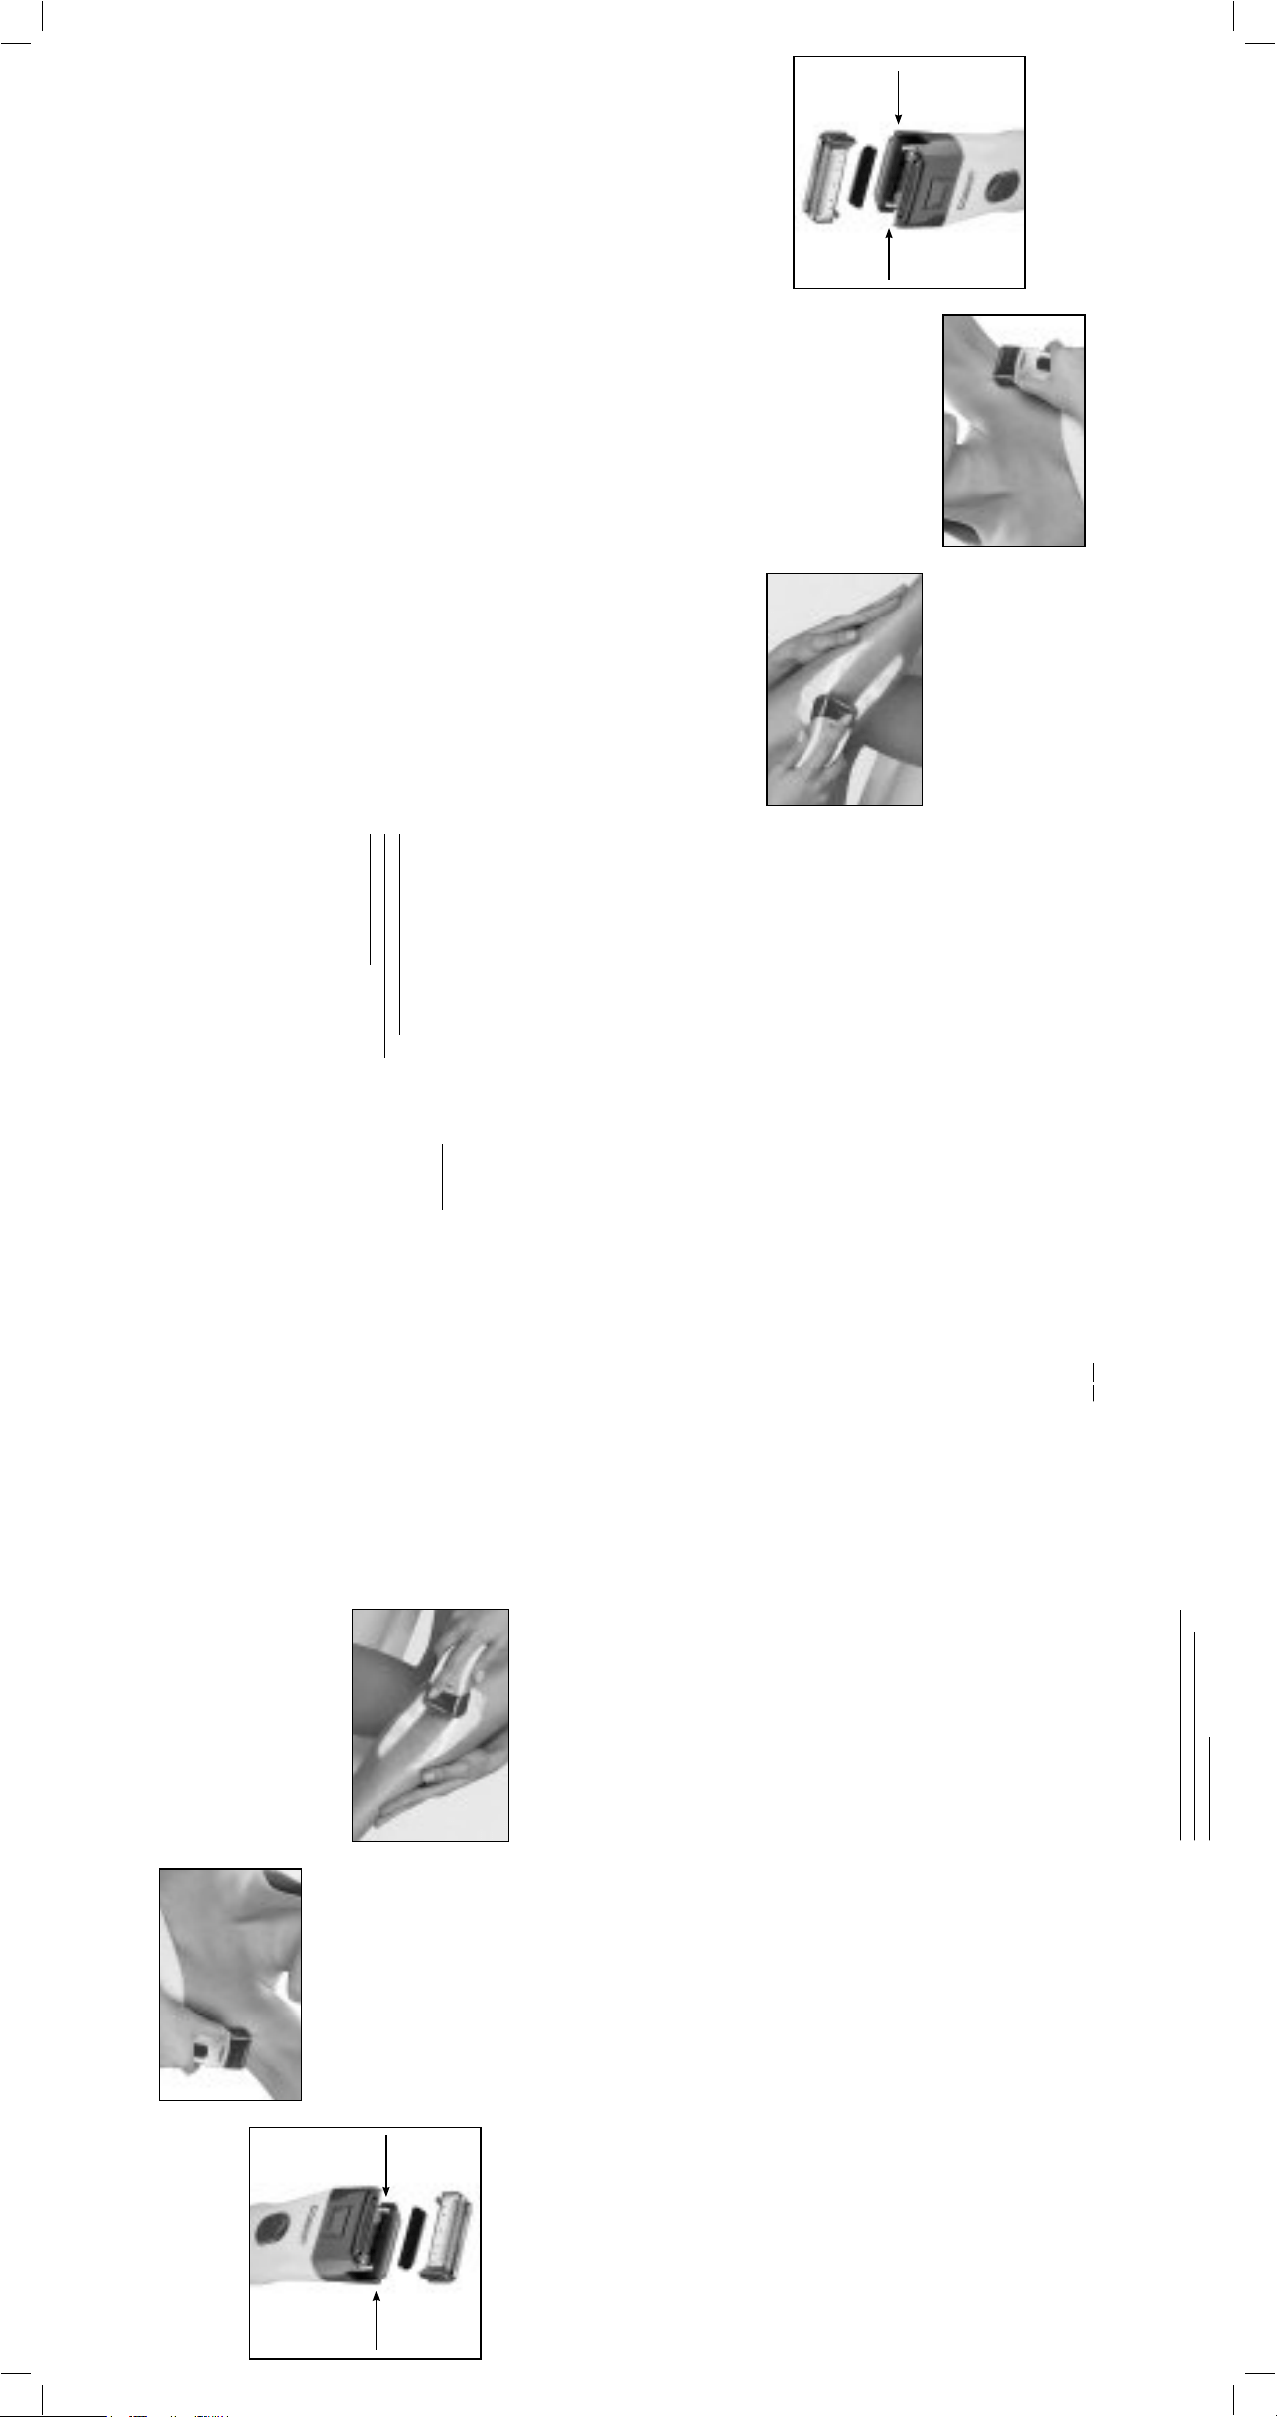
2. Hold shaver head and lift up from the back,
(See FIG.1) then press foil frame release but-
tons on each side and lift up (the cutter is now
in view). Be careful not to push on the foils.
They are delicate and can easily be damaged.
Important: After several uses, you will be able
to determine the optimum shaving method for
your legs and bikini area.
SHAVING YOUR UNDERARMS
1. Prepare your underarms for wet or dry shav-
ing. (Be sure that your skin is clean and free of
deodorant.)
2. Turn the shaver on.
3. Lift your arm until the skin under the arm
stretches slightly.
4. Use the trimmer portion first to remove any
long hair, stroking trimmer against the direction
of hair growth.
5. Hold the shaver so that it is in full contact
with your skin, and shave with gentle strokes.
6. It is important to press lightly. Pressing too
hard may lead to skin irritation.
7. When finished shaving, turn the shaver off.
Important: After several uses, you will be able
to determine the optimum shaving method for
your underarms.
SHAVING YOUR
LEGS/BIKINI AREA
NOTE: Pushing the shaver against the skin too
hard will not allow the hairs to enter the foils and
be cut. Experience will show just the right pres-
sure to use to maximize performance.
Press Here
FIG. 1
Press Here
1. Prepare your legs for wet or dry shaving.
2. Turn shaver on.
3. Shave with smooth, steady strokes up and
down your skin.
4. Keep the full shaving head in contact with
your skin.
5. For best results, shave against the direction of
hair growth.
6. Your shaver has two full-size trimmers. One
in the front and the second in the back. These
cut longer hair to stubble length, allowing the
foil shaver to perform more effectively. The
shaver also has a bikini pop-up trimmer for
your complete shaving needs.
7. When you finish shaving, turn the shaver off.
8. To trim the bikini area, use the handy pop-up
feature to easily see what you are trimming.
3. Rinse the shaver cutter and foil frame under
running water or in a sink. (You can use the
cleaning brush which is included.) Do not use
hot water. Use only warm or cold water.
4. After wet cleaning, allow the foil frame and
cutters to air-dry before closing foil frame and
shaver head. Replace shaver head back onto
the shaver until it clicks into place. Wipe the
surface of the main unit with a dry towel. Do
not dry the foil area. Let the shaving head air-
dry. Once the shaving head is dry, replace the
plastic protection cap.
Le felicitamos por haber comprado esta máquina
de afeitar de doble hoja con agua o en seco.
Para lograr resultados óptimos, siempre lea las
instrucciones de uso y mantenimiento que se
encuentran a continuación. Gracias por elegir
Conair, el no. 1 en aparatos de cuidado personal.
MEDIDAS DE
SEGURIDAD
IMPORTANTES
Siempre que use aparatos eléctricos, debe
tomar precauciones básicas de seguridad,
entre las cuales las siguientes:
LEA TODAS LAS
INSTRUCCIONES
ANTES DE USARLO
PELIGRO – Para reducir el riesgo de
muerte o herida por descarga:
1. No coloque ni guarde este producto donde la
base de carga pueda caer o ser empujado a
una bañera o un lavabo. No coloque la base de
carga ni la deje caer al agua u otro líquido.
2. Siempre desconecte el aparato
inmediatamente después de usarlo, excepto
cuando lo está cargando.
3. Siempre desconecte el aparato antes de
limpiarlo.
4. No trate de alcanzar el aparato después
de que hubiese caído al agua.
ADVERTENCIA –
Para reducir el
riesgo de quemaduras, electrocución, incendio
o heridas:
1. Este aparato no debería ser usado por,
sobre o cerca de niños o personas con
ciertas discapacidades.
2. Utilice este aparato únicamente con
el propósito para el cual fue diseñado y
solamente según las instrucciones. Sólo use
accesorios recomendados por el fabricante.
3. No utilice este aparato si el cable
o la clavija estuviesen dañados, si no
funcionase debidamente, si estuviese
dañado, o después de que se hubiese
caído al piso o al agua. Regrese
el aparato a un centro de servicio
autorizado para su revisión y reparación.
4. Mantenga el cable alejado de las
superficies calientes.
5. Nunca deje caer ni inserte ningún objeto
en ninguna de las aberturas del aparato.
6. No utilice el aparato en exteriores, ni
lo haga funcionar donde se estén usando
productos en aerosol (spray) o donde se esté
administrando oxígeno.
7. No utilice este aparato con hojas rotas o
dañadas. Esto podría provocar una herida.
8. Siempre conecte el cable al aparato
antes de conectarlo a la toma de corriente.
Siempre apague el aparato (OFF) antes de
desconectarlo.
Puede que sea necesario utilizar un
adaptador de enchufe (no incluido) para
conectar el aparato fuera de los Estados
Unidos.
Este artefacto cumple con la Sección 15 de
la Normativa FCC. Su funcionamiento está
sujeto a las dos condiciones siguientes: (1)
Este artefacto no puede causar ninguna
interferencia perjudicial, y (2) Este artefacto
debe aceptar cualquier interferencia recibida,
incluso alguna interferencia que pudiera
ocasionar una operación no deseada.
Advertencia: Se advierte que las
modificaciones no aprobadas expresamente
por la autoridad competente en materia de
conformidad podrían rescindir el permiso del
usuario para operar el equipo.
GUARDE ESTAS
INSTRUCCIONES
ADVERTENCIA
1. Si su piel es sensible a los productos
cosméticos, se irrita fácilmente cuando se
afeita o padece de alergia, pruebe el aparato
sobre una pequeña sección del brazo o de la
pierna antes de usarlo.
2. Las hojas de afeitar son delgadas
y precisas. No las apriete mucho
sobre la piel ni las deje caer. Una hoja
lastimada o deformada impedirá el buen
funcionamiento del aparato y puede
provocar heridas. Reemplace las hojas
defectuosas inmediatamente.
3. Límpielo en agua fría o tibia únicamente.
No utilice agua caliente, agua salina o
limpiadores. Esto puede dañar los sellos de
impermeabilidad del aparato.
4. No sumerja el aparato en agua durante un
tiempo prolongado.
5. Si usa desodorante, lave bien y deje
secar la hoja y las cuchillas al aire después
de cada uso. Si no lo hace, las cuchillas se
pueden oxidar.
INSTRUCCIONES
DE OPERACIÓN
IMPORTANTE
Este aparato ha sido diseñado para
proporcionar un afeitado al ras suave y preciso.
Si no está acostumbrada a afeitarse con una
máquina de afeitar recargable, puede que
requiera un período de adaptación a este nuevo
método de eliminación del vello. Dese un poco
de tiempo para determinar cuál es el mejor
método para el mejor afeitado.
Durante tres a cuatro semanas, utilice
exclusivamente la máquina de afeitar para
afeitar sus piernas/axilas. Puede que sus
primeros intentos no sean perfectos. Esto es
normal. Su piel y sus vellos necesitan tiempo
para acostumbrarse a esta nueva técnica
de afeitado. Precaución: Presionar las hojas
mucho contra la piel no producirá resultados
satisfactorios. Se debe pasar la máquina
suavemente sobre la piel; presionar mucho
aplasta los vellos e impide el afeitado. Sea
paciente; utilice el aparato 10–12 veces antes
de juzgar su rendimiento.
INSTRUCCIONES DE CARGA DEL
LWD375:
Potencia: 100–240V, 50/60Hz
Antes de usar el aparato por primera vez, o si
no lo ha usado desde hace más de seis meses,
deberá cargarlo durante 16 horas. Una carga
completa dará al aparato una autonomía de
30 minutos. Después de la carga inicial, cada
carga demorará 16 horas. Cargue el aparato
cuando sea necesario.
Para cargar el LWD375, enchufe el adaptador
en una toma de corriente de 100–240V C.A., y
luego coloque el aparato en la base de carga.
Asegúrese de que el aparato esté apagado
(OFF). Las hojas de afeitar son delgadas y
precisas. No presione las hojas al colocar
el aparato en la base de carga. Para más
protección, mantenga el protector de hojas
puesto cuando no lo está usando.
1. Asegúrese de que el aparato esté apagado.
Si el interruptor no está en la posición "OFF",
el aparato no se cargará y puede causar daños
severos.
2. Sostenga la base de carga seguramente en
una mano e introduzca el aparato firmemente
en la base con la otra mano. Asegúrese de
que el aparato esté debidamente puesto. El
indicador luminoso de carga se encenderá.
3. No encienda el aparato durante la carga.
4. El indicador de carga permanecerá
encendido mientras el aparato está cargando.
5. Una carga completa dará al aparato una
autonomía de aproximadamente 30 minutos.
Modelo recargable LWD375
¡Felicitaciones! Su máquina de afeitar en seco/
húmedo Conair le permitirá conseguir piernas
suaves y sedosas, fácilmente. Esta máquina
de afeitar puede usarse con crema de afeitar,
para un afeitado al ras suave y preciso, o en
seco. También la puede usar en la ducha o
el baño, ya que la unidad es completamente
sumergible. Además, su nueva máquina
de afeitar es fácil de limpiar. Simplemente
enjuague el cabezal en agua corriente tibia
o fría. NO USE AGUA CALIENTE. ESTO PUEDE
DAÑAR LOS SELLOS DE IMPERMEABILIDAD
DEL APARATO.
PRECAUCIÓN:
No sumerja el cable ni la base de carga en
agua u otro líquido.
No enchufe/desenchufe el cable con las manos
mojadas.
Las hojas de afeitar y las cuchillas internas
son delicadas y deben manipularse con mucho
cuidado.
PREPARACIÓN
1. Aplique crema de afeitar o jabón sobre la
piel antes de afeitarse con agua. Esto facilitará
el afeitado y eliminará los residuos de aceite.
Precaución: NO utilice gel de afeitar, ya que
los geles pueden obstruir las hojas.
2. Antes del afeitado en seco, asegúrese de
que su piel esté limpia. Si su piel es sensible,
puede aplicar talco antes y después del
afeitado.
3. Limpie el aparato después de cada uso. Esto
asegurará un rendimiento óptimo. Para más
información, véase la sección "Instrucciones de
limpieza".
4. Aunque el aparato es a prueba de agua,
no lo sumerja en agua durante un tiempo
prolongado.
INSTRUCCIONES DE USO:
1. Retire el protector de hojas de plástico.
2. Ponga el interruptor en la posición "ON"
para encender el aparato.
3. Después de cada uso, apague el aparato,
límpielo y regrese el protector de hojas sobre
las mismas.
4. Regrese la unidad principal sobre la base de
carga/almacenaje.
INSTRUCCIONES DE LIMPIEZA
1. Asegúrese de que el aparato esté apagado
(OFF).
2. Sosteniendo firmemente el cabezal, oprima
los botones de liberación y alce el cabezal
(FIG.1). Tenga cuidado de no presionar las
hojas. Son delicadas y pueden dañarse
fácilmente.
8. Para afeitar las ingles, acorte los vellos
primero con la cuchilla recortadora integrada.
Importante: Necesitará hacer varios intentos
hasta encontrar la mejor forma de afeitar sus
piernas/ingles.
CÓMO AFEITAR SU AXILAS
1. Prepare la piel para el tipo de afeitado
deseado, con agua o en seco. Asegúrese
de que la piel esté limpia, seca y libre de
desodorante.
2. Encienda el aparato.
3. Alce el brazo para estirar ligeramente la piel.
4. Si el vello es largo, acórtelo con la cuchilla
recortadora integrada, pasando la máquina en
dirección contraria al crecimiento del vello.
5. Mantenga el aparato en contacto con la piel
y afeite los vellos con movimientos suaves.
6. No presione mucho. Hacer mucha presión
puede causar irritaciones cutáneas.
7. Después de terminar, apague el aparato
(OFF).
Importante: Necesitará hacer varios intentos
hasta encontrar la mejor forma de afeitar sus
axilas.
CÓMO AFEITAR
SUS PIERNAS/INGLES
NOTA: Presionar las hojas contra la piel aplasta
los vellos e impide el afeitado. La experiencia
le mostrará cuanta presión aplicar para obtener
resultados óptimos.
Presionar aquí
FIG. 1
Presionar aquí
1. Prepare la piel para el tipo de afeitado
deseado, con agua o en seco.
2. Encienda el aparato (ON).
3. Mueva la máquina suavemente contra la
piel, arriba y abajo.
4. Siempre mantenga el aparato en contacto
con la piel.
5. Para lograr resultados óptimos, aféitese en
dirección contraria al crecimiento del vello.
6. Su máquina de afeitar cuenta con dos
cuchillas recortadoras anchas, una adelante y
otra atrás, que permiten acortar el vello antes
de afeitarlo, para un afeitado más eficaz. La
máquina de afeitar también está equipada con
una cuchilla recortadora integrada para acortar
el vello largo.
7. Después de terminar, apague el aparato
(OFF).
3. Enjuague las cuchillas internas y las hojas
bajo agua corriente. (puede usar el cepillo de
limpieza provisto). No utilice agua caliente.
Utilice agua fría o tibia solamente.
4. Permita que las cuchillas y las hojas sequen
al aire antes de volver a ensamblar el cabezal.
Una vez seco, vuelva a instalar el cabezal,
presionando hasta que encaje en su lugar.
Limpie el cuerpo del aparato con una toalla
seca. No seque las hojas. Permita que sequen
al aire. Cuando el cabezal esté seco, regrese el
protector de hojas en su puesto.
lwd375ncs_13pg142488_ib_final.indd 1 9/16/13 2:19 PM
5. The cutter can also be cleaned with the
cleaning brush provided.
6. If the body of the shaver becomes dirty,
wipe off with a damp cloth and mild detergent
or soap. Never use thinners, other solvents, or
any harsh cleaners.
CAUTION
1. When shaking off excess water, hold the
main unit firmly to prevent releasing the head
assembly or dropping the unit.
2. Do not use a dryer or heater to dry the shav-
er. This may result in malfunction or damage to
the shaver.
Note: Never pull on the charging stand cord.
Never twist or wrap the cord around the
charging stand.
REPLACING THE POP-UP
TRIMMER ASSEMBLY
Note: We do not recommend replacing the
trimmer assembly yourself. Take or send the
shaver to a Conair Service Center, because
this requires a special tool for replacement.
For most users, these trimmers will stay sharp
for as long as you own your shaver.
BATTERY REMOVAL
AND RECYCLING
TO REMOVE NI-CD BATTERY
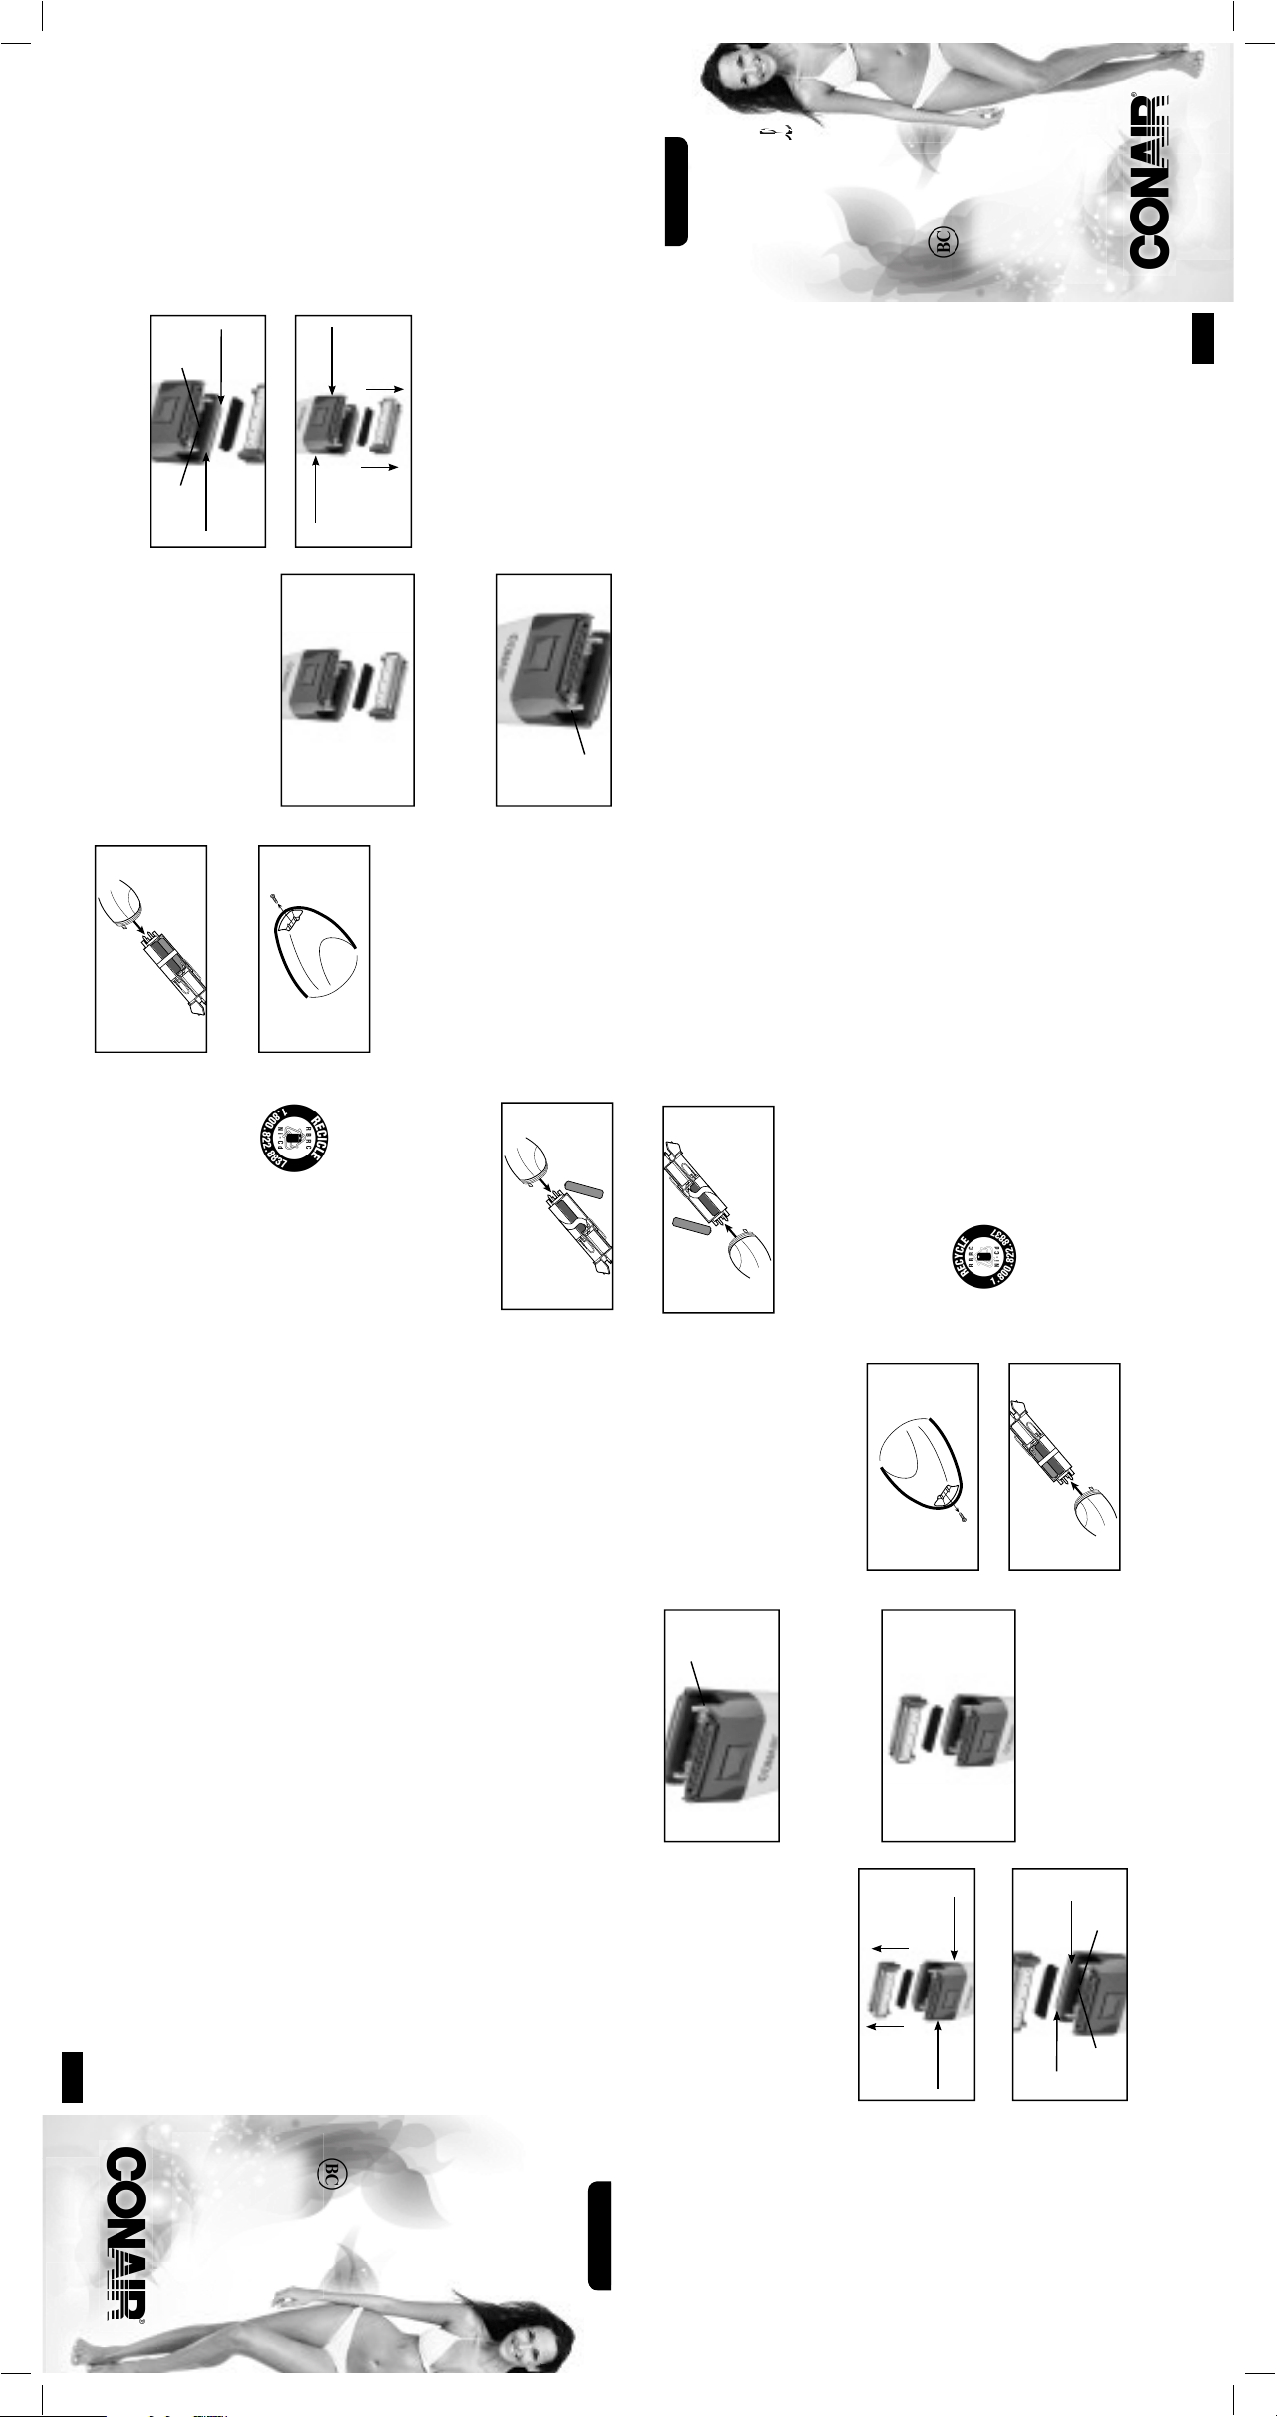
1. Unscrew the screw to remove the end cap.
2. Remove inner parts by pulling upwards.
3. Hold the new inner blades firmly on the
sides and guide them gently into the inner
blade mount one side at a time until they
lock into place. Caution: make sure you do
not lose the little spring under the cutters
(see FIG. 4).
4. Press firmly until the unit snaps into place.
5. Replace the foil frame (see FIG. 5).
REPLACING THE
FOIL FRAME & CUTTER
Replace the foil frame when you find you
have to push harder on the shaver to get a
close shave, or if you have to go over your
leg area more often to get a smooth result. It
is also time to replace the foils if you expe-
rience skin irritation. Replacement time will
depend on how often you use your shaver
and how quickly your hair grows.
Caution: Never replace the cutters without
replacing the foils as well.
1. Remove the foil frame (see FIG. 2).
2. Push one side of the inner blades to
unlock it and take out (see FIG. 3). Be careful
not to lose the small spring, as it will be
needed with the new cutters.
FIG. 2
Lift
Press Here
Press Here
Spring
FIG. 3
Hold Here
Hold Here
Spring
FIG. 5
Spring
FIG. 4
3. Remove the tape and remove used Ni-Cd
battery.
Note: The product you have purchased con-
tains a rechargeable battery. The battery is
recyclable. At the end of its useful life, under
various state and local laws, it may be illegal
to dispose of this battery into the municipal
waste stream. Check with your local solid
waste officials for details in your area for
recycling option or proper disposal.
Service Center
©2013 Conair Corporation
Service Department
7475 North Glen Harbor Blvd.
Glendale, AZ 85307
150 Milford Road, East Windsor, NJ 08520
7475 North Glen Harbor Blvd., Glendale, AZ 85307
13PG142488 IB-12203
Please register this product at
www.conair.com/registration
LIMITED TWO-YEAR WARRANTY
Conair will repair or replace (at our option) your
unit free of charge for 24 months from the
date of purchase if the appliance is defective in
workmanship or materials.
To obtain service under this warranty, return
the defective product to the service center
listed on back, together with your purchase
receipt and $5.00 for postage and handling.
California residents need only provide proof of
purchase and should call 1-800-366-0937 for
shipping instructions. In the absence of a pur-
chase receipt, the warranty period shall be 24
months from the date of manufacture.
ANY IMPLIED WARRANTIES, OBLIGATIONS,
OR LIABILITIES, INCLUDING BUT NOT
LIMITED TO THE IMPLIED WARRANTY OF
MERCHANTABILITY AND FITNESS FOR A
PARTICULAR PURPOSE, SHALL BE LIMITED
IN DURATION TO THE 24-MONTH DURATION
OF THIS WRITTEN, LIMITED WARRANTY.
Some states do not allow limitations on how
long an implied warranty lasts, so the above
limitations may not apply to you.
IN NO EVENT SHALL CONAIR BE LIABLE
FOR ANY SPECIAL, INCIDENTAL, OR
CONSEQUENTIAL DAMAGES FOR BREACH OF
THIS OR ANY OTHER WARRANTY, EXPRESS
OR IMPLIED, WHATSOEVER. Some states do
not allow the exclusion or limitation of special,
incidental, or consequential damages, so the
above limitation may not apply to you.
This warranty gives you specific legal rights,
and you may also have other rights, which vary
from state to state.
Satiny
Smooth
™
Dual Foil
Shaver
oi
i
i
l
l
l
l
l
l
Wet/Dry
For your safety
and continued
enjoyment of this
product, always
read the instruction
booklet carefully
before using.
Instruction Guide
Model LWD375NCS
For shaving tips and information on Conair
appliances, call: 1-800-3-CONAIR or visit us on
the web at www.conair.com
REPLACEMENT PARTS:
These shavers use the following replacement
parts, which can be ordered directly from Conair
by calling customer service at 1-800-3-CONAIR.
CSP23 Replacement Foil and Cutters
Cleaning Brush
Charging Base
5. Si desea, utilice el cepillo de limpieza
provisto para limpiar las cuchillas internas.
6. Si el cuerpo del aparato está sucio, límpielo
con un paño ligeramente humedecido con agua
jabonosa, o detergente suave. Nunca utilice
disolventes, solventes o limpiadores fuertes.
PRECAUCIÓN:
1. Si tiene que sacudir el aparato para eliminar
el exceso de agua, sosténgalo firmemente para
no dejarlo caer o desarmar el cabezal.
2. No utilice un secador o un calentador para
secar el aparato. Esto podría dañarlo o causar
un mal funcionamiento.
Nota: Nunca jale el cable. Nunca retuerza ni
enrolle el cable alrededor de la base de carga.
CAMBIO DE LA CUCHILLA
RECORTADORA INTEGRADA
Nota: No le aconsejamos que intente
reemplazar la cuchilla recortadora integrada.
Se necesita una herramienta especial para
hacer esto. Si la cuchilla está dañada o no
corta, regrese el aparato a un centro de
servicio autorizado. Sin embargo, la cuchilla
ha sido diseñada para durar tanto como el
aparato y es probable que nunca la tenga
que reemplazar durante su vida útil.
REMOCIÓN/RECICLAJE
DE LA BATERÍA
CÓMO RETIRAR LA BATERÍA NI-CD
1. Retire el tornillo para abrir el compartimiento
de la batería.
2. Jale las partes internas hacia arriba.
3. Sostenga las cuchillas por los costados e
insértelas sobre el cabezal, un lado tras otro.
CERCIÓRESE DE NO PERDER EL PEQUEÑO
RESORTE UBICADO DEBAJO DE LAS
CUCHILLAS (FIG. 4).
4. Presione firmemente hasta que encaje.
5. Vuelva a instalar el cabezal (FIG. 5).
CÓMO REEMPLAZAR
LAS HOJAS Y
LAS CUCHILLAS INTERNAS
Si siente que debe hacer fuerza para
afeitar o si debe pasar la máquina sobre la
misma zona varias veces para conseguir
un resultado suave, cambie las cuchillas
internas. Cambie las hojas si irritan la piel.
La vida útil de las cuchillas/hojas dependerá
de la frecuencia de uso del aparato.
Precaución: Siempre reemplace las
cuchillas y las hojas al mismo tiempo.
1. Retire el cabezal (FIG. 2).
2. Presione el costado de las cuchillas
para liberarlas y retírelas (FIG. 3). Tenga
cuidado de no perder el pequeño resorte; lo
necesitará para instalar las nuevas cuchillas.
FIG. 2
Alzar
Presionar aquí
Presionar aquí
Resorte
FIG. 3
Sostener aquí
Sostener aquí
Resorte
FIG. 5
Resorte
FIG. 4
3. Retire la cinta y la batería Ni-Cd.
Nota: Este producto contiene una batería
recargable. Esta batería es reciclable. Según
las normas regionales o locales vigentes,
puede que sea ilegal tirar las baterías con
el resto de la basura al final de su vida útil.
Averigüe las opciones de reciclaje disponibles
en su lugar de residencia con las autoridades
locales.
Centro de servicio
©2013 Conair Corporation
Service Department
7475 North Glen Harbor Blvd.
Glendale, AZ 85307
150 Milford Road, East Windsor, NJ 08520
7475 North Glen Harbor Blvd., Glendale, AZ 85307
13PG142488 IB-12203
Para registrar su producto,
visítenos en:
www.conair.com/registration
GARANTÍA LIMITADA DE DOS AÑOS
Conair reparará o remplazará (a su opción) su
aparato sin cargo por un período de 24 meses a
partir de la fecha de compra si presentara defec-
tos de materiales o fabricación.
Para obtener servicio técnico bajo esta garantía,
regrese su aparato al Centro de Servicio indicado
al dorso, junto con su recibo de compra y un
cheque o giro postal de US$5.00 por gastos de
manejo y envío. Los residentes de California sólo
necesitan dar una prueba de compra y deben lla-
mar al 1-800-366-0937 para recibir instrucciones
de envío. En ausencia del recibo de compra, el
período de garantía será de 24 meses a partir de
la fecha de fabricación.
CUALQUIER GARANTÍA, OBLIGACIÓN O
RESPONSABILIDAD IMPLÍCITAS, INCLUYENDO
PERO NO LIMITADAS A LA GARANTÍA
IMPLÍCITA DE COMERCIABILIDAD Y APTITUD
PARA UN PROPÓSITO ESPECÍFICO, ESTARÁN
LIMITADAS POR LOS 24 MESES DE LA
PRESENTE GARANTÍA ESCRITA. Algunos Estados
no permiten limitaciones sobre la duración de una
garantía implícita, de modo que las limitaciones
mencionadas pueden no regir para usted.
CONAIR NO SERÁ RESPONSABLE, EN NINGÚN
CASO, POR NINGÚN DAÑO ESPECIAL,
INCIDENTAL O CONSECUENTE DEBIDO AL
INCUMPLIMIENTO
DE ESTA O CUALQUIER OTRA
GARANTÍA, EXPRESA O IMPLÍCITA. Algunos
Estados no permiten la exclusión o limitación de
daños especiales, incidentales o consecuentes,
de modo que las limitaciones mencionadas
pueden no regir para usted.
Esta garantía le otorga derechos legales espe-
cíficos y usted puede tener otros derechos que
varían de un Estado a otro.
Húmedo/Seco
Para su seguridad
y para disfrutar
plenamente de este
producto, siempre
lea las instrucciones
cuidadosamente
antes de usarlo.
Instrucciones
Modelo LWD375NCS
Para consejos o información sobre los aparatos de
Conair, llame al: 1-800-3-CONAIR o visítenos en:
www.conair.com
PIEZAS DE REPUESTO
Para pedir piezas de repuesto (véase la lista de
las piezas disponibles a continuación), llame al
1-800-3-CONAIR.
Hojas y cuchillas internas (modelo CSP23)
Cepillo de limpieza
Base de carga
Satiny
Smooth
™
Máquina de afeitar
de doble hoja
CONTAINS NICKEL
-
CADMIUM BATTERY.
BATTERY MUST BE
RECYCLED OR DISPOSED
OF PROPERLY.
ESTE APARATO CONTIENE
UNA BATERÍA RECARGABLE
DE NÍQUEL-CADMIO, LA CUAL
DEBE RECICLARSE SEGÚN LAS
LEYES VIGENTES AL FINAL DE
SU VIDA ÚTIL.
lwd375ncs_13pg142488_ib_final.indd 2 9/16/13 2:19 PM