Loading ...
Loading ...
Loading ...
11
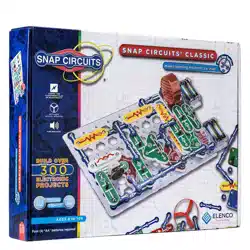
Project #3
Build the circuit shown on the left by placing all the parts with a black 1
next to them on the base grid rst. Then, assemble parts marked with a
2. Finally, lay the speaker (SP) on the table and connect it to the circuit
using the jumper wires as shown.
When you close the slide switch (S1), the music may play for a short
time, and then stop. After the music has stopped, tap on the whistle chip
(WC) and the music should play again. You may also be able to re-start
the sound by clapping loudly next to the whistle chip or by blowing on it.
You could connect the speaker using snap wires instead of the jumper
wires, but then the speaker may create enough sound vibrations to re-
activate the whistle chip.
Sound Activated Switch
OBJECTIVE: To show how sound can turn “ON” an electronic
device.
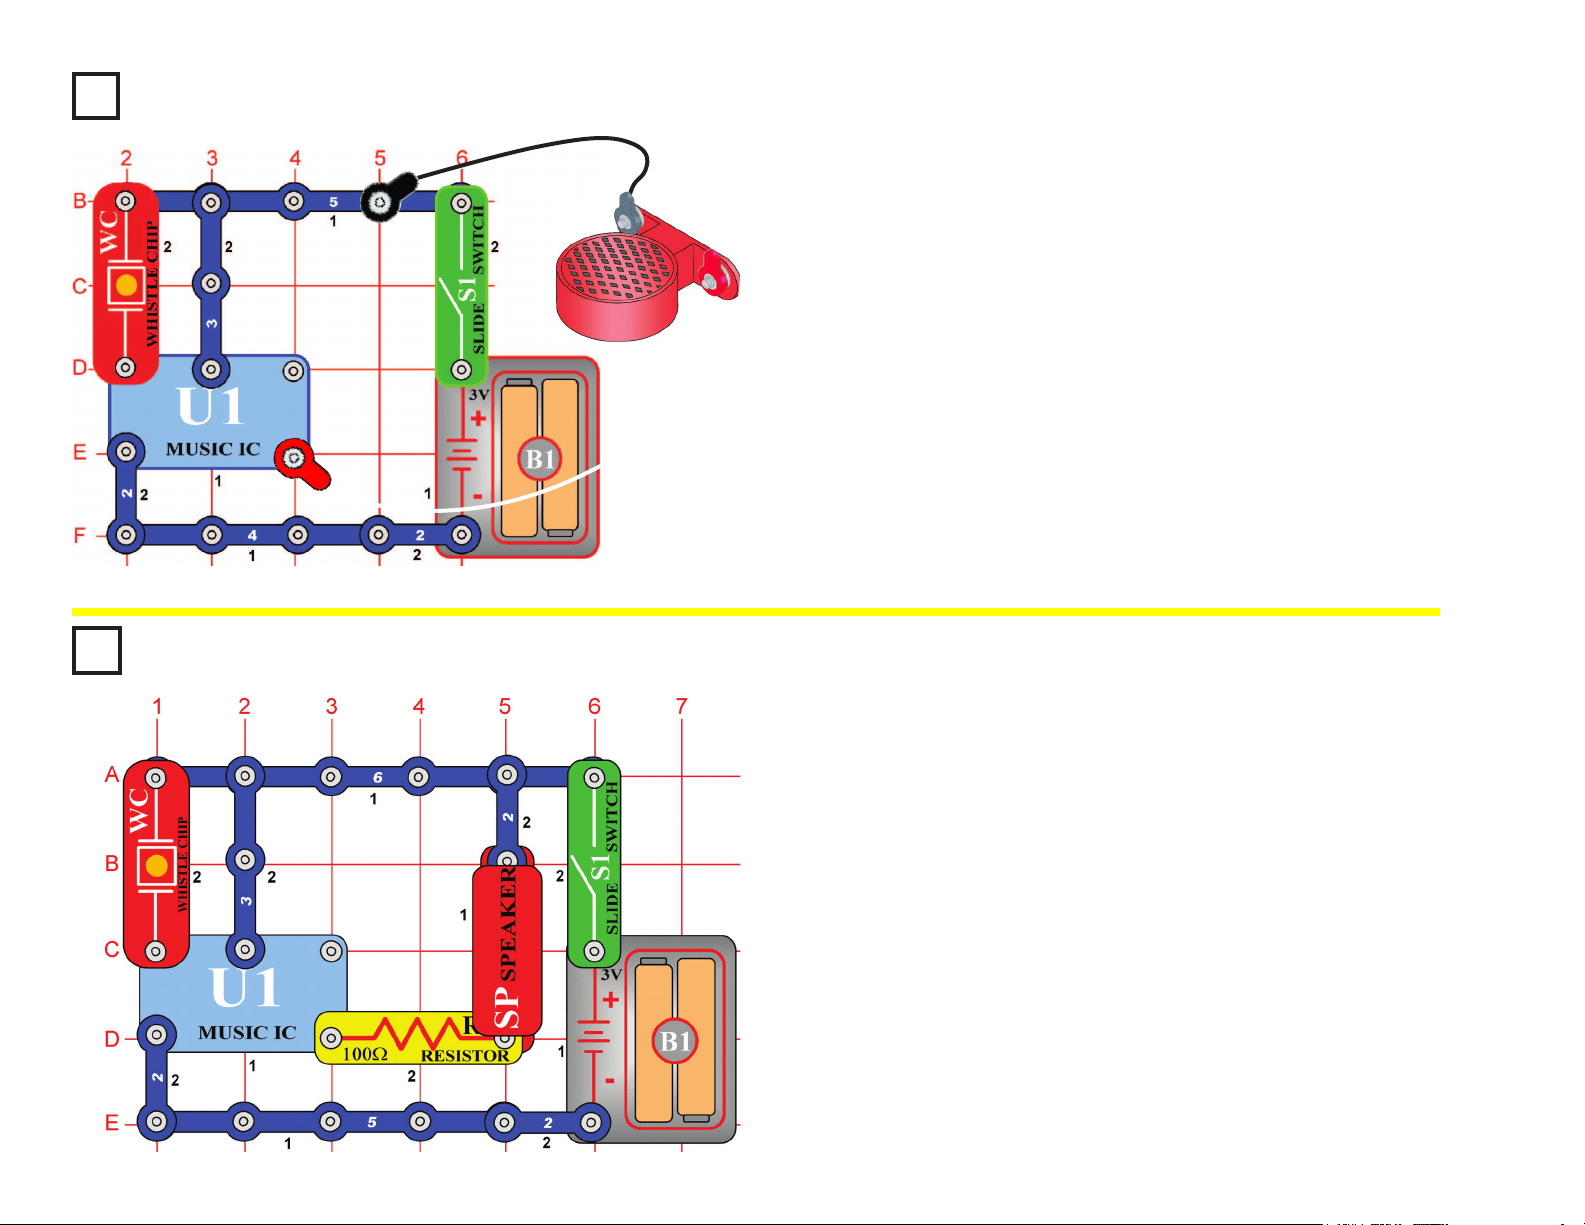
Project #4
Build the circuit shown on the left. When you close the slide switch (S1),
the music may play for a short time and then stop. After the music has
stopped, tap on the whistle chip (WC) and the music should play again.
You may also be able to re-start the sound by clapping loudly next to
the whistle chip or by blowing on it.
In this project, you changed the amount of current that goes through the
speaker (SP) and reduced the sound output of the speaker. Resistors
are used throughout electronics to limit the amount of current that ows.
Adjusting Sound Level
OBJECTIVE: To show how resistance can lower the sound from
the speaker.
(STANDING)
Loading ...
Loading ...
Loading ...