Loading ...
Loading ...
Loading ...
— 12 —
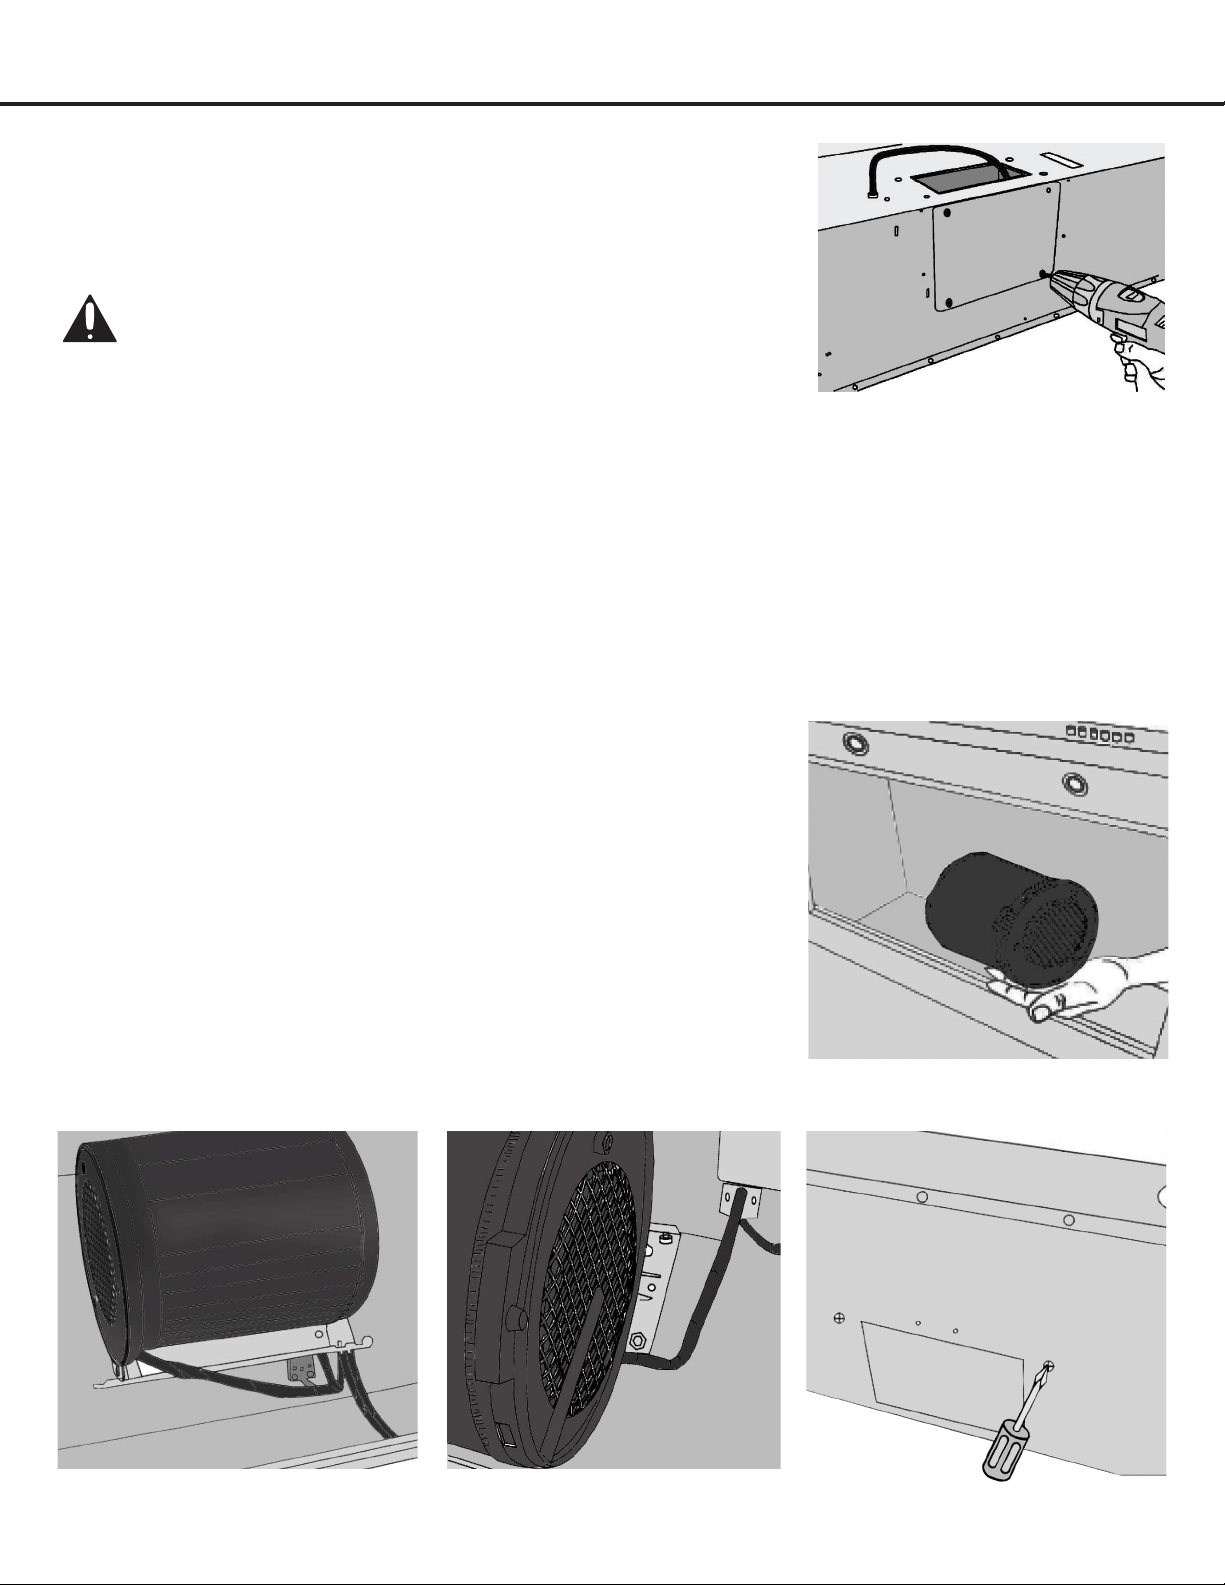
Remove rear vent back plate
•Positiontheunitfacedownonaatnon-abrasivesurfacewithrearofproduct
facing you.
•Remove the back plate by removing the 4 screws (see Figure 5).
STEP 8
Rotating the motor (For rear venting only)
•Positiontheunitonitsbackonaatnon-abrasivesurface–perpendiculartoyourworkingsurface(seeFigure6).
•Place hand to hold motor in position and ensure weight of motor is well supported (see Figure 6). This will ensure
screws don’t get bent or broken.
•Remove 4 screws that hold motor in place on the top side of the hood. Ensure the motor weight is well supported by
your hand as the last screw in place may break under the weight of the motor.
•Once the motor is set free from the hood, rotate motor clock wise to position
venting outlet with rear rectangular hole, ensuring that:
•Put unit upside down so the screw holes securing the motor are in a position
facing you.
•Install4screwstoholdmotor–Useascrewdrivertoperformoperation–NOT
A DRILL as it may strip the motor housing thread (see Figure 9).
Installation
Figure 5
SAFETY WARNING: Risk of electrical shock. This range hood must
be properly grounded. Make sure this is done by a qualified electrician in
accordance with all applicable national and local electrical codes. Before
connecting wires, switch power off at service panel and lock service panel
to prevent power from being switched on accidentally.
•Electric wire is located under the motor as you relocate the motor outlet
(see Figure 7).
•Electric wire is not caught under the motor outlet (See Figure #8).
•4 holes are aligned with screw holes at the rear.
Figure 6
Figure 7 Figure 8 Figure 9
Loading ...
Loading ...
Loading ...