
Loading ...
Loading ...
Loading ...
Do not keep the trigger depressed when the tool is not in use, to prevent
accidental firing.
A significantly reduced working period after charging indicates that the
battery is used and must be replaced.
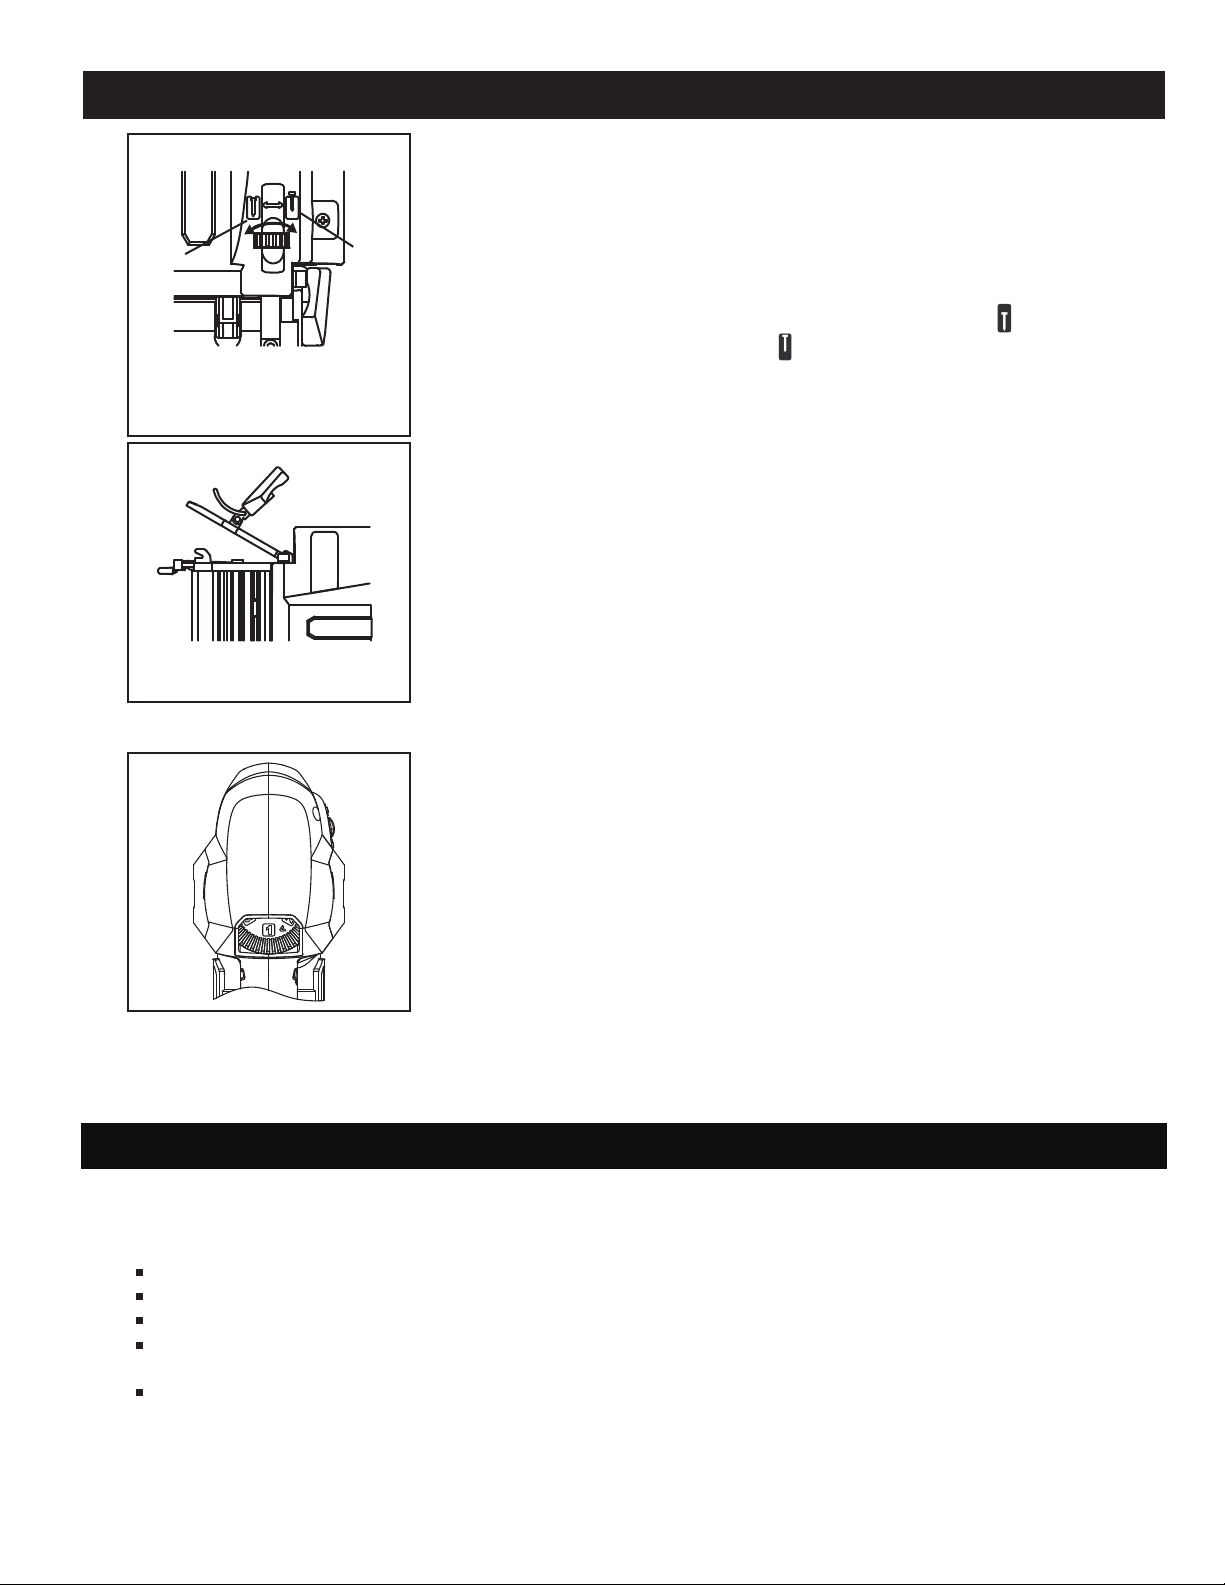
Depth Adjustment Wheel(FIG. 8)
Depth adjustment helps protect work surface and allows proper setting of
nail heads.
For more depth, turn the depth adjustment wheel towards .
For less depth, turn the wheel to .
Removing a jammed nail or staple(FIG. 9)
Note: You must remove any jammed nail/staple before using the tool .
Otherwise, it could cause damage to the mechanism.
Remove the battery pack from the tool.
Open the magazine, remove the staples or nails in channel.
If the fasteners remain jammed after following the above instructions,
open the nosepiece by pulling upwards, then remove the jammed fastener
pieces(Fig9).
Remove the jammed nail with pliers if necessary. After the jammed nail has
been successfully removed , re-tighten the nose piece securely.
With the magazine open, re-insert the battery and shoot 2-3 times, if all is
clear, reload the nails/staples.
The impact force can be adjusted according to the material by using the
impact force knob.The setting range is between stages 1-6. Stage 1 refers
to the lowest impact force, stage 6 to the highest(Fig.10).
If the impact force is set too high, there is a risk that the material to be
attached will be pierced.
If the impact force is set too low, the staples cannot penetrate the material
deeply enough and will not be attached properly.
The required impact force depends on the material and can be determined
by way of field-testing.
ADJUSTMENTS
7
OPERATING PROCEDURES
More
depth
Less
depth
Fig.8
Fig.9
Attention! Always remove the battery before carrying out any work on the machine.
If the tool will not drive a nail, or cycles without driving a nail, glue residue from the nail
strip may need to be cleaned from the area around the driving mechanism.
Remove the battery pack.
Remove nails from the tool.
Open the jam release latch and the magazine.
Use a small amount of air tool oil on a clean cloth or cotton swab to wipe down the
nail channel, removing all traces of glue.
Reinstall nails in the tool and close the magazine
Avoid using solvents when cleaning plastic parts. Most plastics are susceptible to damage
from various types of commercial solvents and may be damaged by their use. Use clean
cloths to remove dirt, dust, oil, grease, etc.
ADJUSTMENTS
MAINTENANCE
Fig.10
Loading ...
Loading ...
Loading ...