- 1 -
PH20 Pocket pH Tester Kit
User Manual
IP67
ISO
9001
:
2015
APERA INSTRUMENTS, LLC
aperainst.com
v6.1

- 2 -
Table of Contents
1. General Introduction ................................................................... 4
2. Keypad Functions ....................................................................... 5
3. What’s in the Kit .......................................................................... 6
4. Preparation before Use ............................................................... 6
5. pH Calibration ............................................................................. 7
6. pH Measurement ........................................................................ 9
7. Parameter Settings ....................................................................10
8. Technical Specifications ...........................................................10
9. Probe Cleaning........................................................................... 11
10. Probe Storage .......................................................................... 11
11. Troubleshooting Guide .............................................................12
12. Battery Replacement ................................................................14
13. Limited Warranty ......................................................................15

- 3 -
scan to watch video tutorial
ATTENTION
Ը Water droplets are added during production to maintain the
moisture of the probe. This is normal practice and should not be
attributed to used product.
Ը Never use the product when it’s freezing cold. Let it warm to room
temperature before using.
Ը The latest PH20 Tester comes with an upgraded probe structure
equipped with a sensor shield that prevents glass bulb breakage
from accidental collisions (see picture below). You can remove the
shield when cleaning the sensor and put it back on afterwards.
Thank you for choosing Apera Instruments PH20 Pocket pH Tester
Kit. Please read this manual carefully before use in order to properly
use and maintain the product.
Sensor Shield
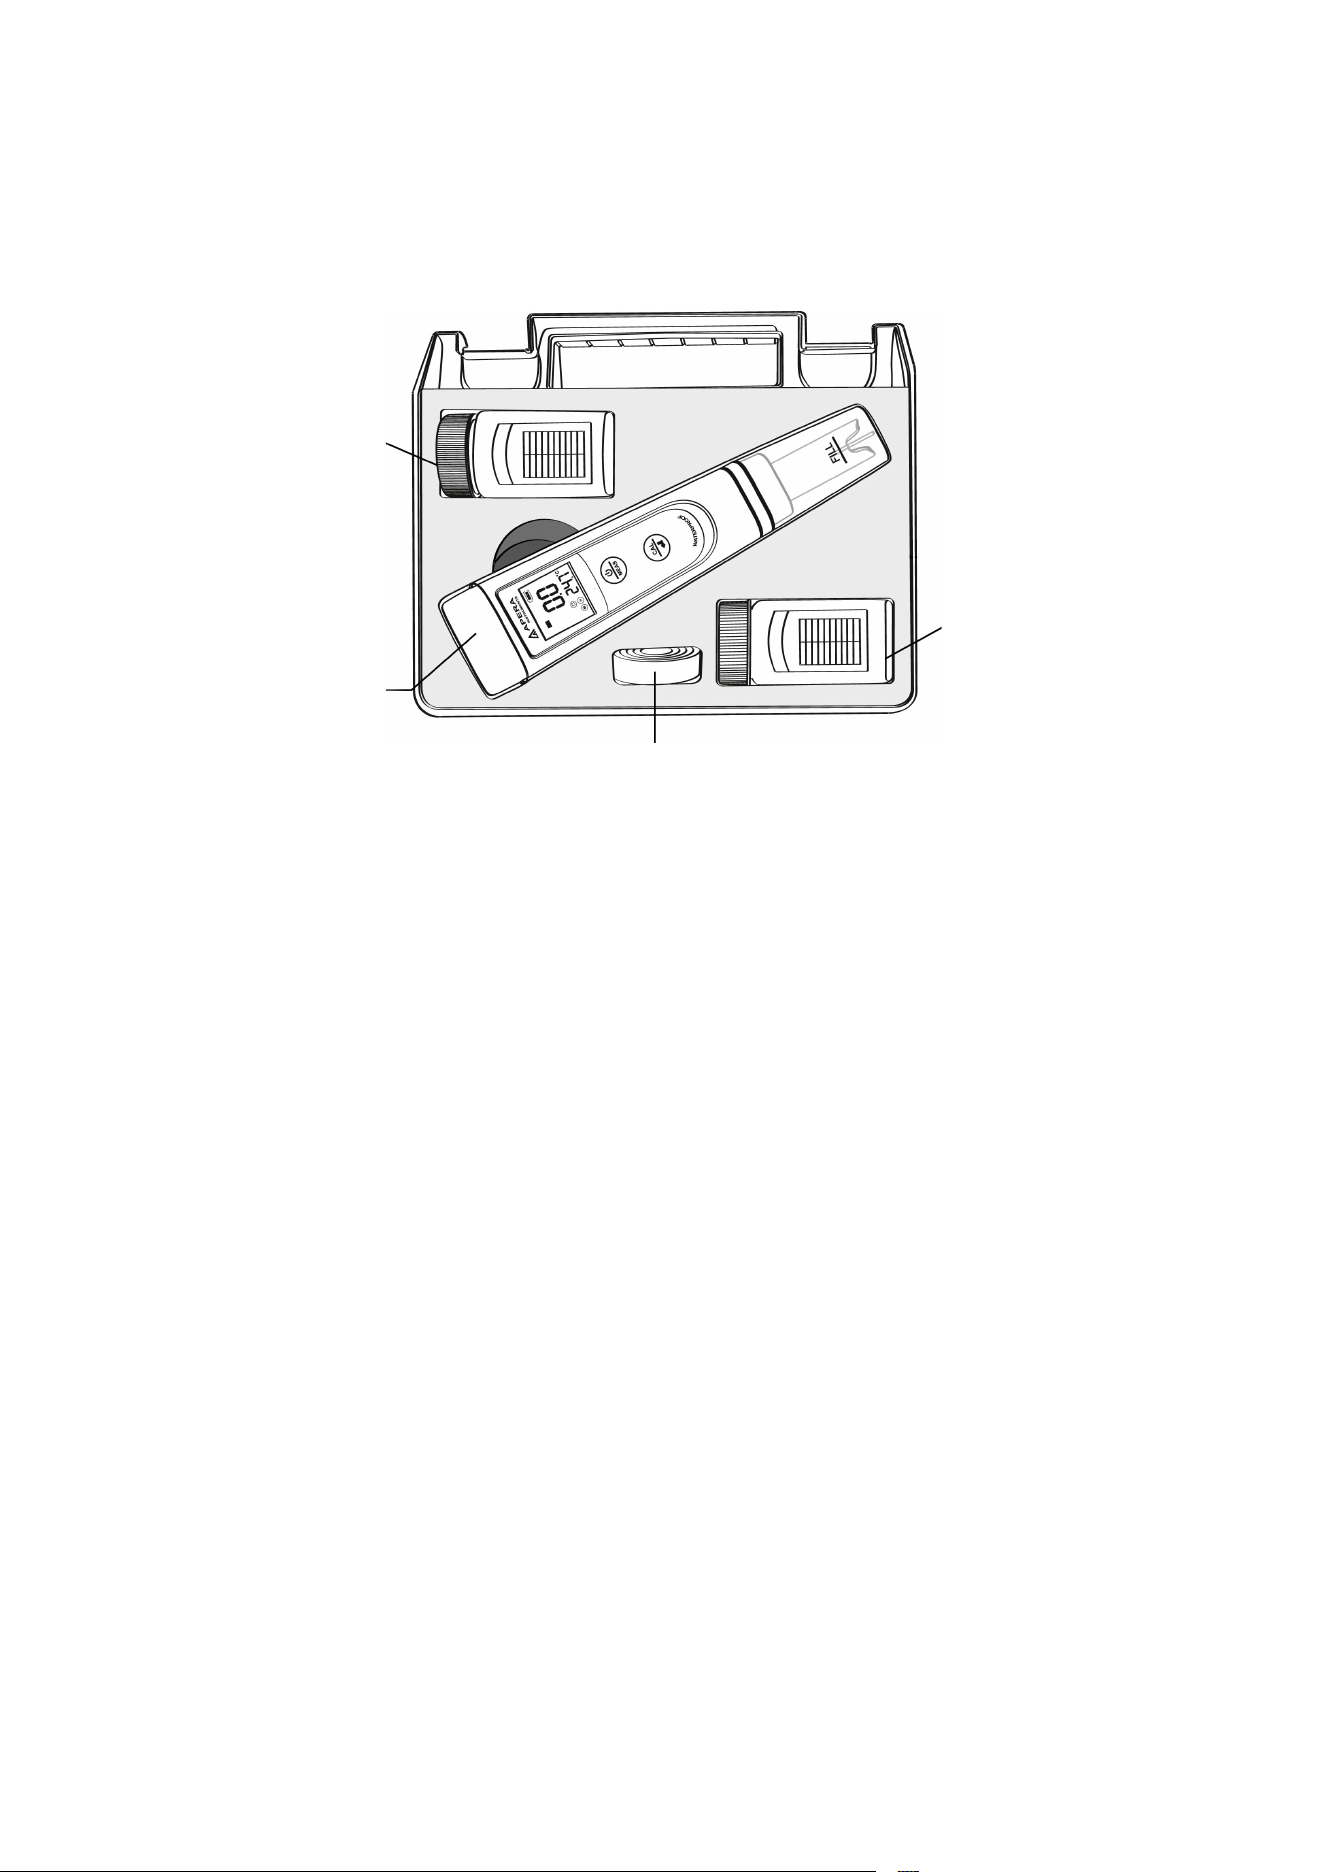
- 4 -
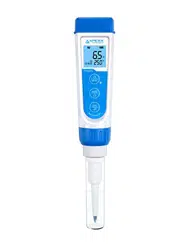
1. General Introduction
Probe Cap
Ը Water droplets are added during
production to maintain the moisture
of the probe. This is normal practice
and should not be attributed to used
product.
Ը The fill line shows the level to which
you should pour the soaking solution
or sample solution.
Ը For details of probe storage, see
Section 7.
pH Probe
Ը Built with Apera’s proprietary lithium glass
membrane for high accuracy and fast
response.
Ը Temp. sensor is built in for automatic temp.
compensation.
Ը The pH probe is non-replaceable.
stands for stabilized reading
stands for successful
calibration: is pH 4, is pH 7, is
pH 10.
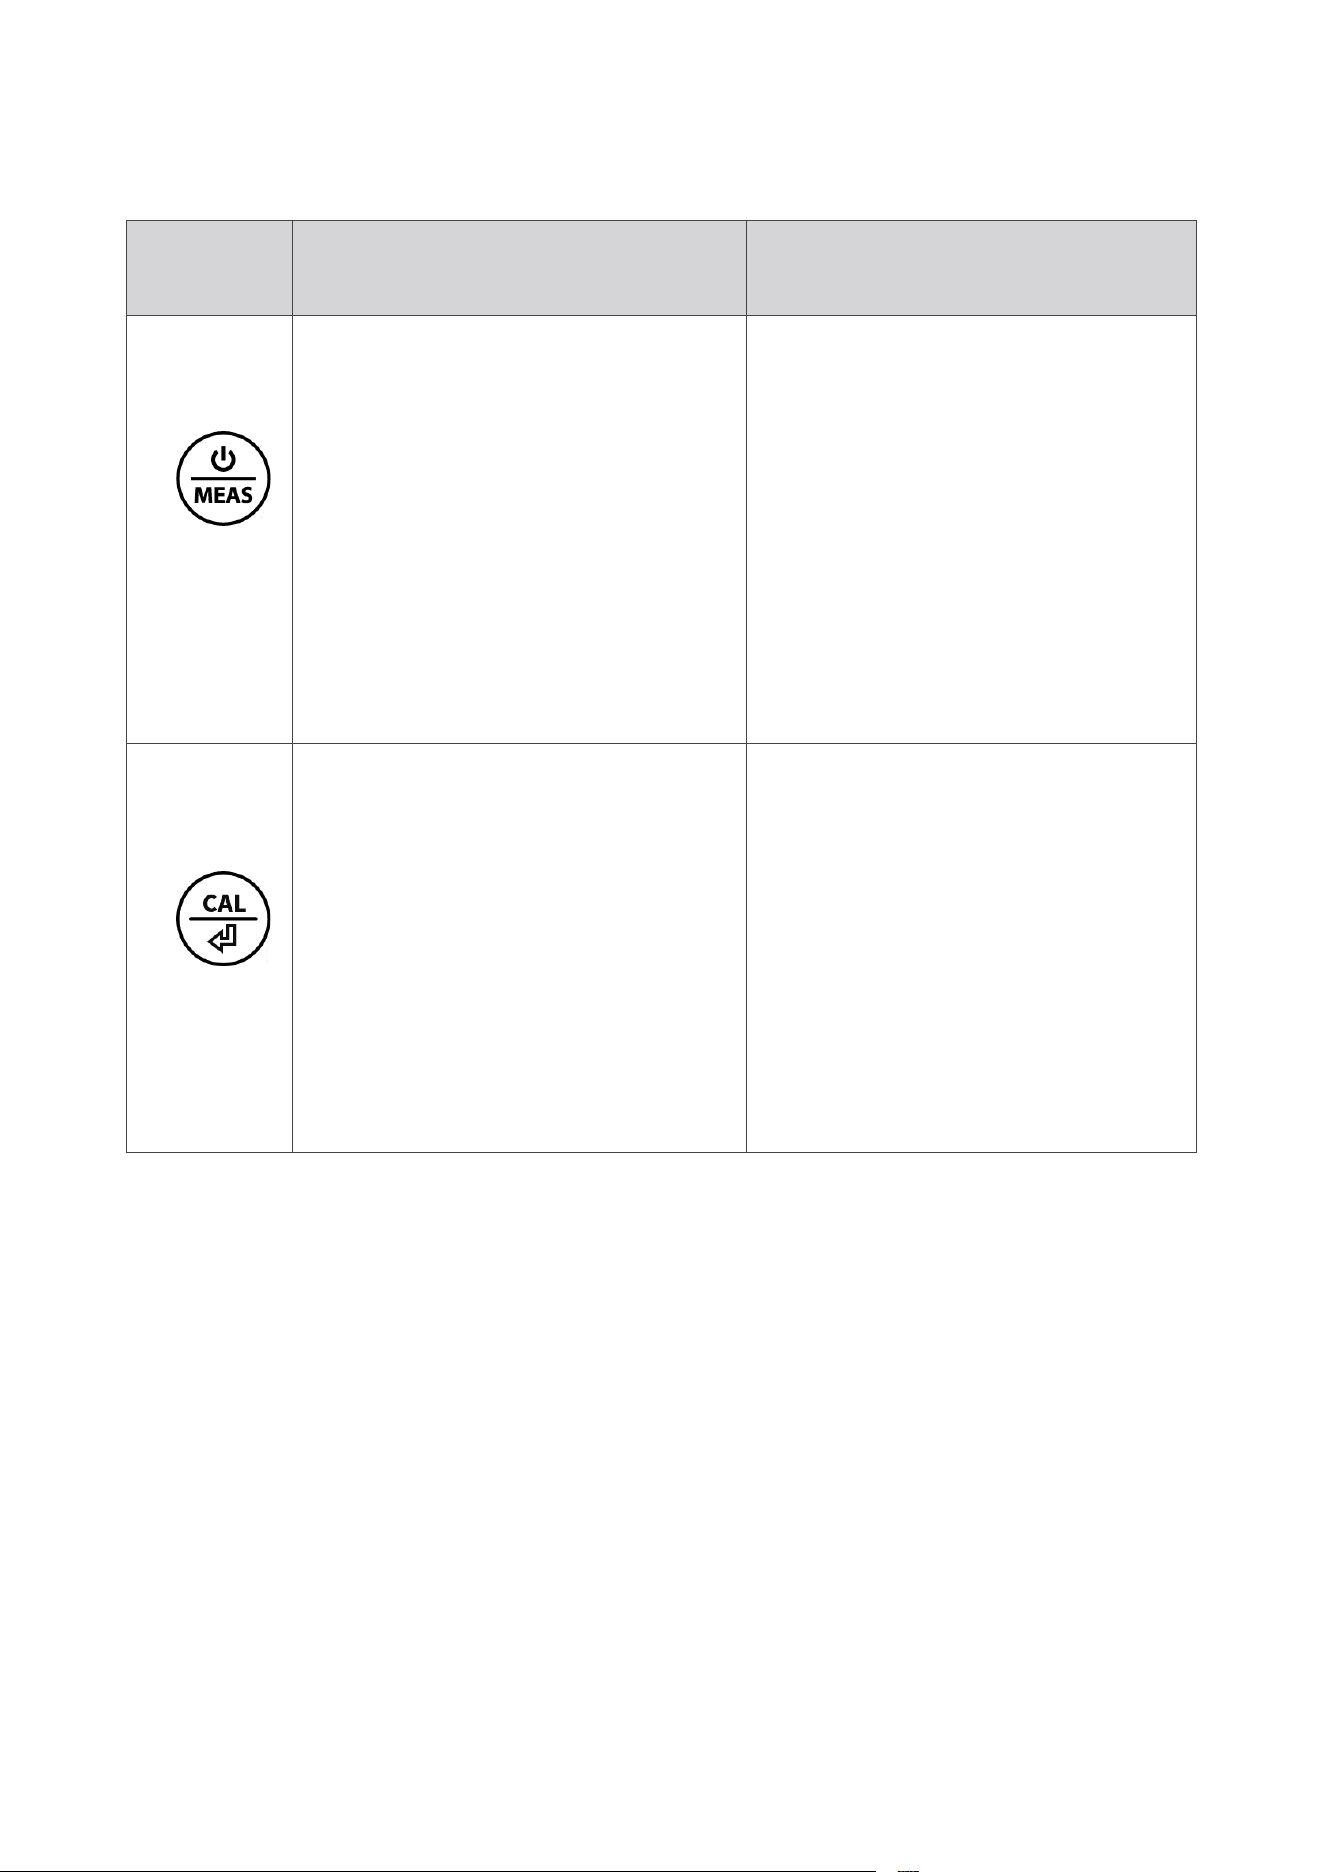
- 5 -
Short Press (tap)
Long Press
(press >2 seconds)
Ը Short press to power on;
Ը In settings mode
Ը short press to change
parameter;
Ը In calibration mode,
short press to cancel
calibration.
Ը Long press to power
Off;
Ը When the tester is
powered off, long press
to enter settings mode.
Ը In calibration mode,
short press to finish
calibration;
Ը In settings mode,
short press to confirm
changes.
Ը In measurement mode,
long press to enter
calibration mode.
2. Keypad Functions
- 6 -
4.1 Prepare a cup of pure water (8-16oz) for probe rinsing.
Pure water refers to drinking water, RO water, distilled water, or
deionized water.
4.2 Pull off the battery insulation paper; Take off the probe cap.
4.3 Perform a 2-point calibration in pH 7.00 and pH 4.00 standard
buffers. Refer to Section 4 for tutorial.
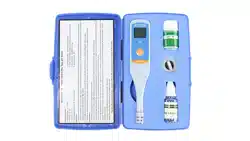
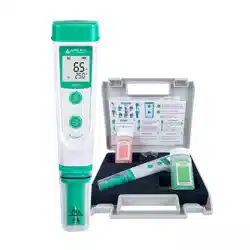
3. What’s in the Kit
Lanyard
pH buffer
pH buffer
PH20 tester
4. Preparation before Use
- 7 -
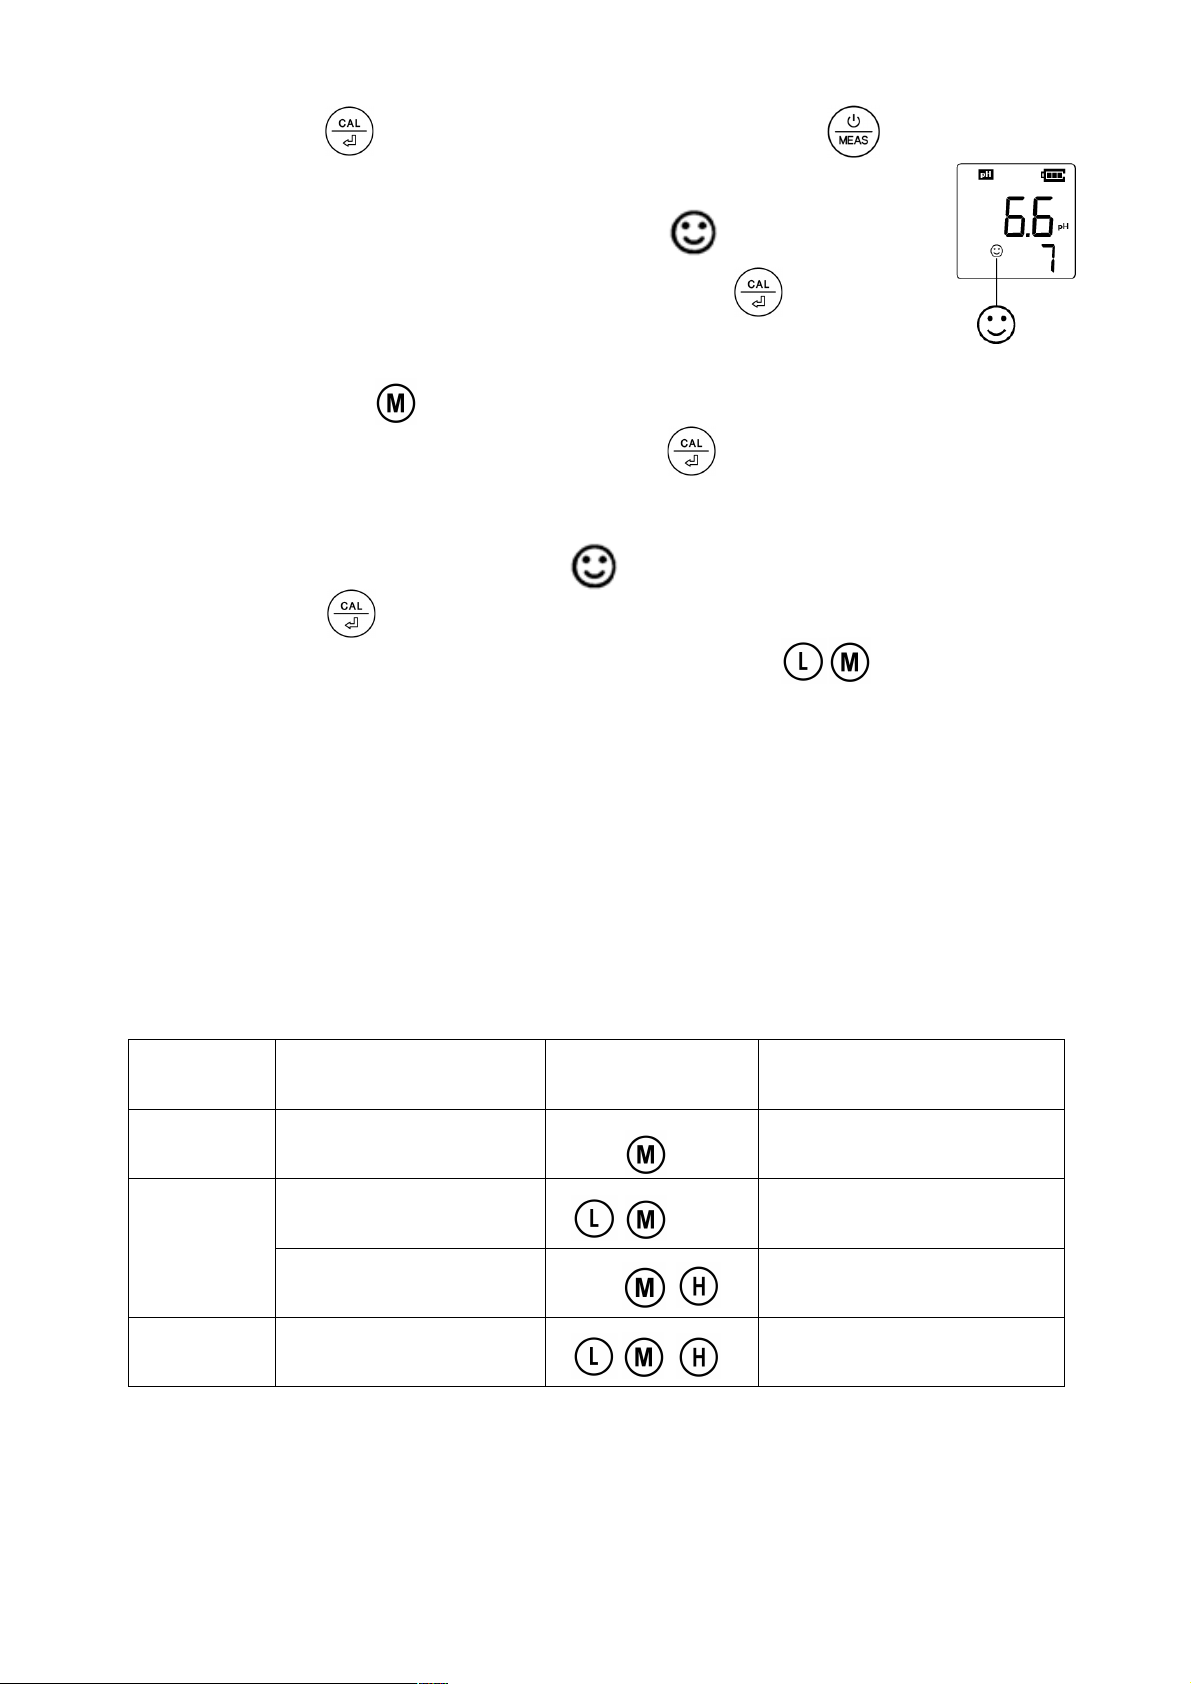
5. pH Calibration
5.1 Short press to power on.
5.2 Rinse the probe in pure water and shake
off excess water. Long press to enter
calibration mode. (short press to go back
to measurement mode if you want to cancel the
calibration). "7" will show up at the lower right
corner, reminding you to calibrate pH 7 first.
5.3 Insert the probe in the 7.00 pH calibration
solution to start 1st point calibration; Make a
quick stir in the solution then hold still; Wait for
to appear and stay on the screen.
5.4 Short press to start 1st point calibration;
tester will return to measurement mode; will
display on the lower left corner, indicating a
successful 1-point calibration.
5.5 To calibrate 2nd point, use 4.00 pH buffer
and repeat Step 5.2 to 5.4 (Do NOT turn off
the tester after you finish pH 7 calibration).
will display next to , indicating a successful
2-point calibration.
5.6 If necessary (target pH>8.0), calibrate
3rd point using 10.01 standard pH buffer (sold
separately) and repeat Step 5.2 to 5.4.
will show up next to and , indicating a
successful 3-point calibration.

- 8 -
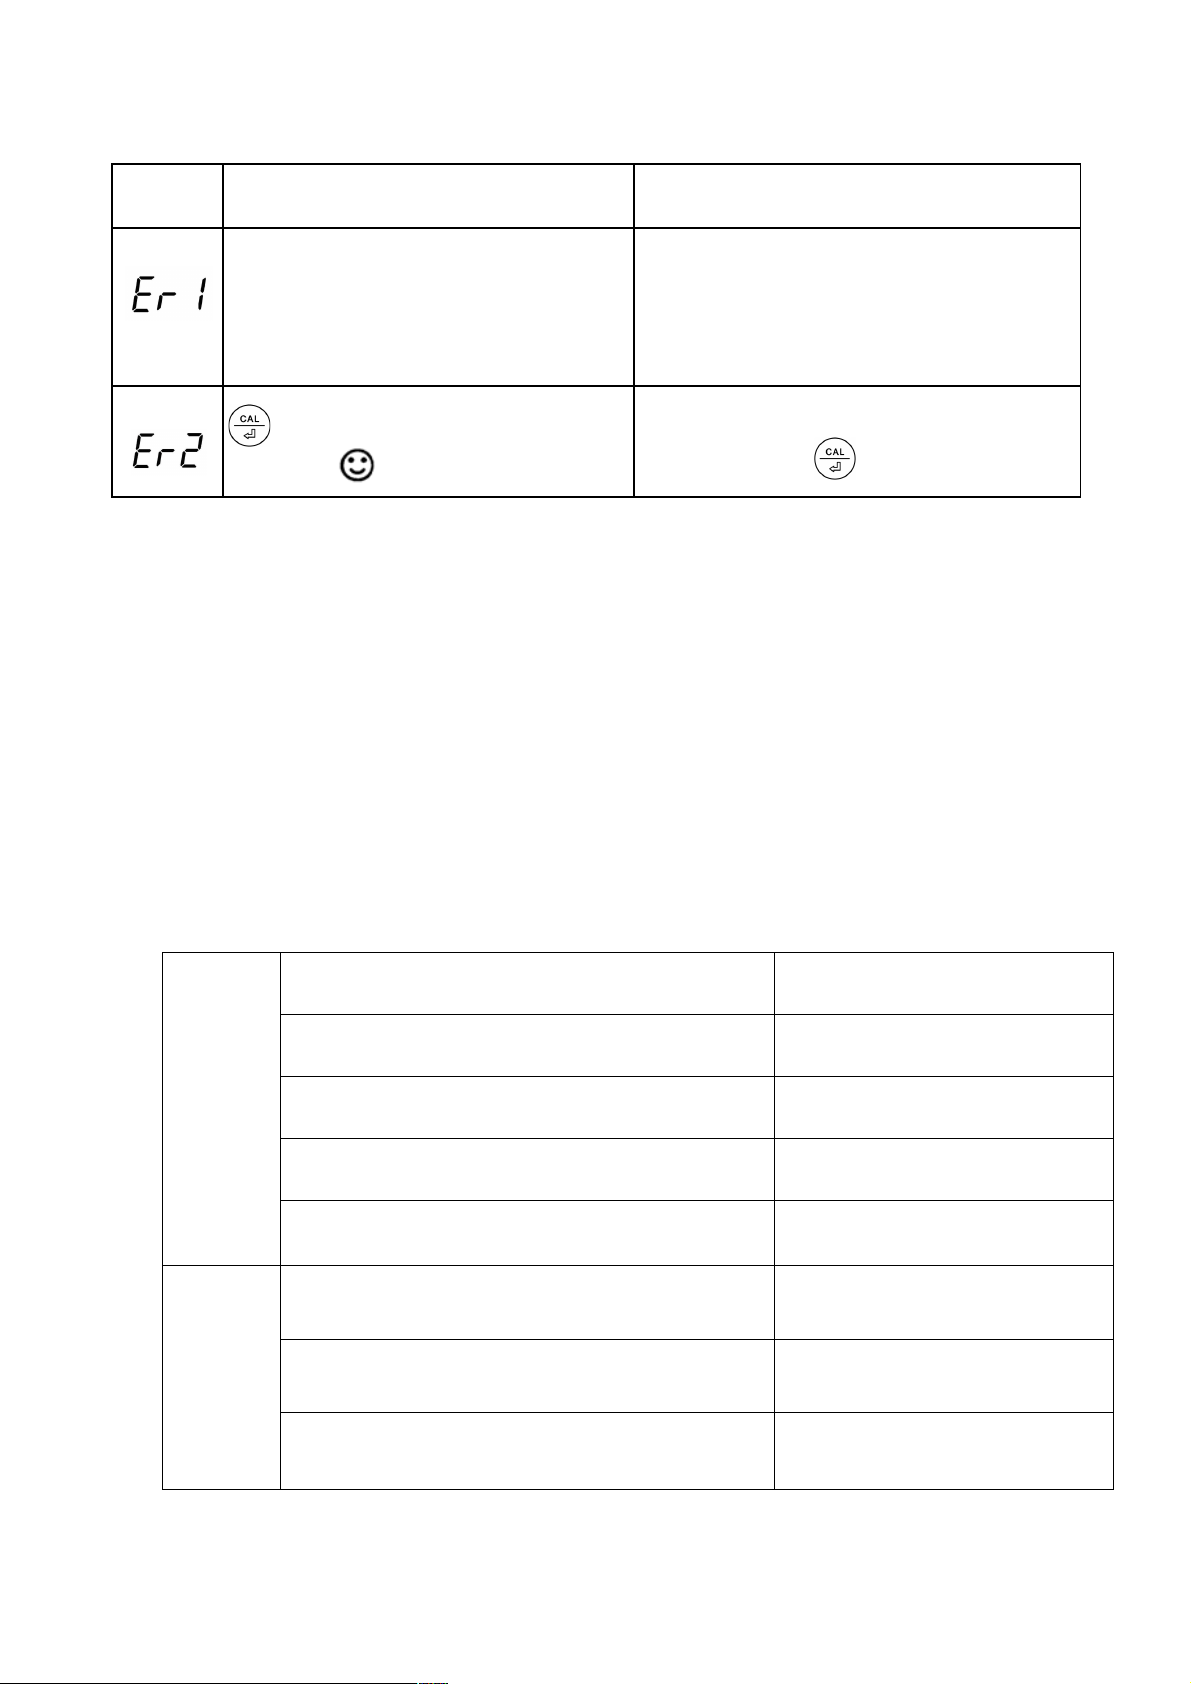
5.7 Notes about Calibration
5.7.1 Always start calibrating with pH 7.00 first. Perform the 2nd and
3rd point calibration immediately after the 1st point is finished. Do NOT
turn off the meter before you calibrate the second or third point.
Otherwise, after you restart the meter and perform calibration in pH 4.00
or pH 10.01, error will be generated and you will have to calibrate
with pH 7.00 again. For more troubleshooting tips with calibration, refer
to Section 11.
5.7.2 In calibration mode, when the reading is not fully stabilized ( is
not staying on LCD), pressing will cause error. Refer to Section
11 Trouble Shooting Guide for more details.
5.7.3 Only pH 4.00 and pH 7.00 buffer solutions are included in the test
kit, pH 10.01 is not. You can purchase it separately if needed (when your
target pH level is >9.0 pH).
5.7.4 Having good-quality calibration buffers ready is the basis for
reliable pH measurement. The bottled buffers (2 oz.) in the kit can be
used for up to 10 times of calibration (make sure they are tightly closed
when not in use). After that, we recommend replacing them with new
ones to keep the accuracy.
5.7.5 Tester will automatically recognize pH buffer solutions, you
can choose 1 to 3 points of calibration. For details, please refer to the
following table:
Calibration
Calibration
Solution
Icon When to use
1-point
Calibration
7.00 pH
Required Accuracy≥
0.3 pH
2-point
Calibration
7.00 pH and 4.00
pH
Target pH level< 9.0
pH
7.00 pH and 10.01
pH
Target pH level> 9.0
pH
3-point
Calibration
7.00 pH, 4.00 pH
and 10.01 pH
Wide measurement
range

- 9 -
6. pH Measurement
6.1 Short press to power on the tester. Remove the probe cap.
6.2 Rinse the probe in pure water. Then shake off excess water.
6.3 Dip the probe into your sample solution at least 1 inch deep,
make a quick stir and hold still. Record the reading as the pH
measurement after it's stabilized ( comes up and stays on
screen). When the probe is in the air, it's normal that the reading is
randomly jumping.
6.4 Pure Water pH Measurement
When testing pure water like tap water, drinking water, RO water
and distilled water, it will take longer for the readings to get fully
stabilized (typically 1-5 minutes). Please be patient. Before taking
measurement, soak the probe in pH 4.00 buffer solution for 30
seconds. If reading is not stablized in 5 minutes, add Apera 3M
KCL (AI1107) to your pure water at the ratio of 1:1000 (e.g. 1 ml KCL
to 1000 ml water) to accelerate stabilization while minimizing pH
change. If the accuracy does not meet your requirement, please
contact Apera to find the specialized meter designed for pure water
pH test.
6.5 To achieve the best measurement accuracy, calibrate the pH
probe at the same/similar temperature as your sample.
6.6 Avoid testing in very high (>113°F) or very low (<41°F)
temperature solutions as it will cause greater measurement error
and will shorten the pH probe's life span.
- 10 -
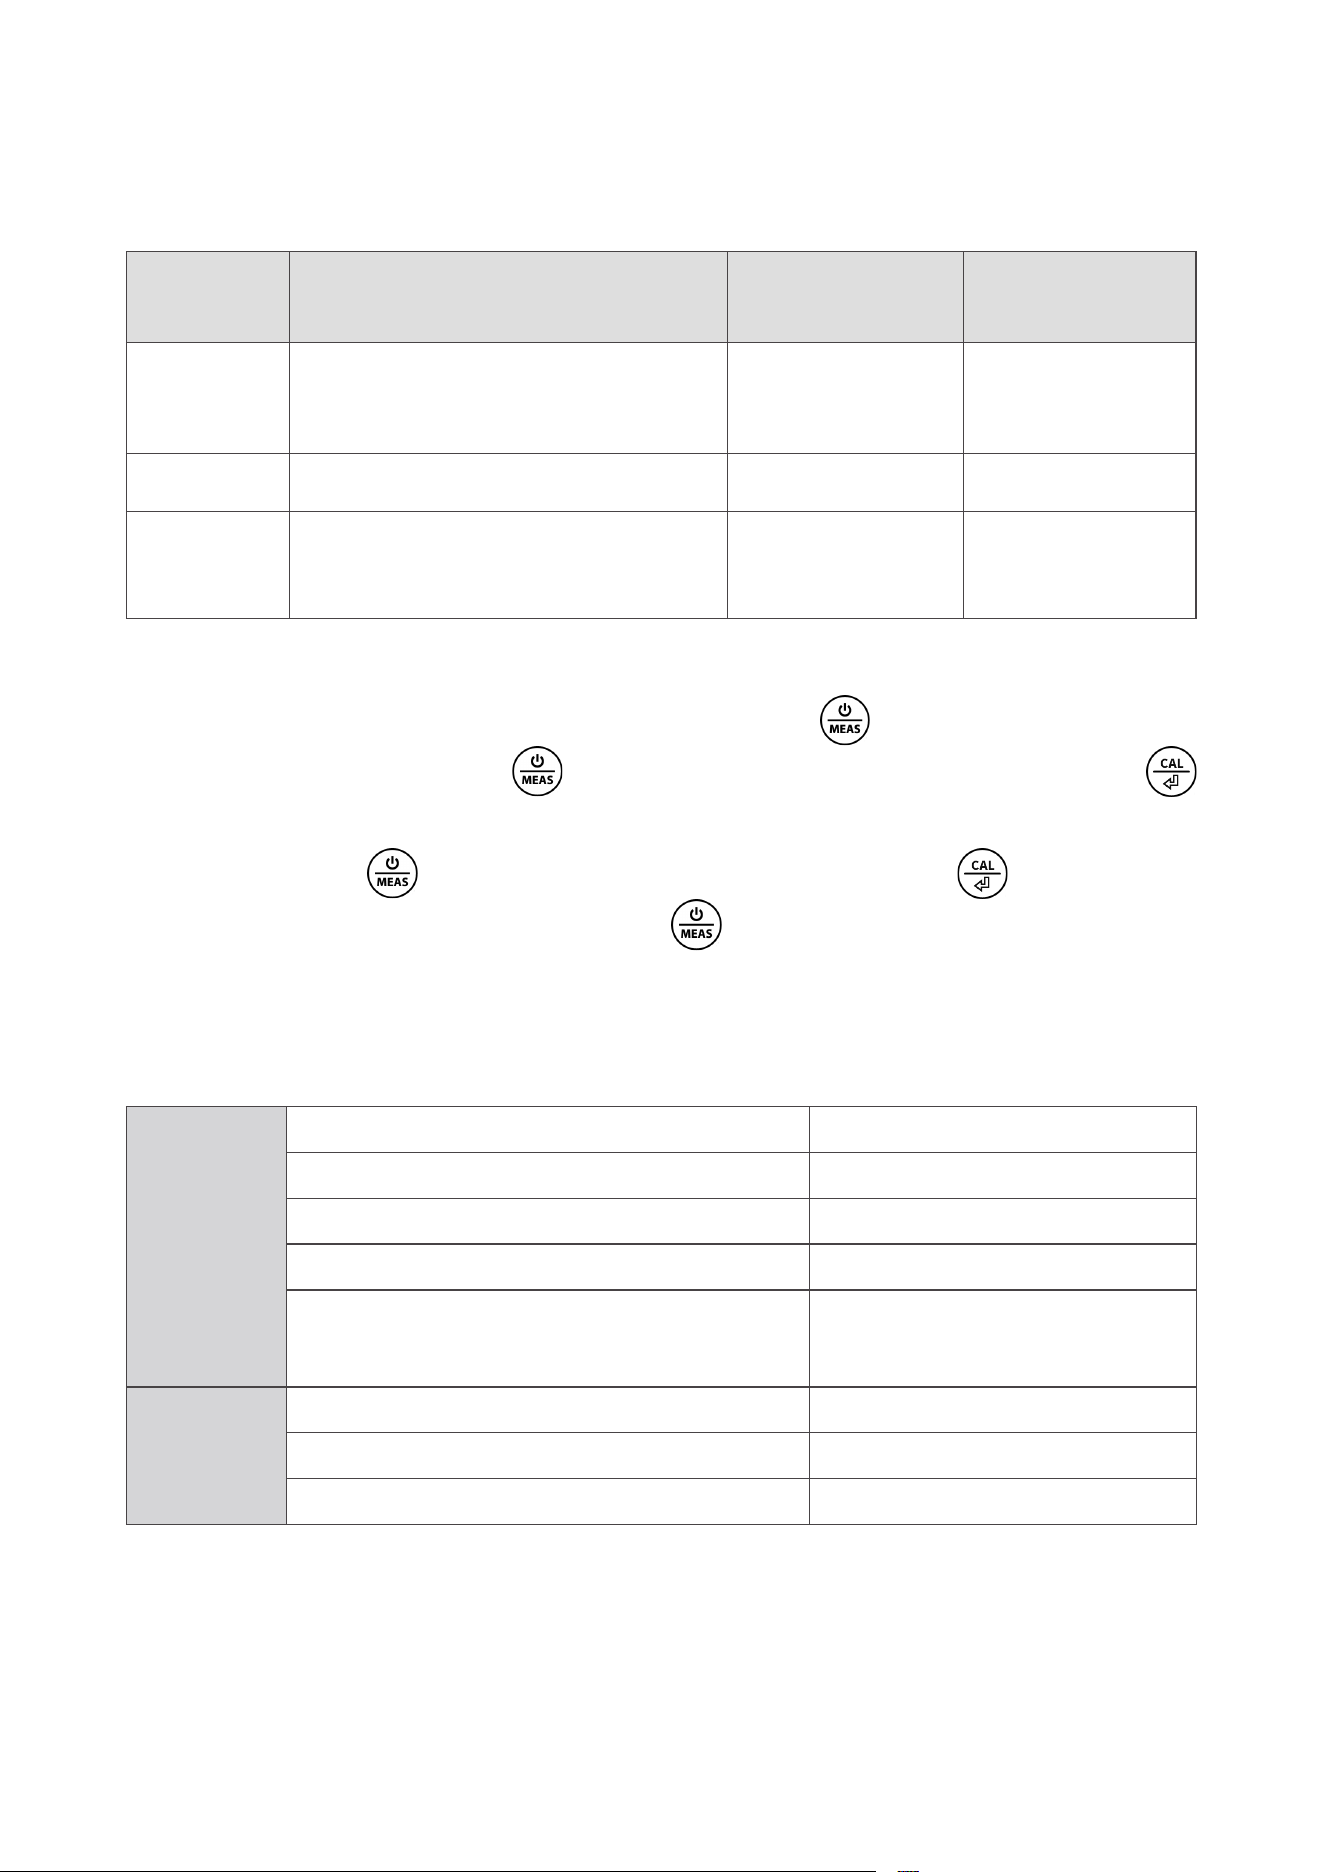
7. Parameter Settings
Symbol
Parameter Setting
Content
Code
Factory
Default
P1
Select pH buffer standard
series
USA – NIST USA
P2 Select temperature unit ˚F – ˚C ˚F
P3
Back to factory default
setting
No – Yes No
6.2 Parameter Setup
When the tester is turned off, long press
to enter parameter
settings→ short press to switch P1-P2-P3→Short press
to select the parameter you want to change (parameter flicking)
→short press to make changes, short press to confirm
parameter change →Long press to go back to measurement
mode.
7.1 Settings Menu
8. Technical Specifications
pH
Measurement Range 0 – 14.0 pH
Resolution 0.1 pH
Accuracy ±0.1 pH
Calibration Points 1 – 3 points
Automatic Temperature
Compensation (ATC)
0 – 50˚C (32 – 122˚F)
Temp.
Measurement Range 0 – 50˚C (32 – 122˚F)
Resolution 0.1 ˚C /˚F
Accuracy ±0.5˚C/±1˚F
pH probes do NOT last forever. They age through normal use and
will eventually fail. The average lifetime of a probe is 1-3 years
depending how it is used and maintained. To ensure you receive a
long life from your tester, please ensure you follow the guide below.

- 11 -
9. Probe Cleaning
9.1 The tester is only as accurate as the probe is clean. Always
thoroughly rinse off the probe before and after each test with clean
water in a container and shake off excess water.
9.2 For tough contaminants, detach the sensor shield, soak the
probe in Apera’s cleaning solution (AI1166) or detergent water for
30 minutes. Then use a soft brush to remove the contaminants.
Afterwards, soak the probe in Apera 3M KCL soaking solution
(AI1107) for at least 1 hour. Rinse it off, then re-calibrate the tester
before using.
9.3 Never use your finger to touch the glass membrane or use
other material to rub it. Doing so could generate static electricity
and cause measurement errors. To remove excess water, just shake
them off or use clean tissue paper or Kimwipe to dap off.
10. Probe Storage
10.1 Under regular usage (daily or weekly use), just make sure
probe cap is wet with some water droplets or pH 4 buffer droplets,
and tightly close the cap with the red O-ring.
10.2 For long-term storage (>1 month), add Apera 3M KCL soaking
solution (AI1107) to the Fill line in the probe cap and store the probe
in it. Close on the probe cap tightly with the red O-ring.
10.3 If you find white crystals inside or outside the probe cap, don't
worry. It is the 3M KCL soaking solution that crystalizes over time
by its nature. Just rinse them off and add in new soaking solution.
This chemical is not poisonous or dangerous. And the probe’s
performance will not be affected at all.
10.4 NEVER store the probe in pure water like tap, RO, distilled,
or deionized water as they could damage the pH probe. If this
happens, immediately soak the pH probe Apera 3M KCL soaking
solution overnight, then re-calibrate it before using. Pure water is
only for rinsing the probe.
- 12 -
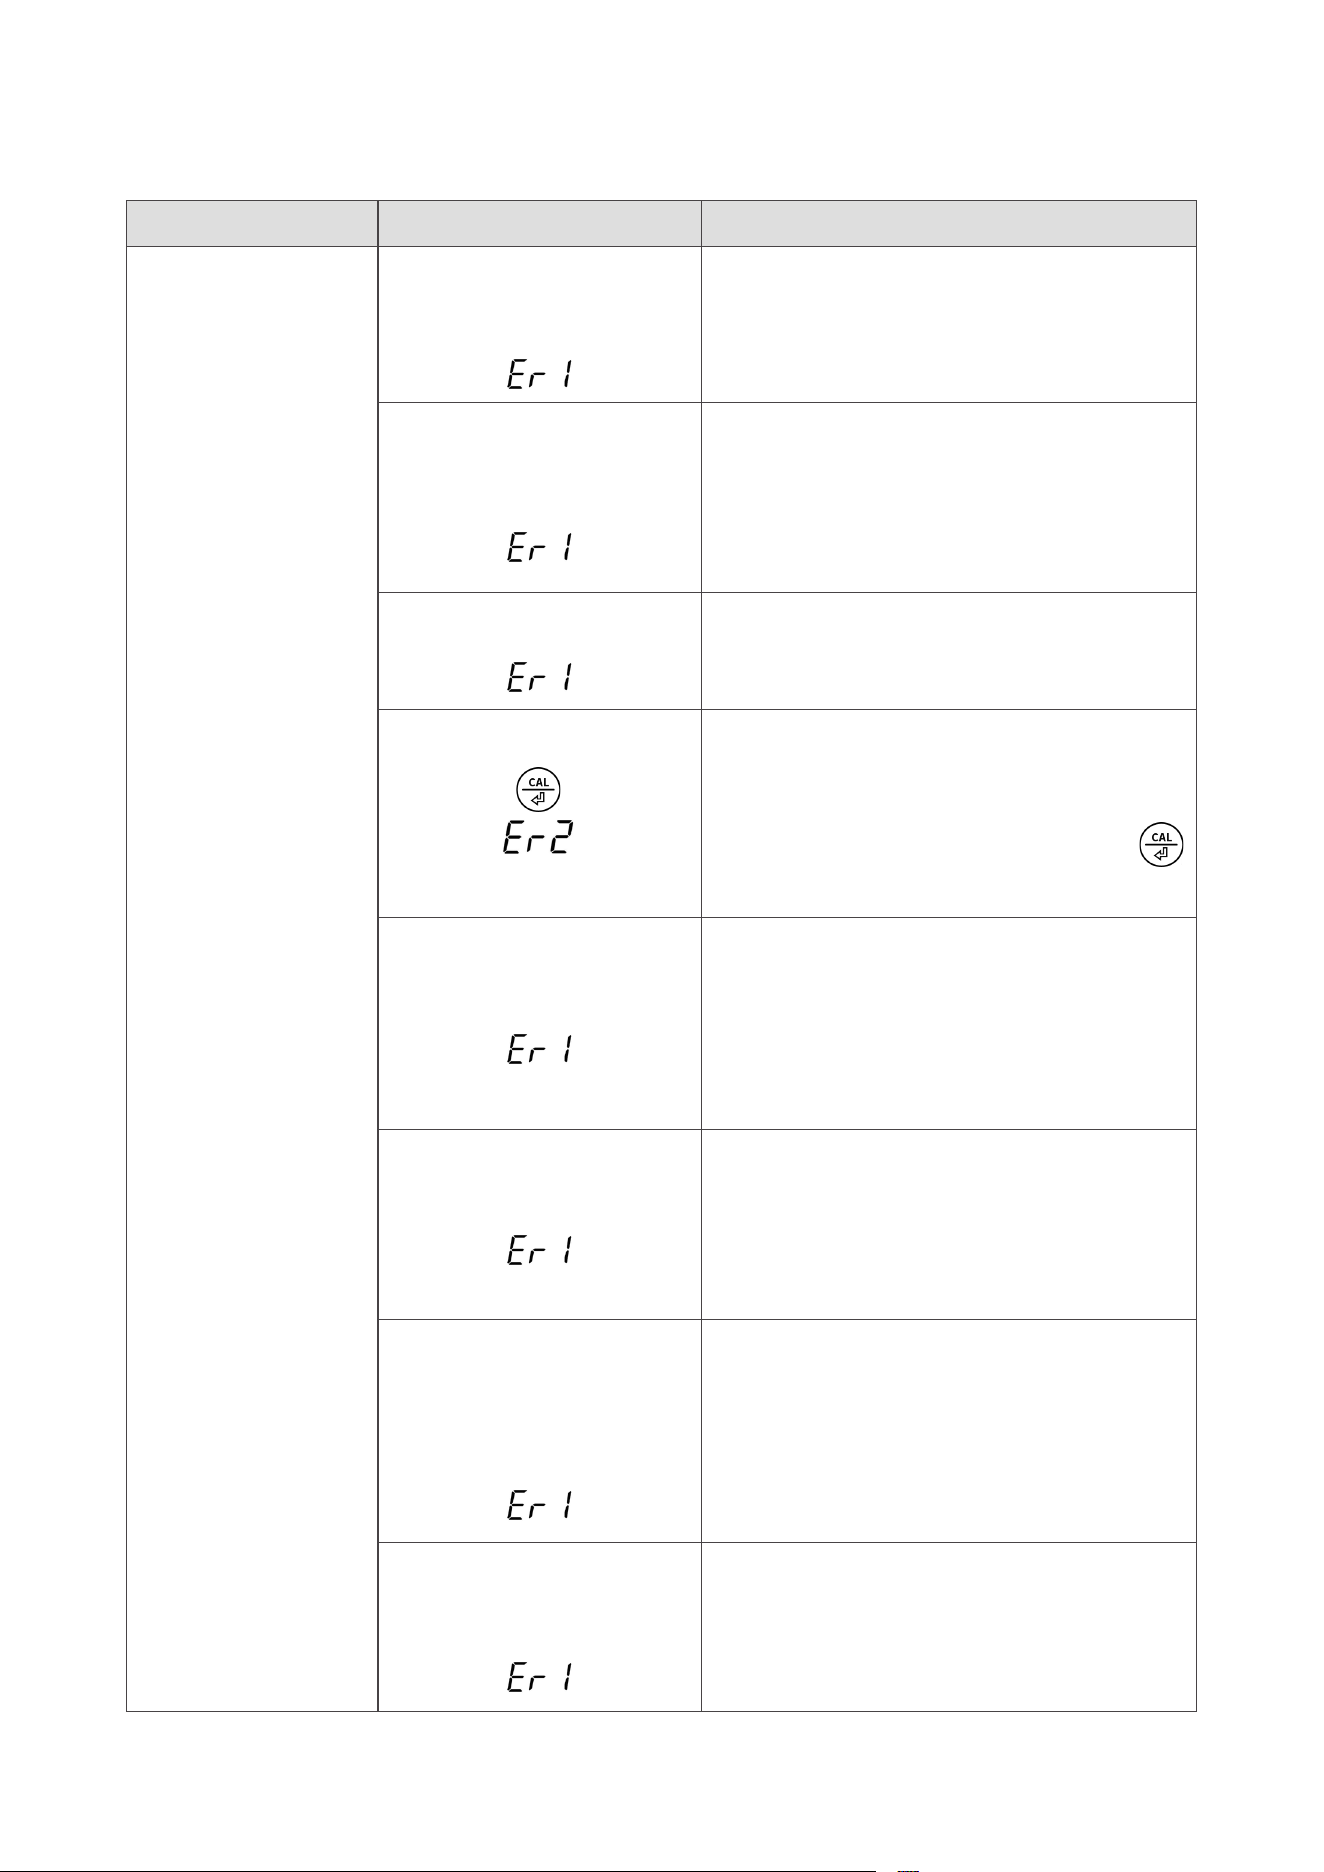
11. Troubleshooting Guide
Trouble Reasons How to fix
Cannot calibrate
Wrong calibration
order
( )
Refer to Section 5.7.1
Poor quality standard
buffer solutions
( )
Replace with fresh and clean
standard calibration solutions made
by legitimate scientific instrument
manufacturers.
Contaminated probe
( )
Thoroughly clean off the probe
(refer to Section 9)
Pressing too soon
( )
Wait for the reading to get
stabilized (smiley face to stay on
the screen) before pressing
button to finish calibration.
Broken probe
( )
If you don’t find any visible damage
of the probe, contact Apera for
warranty fulfillment. If there is
visible damage, replace the tester.
Dried-out probe
( )
Soak the probe in Apera 3M KCL
soaking solution for at least 1 hour.
And refer to Section 10 for proper
probe storage.
Probe is not fully
submerged in the
solution
( )
Make sure the probe is fully
immersed in the solution at least 1
inch deep.
Air bubbles around
or inside the probe
( )
Make a quick stir in the solution to
remove air bubbles.

- 13 -
Trouble Reasons How to fix
Reading response is
much slower, won’t
stabilize.
Dirty probe or
clogged junction
Throughly clean off the probe
(refer to Section 9)
Aged probe Replace the tester
Testing pure water
like tap/drinking/RO/
distlled/deionized
water
Refer to Section 6.4
Display similar
readings in any
solutions or always
display 7.0 pH
Broken probe
If you don’t find any visible
damage of the probe, contact
Apera for warranty fulfillment. If
there is visible damage, replace
the tester.
Instrument defect
Contact Apera for warranty
fulfillment
Reading keeps
jumping erratically
Probe is not fully
submerged in the
solution
Make sure the probe is fully
immersed in the solution at least 1
inch deep.
Air bubbles around
or inside the probe
Make a quick stir in the solution
to remove air bubbles.
Calibration is
successful, but
reading is not
accurate
Aged probe Replace the tester.
Comparison with
other testers, test
strips, or drop tests
To compare with other testers,
make sure to calibrate all testers
in the same pH 7 buffer, then
test pH 4. Whichever gives more
accurate reading is the more
accurate one. Test strips or drop
tests’ accuracy is not comparable
to pH meters’.
Your pH probe is
not suitable for your
application
Contact Apera to find the
appropriate model for your
specific application.
11. Troubleshooting Guide
- 14 -
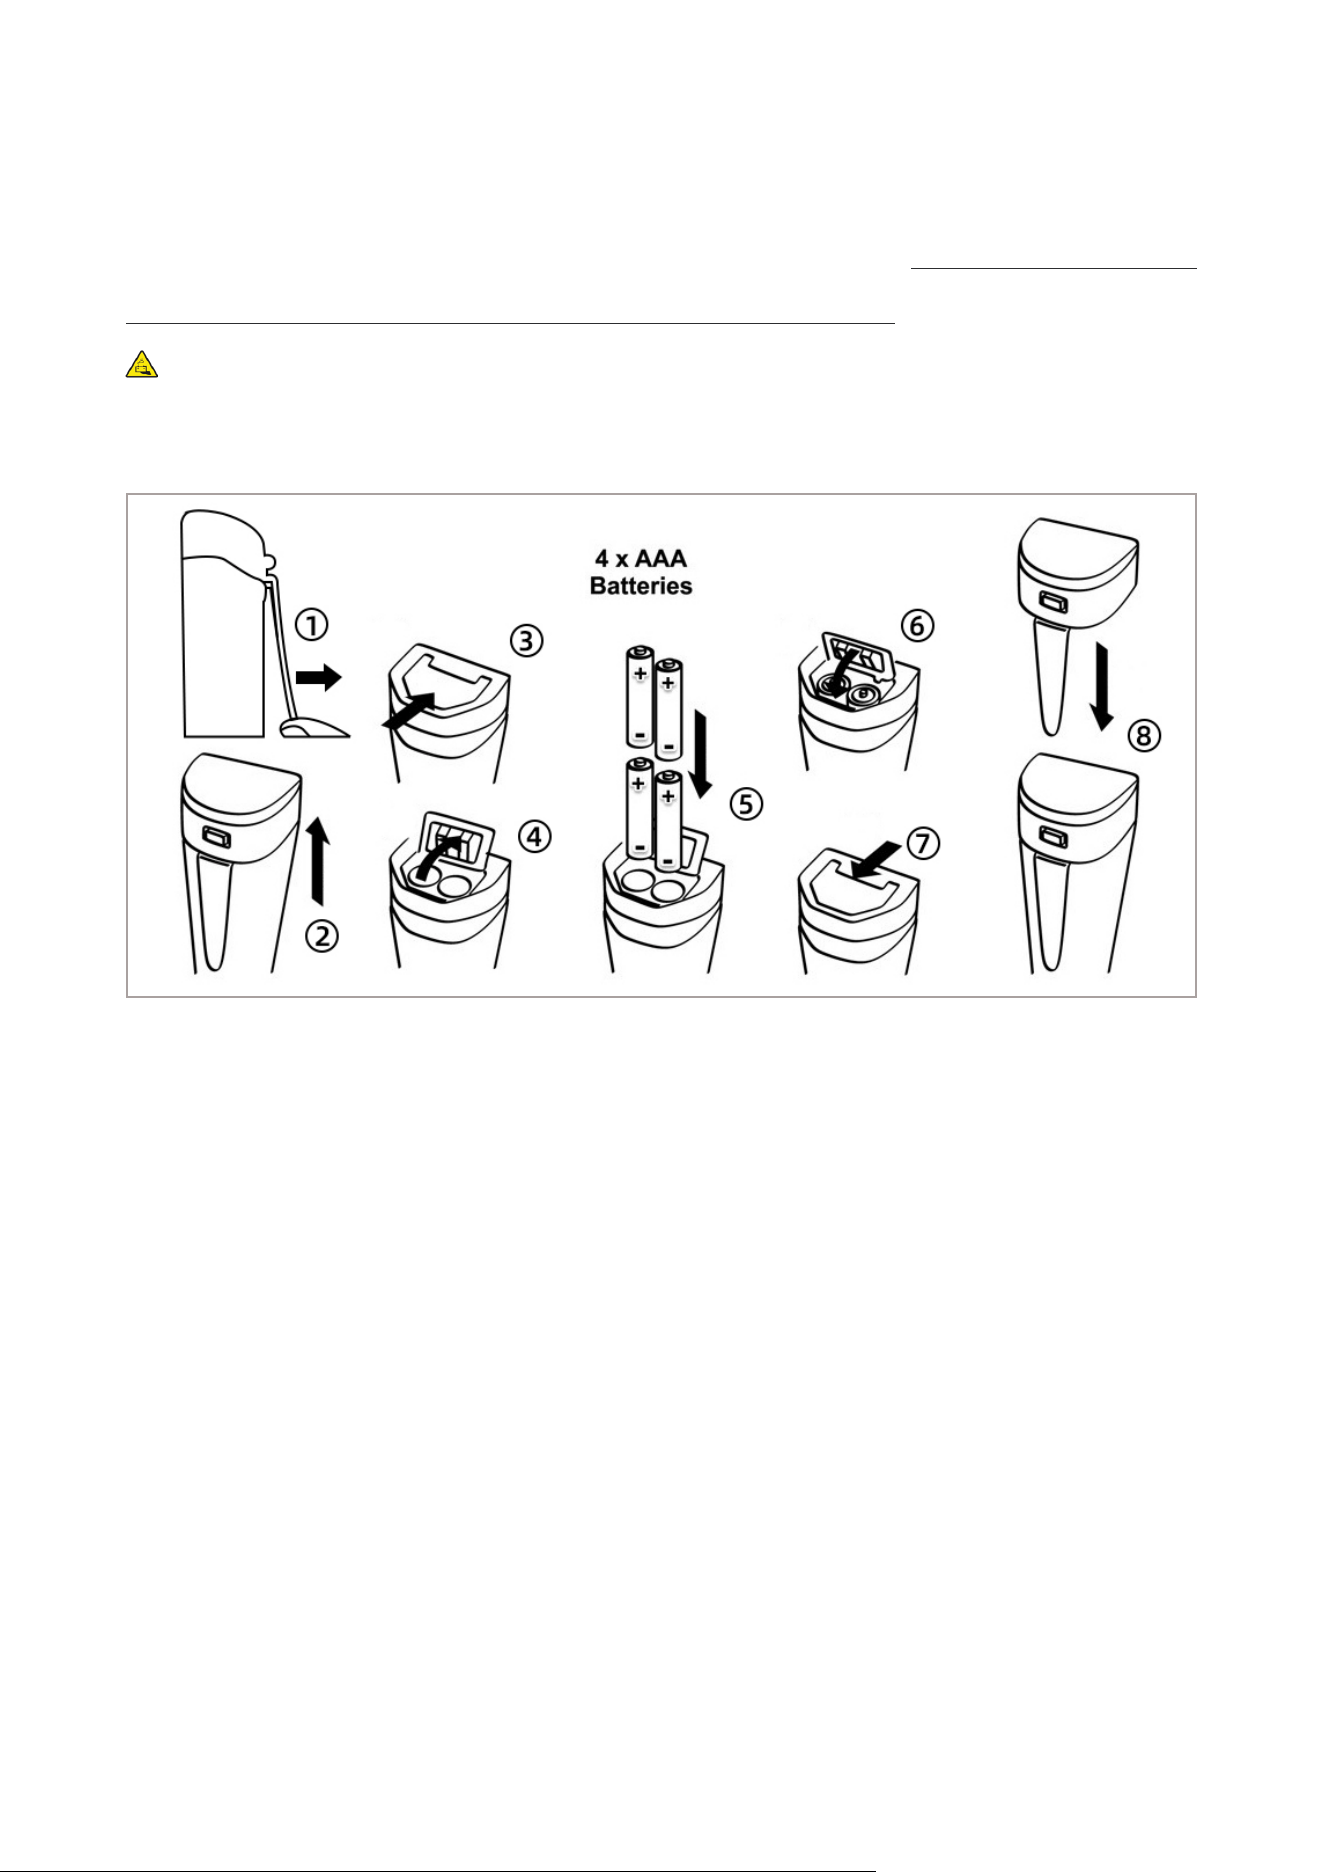
12. Battery Replacement
Please install batteries according to the following steps. *Please
note the correct direction of battery installation: The Positive Side
(“+”) OF EVERY SINGLE Battery MUST FACE UP.
(WRONG INSTALLATION OF BATTERIES WILL CAUSE DAMAGE TO
THE TESTER AND POTENTIAL HAZARDS!)
①
Loosen the pocket clip
②
Pull off the battery cap
③
Slide and unlock battery compartment
④
Open the battery compartment
⑤
Insert the batteries (all "+" FACE UP)
⑥
Press down the battery compartment
⑦
Slide and lock the battery compartment
⑧
Close on the battery cap (make sure it's tightly closed with the
O-ring. Otherwise the waterproof rating could be compromised.)

- 15 -
13. Limited Warranty
We warrant this instrument to be free from defects in material and
workmanship and agree to repair or replace free of charge, at option
of APERA INSTRUMENTS, LLC, any malfunctioned or damaged
product attributable to responsibility of APERA INSTRUMENTS, LLC
for a period of TWO YEARS (SIX MONTHS for the probe) from the
delivery.
This limited warranty does NOT cover any damages due to:
•
accidental damage
•
transportation, storage
•
improper use
•
failure to follow the product instructions
•
Unauthorized repair or modifications
•
normal wear and tear
•
Other external causes or actions beyond our reasonable control
To get the fastest warranty fulfillment, go to support.aperainst.
com and submit a new Support Ticket. One of our customer service
specialists will get in touch with you within one business day.

- 16 -
APERA INSTRUMENTS, LLC
Address: 6656 Busch Blvd, Columbus Ohio 43229
Tel: 1-614-285-3080
Email: inf[email protected]
Website: aperainst.com