Loading ...
Loading ...
Loading ...
TURNING CHISELS:
The five basic types df turning chisels are shown in
Figure 2. They are available in various sizes indi-
vidually, or in matched sets.
The gouge chisel is used for the slower speed
rough Cutting operations as well as for finishing cuts
on irregular shapes. The gouge should be used with
the beveled edge down. The chisel should be roiled
slightly in the direction in which it is advancing as
shown in Figure 3.
The spear point is used in a scraping manner by
feeding the point::directly into the work piece with
the beveled side down.
The round nose chisel is recommended for cutting
coves in face plate and cylindrical work. Like the
spear point, the round nose chisel cuts in a scraping
manner with the beveled side down,
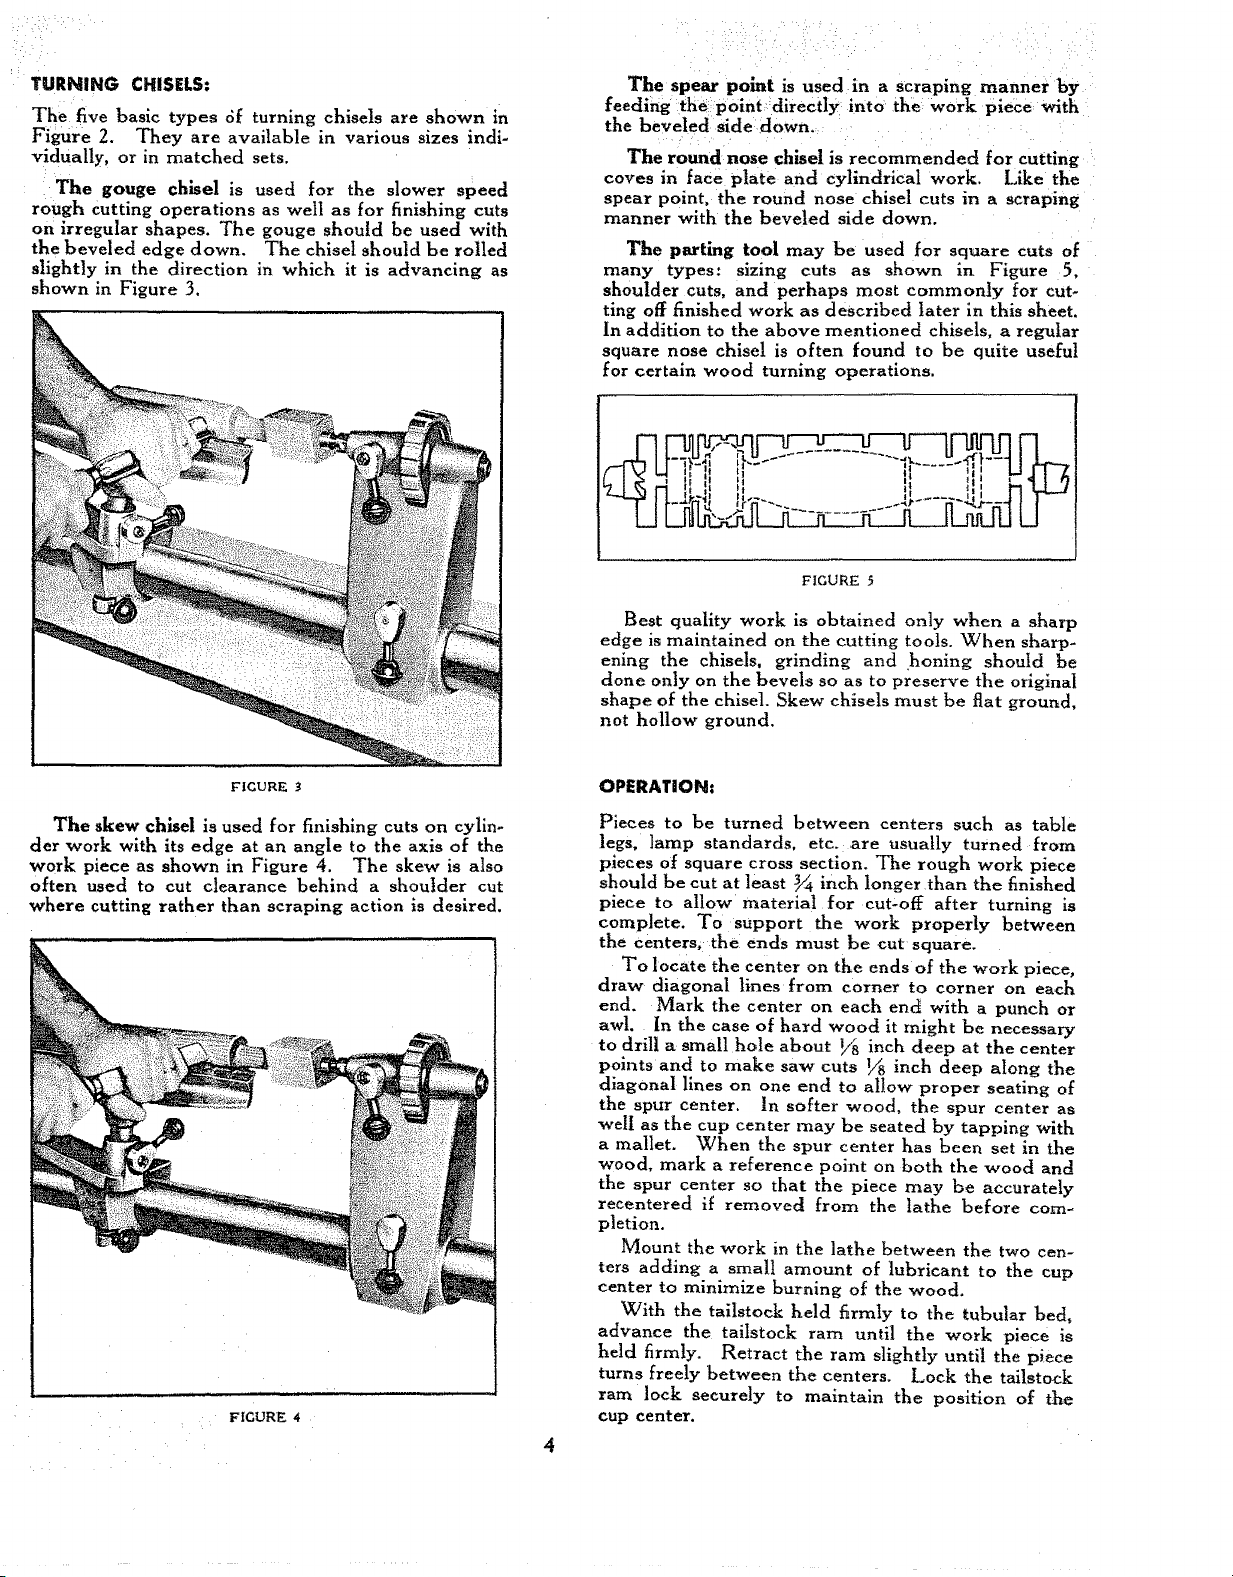
The parting tool may be used for square cuts of
many types: sizing cuts as shown in Figure 5,
shoulder cuts, and perhaps most commonly for cut-
ting off finished work as described later in this sheet.
In addition to the above mentioned chisels, a regular
square nose chisel is often found to be quite useful
for certain wood turning operations.
FIGURE 5
Best quality work is obtained only when a sharp
edge is maintained on the cutting tools. When sharp-
ening the chisels, grinding and honing should be
done only on the bevels so as to preserve the original
shape of the chisel. Skew chisels must be flat ground,
not hollow ground.
FIGURE 3
The skew chisd is used for finishing cuts on cylin-
der work with its edge at an angle to the axis of the
work piece as shown in Figure 4, The skew is also
often used to cut clearance behind a shoulder cut
where cutting rather than scraping action is desired.
FIGURE 4
4
OPERATION_
Pieces to be turned between centers such as table
legs, lamp standards, etc. are usually turned from
pieces of square cross section. The rough work piece
should be cut at least 3_ inch longer than the finished
piece to allow material for cut-off after turning is
complete. To support the work properly between
the centers; the ends must be cut square.
To locate the center on the ends of the work piece,
draw diagonal lines from corner to corner on each
end. Mark the center on each end with a punch or
awl. In the case of hard wood it might be necessary
to drill a small hole about _/h inch deep at the center
points and to make saw cuts _ inch deep along the
diagonal lines on one end to allow proper seating of
the spur center. In softer wood, the spur center as
well as the cup center may be seated by tapping with
a mallet. When the spur center has been set in the
wood, mark a reference point on both the wood and
the spur center so that the piece may be accurately
recentered if removed from the lathe before com-
pletion.
Mount the work in the lathe between the two cen-
ters adding a small amount of lubricant to the cup
center to minimize burning of the wood.
With the tailstock held f_rmly to the tubular bed,
advance the tailstock ram until the work piece is
held firmly. Retract the ram slightly until the piece
turns freely between the centers. Lock the tailstock
ram lock securely to maintain the position of the
cup center.
Loading ...
Loading ...