Loading ...
Loading ...
Loading ...
6
UNPACKING AND CLEANING
Carefully unpack the machine and all loose items from the
shipping container(s). Remove the rust-preventative oil from
unpainted surfaces using a soft cloth moistened with mineral
spirits, paint thinner or denatured alcohol.
NOTICE
Do not use highly volatile solvents such as
gasoline, naphtha, acetone or lacquer thinner for cleaning your
machine.
After cleaning, cover the unpainted surfaces with a good quality
household floor paste wax.
ASSEMBLY
To reduce the risk of injury, turn unit off
and disconnect it from power source before installing and
removing accessories, before adjusting or when making
repairs. An accidental start-up can cause injury.
ASSEMBLY TOOLS REQUIRED
•Two hex wrenches (supplied)
ASSEMBLY TIME ESTIMATE
Assembly for this machine takes approximately 1 hour.
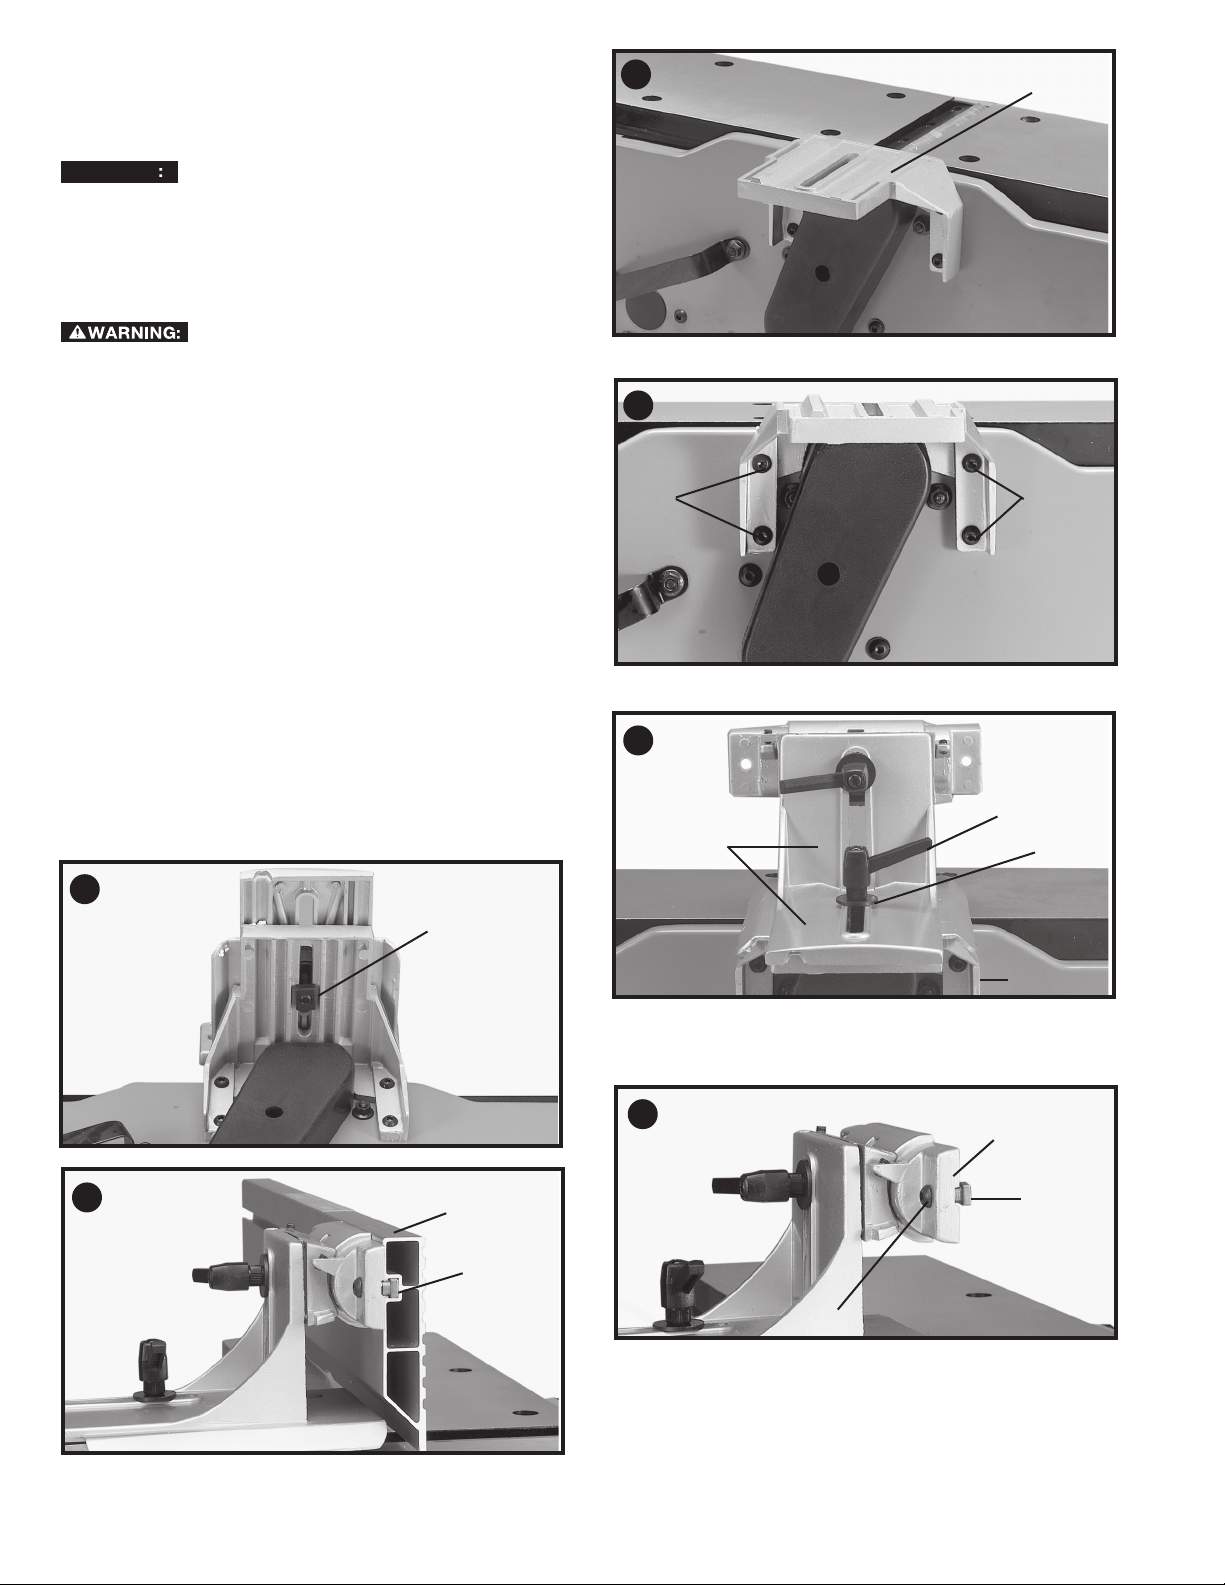
FENCE
1. Assemble the fence mounting bracket (A) Fig. 5 to the
jointer base using the four M6x1x16 mm button head
screws (B) Fig. 6.
2. Assemble the fence sliding bracket (C) Fig. 7 to mounting
bracket (A) using the lockhandle (D), M8 flat washer (E) and
special nut (F) Fig. 8.
3. Insert a M6x1x16 mm button head screw (G) Fig. 9 through
fence tilting bracket (H) and thread a M6 x 1 square nut (J)
onto threaded end of screw (G). DO NOT COM PLETE LY
TIGHTEN SCREW (G) AT THIS TIME. Assemble screw
and square nut to opposite end of tilting bracket in the
same manner.
4. Slide groove of fence (L) Fig. 10 over square nuts (J).
A
B
B
A
C
D
E
F
H
J
G
J
L
5
8
6
9
7
10
Loading ...
Loading ...
Loading ...