Loading ...
Loading ...
Loading ...
12
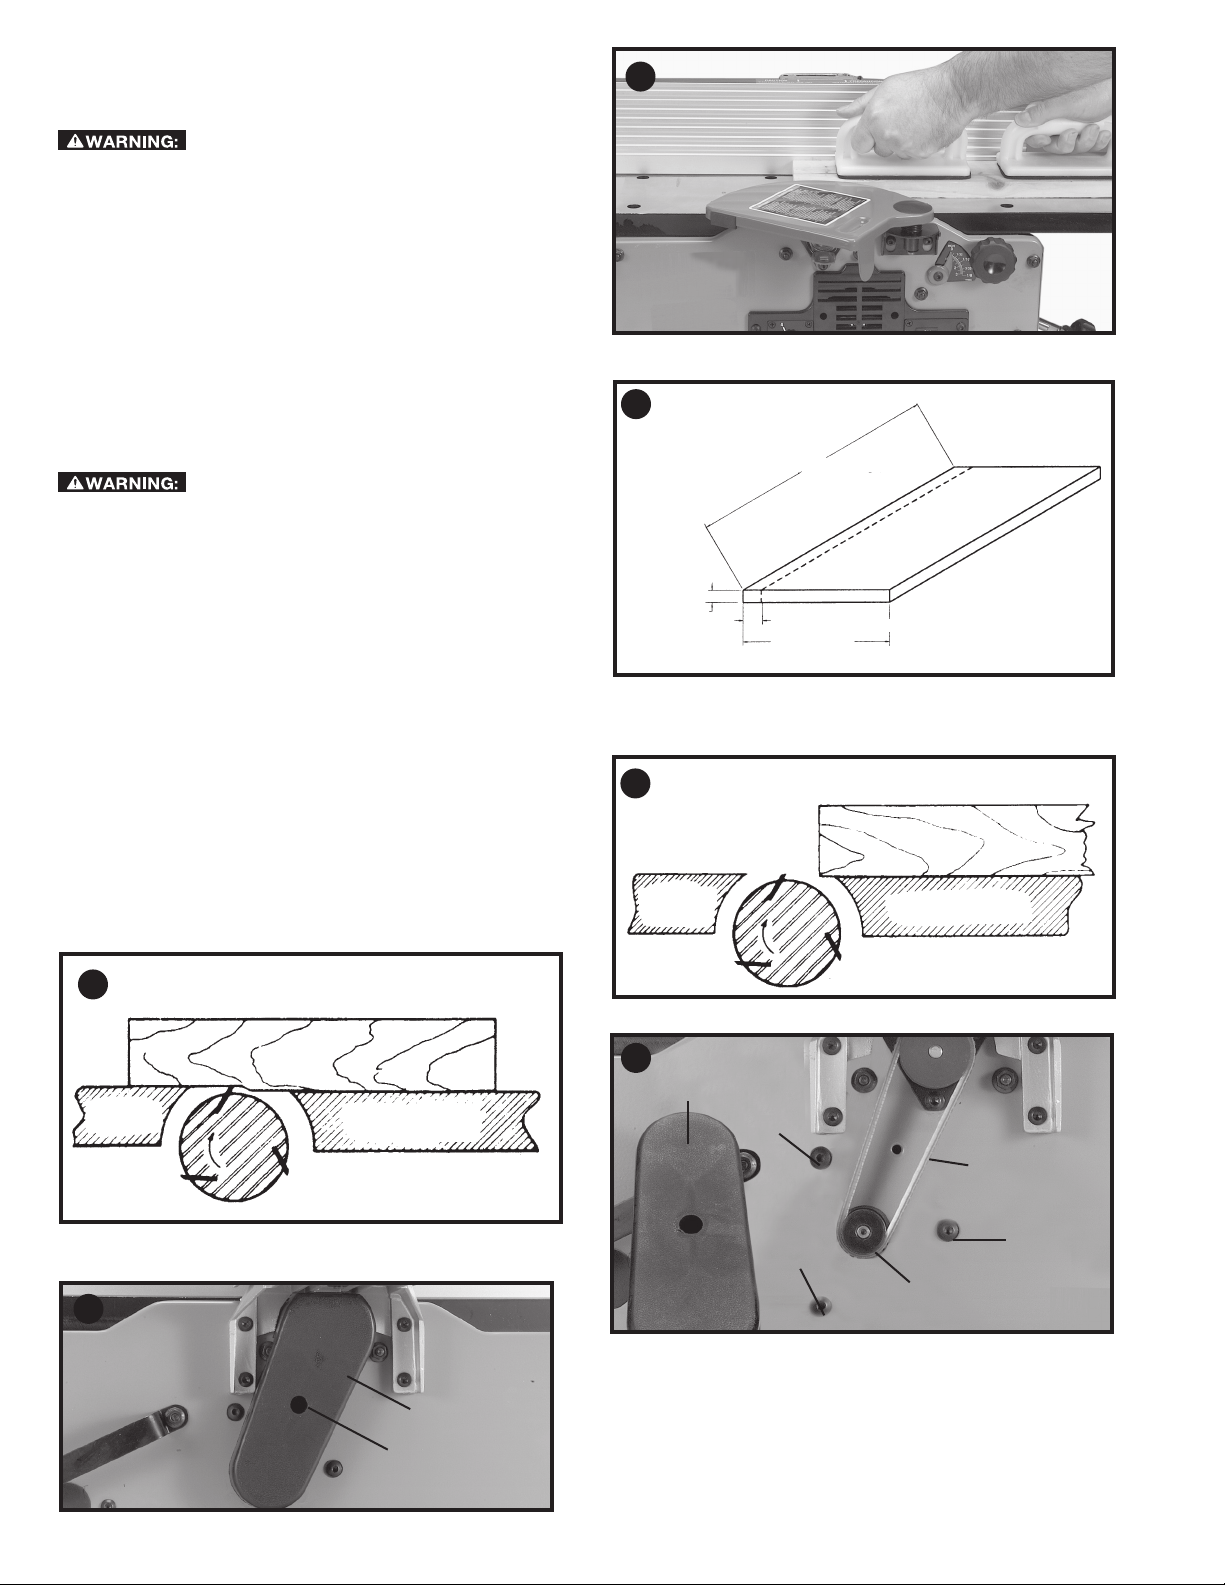
PLANING SHORT OR THIN WORK
When planing short or thin pieces, always use push blocks to
minimize all danger to the hands. Fig. 40, illustrates using the
Push Blocks properly.
Do not perform jointing operations on
material shorter than 10 inches (254 mm), narrower than
3/4 inch (19 mm), or less than 1/2 inch (12.7 mm) thick (refer
to Fig. 41).
DIRECTION OF GRAIN
Avoid feeding work into the jointer against the grain as shown
in Fig. 42. The result will be chipped and splintered edges. Feed
with the grain as shown in Fig. 43 to obtain a smooth surface.
TROUBLESHOOTING
For assistance with your machine, visit our website at www.
portercable.com for a list of service centers or call the help line
at 1-888-848-5175.
MAINTENANCE
To reduce the risk of injury, turn unit off
and disconnect it from power source before installing and
removing accessories, before adjusting or when making
repairs. An accidental start-up can cause injury.
BELT REPLACEMENT
When it becomes necessary to replace the belt on your jointer:
1. Remove screw (A) Fig. 44, using hex wrench supplied, and
remove belt guard (B).
2. Loosen three screws (C) Fig. 45, to release belt tension
and remove belt (D) from pulleys.
3. Assemble new belt to the cutterhead and motor pulleys.
Press down on motor pulley (E) Fig. 45, to tension belt and
tighten three screws (C).
NOTE: There should be approximately 1/4 inch (6.4 mm)
deflection in the belt (D) at the center span of the pulleys
using light finger pressure. The belt does not require excessive
tension to function properly.
4. Replace belt guard (B) Fig. 44.
MINIMUM AND
MAXIMUM PLANING
DIMENSIONS
1/2 inch
(12.7 mm)
MINIMUM
3/4 inch (19mm) MINIMUM
6 inches
(152.4 mm) MAXIMUM
10 inches (254 mm) MINIMUM
IN-FEED TABLE
OUT-FEED
TABLE
CUTTER
WRONG FEED -
AGAINST THE
GRAIN
MATERIAL
B
A
B
C
C
C
D
E
41
44
42
40
45
IN-FEED TA BLE
OUT-FEED
TABLE
CUTTER
MATERIAL
43
CORRECT FEED - WITH THE GRAIN
Loading ...
Loading ...
Loading ...