Loading ...
Loading ...
Loading ...
11
A
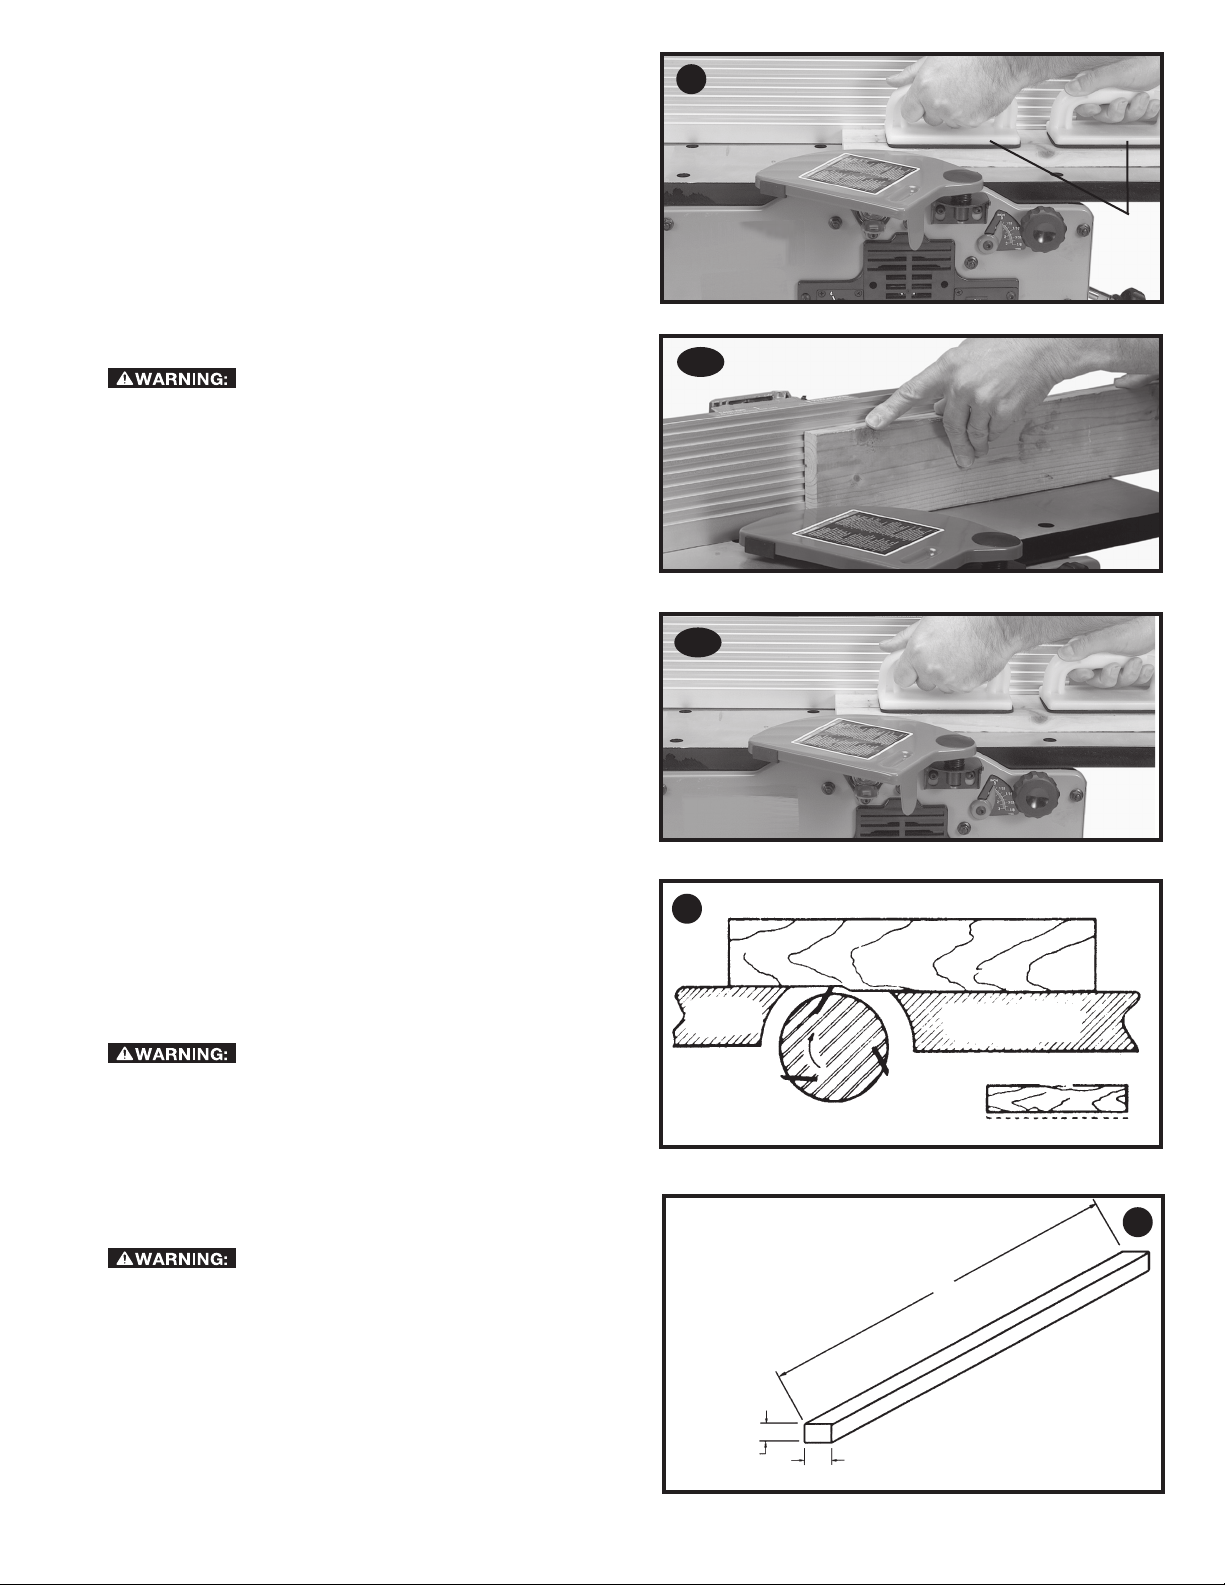
PUSH BLOCKS
A set of push blocks (A) Fig. 36 is supplied with your jointer and
should be used whenever possible to minimize all danger to
your hands. Fig. 36 illustrates using the push blocks properly.
MACHINE USE
The following directions will give the beginner a start on jointer
operations. Use scrap pieces of lumber to check the settings
and to get the feel of the operations before attempting regular
work.
NOTE: The knives on the jointer will not wear evenly by feeding
the wood through the same spot on the table every time. Feed
the wood through the jointer at different spots on the table to
help eliminate uneven wear of the knives.
Always use cutterhead guard and keep
hands away from cutterhead. Use push blocks whenever
possible.
DEFINITION OF JOINTING, PLANING
1. JOINTING OPERATIONS – Jointing cuts or edge
jointing are made to square an edge of a workpiece.
The workpiece is positioned on the jointer with the
narrow edge of the workpiece on the infeed table and
the major flat surface of the workpiece against the fence,
as shown in Fig. 37A. The workpiece is moved from the
infeed table, across the cutterhead to the outfeed table.
2. PLANING OPERATIONS – Planing or surfacing are
identical to the jointing operation except for the position
of the workpiece. For planing, the major flat surface of
the workpiece is placed on the infeed table of the jointer
with the narrow edge of the workpiece against the fence,
as shown in Fig. 37B. The workpiece is moved from the
infeed table, across the cutterhead to the outfeed table.
Use push blocks when performing planing operations
whenever possible.
PLACEMENT OF HANDS DURING FEEDING
At the start of the cut, the left hand holds the work firmly
against the infeed table and fence, while the right hand pushes
the work toward the knives. After the cut is un der way, the new
surface rests firmly on the outfeed table as shown in Fig. 38.
The left hand should then be moved to the work on the outfeed
table, at the same time maintaining flat contact with the fence.
The right hand presses the work forward, and before the right
hand reaches the cutterhead it should be moved to the work
on the outfeed table.
Never pass hands directly over the
cutterhead.
JOINTING AN EDGE
This is the most common operation for the jointer. Set the
guide fence square with the table. Depth of cut should be the
minimum required to obtain a straight edge. Hold the best face
of the piece firmly against the fence throughout the feed as
shown in Fig. 37A.
Do not perform jointing operations on
material shorter than 10 inches (254 mm), narrower than
3/4 inch (19 mm), or less than 1/2 inch (12.7 mm) thick (refer
to Fig. 39).
PLANING WARPED PIECES
If the wood to be planed is dished or warped, take light cuts
until the surface is flat. Avoid forcing such material down
against the table; excessive pressure will spring it while
passing the knives, and it will spring back and remain curved
after the cut is completed.
OUT-FEED
TABLE
IN-FEED TABLE
CUTTER
MATERIAL
3/4 inch (19 mm) MIN I MUM
10 inches (254 mm) MINIMUM
MINIMUM JOINTING DIMENSIONS
1/2 inch
(12.7 mm)
MIN I MUM
38
36
39
37A
37B
Loading ...
Loading ...
Loading ...