
ANKEWAY
USER MANUAL
AW1001

User Manual (English )
EXPEX
Wiring Diagram and Define
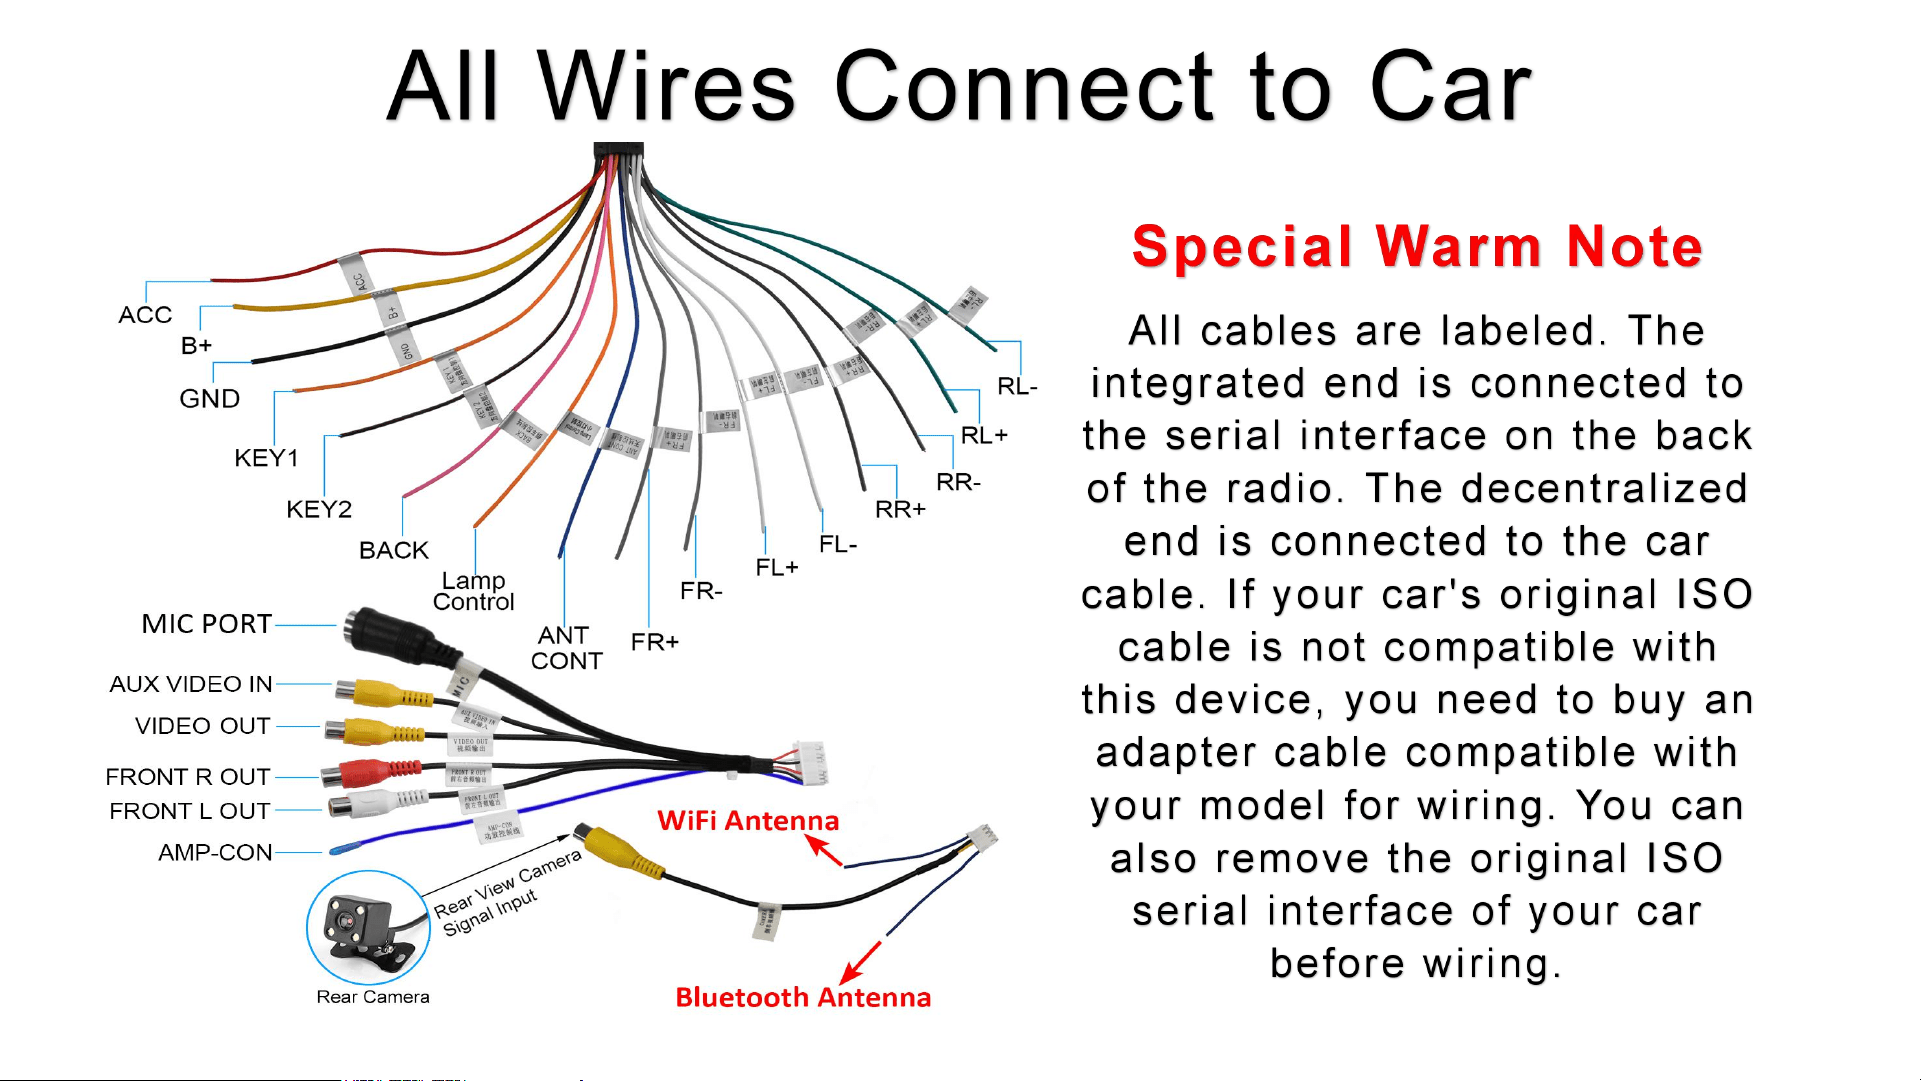

R L / R R / F L / F R : t o 4 s p e a k e r s .
A N T- C O N T: t o A n t e n n a ( N o
a n t e n n a n o w i r i n g ) .
L a m p C o n t r o l : t o c a r f r o n t
s m a l l l i g h t .
B a c k : t o r e a r c a m e r a s i g n a l i n p u t
c a b l e .
K E Y 1 ( K E Y 2 ) : U s e o n l y o n e o f t h e
c a b l e s t o c o n n e c t t h e s i g n a l
o u t p u t c a b l e o f t h e c a r ' s S W C . I f
" K E Y 1 " i s n o t c o m p a t i b l e ,
s e l e c t " K E Y 2 " .
G N D : t o b a t t e r y n e g a t i v e / i r o n /
g r o u n d .
B + : t o c a r b a t t e r y p o s i t i v e .
A C C : t o c a r i g n i t i o n d e t e c t i o n
c a b l e .
Main Cable Wiring Diagram
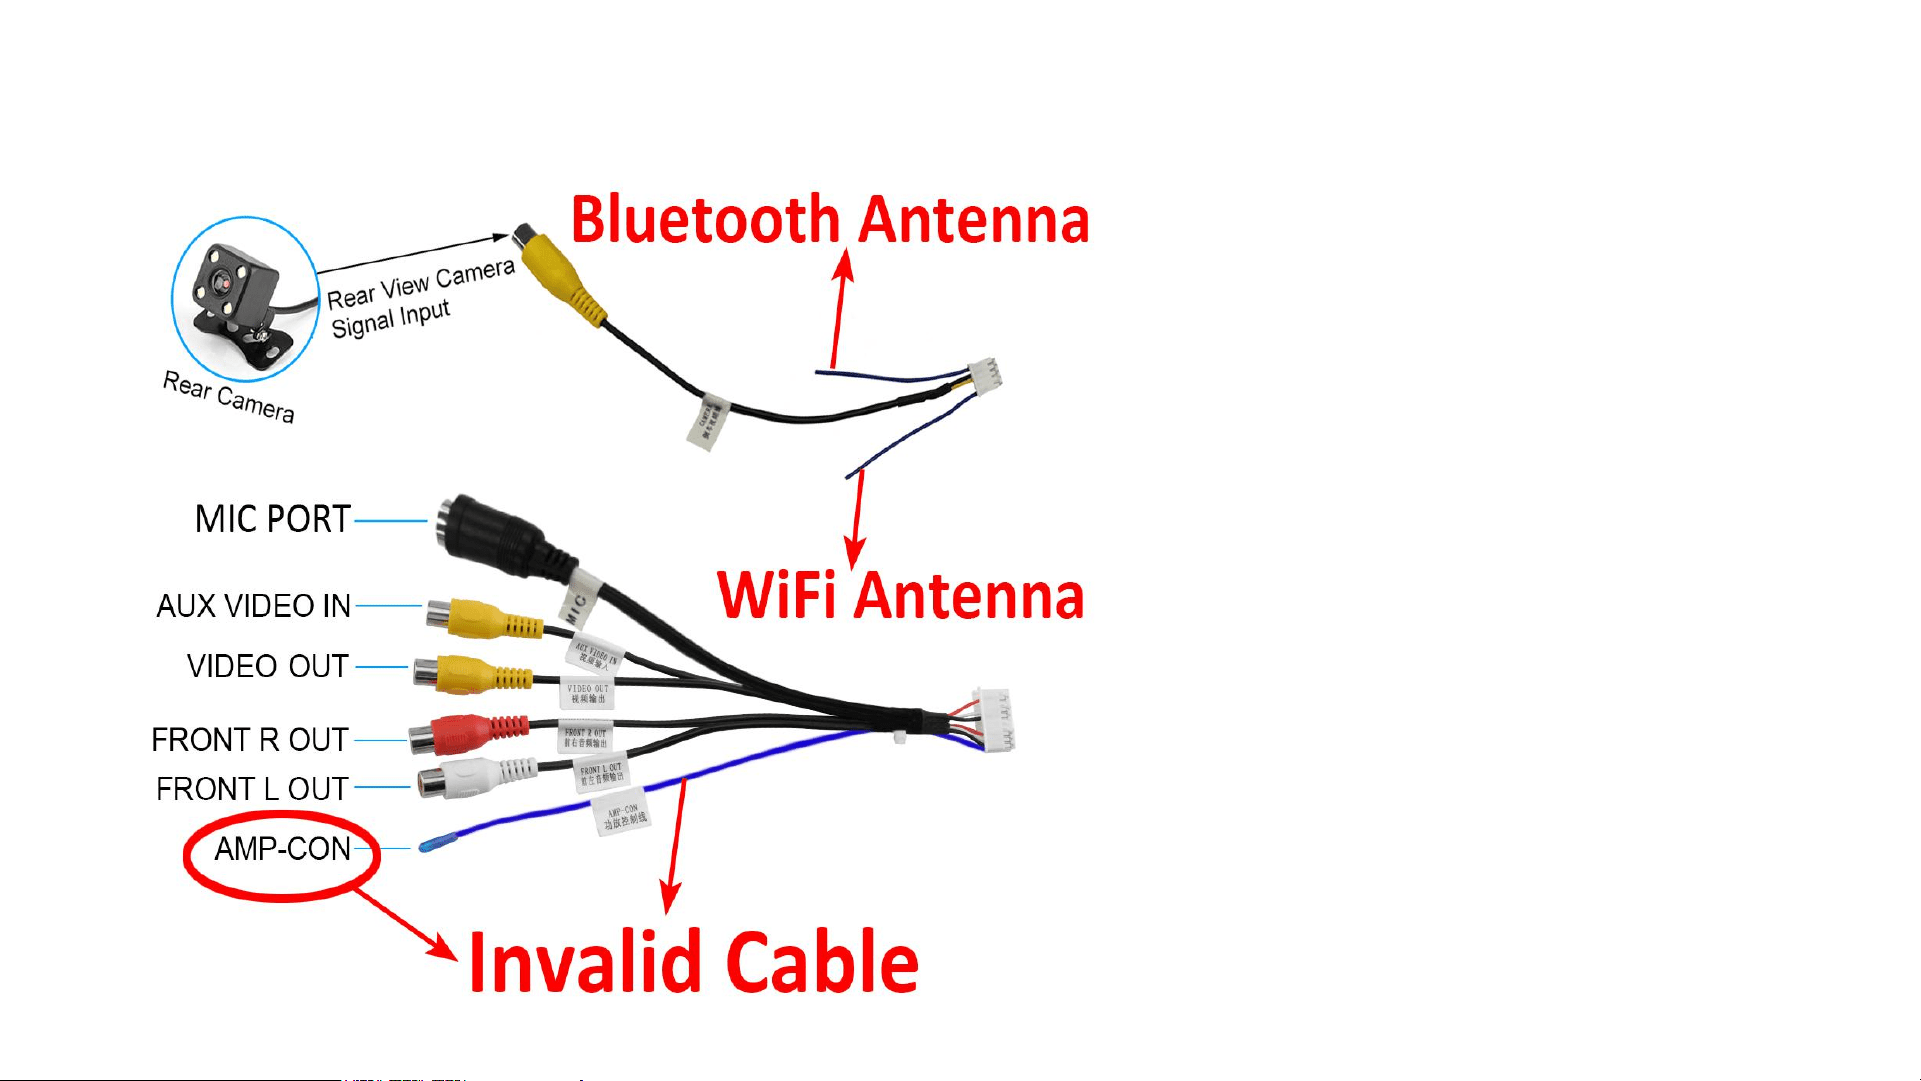
Video/Audio/Amplifier/WiFi/BT/MIC
• FRONT R/L OUT: Connect to the
amplifier Audio Input
• Special Note: The "AMP-CON"
has no voltage output, so it
needs "ACC" cables instead of
"AMP-CON" to power the
amplifier. In order to reduce the
current noise, a power filter
recommended.
• Special Note: Whether you need
the Rear Camera or not, you
must connect the "CAMERA"
Cable to the 10-pin port on the
back of the radio to ensure that
the radio gets better WiFi and
Bluetooth signals.
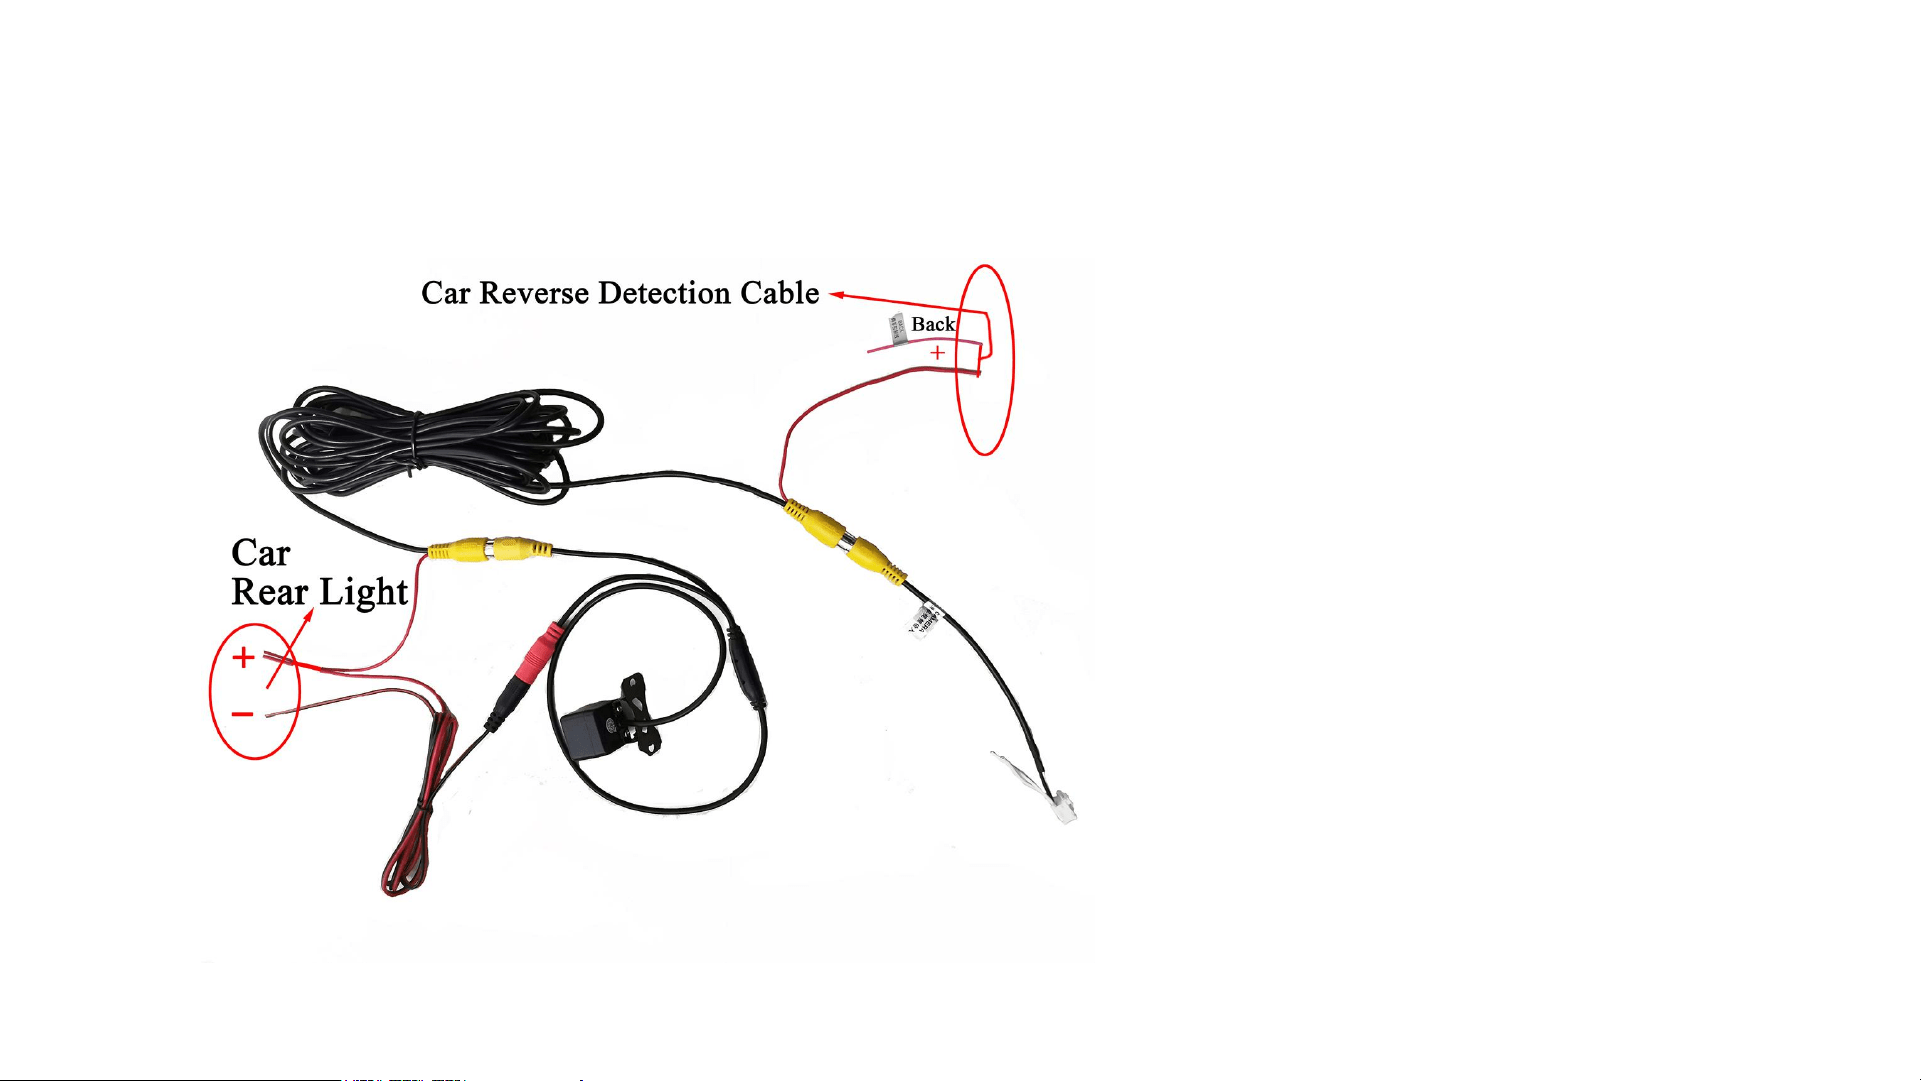
Reversing Camera Wiring Diagram
Wi r i n g A : C o m b i n e t h e
" s h o r t r e d c a b l e " w i t h t h e
“ B a c k ” c a b l e a n d c o n n e c t
t o t h e c a r r e v e r s e
d e t e c t i o n c a b l e .
Wi r i n g B : C o m b i n e t h e
t w o " s h o r t r e d c a b l e s "
a n d c o n n e c t t o t h e
p o s i t i v e p o l e o f t h e c a r ' s
t a i l l i g h t .
Wi r i n g C : C o n n e c t e d t o
t h e r a d i o r e v e r s i n g v i d e o
i n p u t p o r t ( 1 0 - p i n )
B
c
A
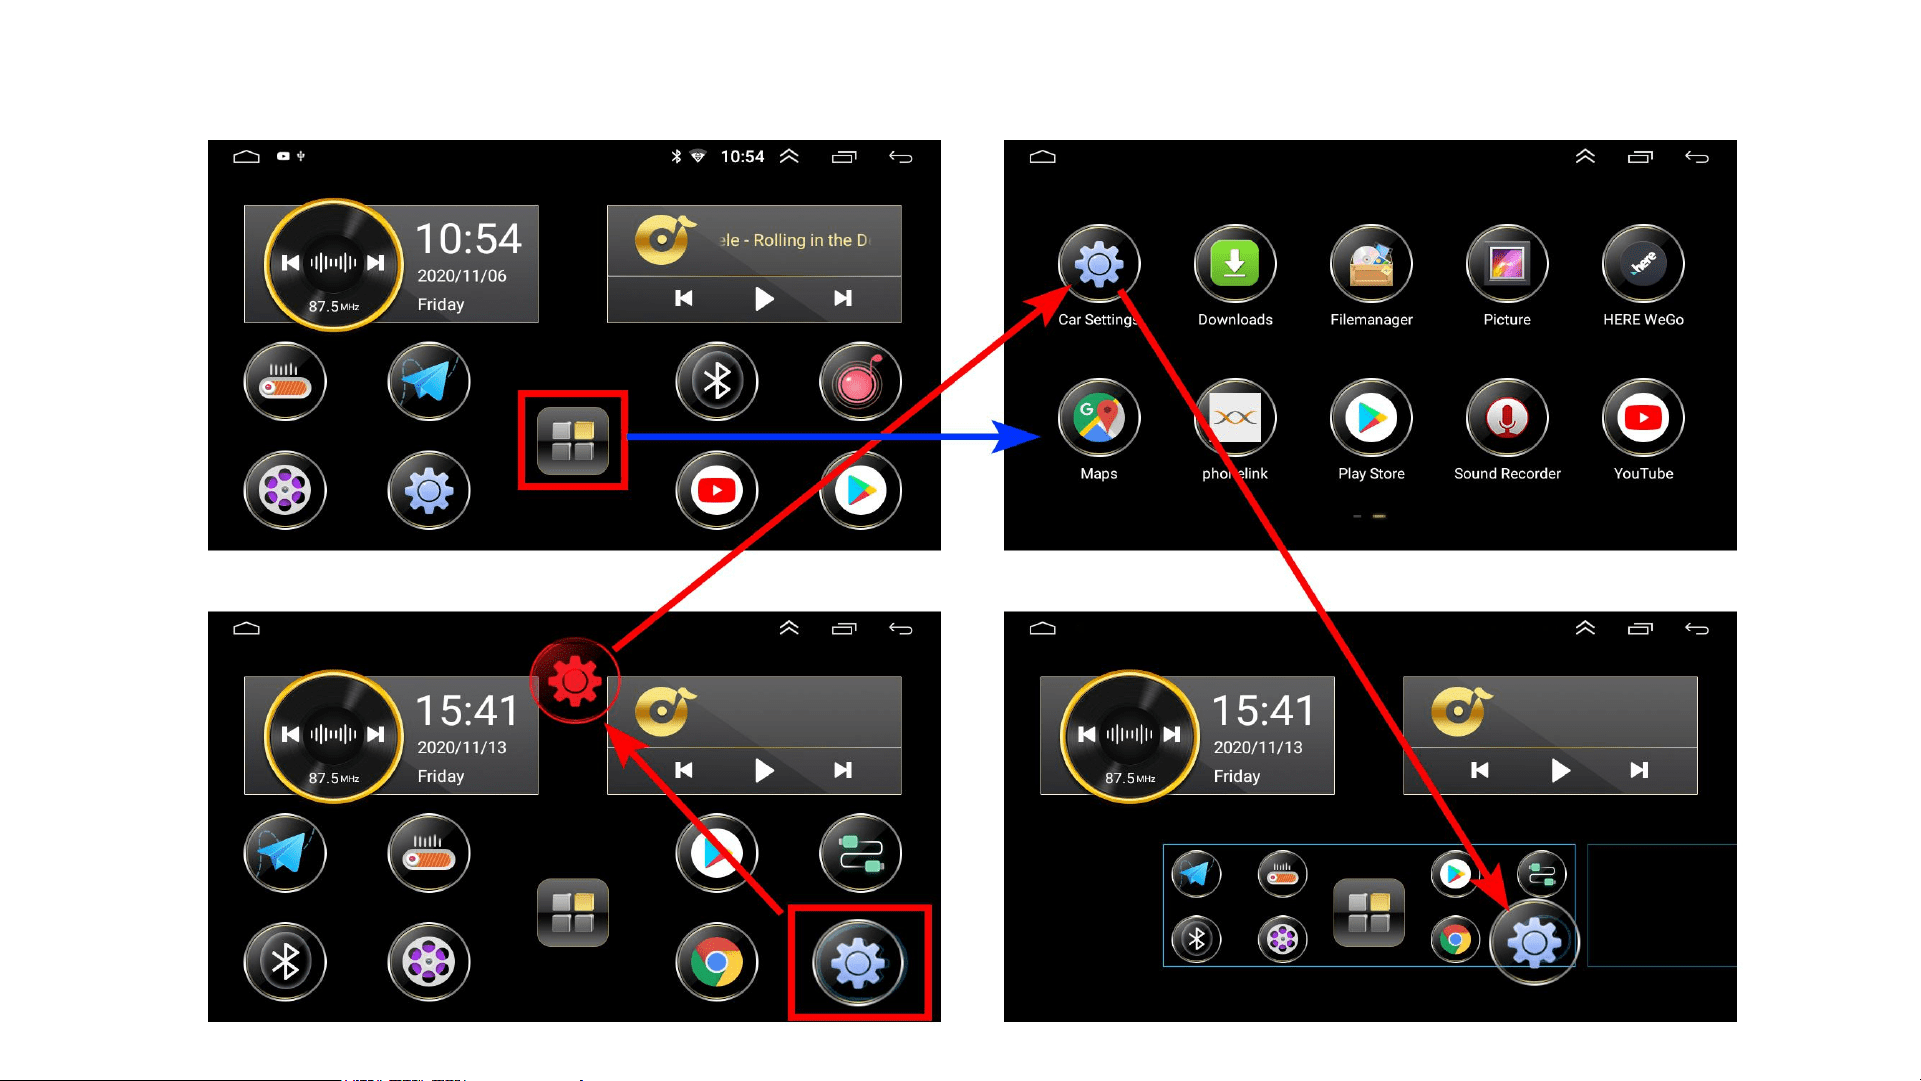
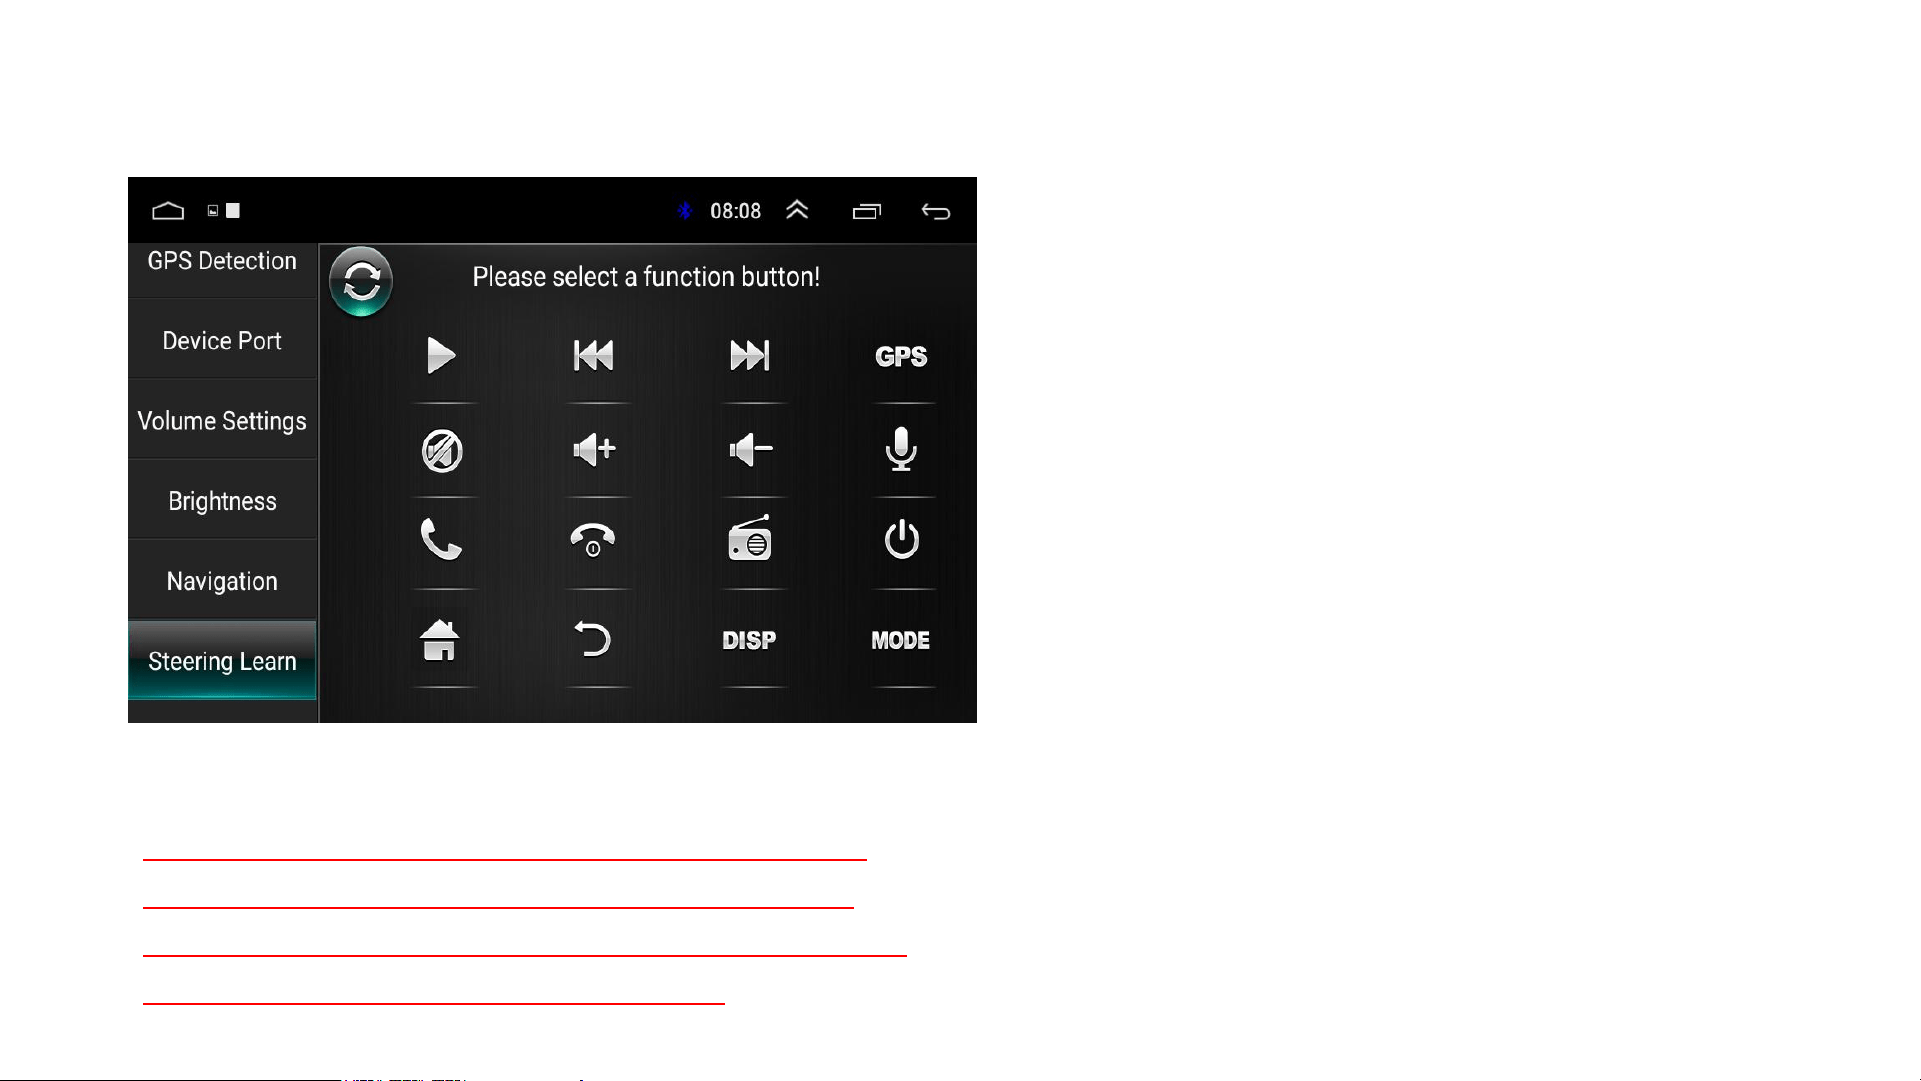
Home Settings
Step-1
Step-2

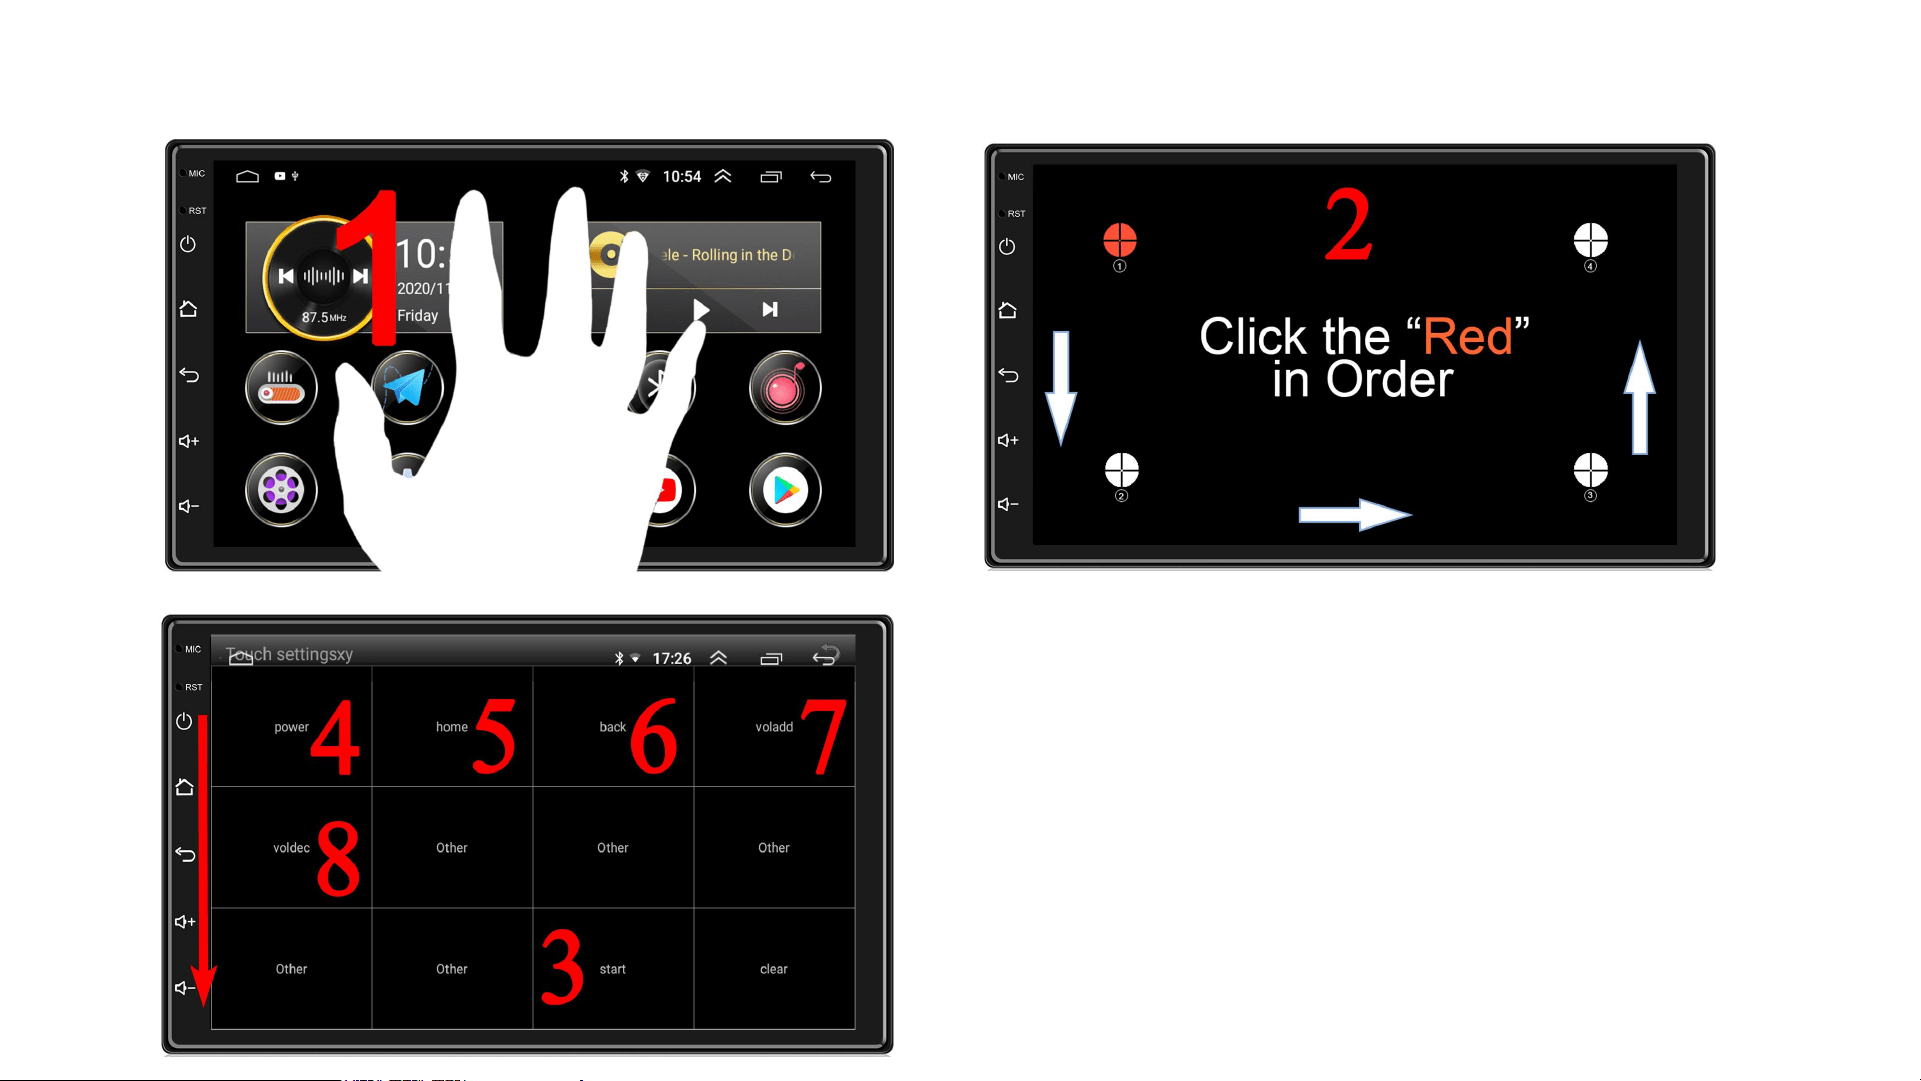
●Must be corrected when first used or the buttons
fail
● Debugging Method:
● Step 1: Turn on the radio, press and hold the screen with 5 fingers until 4
"round options" appear. Then click on the 4 "round options" (from 1 to 4).
● Step 2: Click the “Start” option will turn red and start calibration.
● Step 3: Click the "Power" option will turn red and then click the power button
on the left side of the screen. If "Power" returns to black, the calibration was
successful. Then use the same method to correct the remaining buttons. Click
the "Close" option after the calibration is completed.
Side Button Debugging & Calibration
Side Button Debugging and Calibration
单击此处添加正文
单击此处添加正文
Tips for 4 - 5- 6- 7- 8
Click the "Power" option will turn red and then
click the power button on the left side of the
screen. If "Power" returns to black, the
calibration was successful. Then use the same
method to correct the remaining buttons. Click the
"Close" option after the calibration is completed.
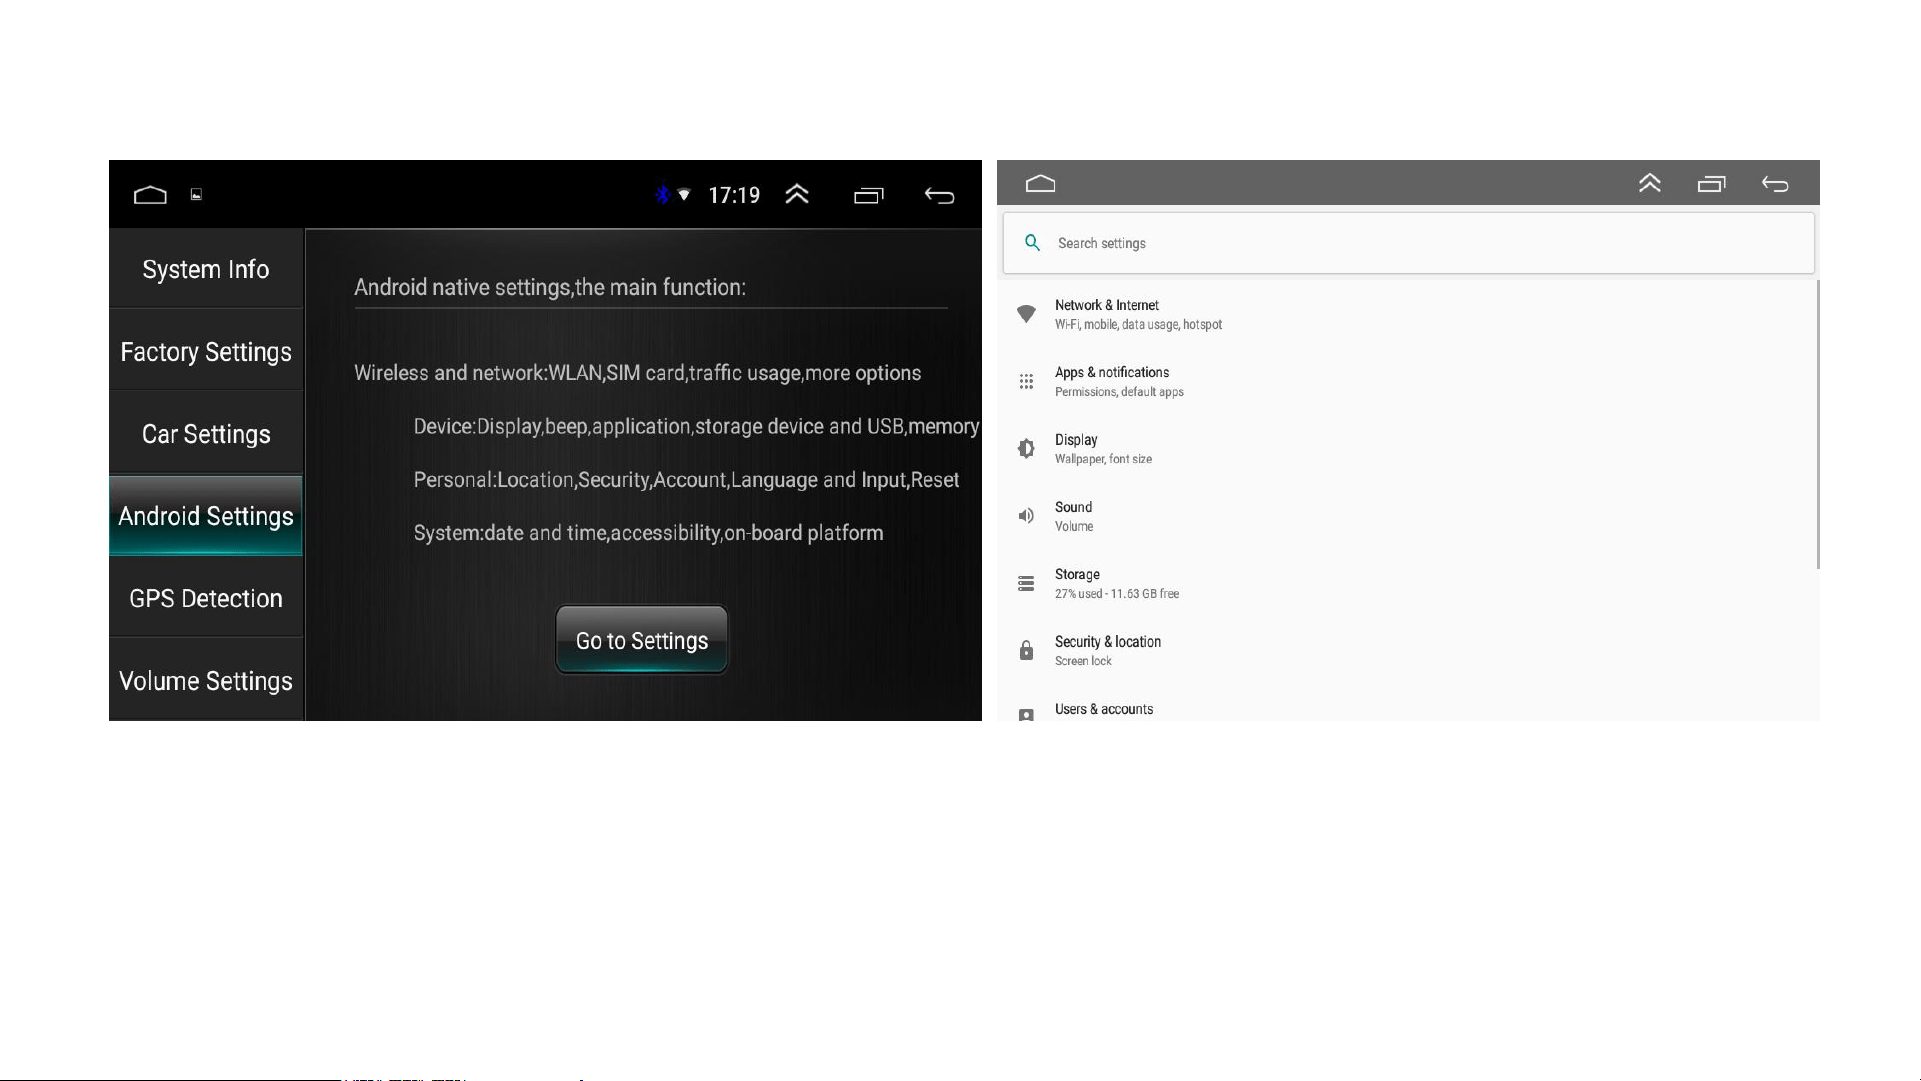
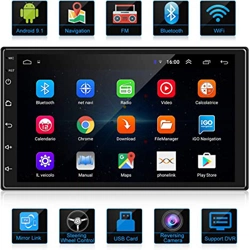
Android Settings
Android Settings:
G o t o s e tti n g s f o r “L a n g u a g e / D aTe & Ti m e / WiF i / . . . ”
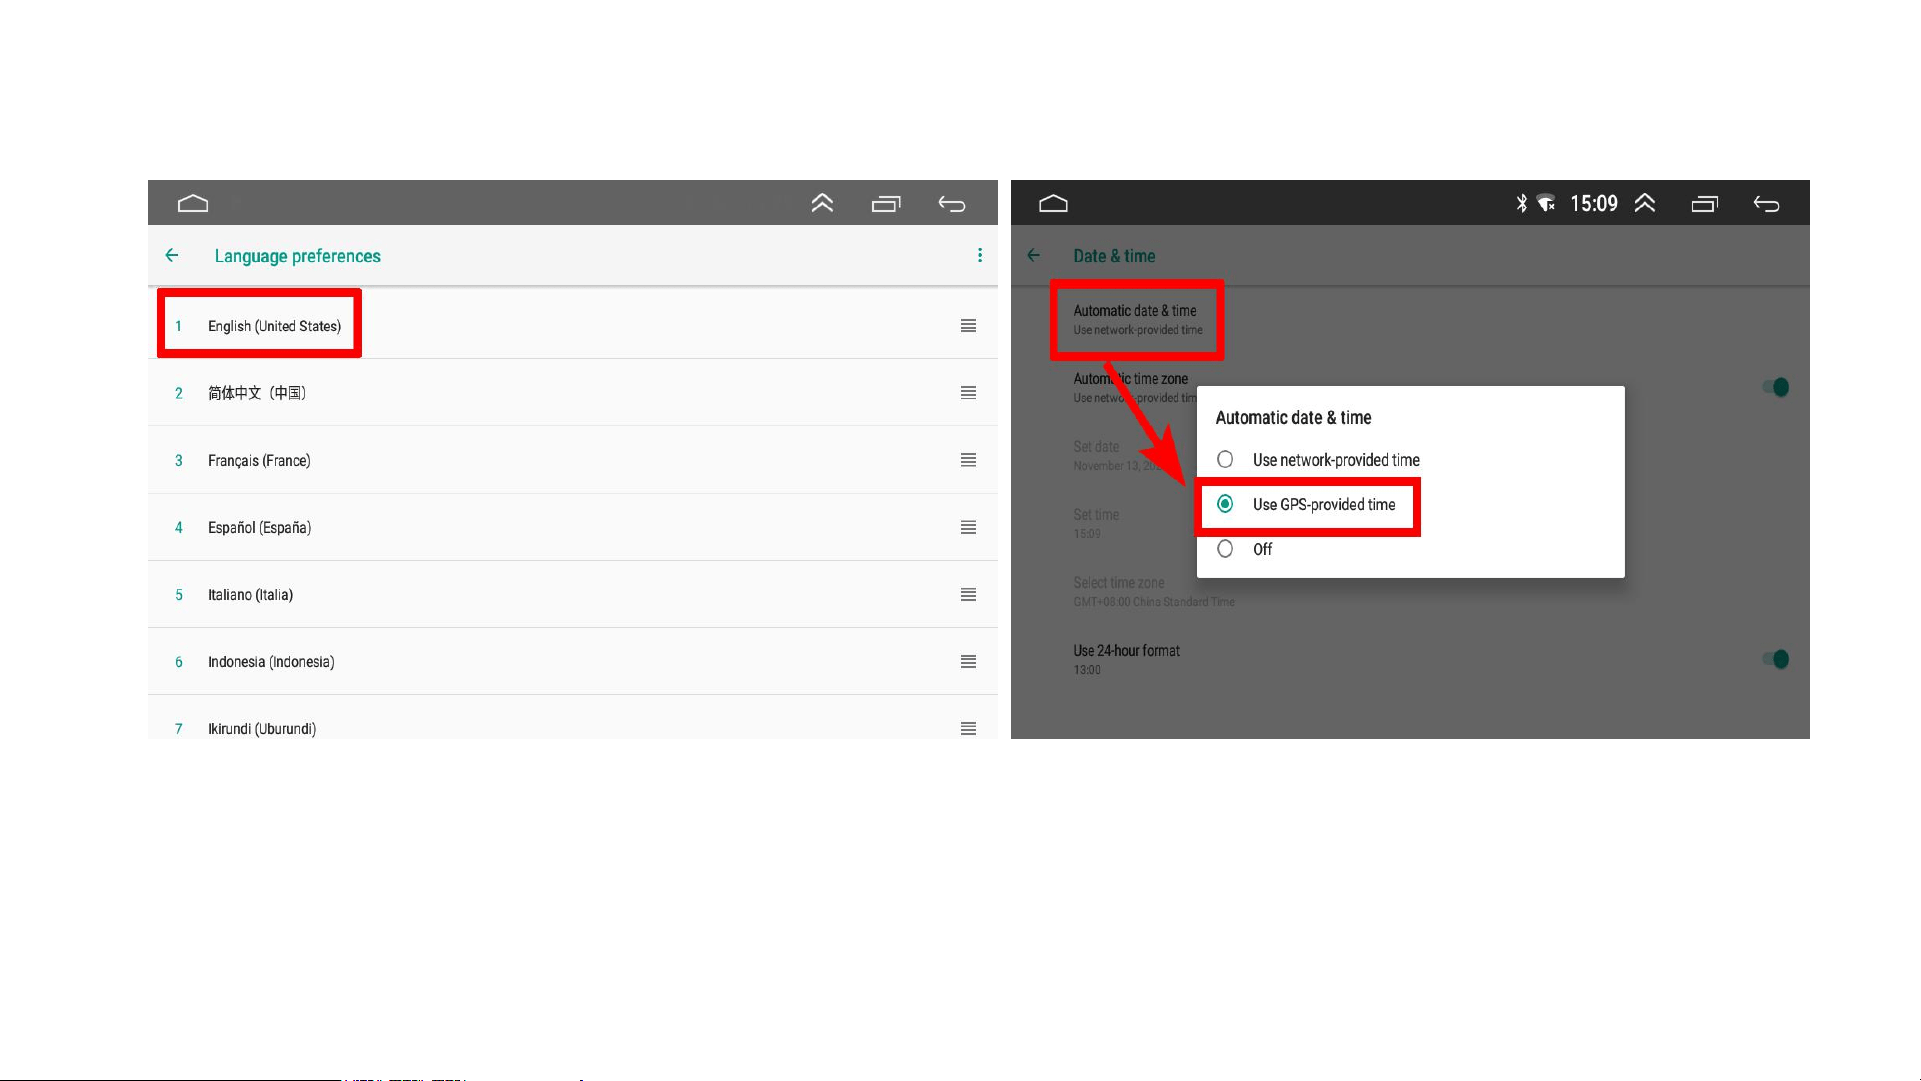
Language and Time Settings
Language Settings
• Step-1, press and hold the language
option you need.
• Step-2, drag it to the top.
Time Setting
• Choose GPS-provided time
SWC Settings / Learning / Correction
● SWC Debugging:
● Step 1: Click "Settings" to find the
"Steering Learn" for the SWC
system.
● Step 2: Press the control button
on your car's steering wheel and
don't let go, then click the
corresponding control button on
the screen to complete the
debugging. Then debug the next
button.
● Step 3: After you finish debugging
all the keys, your steering wheel
controls will work.
Tips:
Just select one of the cables "KEY1" and
"KEY2" to connect to the SWC (Select a
compatible cable). You need to connect the
two cables if you have two SWC.
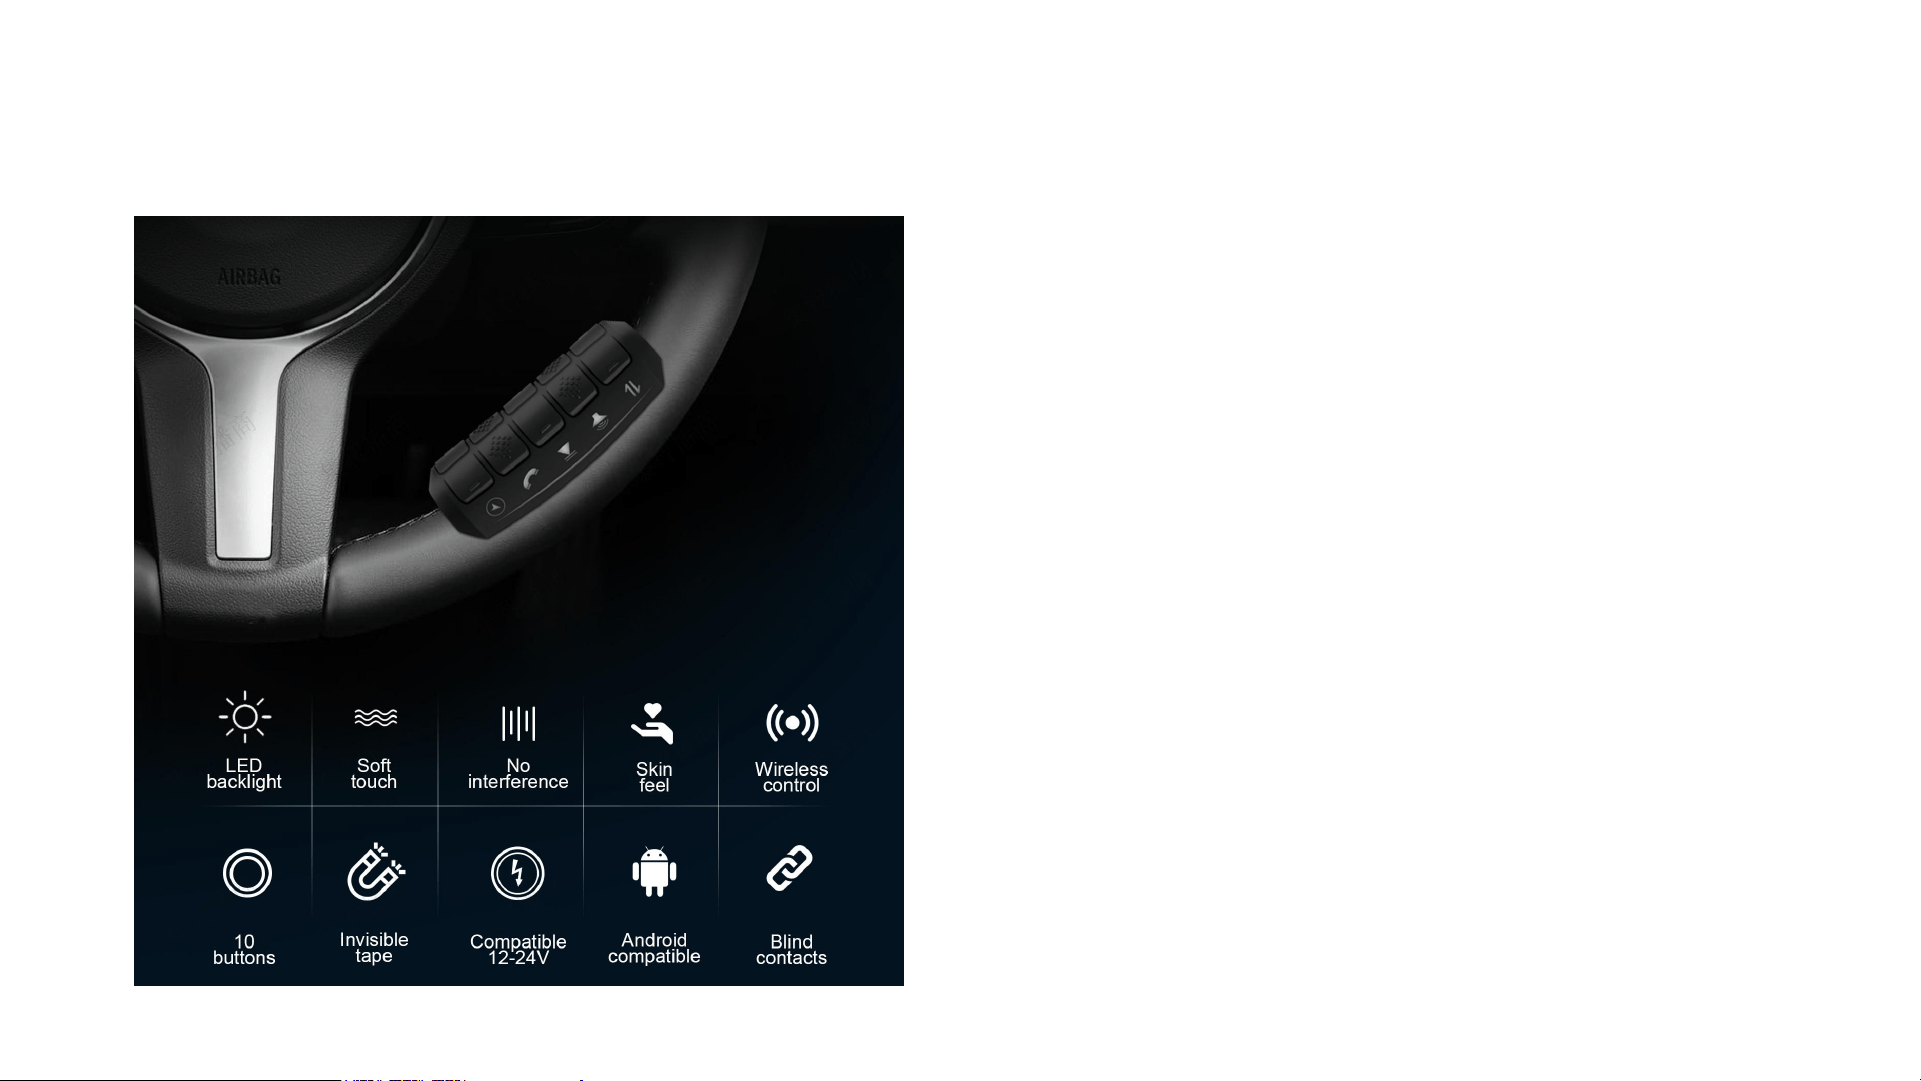
ANKEWAY External Steering Wheel Control
• ANKEWAY (ANKEWAYUK) Store sells
an external Steering Wheel Control
that is perfectly compatible with
Android radio.
• We recommend you to buy it and fix it
on the steering wheel.
• Connect the "KEY1" and "KEY2"
cables of the external steering wheel
control to the "KEY1" and "KEY2" of
the radio.
• The red cable is connected to the
"ACC" of the radio, and the black
cable is connected to the "GND" of the
radio.

Easy Connection for Mirror-link
• Download and
install App "Easy
Connection" for
Android phones
(Google Play).
• iPhone does not
need to install this
App.
How to Connect and Use
(for Android Phone)
Step-1, Install Google Assistant for
voice command.
Step-2, Connect the radio and
mobile phone via USB (or WiFi) to
play video.
Step-3, Connect the radio and
mobile phone via Bluetooth to play
audio.
Step-4, Click App "Easy
Connection" on the phone and
radio.
Step-5, Follow the App operation
prompt to complete Mirror-link.
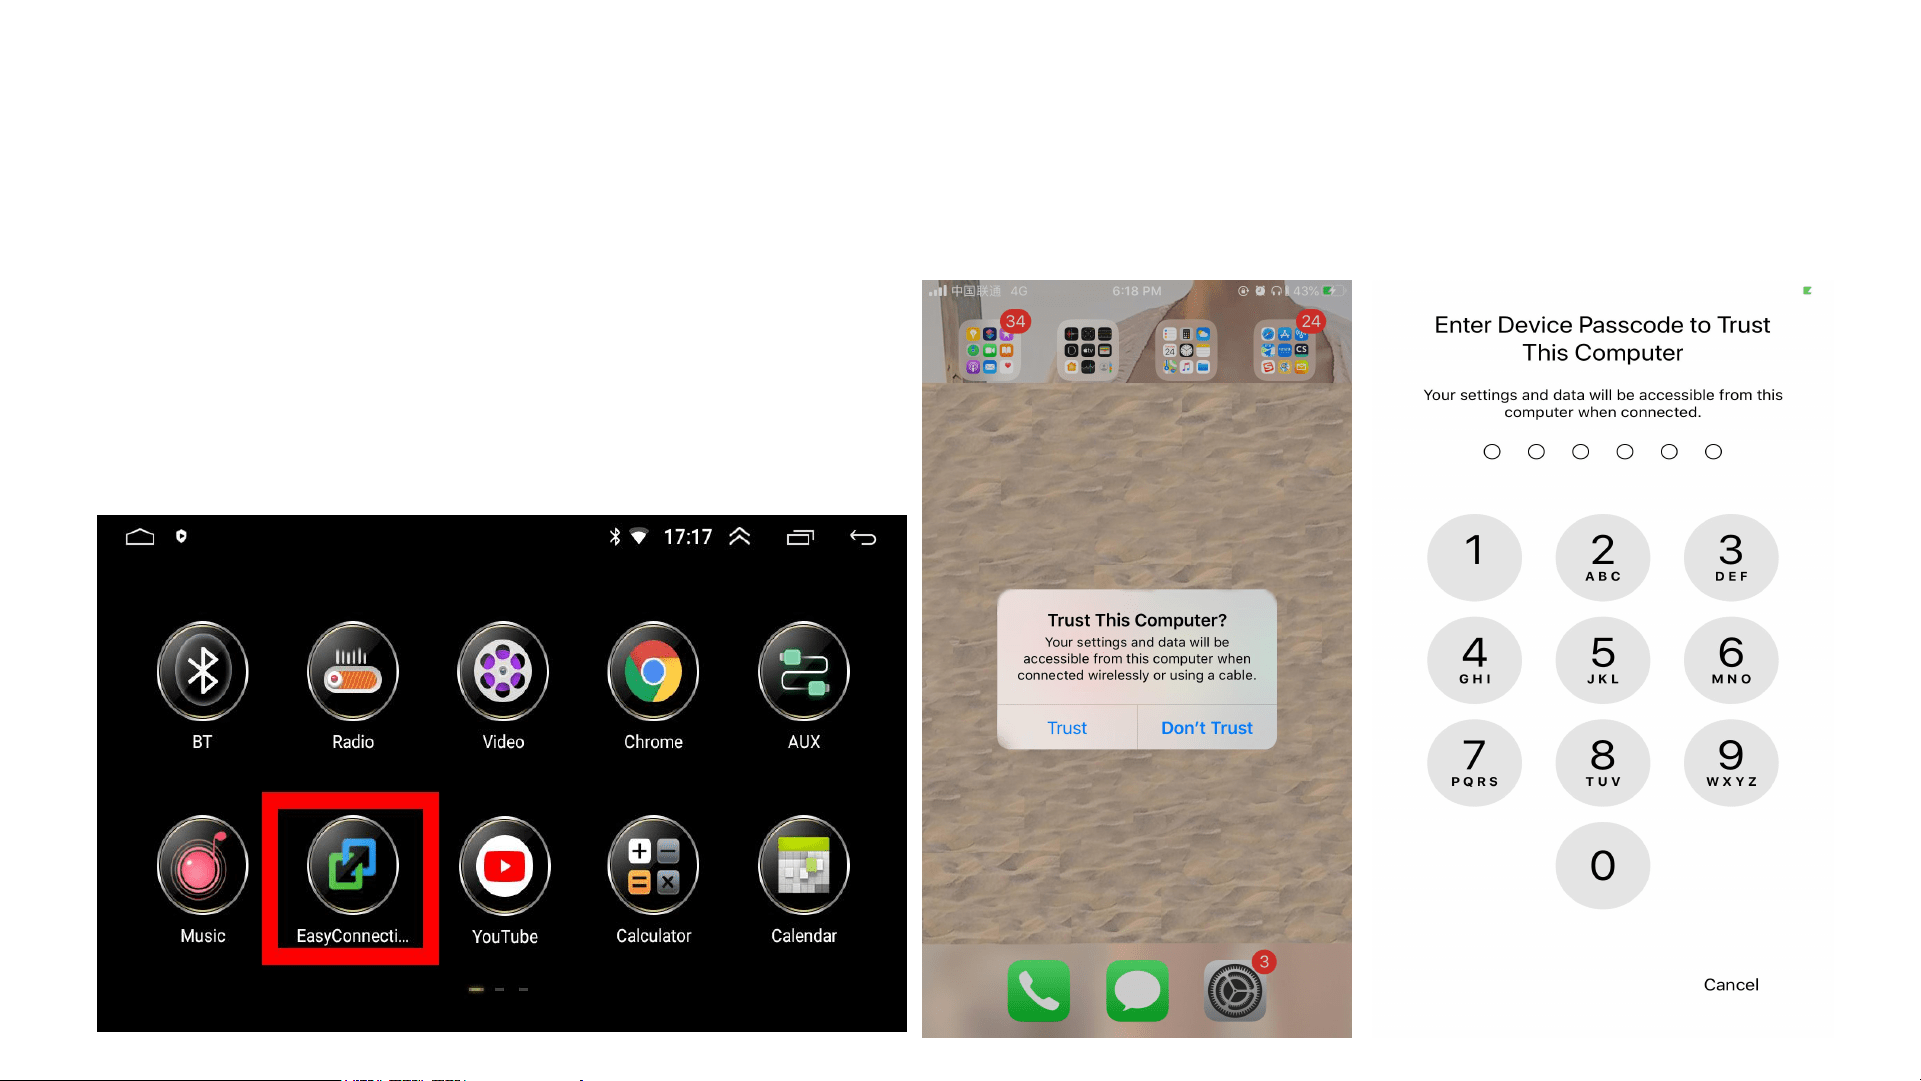
Step-1, Connect the radio and mobile
phone via USB (or WiFi).
Step-2, Click App "Easy Connection"
on the radio.
Step-3, Follow the operation prompt to
complete Mirror-link.
How to Connect and Use (for iPhone)
Trust
Enter the Screen Password
A
C
B
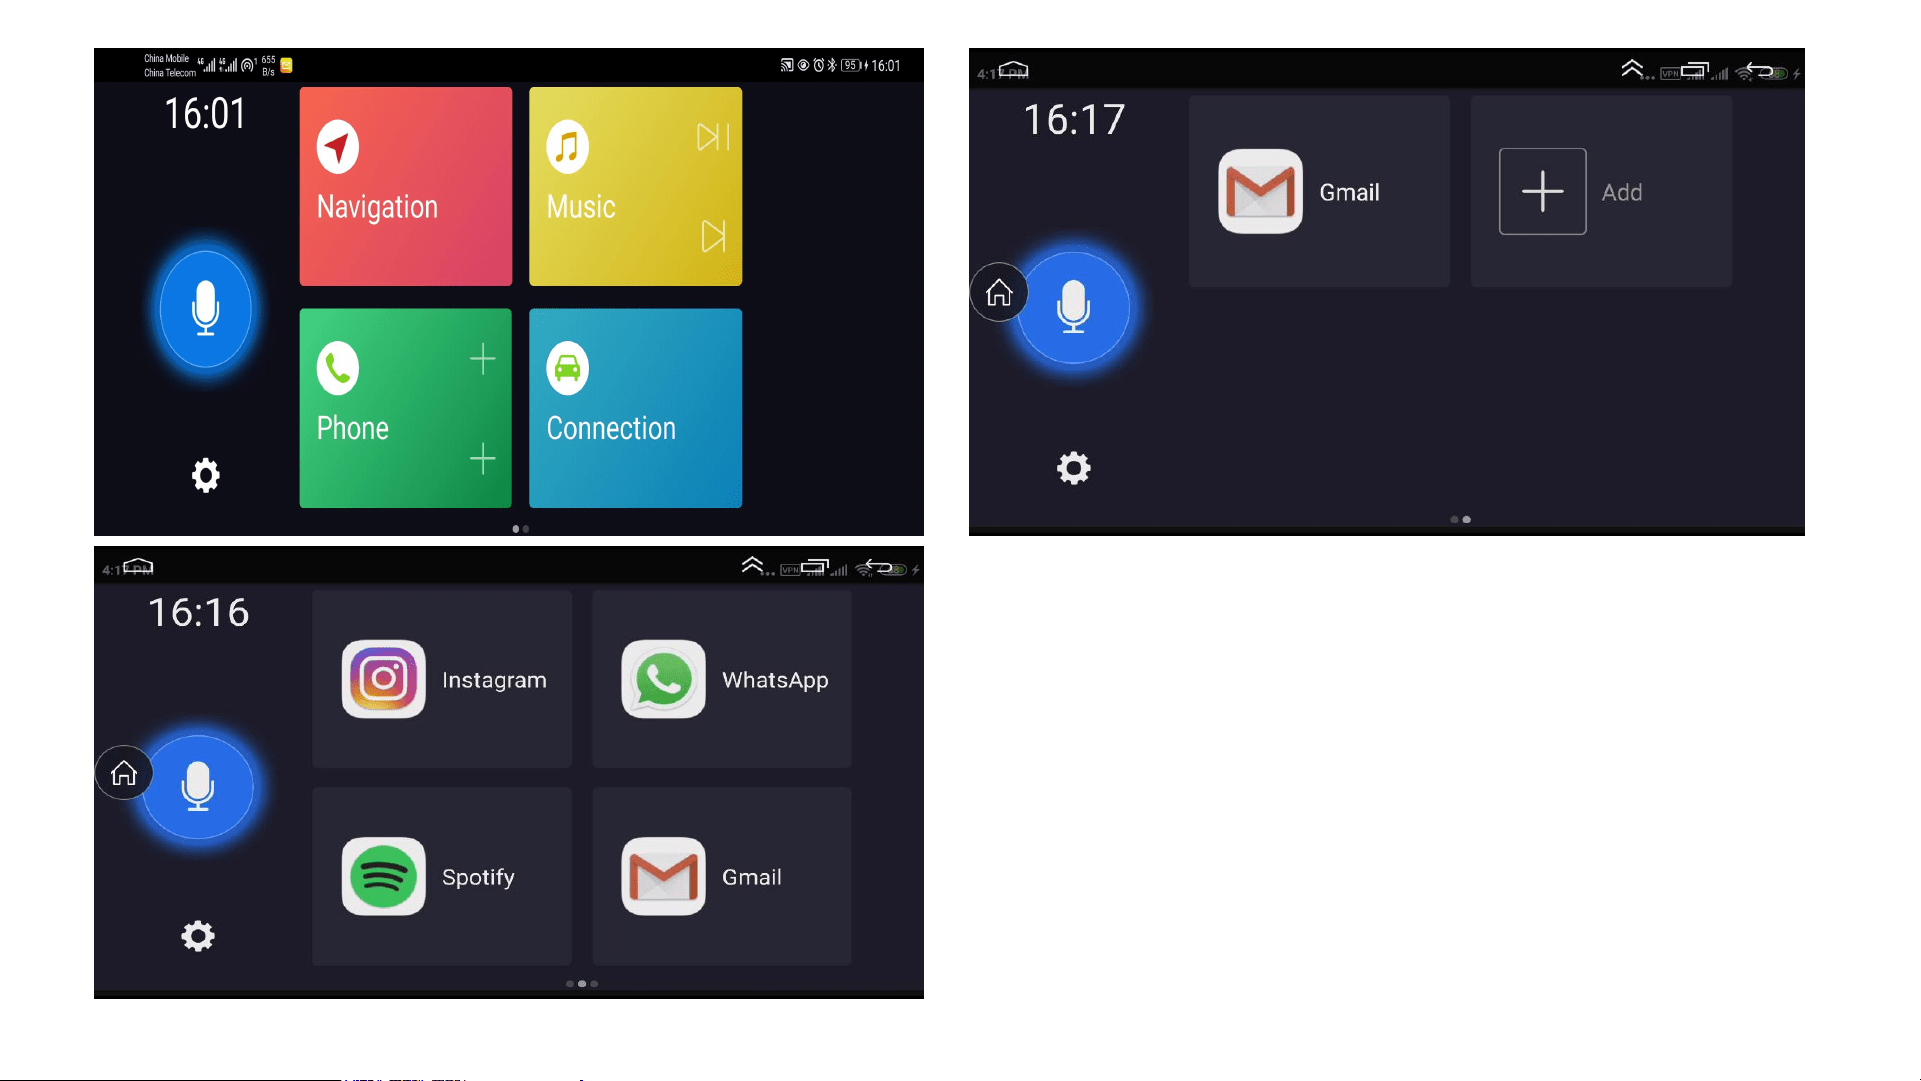
Add App
• Step-1, Swipe the screen "A" from
right to left to enter the next page.
• Step-2, Touch the "Add +" in the
screen "B" to add the App you need.
• Step-3, Place 4 apps on each page.
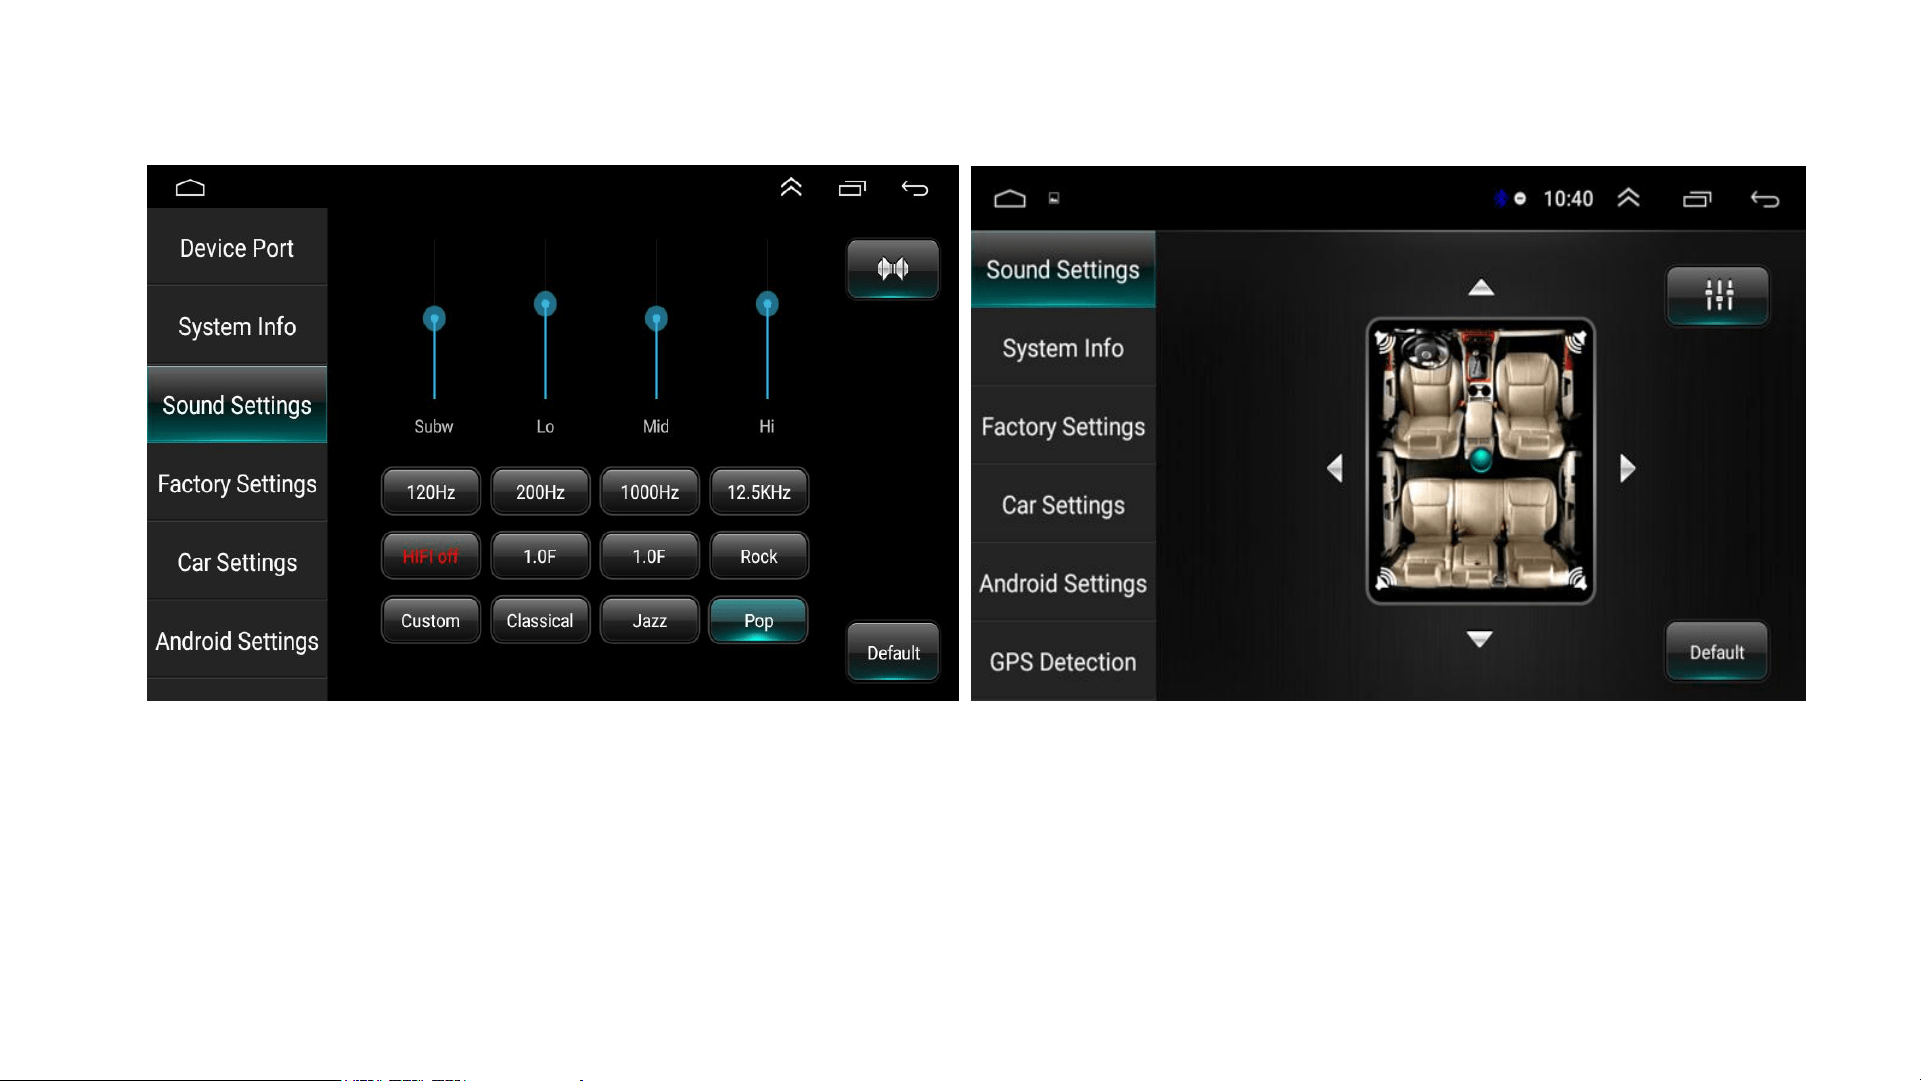
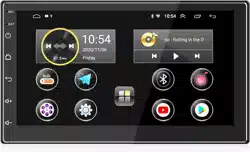
EQ & Speakers Settings
• EQ: HiFi / Pop / Jazz / Rock / Classic / Custom
• Speakers Settings: Custom / Default
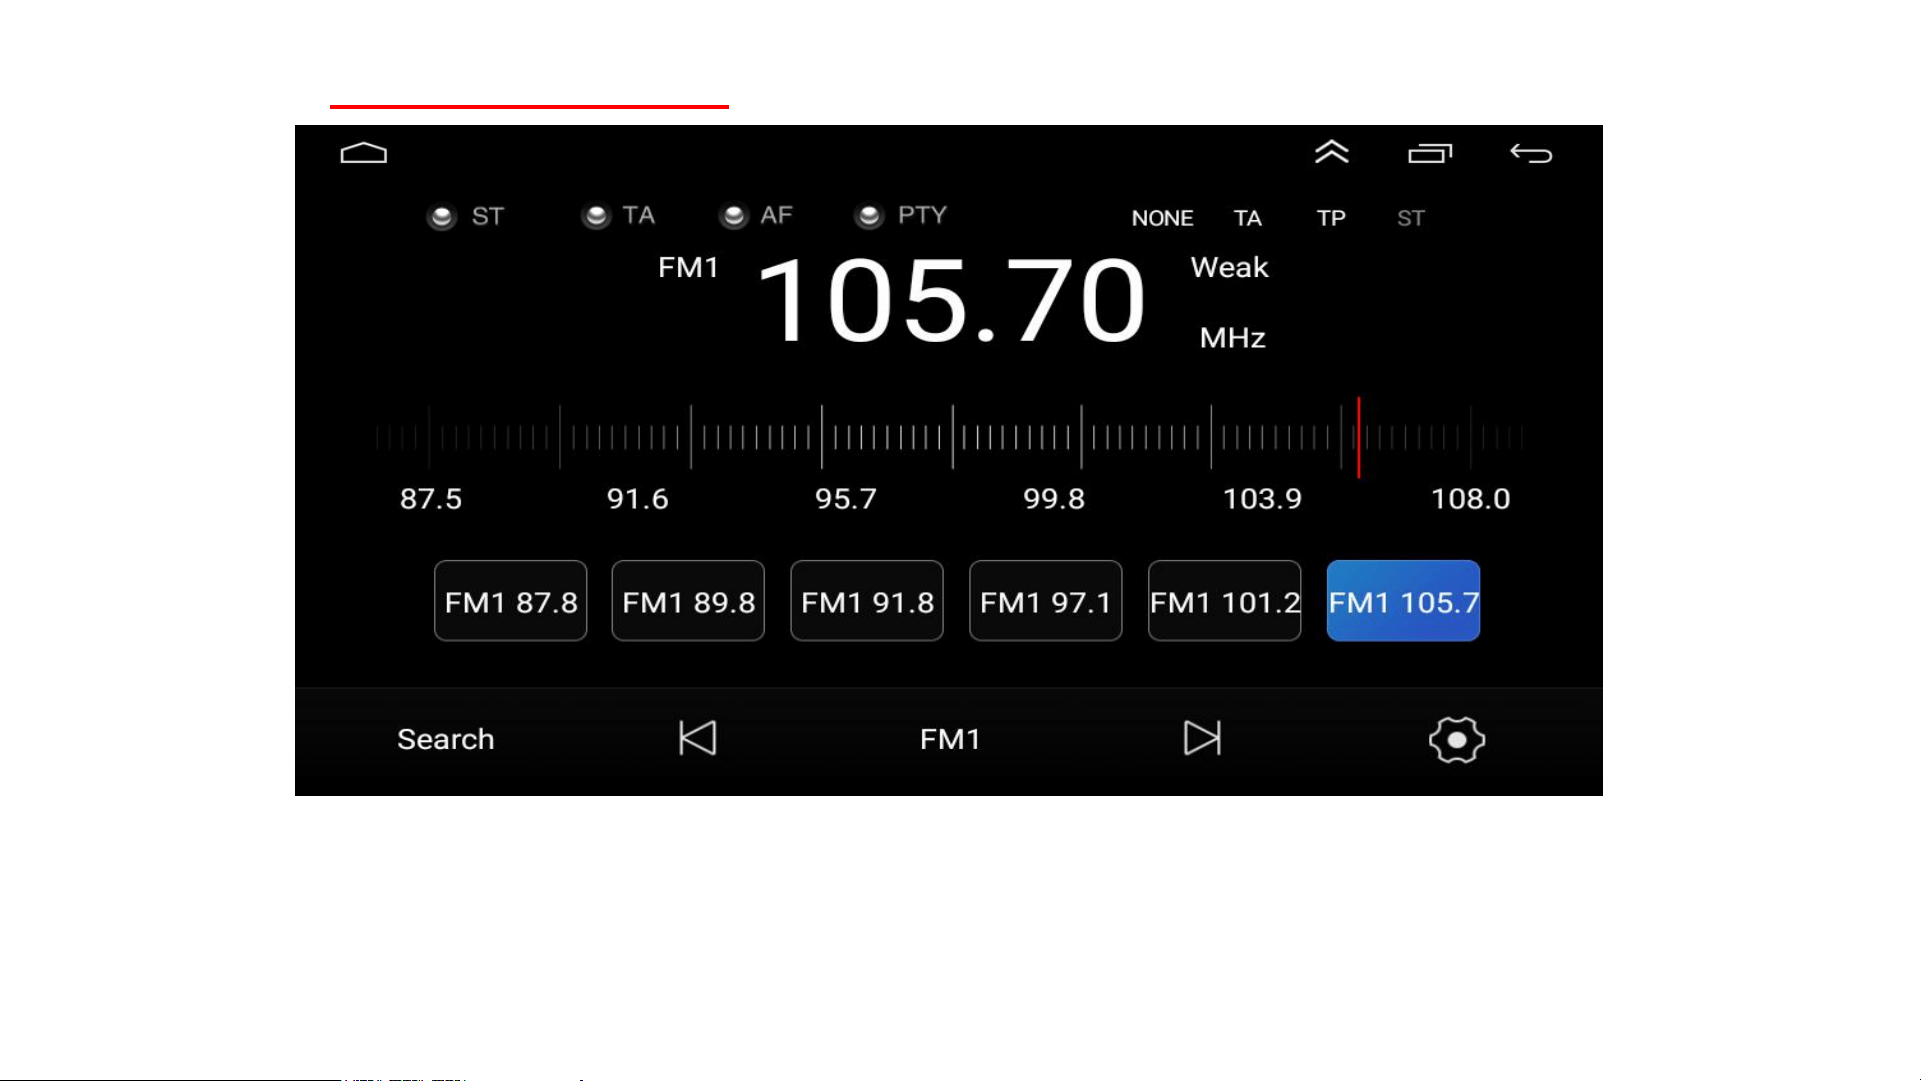
RDS+FM Android Car Radio
RDS / FM
• Stable signal, great sound quality, more radio channels.
• It can also broadcast traffic conditions, weather, etc. in real-time.
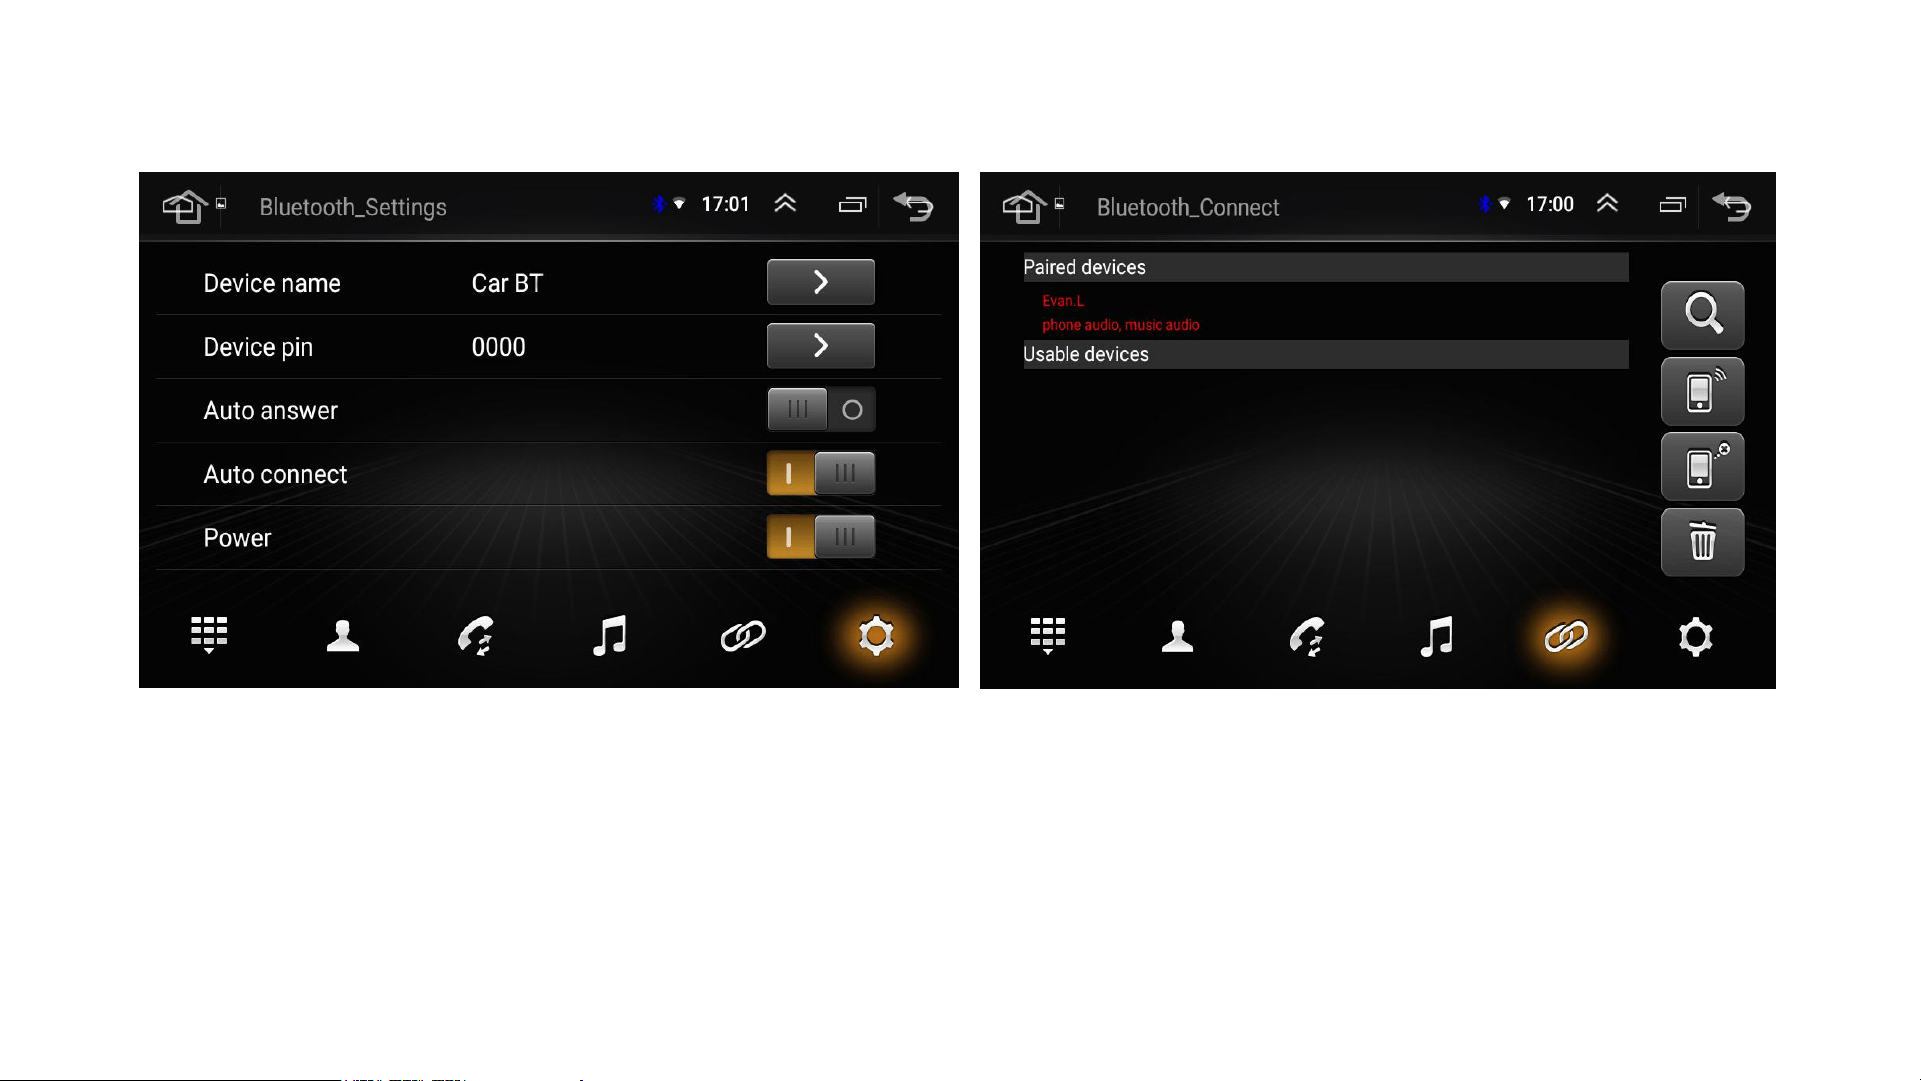
How to Connect Bluetooth
• Radio Bluetooth Name: Car BT
• BT connection Pin: 0000
• Touch the "Search" button to find
connectable devices
• Connected: "Red" phone name
• Failed: "Blue" phone name
Bluetooth for Hands-Free Calls & Music
• Dialer
• Phone Book
• Call History
• Bluetooth Wireless Music
• MP3 / WAV / WMA
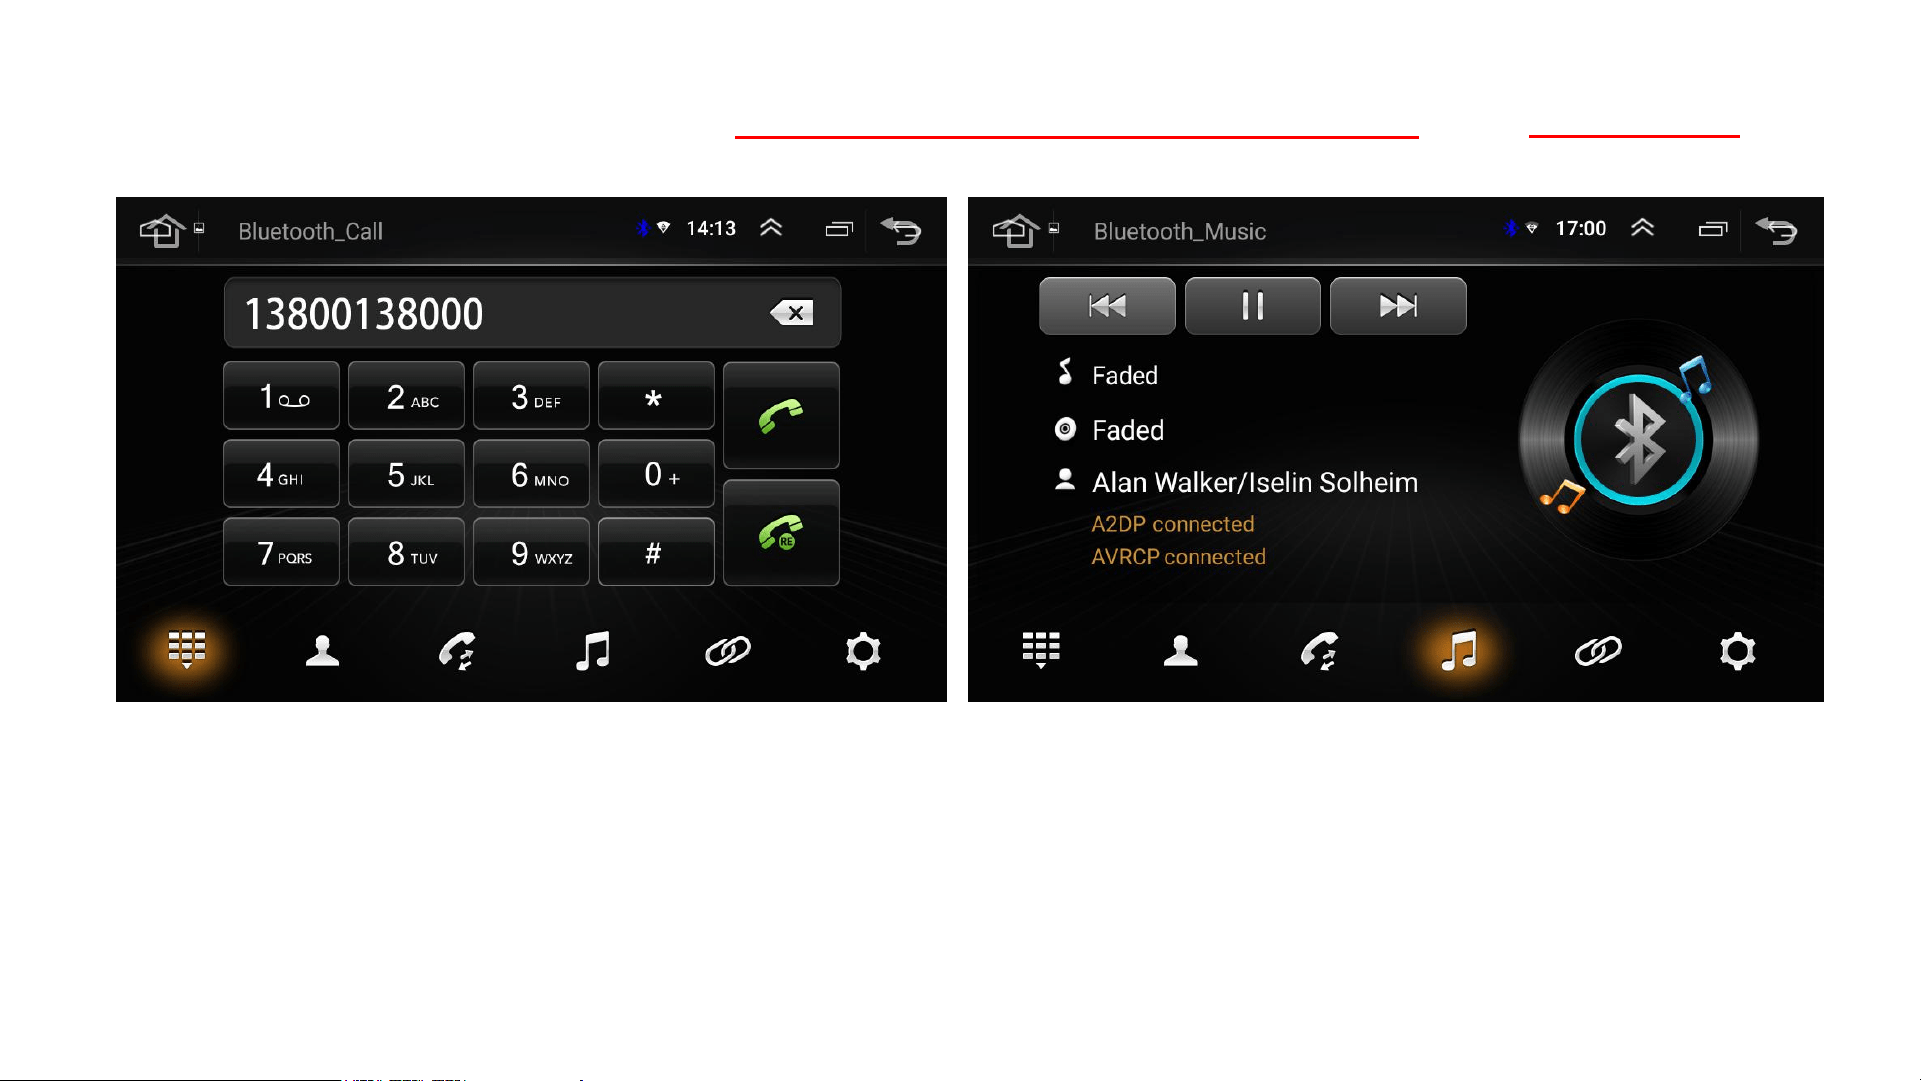
U-Disk / Local Music & Video
• U-Disk / Local Music
• MP3 /WMA
• U-Disk / Local Video
• MP4 / AVI...
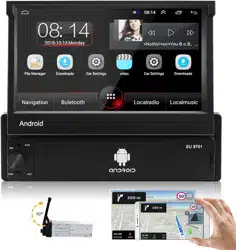
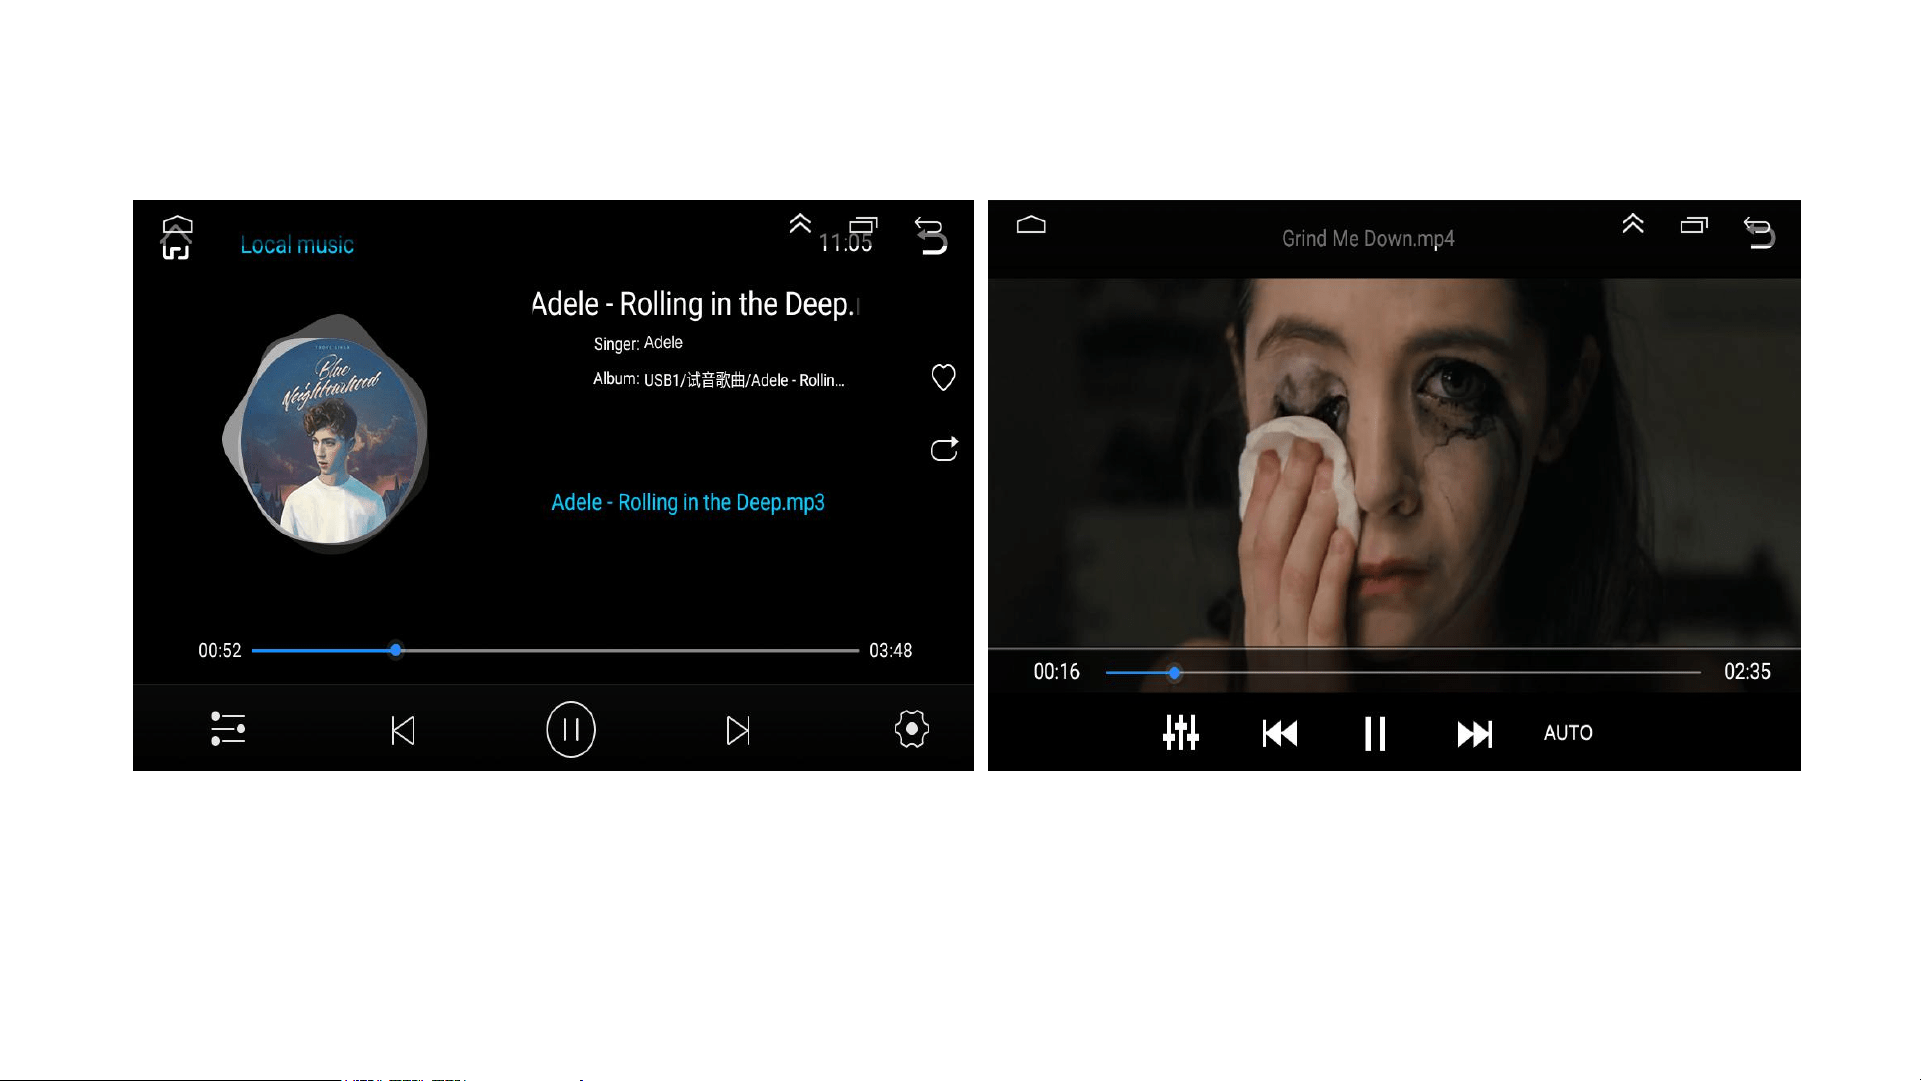
GPS Navigation
• HERE WeGo
• Google Maps
• "HERE WeGo" App
• Download the Map Data of
Your Country
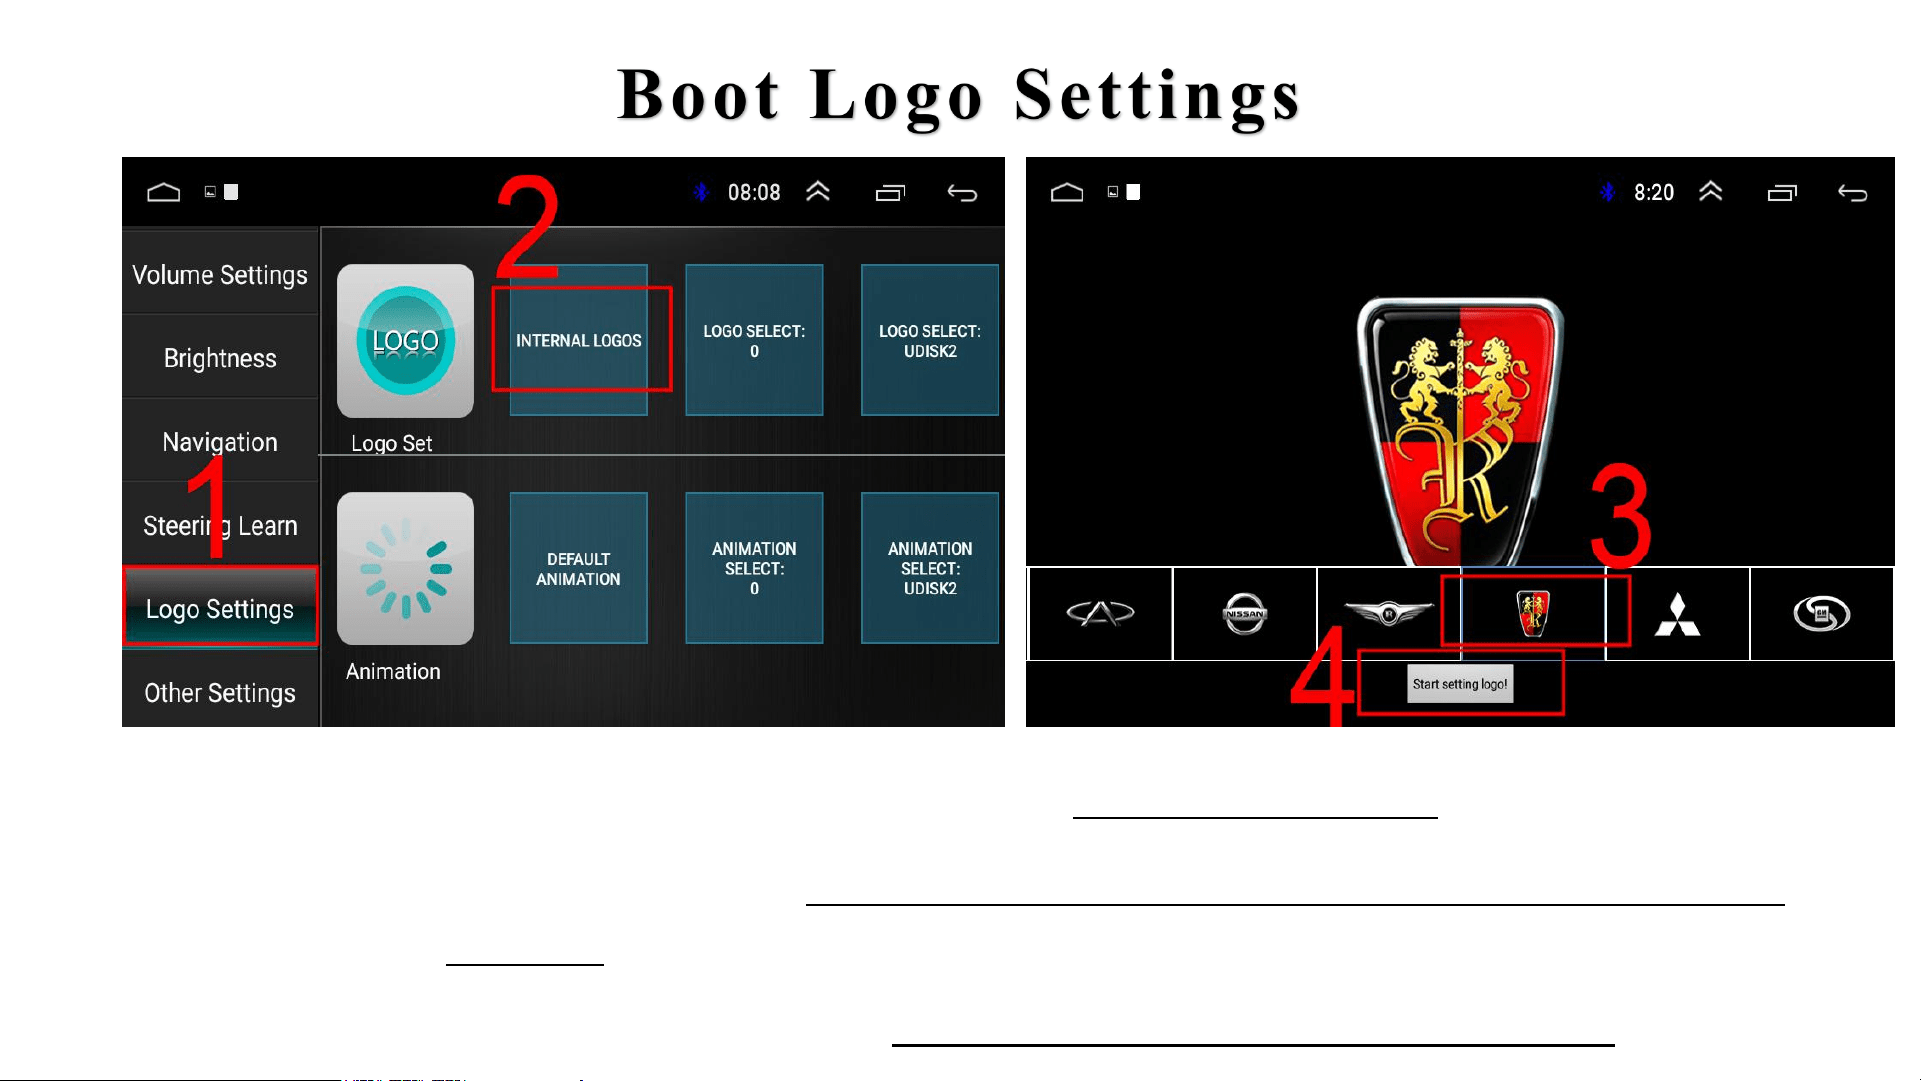
• Steps for Logo Settings : Click 1, 2, 3, 4.
• DIY Settings:Import the LOGO picture via USB storage for
setting.
● (Pics Format: "BMP"/1024*600).
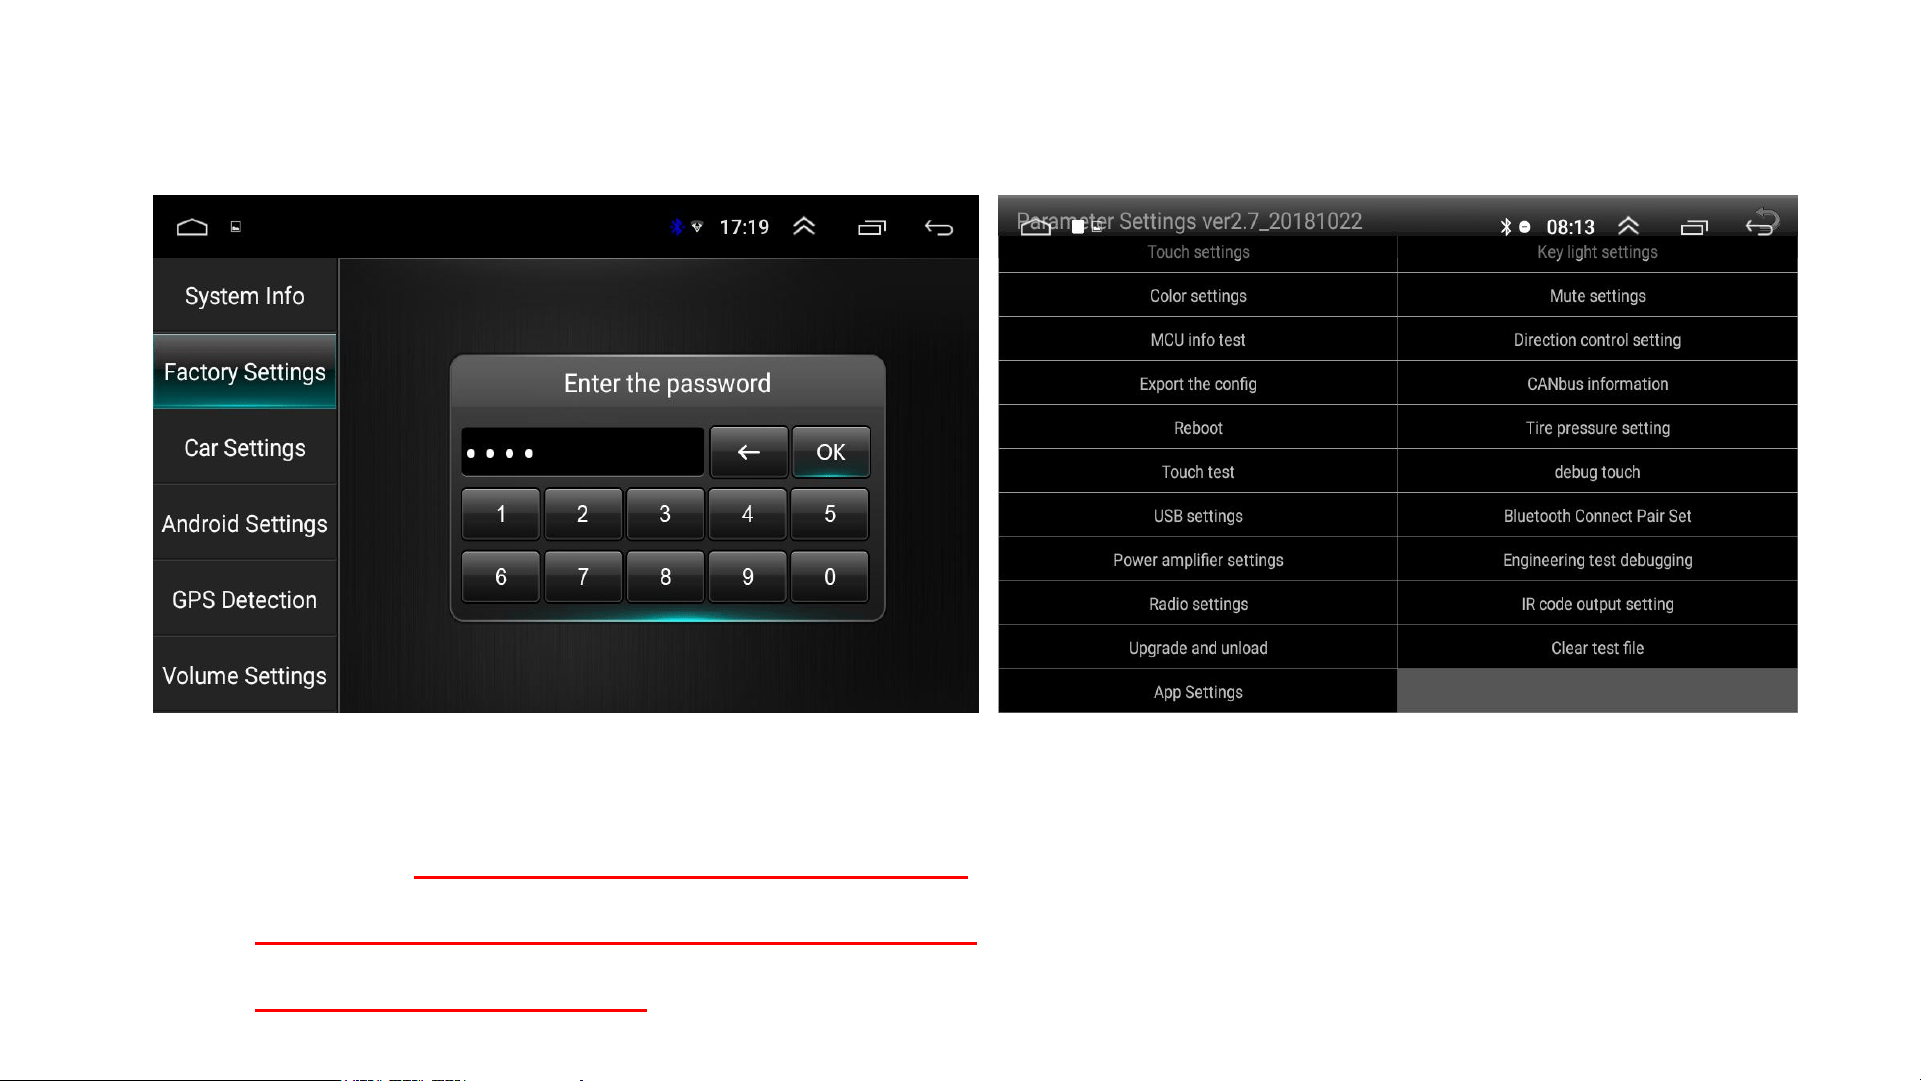
Factory Settings
• Password: 8888
• Tips:It is not recommended
to restore the factory settings
if not necessary
• Software Settings
• Hardware Settings
Instructions for use
EXPEX
Instructions for use
EXPEX