Home
Bookmarks
Home
Karcher
Karcher 1.012-910.0 User Manual
Page 74
Karcher 1.012-910.0 VCN 3 Cordless
Operating instructions - Page 74
For 1.012-910.0.
PDF File Manual
,
76 pages
,
Read Online
|
Download pdf file
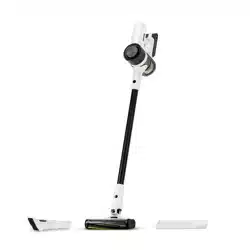
VCN Cordless Stick Vacuum Cleaners
Contents
Safety Instructions
Hazard Levels
Important Safety Instructions
Charger
Intended Use
Owner/User Responsibility
Improper Use
Environmental Protection
Customer Service
Registration
Warranty
USA Customer Service
Canada Customer Service
Mexico Customer Service
Scope of Delivery
Box Contents
Packing List
Connecting and Operating Elements
Assembly
Battery Pack Install and Removal
1. Hold the battery pack and insert it along the guide groove. After hearing a “click”, make sure that the battery pack is tight, secure, and locked into place.
2. To remove the battery pack, press the battery pack release button and pull the battery pack in the opposite direction. (Besides replacing the battery pack, the battery pack does not need to be removed from the machine.)
Disassembly and Assembly of Connector tube
1. Align the button end of the connector tube and insert it into the port of the hand held vacuum cleaner. After it clicks into place, make sure that the connector tube is tight and secure.
2. To remove the connector tube, press the release button on the connector tube (as shown in the figure). Then pull the connector tube out of the vacuum cleaner.
Disassembly and Assembly of Roller head
1. Align the upper connector of the roller head with the end of the connector tube (without button) and insert it into the port of the tube. After it clicks into place, make sure that the roller head is tight and secure.
2. If you want to remove the roller head, press the release button on the roller head (as shown in the figure) and pull the roller head out of the tube.
Wall Mounting Storage Installation
1. Put the assembled hand-held vacuum cleaner into the mount and stand the hand-held vacuum cleaner upright, near the ground. The height should be high enough so that the roller head of the assembled vacuum cleaner does not touch the ground.
2. Once the correct height for the mount is determined, holding the mount in place, remove the hand-held vacuum cleaner, mark the hole placement in the center of the mount, place the screw, and tighten it until snug against the wall.
3. After the center screw is installed, make sure the mount is level and then mark the lower hole, place screw, and tighten until snug against the wall.
Using the Mounting storage
1. While holding the connector tube of the vacuum, lift the machine up. With the bottom of the dust bin facing the wall, place the connector tube into the mount, and gently rest the top of the machine onto the mount.
2. When you are ready use the machine, take the machine out of the mount by grabbing the connector tube with your hand and lifting the machine up.
Accessory Installation
Upholstery Brush
1. Connect the hand-held vacuum cleaner to the upholstery brush.
2. Align the upholstery brush connector and insert it into the port of the hand- held vacuum cleaner. After it clicks into place, make sure that the upholstery brush is tight and secure. If you want to remove the upholstery brush, just press the rele...
Crevice Nozzle and Dusting brush 2 in 1
1. To connect the hand-held vacuum cleaner to the crevice nozzle or the two-in-one brush attachment: Align the circular port of the crevice nozzle or the two-in-one brush attachment with the suction port of the hand-held vacuum cleaner, and then inse...
2. To connect the hand-held vacuum cleaner to the crevice nozzle or the two-in-one brush attachment with the conductive metal tube: Align the circular port of either the crevice nozzle or the two-in-one brush attachment. Insert the attachment into th...
Pet Accessories (Flexible Hose, Upholstery Tool, and Brush for pet)
Accessory Storage
Charging the Machine VCN 3
Operation
1. Insert the adapter into the charging port of the battery pack and connect it to the AC power source to charge.
2. When the battery pack is inserted into the hand-held vacuum cleaner to charge, the hand-held vacuum cleaner indicator light displays as follows: when the red light is flashing, it is charging; when the light turns green, it is fully charged. The b...
VCN 4 & VCN 5
1. When the battery pack is inserted into the hand-held vacuum cleaner for charging, the display screen of the hand-held vacuum cleaner shows the current power and “Charging” on the display during charging.
2. The battery pack can also be removed from the hand-held vacuum cleaner for charging. When charging, the power indicator light on the battery pack displays as follows: when the red light is flashing, it is charging; when the light turns green, it i...
Initial Start-Up VCN 3
1. Pull the on/off trigger to turn the machine on. The power indicator light will display steady green. The default speed once powered on is ECO mode; press the speed control button (MAX) to switch to MEDIUM mode, press the speed control button (MAX)...
2. Pressing the speed control button alternates speeds based on the ECO-MEDIUM-MAX pattern.
3. Finally, pull the on/off trigger to turn the machine off.
Initial Start-Up VCN 4& 5
1. Pull the on/off trigger to turn the machine on. The power indicator light will display steady green. The default speed once powered on is ECO mode; press the speed control button to switch to MEDIUM mode, press the speed control button again to sw...
2. Pull the on/off trigger button to turn the machine off.
Using the Roller head
Using the Crevice Nozzle and Dusting brush 2 in 1
Using the Pet Accessories (Flexible hose, Upholstery Tool, and Brush for pet)
Upholstery Brush
Cleaning and Maintenance
Maintenance Notifications VCN 4 & 5
1. Replace the filter - please replace the HEPA filter with a new filter from an authorized dealer.
2. Clean the brush - please remove and clean the brush. Refer to the “Cleaning, Changing, or Replacing the Roller Brush Assembly” section in this manual.
3. Air dust blocked - please check the connector tube, vacuum suction port, and dust cup for any blockages. Remove them accordingly.
4. Battery Overheating - The battery of the machine is overheating. Turn off the device immediately.
1. Press the release button for the dust bin to open the bottom cover and empty the dust.
Cleaning the filter system
1. Rotate the cyclone cone assembly by hand to separate it from the hand- held vacuum cleaner for cleaning.
Cleaning the HEPA Filter Assembly
1. Rotate the HEPA filter decorative cover by hand, counter clockwise as shown in the figure in order to remove the HEPA filter assembly from the hand-held vacuum cleaner.
2. Rotate the HEPA air filter in the direction shown in the figure in order to separate the HEPA filter decorative cover from the HEPA filter assembly.
Cleaning, Changing, or Replacing the Roller Brush Assembly
1. To remove the roller brush, Toggle the lock button in the direction of the arrow, and the end cap of the roller brush will pop out automatically.
2. Lift off the end cap of the roller brush, this will allow the roller brush to be taken out of the groove for cleaning.
3. After cleaning or replacing (or for VCN 4 and VCN 5, changing to other roller types), you can install the roller brush assembly in the reverse order of disassembly and press the end cover of the roller brush. When you hear a “click” sound, the...
Daily Maintenance
Technical Data
Troubleshooting
Warranty Information
Warranty Information
Cleaning the Dust Bin
9.808-379.0 VC-PD516 OPERATORS MANUAL - FR.pdf
Aspirateurs-balais sans fil VCN
Contenu
Instructions de sécurité
Niveaux de danger
Consignes de sécurité Importantes
Chargeur
Utilisation prévue
Responsabilité du propriétaire/utilisateur
Utilisation inappropriée
Protection de l’environnment
clientèle
Inscription
Garantie
Service à la clientèle du USA
Service à la clientèle du Canada
Service à la clientèle du Mexique
Étendue de la livraison
Contenu de la boîte
Liste de colisage
Montage
Installation et retrait du bloc-piles et retrait
1. Tenez le bloc-piles et insérez-le long de la rainure de guidage. Après avoir entendu un “clic”, assurez-vous que la batterie est bien serré, sécurisé et verrouillé en place.
2. Pour retirer le bloc-piles, appuyez sur le bouton de libération du bloc-piles et tirez le bloc de piles dans la direction opposée. (Outre le remplacement de la batterie, il n'est pas nécessaire de la n'a pas besoin d'être retiré de la machine).
Démontage et montage du tube connecteur
1. Alignez l'extrémité du bouton du tube connecteur et insérez-le dans le de l'aspirateur à main. Une fois qu'il s'est mis en place, assurez-vous que le tube connecteur est bien serré et bien fixé.
2. Pour retirer le tube connecteur, appuyez sur le bouton de libération sur le tube connecteur (comme indiqué sur la figure). Puis tirez le tube connecteur hors de l'aspirateur.
Démontage et montage de la tête de rouleau
1. Aligner le connecteur supérieur de la tête de rouleau avec l'extrémité du tube connecteur (sans bouton) et insérez-le dans l'orifice du tube. Une fois qu'il s'est enclenché en place, assurez-vous que la tête de rouleau est bien serrée et s...
2. Si vous voulez retirer la tête de rouleau, appuyez sur le bouton de déverrouillage de la tête de rouleau (comme indiqué sur la figure) et tirez la tête de rouleau hors du tube.
Rangement mural Installation
1. Placez l'aspirateur à main assemblé dans le support et mettez l'aspirateur à main debout, près du sol. La hauteur doit être suffisante pour que la tête de rouleau de l'aspirateur assemblé ne touche pas le sol.
2. Une fois que la hauteur correcte du support a été déterminée, en maintenant le support en place, retirez l'aspirateur à main, marquez l'emplacement du trou au centre du support, placez la vis et serrez-la jusqu'à ce qu'elle soit bien serrée...
3. Une fois la vis centrale installée, assurez-vous que le support est de niveau, puis marquez le trou inférieur, placez la vis et serrez-la bien contre le mur.
Utilisation du Stockage de montage
1. Tout en tenant le tube connecteur de l'aspirateur, soulevez la machine. Le fond du bac à poussière étant orienté vers le mur, placez le tube connecteur dans le support, puis posez délicatement le haut de la machine sur le support. la machine ...
2. Lorsque vous êtes prêt à utiliser la machine, sortez-la du support en saisissant le tube connecteur avec votre main et en soulevant la machine. machine vers le haut.
Installation des accessoires
Brosse à tapisserie
1. Connectez l'aspirateur à main à la brosse à tapisserie.
2. Alignez le connecteur de la brosse à tapisserie et insérez-le dans le port de l'aspirateur à main. Une fois qu'elle s'est mise en place, assurez- vous que la brosse à tapisserie est bien fixée. Si vous souhaitez retirer la brosse d'ameublemen...
Suceur plat et brosse à épousseter 2 en 1
1. Pour connecter l'aspirateur à main l'aspirateur à main au suceur plat ou à l'accessoire brosse deux en un: Alignez l'orifice circulaire du suceur plat ou de l'accessoire brosse deux en un avec l'orifice d'aspiration de l'aspirateur à main, pui...
2. Pour connecter l'aspirateur à main l'aspirateur à main au suceur plat ou à l'accessoire brosse deux en un avec le tube métallique conducteur: Alignez l'orifice circulaire du suceur plat ou de l'accessoire brosse deux en un. Insérez l'accessoi...
Accessoires pour animaux de compagnie (tuyau extensible, outil de rembourrage et brosse pour animaux de compagnie)
1. Insérez l'extrémité ronde du tuyau extensible dans le port de l'aspirateur à main. Notez que le tuyau extensible doit être utilisé pour connecter l'accessoire pour tissus d'ameublement ou la brosse pour animaux de compagnie.
2. Pour utiliser l'outil de rembourrage, insérez son connecteur de forme ovale dans le port de forme ovale du tuyau extensible.
3. Pour utiliser la brosse pour animaux de compagnie, insérez son connecteur de forme ovale dans le port de forme ovale du tuyau extensible.
Rangement des accessoires
Chargement de la machine VCN 3
Opération
1. Insérez l'adaptateur dans le port de charge de la batterie et connectez-le à la source d'alimentation CA pour le charger.
2. Lorsque le bloc-piles est inséré dans l'aspirateur à main pour le charger, le témoin lumineux de l'aspirateur à main s'affiche comme suit: lorsque le voyant rouge clignote, il est en charge; lorsque le voyant devient vert, il est complètemen...
Chargement des machines VCN 4 y VCN 5
1. Lorsque le bloc de batteries est inséré dans l'aspirateur à main pour être rechargé, l'écran de l'aspirateur à main affiche la puissance actuelle et “Charging” sur l'écran pendant la charge.
2. La batterie peut également être retirée de l'aspirateur à main pour être rechargée. Lors de la charge, le voyant d'alimentation de la batterie s'affiche comme suit : lorsque le voyant rouge clignote, il est en charge; lorsque le voyant devie...
Démarrage initial VCN 3
1. Tirez sur la gâchette marche/arrêt pour mettre la machine en marche. Le témoin d'alimentation s'affiche en vert fixe. La vitesse par défaut, une fois l'appareil allumé, est le mode ECO; appuyez sur le bouton de contrôle de la vitesse (MAX) p...
2. En appuyant sur le bouton de contrôle de la vitesse permet d'alterner les vitesses en fonction du ECO-MEDIUM-MAX.
3. Enfin, appuyez sur la gâchette marche/arrêt pour éteindre la machine.
Démarrage initial VCN 4 y 5
1. Tirez sur la gâchette marche/arrêt pour mettre la machine en marche. Le témoin lumineux d'aspiration s'affiche en vert fixe. La vitesse par défaut, une fois l'appareil sous tension, est le mode ECO ; appuyez sur le bouton de contrôle de la vi...
2. Appuyez sur le bouton de déclenchement marche/arrêt pour mettre la machine à l'arrêt.
Utilisation de la tête de rouleau
Utilisation des accessoires pour animaux de compagnie (tuyau flexible, outil de rembourrage et brosse pour animal de compagnie)
Utilisation de la tête de rouleau
Nettoyage et entretien
Notifications de maintenance VCN 4 & 5
1. Remplacer le filtre - veuillez remplacer le filtre HEPA par un nouveau filtre provenant d'un revendeur agréé.
2. Nettoyer la brosse - veuillez retirer et nettoyer la brosse. Reportez-vous à la section “Nettoyage, changement ou remplacement de l'ensemble de brosse à rouleau” dans ce manuel.
3. La poussière d'air est bloquée - veuillez vérifier que le tube de connexion, l'orifice d'aspiration de l'aspirateur et la ventouse ne sont pas bloqués. Retirez-les en conséquence.
4. Surchauffe de la batterie - La batterie de la machine est en surchauffe. Éteignez l'appareil immédiatement
Nettoyage du bac à poussière
1. Appuyez sur le bouton de déverrouillage du bac à poussière poussière pour ouvrir le couvercle inférieur et vider la poussière.
Nettoyage du système de filtration
1. Faites pivoter l'assemblage du cône du cyclone dans le sens inverse des aiguilles d'une montre à la main pour le séparer de l'aspirateur à main pour le nettoyage.
de l'appareil
1. Faites tourner le couvercle décoratif du filtre HEPA à la main, dans le sens inverse des aiguilles d'une montre, comme indiqué sur la figure, afin de retirer l'ensemble du filtre HEPA de l'aspirateur à main.
2. Faites tourner le filtre à air HEPA dans le sens indiqué sur la figure afin de séparer le couvercle décoratif du filtre HEPA de l'ensemble du filtre HEPA.
Nettoyage, changement ou remplacement de l'ensemble de brosse à rouleau
1. Pour retirer la brosse à rouleau, tournez le bouton de verrouillage dans le sens de la flèche et le capuchon de la brosse à rouleau se détache automatiquement.
2. Soulevez le capuchon à l'extrémité de la brosse du rouleau, ce qui permettra de retirer la brosse du rouleau de la rainure pour la nettoyer.
3. Après nettoyage ou remplacement (ou pour VCN 4 et VCN 5, passage à d'autres types de rouleaux), vous pouvez installer l'ensemble de la brosse à rouleau dans l'ordre inverse du démontage et appuyer sur le capuchon d'extrémité de la brosse à ...
Entretien quotidien
Données techniques
Dépannage
Informations De Garantie
Informations De Garantie
9.808-379.0 VC-PD516 OPERATORS MANUAL - SP.pdf
Aspiradoras inalámbricas VCN
Contenido
Instrucciones de seguridad
Niveles de peligro
Instrucciones de seguridad importantes
Carga
Uso previsto
Responsabilidad del propietario/usuario
Uso inapropiado
Protección del medioambiente
Servicio al cliente
Registro
Garantía
Atención al cliente de EE. UU.
Atención al cliente de Canadá
Atención al cliente de México
Alcance de la entrega
Contenido de la caja
Lista de empaque
Conexión y elementos operativos
Ensamblaje
Montaje y desmontaje de la batería
1. Sujete la batería e insértela a lo largo de la ranura guía. Después de escuchar un “clic”, asegúrese de que la batería esté bien apretada, segura y bloqueada en su lugar.
2. Para extraer la batería, pulse el botón de liberación de la batería y tire de ella en la dirección opuesta. (Además de sustituir la batería, no es necesario extraerla de la máquina).
Desmontaje y montaje del tubo conector
1. Alinee el extremo del botón del tubo conector e introdúzcalo en la aspiradora de mano. Una vez colocado, asegúrese de que el tubo conector esté bien apretado y sujeto.
2. Para retirar el tubo conector, pulse el botón de liberación del tubo conector (como se muestra en la figura). A continuación, extraiga el tubo conector de la aspiradora.
Desmontaje y montaje del Cabezal de rodillo
1. Alinee el conector superior del cabezal de rodillo con el extremo del tubo conector (sin botón) e introdúzcalo en el orificio del tubo. Una vez encajado en su sitio, asegúrese de que el cabezal de rodillo esté bien apretado y sujeto.
2. Si desea extraer el cabezal, pulse el botón de liberación del cabezal de rodillo (como se muestra en la figura) y tire del cabezal de rodillo para sacarlo del tubo.
Instalación del soporte de pared
1. Coloque la aspiradora de mano montada en el soporte en posición vertical cerca del suelo. La altura debe ser suficiente para que el cepillo de la aspiradora montada no toque el suelo.
2. Una vez determinada la altura correcta del soporte, sujetando el soporte en su sitio, retire la aspiradora de mano, marque la ubicación del orificio en el centro del soporte, coloque el tornillo y apriételo hasta que quede apretado contra la pared.
3. Una vez instalado el tornillo central, asegúrese de que el soporte esté nivelado, luego marque el orificio inferior, coloque el tornillo y apriételo contra la pared.
Uso del soporte de pared
1. Mientras sujeta el tubo conector de la aspiradora, levántela. Con la parte inferior del contenedor de polvo orientada hacia la pared, coloque el tubo conector en el soporte y, a continuación, coloque con cuidado la parte superior de la máquina ...
2. Cuando esté listo para utilizar la máquina, sáquela del soporte agarrando el tubo conector con la mano y levantando la máquina hacia arriba.
Instalación de accesorios
Cepillo para tapicerías
1. Conecte el aspirador de mano al cepillo para tapicerías.
2. Alinee el conector del cepillo para tapicerías e introdúzcalo en el puerto de la aspiradora de mano. Una vez colocado, asegúrese de que el cepillo para tapicerías está bien sujeto. Si desea extraer el cepillo para tapicerías, simplemente pul...
Herramienta para grietas, cepillo para polvo 2 en 1
1. Para conectar la aspiradora de mano a la herramienta para grietas o al accesorio de cepillo 2 en 1: Alinee el orificio circular en el accesorio para rincones o al accesorio de cepillo 2 en 1 con el orificio de succión en la aspiradora de mano, lu...
2. Para conectar la aspiradora de mano a la herramienta para grietas o al accesorio de cepillo 2 en 1 con el tubo conector: Alinee el orificio circular de la herramienta para grietas o al accesorio de cepillo 2 en 1. Inserte el accesorio en el orific...
Accesorios para mascotas (manguera flexible, herramienta para tapicería y cepillo para mascotas)
Almacenamiento de accesorios
Carga de la máquina VCN 3
Operación
1. Inserte el adaptador en el puerto de carga de la batería y conéctelo a la red eléctrica para cargarla.
2. Cuando la batería se introduce en el aspirador de mano para cargarlo, la luz indicadora del aspirador de mano se muestra de la siguiente manera: cuando la luz roja parpadea, se está cargando; cuando la luz se vuelve verde, está completamente ca...
Carga de las máquinas VCN 4 y VCN 5
1. Cuando se introduce la batería en el aspirador de mano para cargarlo, la pantalla del aspirador de mano muestra la potencia actual y “Cargando” en la pantalla durante la carga.
2. La batería también puede extraerse del aspirador de mano para cargarla. Durante la carga, la luz indicadora de la batería parpadea de la siguiente manera: cuando la luz roja parpadea, la batería se está cargando; cuando la luz se vuelve verde...
Encendido inicial VCN 3
1. Apriete el gatillo de encendido/ apagado para arrancar la máquina. El indicador se iluminará en verde fijo. La velocidad por defecto, una vez encendida la máquina, es el modo ECO; pulse el botón de control de velocidad (MAX) para pasar al modo...
2. Pulsando el botón de control de velocidad se pueden alternar las velocidades según el ECO-MEDIUM- MAX.
3. Por último, pulse el gatillo de encendido/apagado para apagar la máquina.
Encendido inicial VCN 4 y VCN 5
1. Apriete el gatillo de encendido/ apagado para arrancar la máquina. El indicador de encendido se iluminará en verde. La velocidad por defecto, una vez encendida la máquina, es el modo ECO; pulse el botón de control de velocidad para cambiar al ...
2. Pulse el interruptor de encendido/ apagado para apagar la máquina.
Uso del Cabezal de rodillo
Uso del accesorio para grietas y el cepillo 2 en 1
Uso de los accesorios para mascotas (manguera flexible, herramienta para tapicería y cepillo para mascotas).
Utilización del cepillo para tapicería
Limpieza y
mantenimiento
Notificaciones de mantenimiento VCN 4 & VCN 5
1. Cambie el filtro - sustituya el filtro HEPA por uno nuevo de un distribuidor autorizado.
2. Limpiar el cepillo: desmonte y limpie el cepillo. Consulte la sección “Limpiar, cambiar o reemplazar el conjunto cepillo de rodillo” de este manual.
3. Conducto de aire obstruido - compruebe que el tubo de conexión, la boca de aspiración del aspirador y la ventosa no estén obstruidos. Retírelos en consecuencia.
4. Sobrecalentamiento de la batería - La batería de la máquina se está sobrecalentando. Apague la máquina inmediatamente.
Limpieza del contenedor de polvo
1. Pulse el botón de desbloqueo del depósito de polvo para abrir la tapa inferior y vaciar el polvo.
Limpieza del sistema de filtrado
1. Gire el conjunto del cono del ciclón con la mano en el sentido contrario a las agujas del reloj para separarlo de la aspiradora de mano para limpiarlo.
Limpieza del filtro HEPA
1. Gire la tapa decorativa del filtro HEPA con la mano, en sentido contrario a las agujas del reloj, como se muestra en la figura, para extraer el conjunto del filtro HEPA de la aspiradora de mano.
2. Gire el filtro de aire HEPA en la dirección indicada en la figura para separar la cubierta decorativa del filtro HEPA del conjunto del filtro HEPA.
Limpiar, cambiar o reemplazar el conjunto cepillo de rodillo
Mantenimiento diario
Datos técnicos
Solución de problemas
Información de garantía
Información de garantía
Blank Page
Blank Page
9.808-379.0 VC-PD516 OPERATORS MANUAL.pdf
VCN Cordless Stick Vacuum Cleaners
Contents
Safety Instructions
Hazard Levels
Important Safety Instructions
Charger
Intended Use
Owner/User Responsibility
Improper Use
Environmental Protection
Customer Service
Registration
Warranty
USA Customer Service
Canada Customer Service
Mexico Customer Service
Scope of Delivery
Box Contents
Packing List
Connecting and Operating Elements
Assembly
Battery Pack Install and Removal
1. Hold the battery pack and insert it along the guide groove. After hearing a “click”, make sure that the battery pack is tight, secure, and locked into place.
2. To remove the battery pack, press the battery pack release button and pull the battery pack in the opposite direction. (Besides replacing the battery pack, the battery pack does not need to be removed from the machine.)
Disassembly and Assembly of Connector tube
1. Align the button end of the connector tube and insert it into the port of the hand held vacuum cleaner. After it clicks into place, make sure that the connector tube is tight and secure.
2. To remove the connector tube, press the release button on the connector tube (as shown in the figure). Then pull the connector tube out of the vacuum cleaner.
Disassembly and Assembly of Roller head
1. Align the upper connector of the roller head with the end of the connector tube (without button) and insert it into the port of the tube. After it clicks into place, make sure that the roller head is tight and secure.
2. If you want to remove the roller head, press the release button on the roller head (as shown in the figure) and pull the roller head out of the tube.
Wall Mounting Storage Installation
1. Put the assembled hand-held vacuum cleaner into the mount and stand the hand-held vacuum cleaner upright, near the ground. The height should be high enough so that the roller head of the assembled vacuum cleaner does not touch the ground.
2. Once the correct height for the mount is determined, holding the mount in place, remove the hand-held vacuum cleaner, mark the hole placement in the center of the mount, place the screw, and tighten it until snug against the wall.
3. After the center screw is installed, make sure the mount is level and then mark the lower hole, place screw, and tighten until snug against the wall.
Using the Mounting storage
1. While holding the connector tube of the vacuum, lift the machine up. With the bottom of the dust bin facing the wall, place the connector tube into the mount, and gently rest the top of the machine onto the mount.
2. When you are ready use the machine, take the machine out of the mount by grabbing the connector tube with your hand and lifting the machine up.
Accessory Installation
Upholstery Brush
1. Connect the hand-held vacuum cleaner to the upholstery brush.
2. Align the upholstery brush connector and insert it into the port of the hand- held vacuum cleaner. After it clicks into place, make sure that the upholstery brush is tight and secure. If you want to remove the upholstery brush, just press the rele...
Crevice Nozzle and Dusting brush 2 in 1
1. To connect the hand-held vacuum cleaner to the crevice nozzle or the two-in-one brush attachment: Align the circular port of the crevice nozzle or the two-in-one brush attachment with the suction port of the hand-held vacuum cleaner, and then inse...
2. To connect the hand-held vacuum cleaner to the crevice nozzle or the two-in-one brush attachment with the conductive metal tube: Align the circular port of either the crevice nozzle or the two-in-one brush attachment. Insert the attachment into th...
Pet Accessories (Flexible Hose, Upholstery Tool, and Brush for pet)
Accessory Storage
Charging the Machine VCN 3
Operation
1. Insert the adapter into the charging port of the battery pack and connect it to the AC power source to charge.
2. When the battery pack is inserted into the hand-held vacuum cleaner to charge, the hand-held vacuum cleaner indicator light displays as follows: when the red light is flashing, it is charging; when the light turns green, it is fully charged. The b...
VCN 4 & VCN 5
1. When the battery pack is inserted into the hand-held vacuum cleaner for charging, the display screen of the hand-held vacuum cleaner shows the current power and “Charging” on the display during charging.
2. The battery pack can also be removed from the hand-held vacuum cleaner for charging. When charging, the power indicator light on the battery pack displays as follows: when the red light is flashing, it is charging; when the light turns green, it i...
Initial Start-Up VCN 3
1. Pull the on/off trigger to turn the machine on. The power indicator light will display steady green. The default speed once powered on is ECO mode; press the speed control button (MAX) to switch to MEDIUM mode, press the speed control button (MAX)...
2. Pressing the speed control button alternates speeds based on the ECO-MEDIUM-MAX pattern.
3. Finally, pull the on/off trigger to turn the machine off.
Initial Start-Up VCN 4& 5
1. Pull the on/off trigger to turn the machine on. The power indicator light will display steady green. The default speed once powered on is ECO mode; press the speed control button to switch to MEDIUM mode, press the speed control button again to sw...
2. Pull the on/off trigger button to turn the machine off.
Using the Roller head
Using the Crevice Nozzle and Dusting brush 2 in 1
Using the Pet Accessories (Flexible hose, Upholstery Tool, and Brush for pet)
Upholstery Brush
Cleaning and Maintenance
Maintenance Notifications VCN 4 & 5
1. Replace the filter - please replace the HEPA filter with a new filter from an authorized dealer.
2. Clean the brush - please remove and clean the brush. Refer to the “Cleaning, Changing, or Replacing the Roller Brush Assembly” section in this manual.
3. Air dust blocked - please check the connector tube, vacuum suction port, and dust cup for any blockages. Remove them accordingly.
4. Battery Overheating - The battery of the machine is overheating. Turn off the device immediately.
1. Press the release button for the dust bin to open the bottom cover and empty the dust.
Cleaning the filter system
1. Rotate the cyclone cone assembly counter clockwise by hand to separate it from the hand-held vacuum cleaner for cleaning.
Cleaning the HEPA Filter Assembly
1. Rotate the HEPA filter decorative cover by hand, counter clockwise as shown in the figure in order to remove the HEPA filter assembly from the hand-held vacuum cleaner.
2. Rotate the HEPA air filter in the direction shown in the figure in order to separate the HEPA filter decorative cover from the HEPA filter assembly.
Cleaning, Changing, or Replacing the Roller Brush Assembly
1. To remove the roller brush, Toggle the lock button in the direction of the arrow, and the end cap of the roller brush will pop out automatically.
2. Lift off the end cap of the roller brush, this will allow the roller brush to be taken out of the groove for cleaning.
3. After cleaning or replacing (or for VCN 4 and VCN 5, changing to other roller types), you can install the roller brush assembly in the reverse order of disassembly and press the end cover of the roller brush. When you hear a “click” sound, the...
Daily Maintenance
Technical Data
Troubleshooting
Warranty Information
Warranty Information
Cleaning the Dust Bin
9.808-379.0 VC-PD516 OPERATORS MANUAL.backup.pdf
VCN Cordless Stick Vacuum Cleaners
Contents
Safety Instructions
Hazard Levels
Important Safety Instructions
Charger
Intended Use
Owner/User Responsibility
Improper Use
Environmental Protection
Customer Service
Registration
Warranty
USA Customer Service
Canada Customer Service
Mexico Customer Service
Scope of Delivery
Box Contents
Packing List
Connecting and Operating Elements
Assembly
Battery Pack Install and Removal
1. Hold the battery pack and insert it along the guide groove. After hearing a “click”, make sure that the battery pack is tight, secure, and locked into place.
2. To remove the battery pack, press the battery pack release button and pull the battery pack in the opposite direction. (Besides replacing the battery pack, the battery pack does not need to be removed from the machine.)
Disassembly and Assembly of Connector tube
1. Align the button end of the connector tube and insert it into the port of the hand held vacuum cleaner. After it clicks into place, make sure that the connector tube is tight and secure.
2. To remove the connector tube, press the release button on the connector tube (as shown in the figure). Then pull the connector tube out of the vacuum cleaner.
Disassembly and Assembly of Roller head
1. Align the upper connector of the roller head with the end of the connector tube (without button) and insert it into the port of the tube. After it clicks into place, make sure that the roller head is tight and secure.
2. If you want to remove the roller head, press the release button on the roller head (as shown in the figure) and pull the roller head out of the tube.
Wall Mounting Storage Installation
1. Put the assembled hand-held vacuum cleaner into the mount and stand the hand-held vacuum cleaner upright, near the ground. The height should be high enough so that the roller head of the assembled vacuum cleaner does not touch the ground.
2. Once the correct height for the mount is determined, holding the mount in place, remove the hand-held vacuum cleaner, mark the hole placement in the center of the mount, place the screw, and tighten it until snug against the wall.
3. After the center screw is installed, make sure the mount is level and then mark the lower hole, place screw, and tighten until snug against the wall.
Using the Mounting storage
1. While holding the connector tube of the vacuum, lift the machine up. With the bottom of the dust bin facing the wall, place the connector tube into the mount, and gently rest the top of the machine onto the mount.
2. When you are ready use the machine, take the machine out of the mount by grabbing the connector tube with your hand and lifting the machine up.
Accessory Installation
Upholstery Brush
1. Connect the hand-held vacuum cleaner to the upholstery brush.
2. Align the upholstery brush connector and insert it into the port of the hand- held vacuum cleaner. After it clicks into place, make sure that the upholstery brush is tight and secure. If you want to remove the upholstery brush, just press the rele...
Crevice Nozzle and Dusting brush 2 in 1
1. To connect the hand-held vacuum cleaner to the crevice nozzle or the two-in-one brush attachment: Align the circular port of the crevice nozzle or the two-in-one brush attachment with the suction port of the hand-held vacuum cleaner, and then inse...
2. To connect the hand-held vacuum cleaner to the crevice nozzle or the two-in-one brush attachment with the conductive metal tube: Align the circular port of either the crevice nozzle or the two-in-one brush attachment. Insert the attachment into th...
Pet Accessories (Flexible Hose, Upholstery Tool, and Brush for pet)
Accessory Storage
Charging the Machine VCN 3
Operation
1. Insert the adapter into the charging port of the battery pack and connect it to the AC power source to charge.
2. When the battery pack is inserted into the hand-held vacuum cleaner to charge, the hand-held vacuum cleaner indicator light displays as follows: when the red light is flashing, it is charging; when the light turns green, it is fully charged. The b...
VCN 4 & VCN 5
1. When the battery pack is inserted into the hand-held vacuum cleaner for charging, the display screen of the hand-held vacuum cleaner shows the current power and “Charging” on the display during charging.
2. The battery pack can also be removed from the hand-held vacuum cleaner for charging. When charging, the power indicator light on the battery pack displays as follows: when the red light is flashing, it is charging; when the light turns green, it i...
Initial Start-Up VCN 3
1. Pull the on/off trigger to turn the machine on. The power indicator light will display steady green. The default speed once powered on is ECO mode; press the speed control button (MAX) to switch to MEDIUM mode, press the speed control button (MAX)...
2. Pressing the speed control button alternates speeds based on the ECO-MEDIUM-MAX pattern.
3. Finally, pull the on/off trigger to turn the machine off.
Initial Start-Up VCN 4& 5
1. Pull the on/off trigger to turn the machine on. The power indicator light will display steady green. The default speed once powered on is ECO mode; press the speed control button to switch to MEDIUM mode, press the speed control button again to sw...
2. Pull the on/off trigger button to turn the machine off.
Using the Roller head
Using the Crevice Nozzle and Dusting brush 2 in 1
Using the Pet Accessories (Flexible hose, Upholstery Tool, and Brush for pet)
Upholstery Brush
Cleaning and Maintenance
Maintenance Notifications VCN 4 & 5
1. Replace the filter - please replace the HEPA filter with a new filter from an authorized dealer.
2. Clean the brush - please remove and clean the brush. Refer to the “Cleaning, Changing, or Replacing the Roller Brush Assembly” section in this manual.
3. Air dust blocked - please check the connector tube, vacuum suction port, and dust cup for any blockages. Remove them accordingly.
4. Battery Overheating - The battery of the machine is overheating. Turn off the device immediately.
1. Press the release button for the dust bin to open the bottom cover and empty the dust.
Cleaning the filter system
1. Rotate the cyclone cone assembly counter clockwise by hand to separate it from the hand-held vacuum cleaner for cleaning.
Cleaning the HEPA Filter Assembly
1. Rotate the HEPA filter decorative cover by hand, counter clockwise as shown in the figure in order to remove the HEPA filter assembly from the hand-held vacuum cleaner.
2. Rotate the HEPA air filter in the direction shown in the figure in order to separate the HEPA filter decorative cover from the HEPA filter assembly.
Cleaning, Changing, or Replacing the Roller Brush Assembly
1. To remove the roller brush, Toggle the lock button in the direction of the arrow, and the end cap of the roller brush will pop out automatically.
2. Lift off the end cap of the roller brush, this will allow the roller brush to be taken out of the groove for cleaning.
3. After cleaning or replacing (or for VCN 4 and VCN 5, changing to other roller types), you can install the roller brush assembly in the reverse order of disassembly and press the end cover of the roller brush. When you hear a “click” sound, the...
Daily Maintenance
Technical Data
Troubleshooting
Warranty Information
Warranty Information
Cleaning the Dust Bin
Page 74/76
Page 1
Page 2
Page 3
Page 4
Page 5
Page 6
Page 7
Page 8
Page 9
Page 10
Page 11
Page 12
Page 13
Page 14
Page 15
Page 16
Page 17
Page 18
Page 19
Page 20
Page 21
Page 22
Page 23
Page 24
Page 25
Page 26
Page 27
Page 28
Page 29
Page 30
Page 31
Page 32
Page 33
Page 34
Page 35
Page 36
Page 37
Page 38
Page 39
Page 40
Page 41
Page 42
Page 43
Page 44
Page 45
Page 46
Page 47
Page 48
Page 49
Page 50
Page 51
Page 52
Page 53
Page 54
Page 55
Page 56
Page 57
Page 58
Page 59
Page 60
Page 61
Page 62
Page 63
Page 64
Page 65
Page 66
Page 67
Page 68
Page 69
Page 70
Page 71
Page 72
Page 73
Page 74
Page 75
Page 76
Contents
Table of Contents
Search
Previous
Next
Troubleshooting
Bookmarks
Loading ...
Loading ...
Loading ...
Loading ...
Loading ...
File type: PDF
File name: 50994281_1-012-912-0.pdf
File size: 12.38 MB
File Language: English
Pages: 76
Author: Karcher
File created: 2023-07-04
Published: 2023-10-07
Updated: 2023-10-06
Download File
Table of Contents
×
VCN Cordless Stick Vacuum Cleaners
1
Contents
1
Safety Instructions
1
Hazard Levels
1
Important Safety Instructions
1
Charger
1
Intended Use
1
Owner/User Responsibility
1
Improper Use
1
Environmental Protection
1
Customer Service
1
Registration
1
Warranty
1
USA Customer Service
1
Canada Customer Service
1
Mexico Customer Service
1
Scope of Delivery
1
Box Contents
1
Packing List
1
Connecting and Operating Elements
1
Assembly
1
Battery Pack Install and Removal
1
1. Hold the battery pack and insert it along the guide groove. After hearing a “click”, make sure that the battery pack is tight, secure, and locked into place.
1
2. To remove the battery pack, press the battery pack release button and pull the battery pack in the opposite direction. (Besides replacing the battery pack, the battery pack does not need to be removed from the machine.)
1
Disassembly and Assembly of Connector tube
1
1. Align the button end of the connector tube and insert it into the port of the hand held vacuum cleaner. After it clicks into place, make sure that the connector tube is tight and secure.
1
2. To remove the connector tube, press the release button on the connector tube (as shown in the figure). Then pull the connector tube out of the vacuum cleaner.
1
Disassembly and Assembly of Roller head
1
1. Align the upper connector of the roller head with the end of the connector tube (without button) and insert it into the port of the tube. After it clicks into place, make sure that the roller head is tight and secure.
1
2. If you want to remove the roller head, press the release button on the roller head (as shown in the figure) and pull the roller head out of the tube.
1
Wall Mounting Storage Installation
1
1. Put the assembled hand-held vacuum cleaner into the mount and stand the hand-held vacuum cleaner upright, near the ground. The height should be high enough so that the roller head of the assembled vacuum cleaner does not touch the ground.
1
2. Once the correct height for the mount is determined, holding the mount in place, remove the hand-held vacuum cleaner, mark the hole placement in the center of the mount, place the screw, and tighten it until snug against the wall.
1
3. After the center screw is installed, make sure the mount is level and then mark the lower hole, place screw, and tighten until snug against the wall.
1
Using the Mounting storage
1
1. While holding the connector tube of the vacuum, lift the machine up. With the bottom of the dust bin facing the wall, place the connector tube into the mount, and gently rest the top of the machine onto the mount.
1
2. When you are ready use the machine, take the machine out of the mount by grabbing the connector tube with your hand and lifting the machine up.
1
Accessory Installation
1
Upholstery Brush
1
1. Connect the hand-held vacuum cleaner to the upholstery brush.
1
2. Align the upholstery brush connector and insert it into the port of the hand- held vacuum cleaner. After it clicks into place, make sure that the upholstery brush is tight and secure. If you want to remove the upholstery brush, just press the rele...
1
Crevice Nozzle and Dusting brush 2 in 1
1
1. To connect the hand-held vacuum cleaner to the crevice nozzle or the two-in-one brush attachment: Align the circular port of the crevice nozzle or the two-in-one brush attachment with the suction port of the hand-held vacuum cleaner, and then inse...
1
2. To connect the hand-held vacuum cleaner to the crevice nozzle or the two-in-one brush attachment with the conductive metal tube: Align the circular port of either the crevice nozzle or the two-in-one brush attachment. Insert the attachment into th...
1
Pet Accessories (Flexible Hose, Upholstery Tool, and Brush for pet)
1
Accessory Storage
1
Charging the Machine VCN 3
1
Operation
1
1. Insert the adapter into the charging port of the battery pack and connect it to the AC power source to charge.
1
2. When the battery pack is inserted into the hand-held vacuum cleaner to charge, the hand-held vacuum cleaner indicator light displays as follows: when the red light is flashing, it is charging; when the light turns green, it is fully charged. The b...
1
VCN 4 & VCN 5
1
1. When the battery pack is inserted into the hand-held vacuum cleaner for charging, the display screen of the hand-held vacuum cleaner shows the current power and “Charging” on the display during charging.
1
2. The battery pack can also be removed from the hand-held vacuum cleaner for charging. When charging, the power indicator light on the battery pack displays as follows: when the red light is flashing, it is charging; when the light turns green, it i...
1
Initial Start-Up VCN 3
1
1. Pull the on/off trigger to turn the machine on. The power indicator light will display steady green. The default speed once powered on is ECO mode; press the speed control button (MAX) to switch to MEDIUM mode, press the speed control button (MAX)...
1
2. Pressing the speed control button alternates speeds based on the ECO-MEDIUM-MAX pattern.
1
3. Finally, pull the on/off trigger to turn the machine off.
1
Initial Start-Up VCN 4& 5
1
1. Pull the on/off trigger to turn the machine on. The power indicator light will display steady green. The default speed once powered on is ECO mode; press the speed control button to switch to MEDIUM mode, press the speed control button again to sw...
1
2. Pull the on/off trigger button to turn the machine off.
1
Using the Roller head
1
Using the Crevice Nozzle and Dusting brush 2 in 1
1
Using the Pet Accessories (Flexible hose, Upholstery Tool, and Brush for pet)
1
Upholstery Brush
1
Cleaning and Maintenance
1
Maintenance Notifications VCN 4 & 5
1
1. Replace the filter - please replace the HEPA filter with a new filter from an authorized dealer.
1
2. Clean the brush - please remove and clean the brush. Refer to the “Cleaning, Changing, or Replacing the Roller Brush Assembly” section in this manual.
1
3. Air dust blocked - please check the connector tube, vacuum suction port, and dust cup for any blockages. Remove them accordingly.
1
4. Battery Overheating - The battery of the machine is overheating. Turn off the device immediately.
1
1. Press the release button for the dust bin to open the bottom cover and empty the dust.
1
Cleaning the filter system
1
1. Rotate the cyclone cone assembly by hand to separate it from the hand- held vacuum cleaner for cleaning.
1
Cleaning the HEPA Filter Assembly
1
1. Rotate the HEPA filter decorative cover by hand, counter clockwise as shown in the figure in order to remove the HEPA filter assembly from the hand-held vacuum cleaner.
1
2. Rotate the HEPA air filter in the direction shown in the figure in order to separate the HEPA filter decorative cover from the HEPA filter assembly.
1
Cleaning, Changing, or Replacing the Roller Brush Assembly
1
1. To remove the roller brush, Toggle the lock button in the direction of the arrow, and the end cap of the roller brush will pop out automatically.
1
2. Lift off the end cap of the roller brush, this will allow the roller brush to be taken out of the groove for cleaning.
1
3. After cleaning or replacing (or for VCN 4 and VCN 5, changing to other roller types), you can install the roller brush assembly in the reverse order of disassembly and press the end cover of the roller brush. When you hear a “click” sound, the...
1
Daily Maintenance
1
Technical Data
1
Troubleshooting
1
Warranty Information
1
Warranty Information
1
Cleaning the Dust Bin
1
9.808-379.0 VC-PD516 OPERATORS MANUAL - FR.pdf
1
Aspirateurs-balais sans fil VCN
25
Contenu
25
Instructions de sécurité
25
Niveaux de danger
25
Consignes de sécurité Importantes
25
Chargeur
28
Utilisation prévue
28
Responsabilité du propriétaire/utilisateur
28
Utilisation inappropriée
29
Protection de l’environnment
29
clientèle
29
Inscription
29
Garantie
29
Service à la clientèle du USA
30
Service à la clientèle du Canada
30
Service à la clientèle du Mexique
30
Étendue de la livraison
31
Contenu de la boîte
31
Liste de colisage
32
Montage
33
Installation et retrait du bloc-piles et retrait
33
1. Tenez le bloc-piles et insérez-le long de la rainure de guidage. Après avoir entendu un “clic”, assurez-vous que la batterie est bien serré, sécurisé et verrouillé en place.
33
2. Pour retirer le bloc-piles, appuyez sur le bouton de libération du bloc-piles et tirez le bloc de piles dans la direction opposée. (Outre le remplacement de la batterie, il n'est pas nécessaire de la n'a pas besoin d'être retiré de la machine).
33
Démontage et montage du tube connecteur
33
1. Alignez l'extrémité du bouton du tube connecteur et insérez-le dans le de l'aspirateur à main. Une fois qu'il s'est mis en place, assurez-vous que le tube connecteur est bien serré et bien fixé.
33
2. Pour retirer le tube connecteur, appuyez sur le bouton de libération sur le tube connecteur (comme indiqué sur la figure). Puis tirez le tube connecteur hors de l'aspirateur.
33
Démontage et montage de la tête de rouleau
33
1. Aligner le connecteur supérieur de la tête de rouleau avec l'extrémité du tube connecteur (sans bouton) et insérez-le dans l'orifice du tube. Une fois qu'il s'est enclenché en place, assurez-vous que la tête de rouleau est bien serrée et s...
33
2. Si vous voulez retirer la tête de rouleau, appuyez sur le bouton de déverrouillage de la tête de rouleau (comme indiqué sur la figure) et tirez la tête de rouleau hors du tube.
33
Rangement mural Installation
34
1. Placez l'aspirateur à main assemblé dans le support et mettez l'aspirateur à main debout, près du sol. La hauteur doit être suffisante pour que la tête de rouleau de l'aspirateur assemblé ne touche pas le sol.
34
2. Une fois que la hauteur correcte du support a été déterminée, en maintenant le support en place, retirez l'aspirateur à main, marquez l'emplacement du trou au centre du support, placez la vis et serrez-la jusqu'à ce qu'elle soit bien serrée...
34
3. Une fois la vis centrale installée, assurez-vous que le support est de niveau, puis marquez le trou inférieur, placez la vis et serrez-la bien contre le mur.
34
Utilisation du Stockage de montage
35
1. Tout en tenant le tube connecteur de l'aspirateur, soulevez la machine. Le fond du bac à poussière étant orienté vers le mur, placez le tube connecteur dans le support, puis posez délicatement le haut de la machine sur le support. la machine ...
35
2. Lorsque vous êtes prêt à utiliser la machine, sortez-la du support en saisissant le tube connecteur avec votre main et en soulevant la machine. machine vers le haut.
35
Installation des accessoires
35
Brosse à tapisserie
35
1. Connectez l'aspirateur à main à la brosse à tapisserie.
35
2. Alignez le connecteur de la brosse à tapisserie et insérez-le dans le port de l'aspirateur à main. Une fois qu'elle s'est mise en place, assurez- vous que la brosse à tapisserie est bien fixée. Si vous souhaitez retirer la brosse d'ameublemen...
35
Suceur plat et brosse à épousseter 2 en 1
36
1. Pour connecter l'aspirateur à main l'aspirateur à main au suceur plat ou à l'accessoire brosse deux en un: Alignez l'orifice circulaire du suceur plat ou de l'accessoire brosse deux en un avec l'orifice d'aspiration de l'aspirateur à main, pui...
36
2. Pour connecter l'aspirateur à main l'aspirateur à main au suceur plat ou à l'accessoire brosse deux en un avec le tube métallique conducteur: Alignez l'orifice circulaire du suceur plat ou de l'accessoire brosse deux en un. Insérez l'accessoi...
36
Accessoires pour animaux de compagnie (tuyau extensible, outil de rembourrage et brosse pour animaux de compagnie)
36
1. Insérez l'extrémité ronde du tuyau extensible dans le port de l'aspirateur à main. Notez que le tuyau extensible doit être utilisé pour connecter l'accessoire pour tissus d'ameublement ou la brosse pour animaux de compagnie.
36
2. Pour utiliser l'outil de rembourrage, insérez son connecteur de forme ovale dans le port de forme ovale du tuyau extensible.
37
3. Pour utiliser la brosse pour animaux de compagnie, insérez son connecteur de forme ovale dans le port de forme ovale du tuyau extensible.
37
Rangement des accessoires
37
Chargement de la machine VCN 3
37
Opération
37
1. Insérez l'adaptateur dans le port de charge de la batterie et connectez-le à la source d'alimentation CA pour le charger.
37
2. Lorsque le bloc-piles est inséré dans l'aspirateur à main pour le charger, le témoin lumineux de l'aspirateur à main s'affiche comme suit: lorsque le voyant rouge clignote, il est en charge; lorsque le voyant devient vert, il est complètemen...
37
Chargement des machines VCN 4 y VCN 5
39
1. Lorsque le bloc de batteries est inséré dans l'aspirateur à main pour être rechargé, l'écran de l'aspirateur à main affiche la puissance actuelle et “Charging” sur l'écran pendant la charge.
39
2. La batterie peut également être retirée de l'aspirateur à main pour être rechargée. Lors de la charge, le voyant d'alimentation de la batterie s'affiche comme suit : lorsque le voyant rouge clignote, il est en charge; lorsque le voyant devie...
39
Démarrage initial VCN 3
39
1. Tirez sur la gâchette marche/arrêt pour mettre la machine en marche. Le témoin d'alimentation s'affiche en vert fixe. La vitesse par défaut, une fois l'appareil allumé, est le mode ECO; appuyez sur le bouton de contrôle de la vitesse (MAX) p...
39
2. En appuyant sur le bouton de contrôle de la vitesse permet d'alterner les vitesses en fonction du ECO-MEDIUM-MAX.
39
3. Enfin, appuyez sur la gâchette marche/arrêt pour éteindre la machine.
39
Démarrage initial VCN 4 y 5
40
1. Tirez sur la gâchette marche/arrêt pour mettre la machine en marche. Le témoin lumineux d'aspiration s'affiche en vert fixe. La vitesse par défaut, une fois l'appareil sous tension, est le mode ECO ; appuyez sur le bouton de contrôle de la vi...
40
2. Appuyez sur le bouton de déclenchement marche/arrêt pour mettre la machine à l'arrêt.
40
Utilisation de la tête de rouleau
41
Utilisation des accessoires pour animaux de compagnie (tuyau flexible, outil de rembourrage et brosse pour animal de compagnie)
42
Utilisation de la tête de rouleau
42
Nettoyage et entretien
42
Notifications de maintenance VCN 4 & 5
42
1. Remplacer le filtre - veuillez remplacer le filtre HEPA par un nouveau filtre provenant d'un revendeur agréé.
43
2. Nettoyer la brosse - veuillez retirer et nettoyer la brosse. Reportez-vous à la section “Nettoyage, changement ou remplacement de l'ensemble de brosse à rouleau” dans ce manuel.
43
3. La poussière d'air est bloquée - veuillez vérifier que le tube de connexion, l'orifice d'aspiration de l'aspirateur et la ventouse ne sont pas bloqués. Retirez-les en conséquence.
43
4. Surchauffe de la batterie - La batterie de la machine est en surchauffe. Éteignez l'appareil immédiatement
43
Nettoyage du bac à poussière
43
1. Appuyez sur le bouton de déverrouillage du bac à poussière poussière pour ouvrir le couvercle inférieur et vider la poussière.
43
Nettoyage du système de filtration
44
1. Faites pivoter l'assemblage du cône du cyclone dans le sens inverse des aiguilles d'une montre à la main pour le séparer de l'aspirateur à main pour le nettoyage.
44
de l'appareil
44
1. Faites tourner le couvercle décoratif du filtre HEPA à la main, dans le sens inverse des aiguilles d'une montre, comme indiqué sur la figure, afin de retirer l'ensemble du filtre HEPA de l'aspirateur à main.
44
2. Faites tourner le filtre à air HEPA dans le sens indiqué sur la figure afin de séparer le couvercle décoratif du filtre HEPA de l'ensemble du filtre HEPA.
44
Nettoyage, changement ou remplacement de l'ensemble de brosse à rouleau
45
1. Pour retirer la brosse à rouleau, tournez le bouton de verrouillage dans le sens de la flèche et le capuchon de la brosse à rouleau se détache automatiquement.
45
2. Soulevez le capuchon à l'extrémité de la brosse du rouleau, ce qui permettra de retirer la brosse du rouleau de la rainure pour la nettoyer.
45
3. Après nettoyage ou remplacement (ou pour VCN 4 et VCN 5, passage à d'autres types de rouleaux), vous pouvez installer l'ensemble de la brosse à rouleau dans l'ordre inverse du démontage et appuyer sur le capuchon d'extrémité de la brosse à ...
45
Entretien quotidien
45
Données techniques
46
Dépannage
47
Informations De Garantie
48
Informations De Garantie
49
9.808-379.0 VC-PD516 OPERATORS MANUAL - SP.pdf
1
Aspiradoras inalámbricas VCN
50
Contenido
50
Instrucciones de seguridad
50
Niveles de peligro
50
Instrucciones de seguridad importantes
50
Carga
53
Uso previsto
53
Responsabilidad del propietario/usuario
53
Uso inapropiado
53
Protección del medioambiente
53
Servicio al cliente
54
Registro
54
Garantía
54
Atención al cliente de EE. UU.
54
Atención al cliente de Canadá
54
Atención al cliente de México
54
Alcance de la entrega
55
Contenido de la caja
55
Lista de empaque
56
Conexión y elementos operativos
56
Ensamblaje
57
Montaje y desmontaje de la batería
57
1. Sujete la batería e insértela a lo largo de la ranura guía. Después de escuchar un “clic”, asegúrese de que la batería esté bien apretada, segura y bloqueada en su lugar.
57
2. Para extraer la batería, pulse el botón de liberación de la batería y tire de ella en la dirección opuesta. (Además de sustituir la batería, no es necesario extraerla de la máquina).
57
Desmontaje y montaje del tubo conector
57
1. Alinee el extremo del botón del tubo conector e introdúzcalo en la aspiradora de mano. Una vez colocado, asegúrese de que el tubo conector esté bien apretado y sujeto.
57
2. Para retirar el tubo conector, pulse el botón de liberación del tubo conector (como se muestra en la figura). A continuación, extraiga el tubo conector de la aspiradora.
57
Desmontaje y montaje del Cabezal de rodillo
57
1. Alinee el conector superior del cabezal de rodillo con el extremo del tubo conector (sin botón) e introdúzcalo en el orificio del tubo. Una vez encajado en su sitio, asegúrese de que el cabezal de rodillo esté bien apretado y sujeto.
57
2. Si desea extraer el cabezal, pulse el botón de liberación del cabezal de rodillo (como se muestra en la figura) y tire del cabezal de rodillo para sacarlo del tubo.
57
Instalación del soporte de pared
58
1. Coloque la aspiradora de mano montada en el soporte en posición vertical cerca del suelo. La altura debe ser suficiente para que el cepillo de la aspiradora montada no toque el suelo.
58
2. Una vez determinada la altura correcta del soporte, sujetando el soporte en su sitio, retire la aspiradora de mano, marque la ubicación del orificio en el centro del soporte, coloque el tornillo y apriételo hasta que quede apretado contra la pared.
58
3. Una vez instalado el tornillo central, asegúrese de que el soporte esté nivelado, luego marque el orificio inferior, coloque el tornillo y apriételo contra la pared.
58
Uso del soporte de pared
59
1. Mientras sujeta el tubo conector de la aspiradora, levántela. Con la parte inferior del contenedor de polvo orientada hacia la pared, coloque el tubo conector en el soporte y, a continuación, coloque con cuidado la parte superior de la máquina ...
59
2. Cuando esté listo para utilizar la máquina, sáquela del soporte agarrando el tubo conector con la mano y levantando la máquina hacia arriba.
59
Instalación de accesorios
59
Cepillo para tapicerías
59
1. Conecte el aspirador de mano al cepillo para tapicerías.
59
2. Alinee el conector del cepillo para tapicerías e introdúzcalo en el puerto de la aspiradora de mano. Una vez colocado, asegúrese de que el cepillo para tapicerías está bien sujeto. Si desea extraer el cepillo para tapicerías, simplemente pul...
59
Herramienta para grietas, cepillo para polvo 2 en 1
60
1. Para conectar la aspiradora de mano a la herramienta para grietas o al accesorio de cepillo 2 en 1: Alinee el orificio circular en el accesorio para rincones o al accesorio de cepillo 2 en 1 con el orificio de succión en la aspiradora de mano, lu...
60
2. Para conectar la aspiradora de mano a la herramienta para grietas o al accesorio de cepillo 2 en 1 con el tubo conector: Alinee el orificio circular de la herramienta para grietas o al accesorio de cepillo 2 en 1. Inserte el accesorio en el orific...
60
Accesorios para mascotas (manguera flexible, herramienta para tapicería y cepillo para mascotas)
61
Almacenamiento de accesorios
61
Carga de la máquina VCN 3
61
Operación
61
1. Inserte el adaptador en el puerto de carga de la batería y conéctelo a la red eléctrica para cargarla.
61
2. Cuando la batería se introduce en el aspirador de mano para cargarlo, la luz indicadora del aspirador de mano se muestra de la siguiente manera: cuando la luz roja parpadea, se está cargando; cuando la luz se vuelve verde, está completamente ca...
61
Carga de las máquinas VCN 4 y VCN 5
62
1. Cuando se introduce la batería en el aspirador de mano para cargarlo, la pantalla del aspirador de mano muestra la potencia actual y “Cargando” en la pantalla durante la carga.
62
2. La batería también puede extraerse del aspirador de mano para cargarla. Durante la carga, la luz indicadora de la batería parpadea de la siguiente manera: cuando la luz roja parpadea, la batería se está cargando; cuando la luz se vuelve verde...
62
Encendido inicial VCN 3
63
1. Apriete el gatillo de encendido/ apagado para arrancar la máquina. El indicador se iluminará en verde fijo. La velocidad por defecto, una vez encendida la máquina, es el modo ECO; pulse el botón de control de velocidad (MAX) para pasar al modo...
63
2. Pulsando el botón de control de velocidad se pueden alternar las velocidades según el ECO-MEDIUM- MAX.
63
3. Por último, pulse el gatillo de encendido/apagado para apagar la máquina.
63
Encendido inicial VCN 4 y VCN 5
63
1. Apriete el gatillo de encendido/ apagado para arrancar la máquina. El indicador de encendido se iluminará en verde. La velocidad por defecto, una vez encendida la máquina, es el modo ECO; pulse el botón de control de velocidad para cambiar al ...
63
2. Pulse el interruptor de encendido/ apagado para apagar la máquina.
63
Uso del Cabezal de rodillo
64
Uso del accesorio para grietas y el cepillo 2 en 1
65
Uso de los accesorios para mascotas (manguera flexible, herramienta para tapicería y cepillo para mascotas).
65
Utilización del cepillo para tapicería
66
Limpieza y
66
mantenimiento
66
Notificaciones de mantenimiento VCN 4 & VCN 5
66
1. Cambie el filtro - sustituya el filtro HEPA por uno nuevo de un distribuidor autorizado.
66
2. Limpiar el cepillo: desmonte y limpie el cepillo. Consulte la sección “Limpiar, cambiar o reemplazar el conjunto cepillo de rodillo” de este manual.
66
3. Conducto de aire obstruido - compruebe que el tubo de conexión, la boca de aspiración del aspirador y la ventosa no estén obstruidos. Retírelos en consecuencia.
66
4. Sobrecalentamiento de la batería - La batería de la máquina se está sobrecalentando. Apague la máquina inmediatamente.
66
Limpieza del contenedor de polvo
67
1. Pulse el botón de desbloqueo del depósito de polvo para abrir la tapa inferior y vaciar el polvo.
67
Limpieza del sistema de filtrado
67
1. Gire el conjunto del cono del ciclón con la mano en el sentido contrario a las agujas del reloj para separarlo de la aspiradora de mano para limpiarlo.
67
Limpieza del filtro HEPA
68
1. Gire la tapa decorativa del filtro HEPA con la mano, en sentido contrario a las agujas del reloj, como se muestra en la figura, para extraer el conjunto del filtro HEPA de la aspiradora de mano.
68
2. Gire el filtro de aire HEPA en la dirección indicada en la figura para separar la cubierta decorativa del filtro HEPA del conjunto del filtro HEPA.
68
Limpiar, cambiar o reemplazar el conjunto cepillo de rodillo
68
Mantenimiento diario
69
Datos técnicos
70
Solución de problemas
71
Información de garantía
72
Información de garantía
73
Blank Page
74
Blank Page
75
9.808-379.0 VC-PD516 OPERATORS MANUAL.pdf
1
VCN Cordless Stick Vacuum Cleaners
1
Contents
1
Safety Instructions
1
Hazard Levels
1
Important Safety Instructions
1
Charger
1
Intended Use
1
Owner/User Responsibility
1
Improper Use
1
Environmental Protection
1
Customer Service
1
Registration
1
Warranty
1
USA Customer Service
1
Canada Customer Service
1
Mexico Customer Service
1
Scope of Delivery
1
Box Contents
1
Packing List
1
Connecting and Operating Elements
1
Assembly
1
Battery Pack Install and Removal
1
1. Hold the battery pack and insert it along the guide groove. After hearing a “click”, make sure that the battery pack is tight, secure, and locked into place.
1
2. To remove the battery pack, press the battery pack release button and pull the battery pack in the opposite direction. (Besides replacing the battery pack, the battery pack does not need to be removed from the machine.)
1
Disassembly and Assembly of Connector tube
1
1. Align the button end of the connector tube and insert it into the port of the hand held vacuum cleaner. After it clicks into place, make sure that the connector tube is tight and secure.
1
2. To remove the connector tube, press the release button on the connector tube (as shown in the figure). Then pull the connector tube out of the vacuum cleaner.
1
Disassembly and Assembly of Roller head
1
1. Align the upper connector of the roller head with the end of the connector tube (without button) and insert it into the port of the tube. After it clicks into place, make sure that the roller head is tight and secure.
1
2. If you want to remove the roller head, press the release button on the roller head (as shown in the figure) and pull the roller head out of the tube.
1
Wall Mounting Storage Installation
1
1. Put the assembled hand-held vacuum cleaner into the mount and stand the hand-held vacuum cleaner upright, near the ground. The height should be high enough so that the roller head of the assembled vacuum cleaner does not touch the ground.
1
2. Once the correct height for the mount is determined, holding the mount in place, remove the hand-held vacuum cleaner, mark the hole placement in the center of the mount, place the screw, and tighten it until snug against the wall.
1
3. After the center screw is installed, make sure the mount is level and then mark the lower hole, place screw, and tighten until snug against the wall.
1
Using the Mounting storage
1
1. While holding the connector tube of the vacuum, lift the machine up. With the bottom of the dust bin facing the wall, place the connector tube into the mount, and gently rest the top of the machine onto the mount.
1
2. When you are ready use the machine, take the machine out of the mount by grabbing the connector tube with your hand and lifting the machine up.
1
Accessory Installation
1
Upholstery Brush
1
1. Connect the hand-held vacuum cleaner to the upholstery brush.
1
2. Align the upholstery brush connector and insert it into the port of the hand- held vacuum cleaner. After it clicks into place, make sure that the upholstery brush is tight and secure. If you want to remove the upholstery brush, just press the rele...
1
Crevice Nozzle and Dusting brush 2 in 1
1
1. To connect the hand-held vacuum cleaner to the crevice nozzle or the two-in-one brush attachment: Align the circular port of the crevice nozzle or the two-in-one brush attachment with the suction port of the hand-held vacuum cleaner, and then inse...
1
2. To connect the hand-held vacuum cleaner to the crevice nozzle or the two-in-one brush attachment with the conductive metal tube: Align the circular port of either the crevice nozzle or the two-in-one brush attachment. Insert the attachment into th...
1
Pet Accessories (Flexible Hose, Upholstery Tool, and Brush for pet)
1
Accessory Storage
1
Charging the Machine VCN 3
1
Operation
1
1. Insert the adapter into the charging port of the battery pack and connect it to the AC power source to charge.
1
2. When the battery pack is inserted into the hand-held vacuum cleaner to charge, the hand-held vacuum cleaner indicator light displays as follows: when the red light is flashing, it is charging; when the light turns green, it is fully charged. The b...
1
VCN 4 & VCN 5
1
1. When the battery pack is inserted into the hand-held vacuum cleaner for charging, the display screen of the hand-held vacuum cleaner shows the current power and “Charging” on the display during charging.
1
2. The battery pack can also be removed from the hand-held vacuum cleaner for charging. When charging, the power indicator light on the battery pack displays as follows: when the red light is flashing, it is charging; when the light turns green, it i...
1
Initial Start-Up VCN 3
1
1. Pull the on/off trigger to turn the machine on. The power indicator light will display steady green. The default speed once powered on is ECO mode; press the speed control button (MAX) to switch to MEDIUM mode, press the speed control button (MAX)...
1
2. Pressing the speed control button alternates speeds based on the ECO-MEDIUM-MAX pattern.
1
3. Finally, pull the on/off trigger to turn the machine off.
1
Initial Start-Up VCN 4& 5
1
1. Pull the on/off trigger to turn the machine on. The power indicator light will display steady green. The default speed once powered on is ECO mode; press the speed control button to switch to MEDIUM mode, press the speed control button again to sw...
1
2. Pull the on/off trigger button to turn the machine off.
1
Using the Roller head
1
Using the Crevice Nozzle and Dusting brush 2 in 1
1
Using the Pet Accessories (Flexible hose, Upholstery Tool, and Brush for pet)
1
Upholstery Brush
1
Cleaning and Maintenance
1
Maintenance Notifications VCN 4 & 5
1
1. Replace the filter - please replace the HEPA filter with a new filter from an authorized dealer.
1
2. Clean the brush - please remove and clean the brush. Refer to the “Cleaning, Changing, or Replacing the Roller Brush Assembly” section in this manual.
1
3. Air dust blocked - please check the connector tube, vacuum suction port, and dust cup for any blockages. Remove them accordingly.
1
4. Battery Overheating - The battery of the machine is overheating. Turn off the device immediately.
1
1. Press the release button for the dust bin to open the bottom cover and empty the dust.
1
Cleaning the filter system
1
1. Rotate the cyclone cone assembly counter clockwise by hand to separate it from the hand-held vacuum cleaner for cleaning.
1
Cleaning the HEPA Filter Assembly
1
1. Rotate the HEPA filter decorative cover by hand, counter clockwise as shown in the figure in order to remove the HEPA filter assembly from the hand-held vacuum cleaner.
1
2. Rotate the HEPA air filter in the direction shown in the figure in order to separate the HEPA filter decorative cover from the HEPA filter assembly.
1
Cleaning, Changing, or Replacing the Roller Brush Assembly
1
1. To remove the roller brush, Toggle the lock button in the direction of the arrow, and the end cap of the roller brush will pop out automatically.
1
2. Lift off the end cap of the roller brush, this will allow the roller brush to be taken out of the groove for cleaning.
1
3. After cleaning or replacing (or for VCN 4 and VCN 5, changing to other roller types), you can install the roller brush assembly in the reverse order of disassembly and press the end cover of the roller brush. When you hear a “click” sound, the...
1
Daily Maintenance
1
Technical Data
1
Troubleshooting
1
Warranty Information
1
Warranty Information
1
Cleaning the Dust Bin
1
9.808-379.0 VC-PD516 OPERATORS MANUAL.backup.pdf
1
VCN Cordless Stick Vacuum Cleaners
2
Contents
2
Safety Instructions
2
Hazard Levels
2
Important Safety Instructions
2
Charger
4
Intended Use
4
Owner/User Responsibility
5
Improper Use
5
Environmental Protection
5
Customer Service
6
Registration
6
Warranty
6
USA Customer Service
6
Canada Customer Service
6
Mexico Customer Service
6
Scope of Delivery
7
Box Contents
7
Packing List
8
Connecting and Operating Elements
8
Assembly
9
Battery Pack Install and Removal
9
1. Hold the battery pack and insert it along the guide groove. After hearing a “click”, make sure that the battery pack is tight, secure, and locked into place.
9
2. To remove the battery pack, press the battery pack release button and pull the battery pack in the opposite direction. (Besides replacing the battery pack, the battery pack does not need to be removed from the machine.)
9
Disassembly and Assembly of Connector tube
9
1. Align the button end of the connector tube and insert it into the port of the hand held vacuum cleaner. After it clicks into place, make sure that the connector tube is tight and secure.
9
2. To remove the connector tube, press the release button on the connector tube (as shown in the figure). Then pull the connector tube out of the vacuum cleaner.
9
Disassembly and Assembly of Roller head
9
1. Align the upper connector of the roller head with the end of the connector tube (without button) and insert it into the port of the tube. After it clicks into place, make sure that the roller head is tight and secure.
9
2. If you want to remove the roller head, press the release button on the roller head (as shown in the figure) and pull the roller head out of the tube.
9
Wall Mounting Storage Installation
10
1. Put the assembled hand-held vacuum cleaner into the mount and stand the hand-held vacuum cleaner upright, near the ground. The height should be high enough so that the roller head of the assembled vacuum cleaner does not touch the ground.
10
2. Once the correct height for the mount is determined, holding the mount in place, remove the hand-held vacuum cleaner, mark the hole placement in the center of the mount, place the screw, and tighten it until snug against the wall.
10
3. After the center screw is installed, make sure the mount is level and then mark the lower hole, place screw, and tighten until snug against the wall.
10
Using the Mounting storage
11
1. While holding the connector tube of the vacuum, lift the machine up. With the bottom of the dust bin facing the wall, place the connector tube into the mount, and gently rest the top of the machine onto the mount.
11
2. When you are ready use the machine, take the machine out of the mount by grabbing the connector tube with your hand and lifting the machine up.
11
Accessory Installation
11
Upholstery Brush
11
1. Connect the hand-held vacuum cleaner to the upholstery brush.
11
2. Align the upholstery brush connector and insert it into the port of the hand- held vacuum cleaner. After it clicks into place, make sure that the upholstery brush is tight and secure. If you want to remove the upholstery brush, just press the rele...
11
Crevice Nozzle and Dusting brush 2 in 1
12
1. To connect the hand-held vacuum cleaner to the crevice nozzle or the two-in-one brush attachment: Align the circular port of the crevice nozzle or the two-in-one brush attachment with the suction port of the hand-held vacuum cleaner, and then inse...
12
2. To connect the hand-held vacuum cleaner to the crevice nozzle or the two-in-one brush attachment with the conductive metal tube: Align the circular port of either the crevice nozzle or the two-in-one brush attachment. Insert the attachment into th...
12
Pet Accessories (Flexible Hose, Upholstery Tool, and Brush for pet)
13
Accessory Storage
13
Charging the Machine VCN 3
13
Operation
13
1. Insert the adapter into the charging port of the battery pack and connect it to the AC power source to charge.
13
2. When the battery pack is inserted into the hand-held vacuum cleaner to charge, the hand-held vacuum cleaner indicator light displays as follows: when the red light is flashing, it is charging; when the light turns green, it is fully charged. The b...
13
VCN 4 & VCN 5
14
1. When the battery pack is inserted into the hand-held vacuum cleaner for charging, the display screen of the hand-held vacuum cleaner shows the current power and “Charging” on the display during charging.
14
2. The battery pack can also be removed from the hand-held vacuum cleaner for charging. When charging, the power indicator light on the battery pack displays as follows: when the red light is flashing, it is charging; when the light turns green, it i...
14
Initial Start-Up VCN 3
15
1. Pull the on/off trigger to turn the machine on. The power indicator light will display steady green. The default speed once powered on is ECO mode; press the speed control button (MAX) to switch to MEDIUM mode, press the speed control button (MAX)...
15
2. Pressing the speed control button alternates speeds based on the ECO-MEDIUM-MAX pattern.
15
3. Finally, pull the on/off trigger to turn the machine off.
15
Initial Start-Up VCN 4& 5
15
1. Pull the on/off trigger to turn the machine on. The power indicator light will display steady green. The default speed once powered on is ECO mode; press the speed control button to switch to MEDIUM mode, press the speed control button again to sw...
10
2. Pull the on/off trigger button to turn the machine off.
15
Using the Roller head
16
Using the Crevice Nozzle and Dusting brush 2 in 1
17
Using the Pet Accessories (Flexible hose, Upholstery Tool, and Brush for pet)
17
Upholstery Brush
18
Cleaning and Maintenance
18
Maintenance Notifications VCN 4 & 5
18
1. Replace the filter - please replace the HEPA filter with a new filter from an authorized dealer.
18
2. Clean the brush - please remove and clean the brush. Refer to the “Cleaning, Changing, or Replacing the Roller Brush Assembly” section in this manual.
18
3. Air dust blocked - please check the connector tube, vacuum suction port, and dust cup for any blockages. Remove them accordingly.
18
4. Battery Overheating - The battery of the machine is overheating. Turn off the device immediately.
18
1. Press the release button for the dust bin to open the bottom cover and empty the dust.
19
Cleaning the filter system
19
1. Rotate the cyclone cone assembly counter clockwise by hand to separate it from the hand-held vacuum cleaner for cleaning.
19
Cleaning the HEPA Filter Assembly
19
1. Rotate the HEPA filter decorative cover by hand, counter clockwise as shown in the figure in order to remove the HEPA filter assembly from the hand-held vacuum cleaner.
19
2. Rotate the HEPA air filter in the direction shown in the figure in order to separate the HEPA filter decorative cover from the HEPA filter assembly.
19
Cleaning, Changing, or Replacing the Roller Brush Assembly
20
1. To remove the roller brush, Toggle the lock button in the direction of the arrow, and the end cap of the roller brush will pop out automatically.
20
2. Lift off the end cap of the roller brush, this will allow the roller brush to be taken out of the groove for cleaning.
20
3. After cleaning or replacing (or for VCN 4 and VCN 5, changing to other roller types), you can install the roller brush assembly in the reverse order of disassembly and press the end cover of the roller brush. When you hear a “click” sound, the...
20
Daily Maintenance
20
Technical Data
21
Troubleshooting
22
Warranty Information
23
Warranty Information
24
Cleaning the Dust Bin
18
Search:
×
Search