W10310051B
W10310052A - SP
High-Efficiency
Washer
Use & Care Guide
Laveuse
Haute Efficacité
Guide d’utilisation et d’entretien
Para obtener acceso al Manual de uso y cuidado en español, o para obtener información adicional acerca de su producto, visite:
www.whirlpool.com/Vantage.
In an effort to conserve natural resources, this washer includes a condensed Use and Care Guide.
A complete Use and Care Guide is included in PDF format with your welcome kit, or can be viewed
or downloaded at www.whirlpool.com/Vantage.
For questions, visit www.whirlpool.com/Vantage, or call 800-262-6226.
™
An de conserver les ressources naturelles, cette sécheuse comprend un guide d’utilisation et d’entretien
condensé. Un guide d’utilisation et d’entretien complet en format PDF est compris avec votre trousse de
bienvenue; il peut aussi être lu ou téléchargé sur www.whirlpool.com/Vantage.
Pour toute question, consulter www.whirlpool.com/Vantage, ou composer le 800-262-6226.
2
You can be killed or seriously injured if you don't immediately
You
can be killed or seriously injured if you don't
follow
All safety messages will tell you what the potential hazard is, tell you how to reduce the chance of injury, and tell you what can
happen if the instructions are not followed.
Your safety and the safety of others are very important.
We have provided many important safety messages in this manual and on your appliance. Always read and obey all safety
messages.
This is the safety alert symbol.
This symbol alerts you to potential hazards that can kill or hurt you and others.
All safety messages will follow the safety alert symbol and either the word “DANGER” or “WARNING.”
These words mean:
follow instructions.
instructions.
DANGER
WARNING
IMPORTANT SAFETY INSTRUCTIONS
SAVE THESE INSTRUCTIONS
Read all instructions before using the washer.
Do not wash articles that have been previously cleaned
in, washed in, soaked in, or spotted with gasoline,
dry-cleaning solvents, other flammable, or explosive
substances as they give off vapors that could ignite or
explode.
Do not add gasoline, dry-cleaning solvents, or other
flammable, or explosive substances to the wash water.
These substances give off vapors that could ignite or
explode.
Under certain conditions, hydrogen gas may be
produced in a hot water system that has not been used
for 2 weeks or more. HYDROGEN GAS IS
EXPLOSIVE. If the hot water system has not been
used for such a period, before using the washing
machine, turn on all hot water faucets and let the water
flow from each for several minutes. This will release
any accumulated hydrogen gas. As the gas is
flammable, do not smoke or use an open flame during
this time.
Do not allow children to play on or in the washer. Close
supervision of children is necessary when the washer is used
near children.
Before the washer is removed from service or discarded,
remove the door or lid.
Do not reach into the washer if the drum, tub or agitator is
moving.
Do not install or store the washer where it will be exposed to
the weather.
Do not tamper with controls.
Do not repair or replace any part of the washer or attempt any
servicing unless specifically recommended in this manual or in
published user-repair instructions that you understand and
have the skills to carry out.
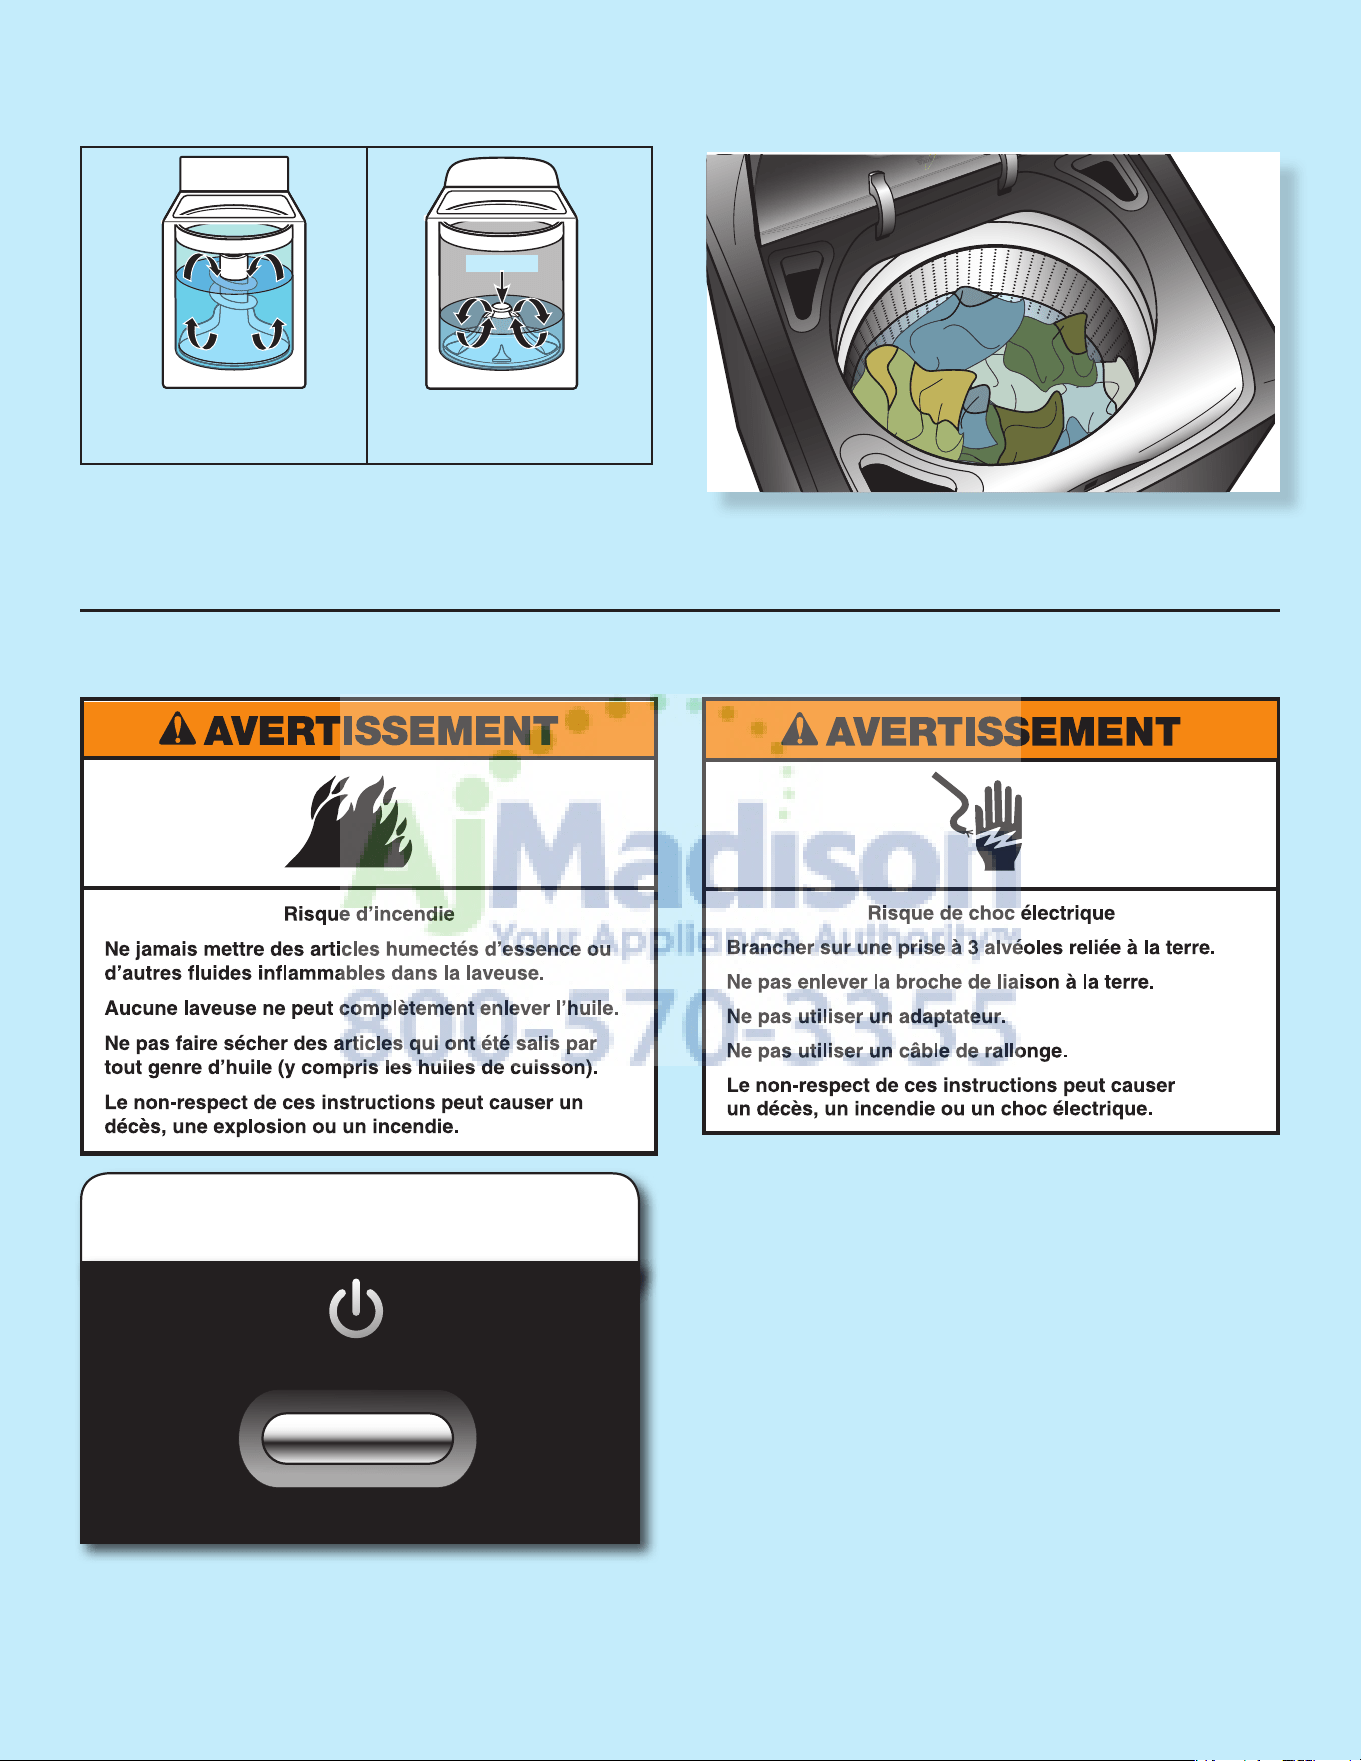
See “Electrical Requirements” for grounding instructions.
WARNING:
To reduce the risk of fire, electric shock, or injury to persons when using the washer, follow basic precautions,
including the following:
You can be killed or seriously injured if you don't immediately
You
can be killed or seriously injured if you don't
follow
All safety messages will tell you what the potential hazard is, tell you how to reduce the chance of injury, and tell you what can
happen if the instructions are not followed.
Your safety and the safety of others are very important.
We have provided many important safety messages in this manual and on your appliance. Always read and obey all safety
messages.
This is the safety alert symbol.
This symbol alerts you to potential hazards that can kill or hurt you and others.
All safety messages will follow the safety alert symbol and either the word “DANGER” or “WARNING.”
These words mean:
follow instructions.
instructions.
DANGER
WARNING
IMPORTANT SAFETY INSTRUCTIONS
SAVE THESE INSTRUCTIONS
Read all instructions before using the washer.
Do not wash articles that have been previously cleaned
in, washed in, soaked in, or spotted with gasoline,
dry-cleaning solvents, other flammable, or explosive
substances as they give off vapors that could ignite or
explode.
Do not add gasoline, dry-cleaning solvents, or other
flammable, or explosive substances to the wash water.
These substances give off vapors that could ignite or
explode.
Under certain conditions, hydrogen gas may be
produced in a hot water system that has not been used
for 2 weeks or more. HYDROGEN GAS IS
EXPLOSIVE. If the hot water system has not been
used for such a period, before using the washing
machine, turn on all hot water faucets and let the water
flow from each for several minutes. This will release
any accumulated hydrogen gas. As the gas is
flammable, do not smoke or use an open flame during
this time.
Do not allow children to play on or in the washer. Close
supervision of children is necessary when the washer is used
near children.
Before the washer is removed from service or discarded,
remove the door or lid.
Do not reach into the washer if the drum, tub or agitator is
moving.
Do not install or store the washer where it will be exposed to
the weather.
Do not tamper with controls.
Do not repair or replace any part of the washer or attempt any
servicing unless specifically recommended in this manual or in
published user-repair instructions that you understand and
have the skills to carry out.
See “Electrical Requirements” for grounding instructions.
WARNING:
To reduce the risk of fire, electric shock, or injury to persons when using the washer, follow basic precautions,
including the following:
Washer Safety
You can be killed or seriously injured if you don't immediately
You
can be killed or seriously injured if you don't
follow
All safety messages will tell you what the potential hazard is, tell you how to reduce the chance of injury, and tell you what can
happen if the instructions are not followed.
Your safety and the safety of others are very important.
We have provided many important safety messages in this manual and on your appliance. Always read and obey all safety
messages.
This is the safety alert symbol.
This symbol alerts you to potential hazards that can kill or hurt you and others.
All safety messages will follow the safety alert symbol and either the word “DANGER” or “WARNING.”
These words mean:
follow instructions.
instructions.
DANGER
WARNING
3
Washer Use
1. Touch POWER to turn on washer
Touch the POWER button to turn on the washer. When you
open the lid, the basket light will turn on.
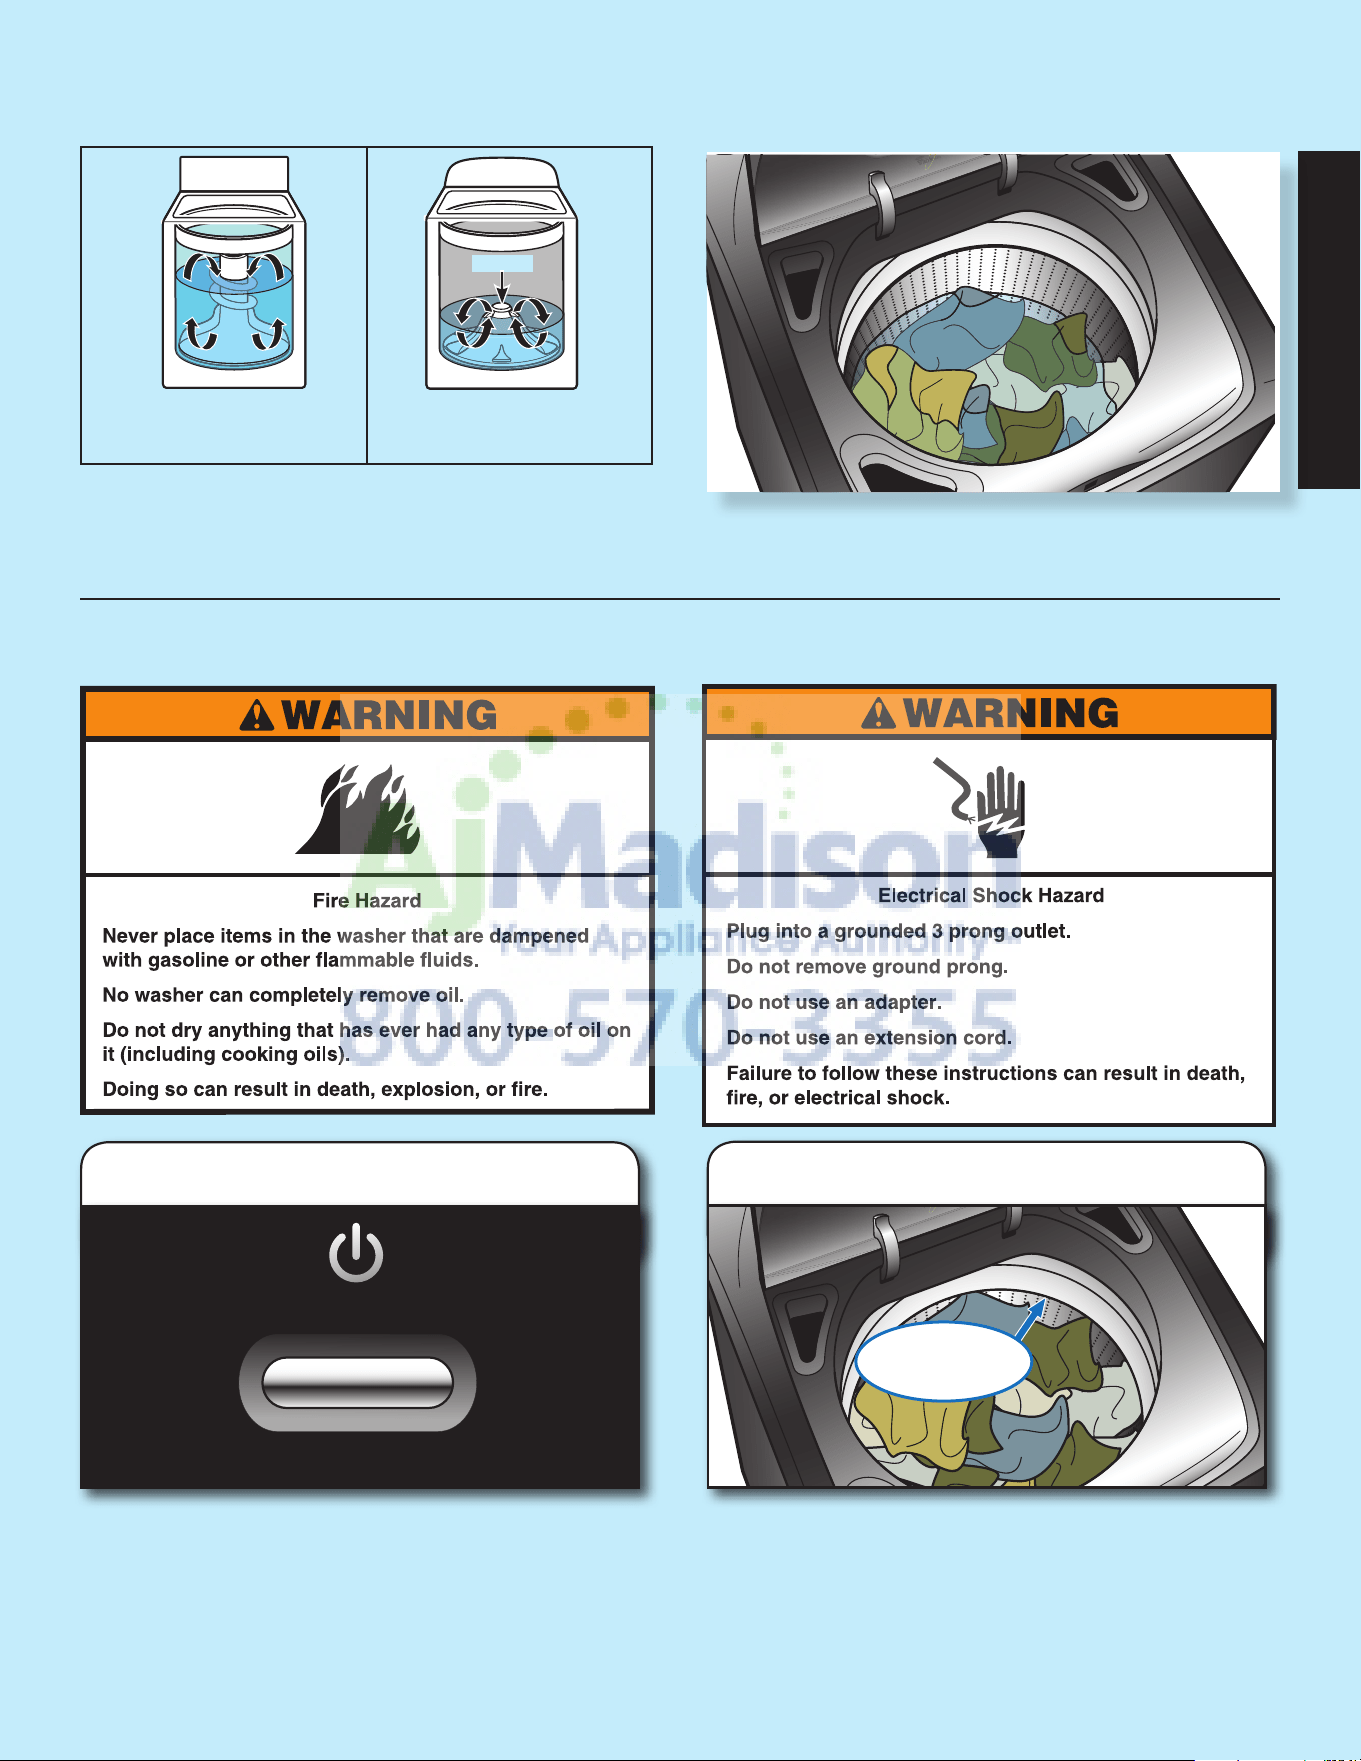
Load garments in loose heaps evenly around basket wall.
For best results, do not load higher than the recommended
maximum load height. Try mixing different sized items to
reduce tangling.
IMPORTANT: Do not overload washer. Items need to move
freely. Overloading can lead to poor cleaning performance, and
may increase wrinkling and tangling.
Recommended
maximum load
height
2. Load laundry into washer
English
Cleaning with Less Water
The most striking difference in your new washer is the
low-water impeller wash system. The washer automatically
adjusts the water level to the load size—no water level selector
is needed.
Traditional agitator-style
washing machine
Washer with low-water
impeller wash system
Impeller
IMPORTANT: You will not see a washer basket full of water
like with your past agitator-style washer. Clothes will not be
completely covered.
4
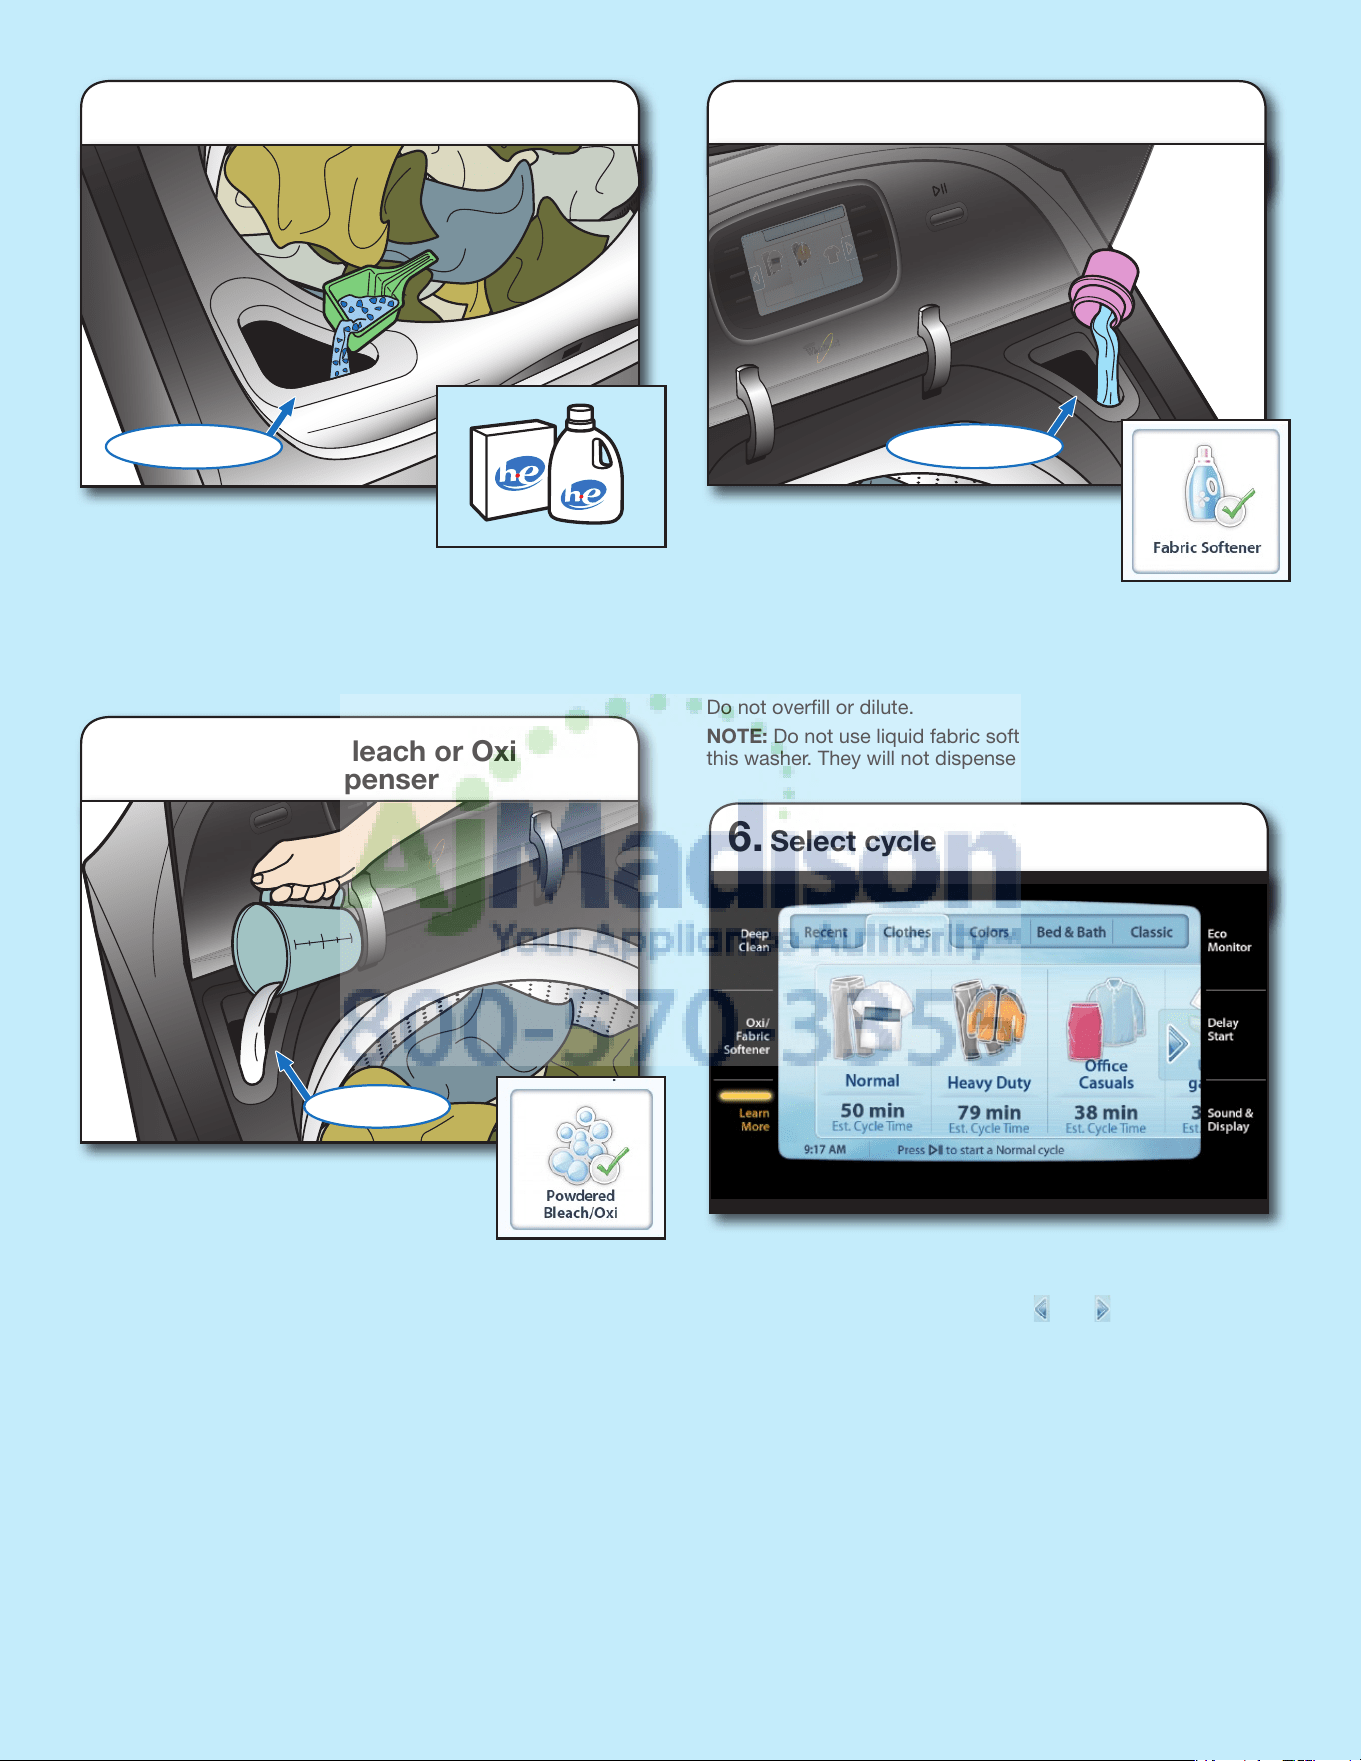
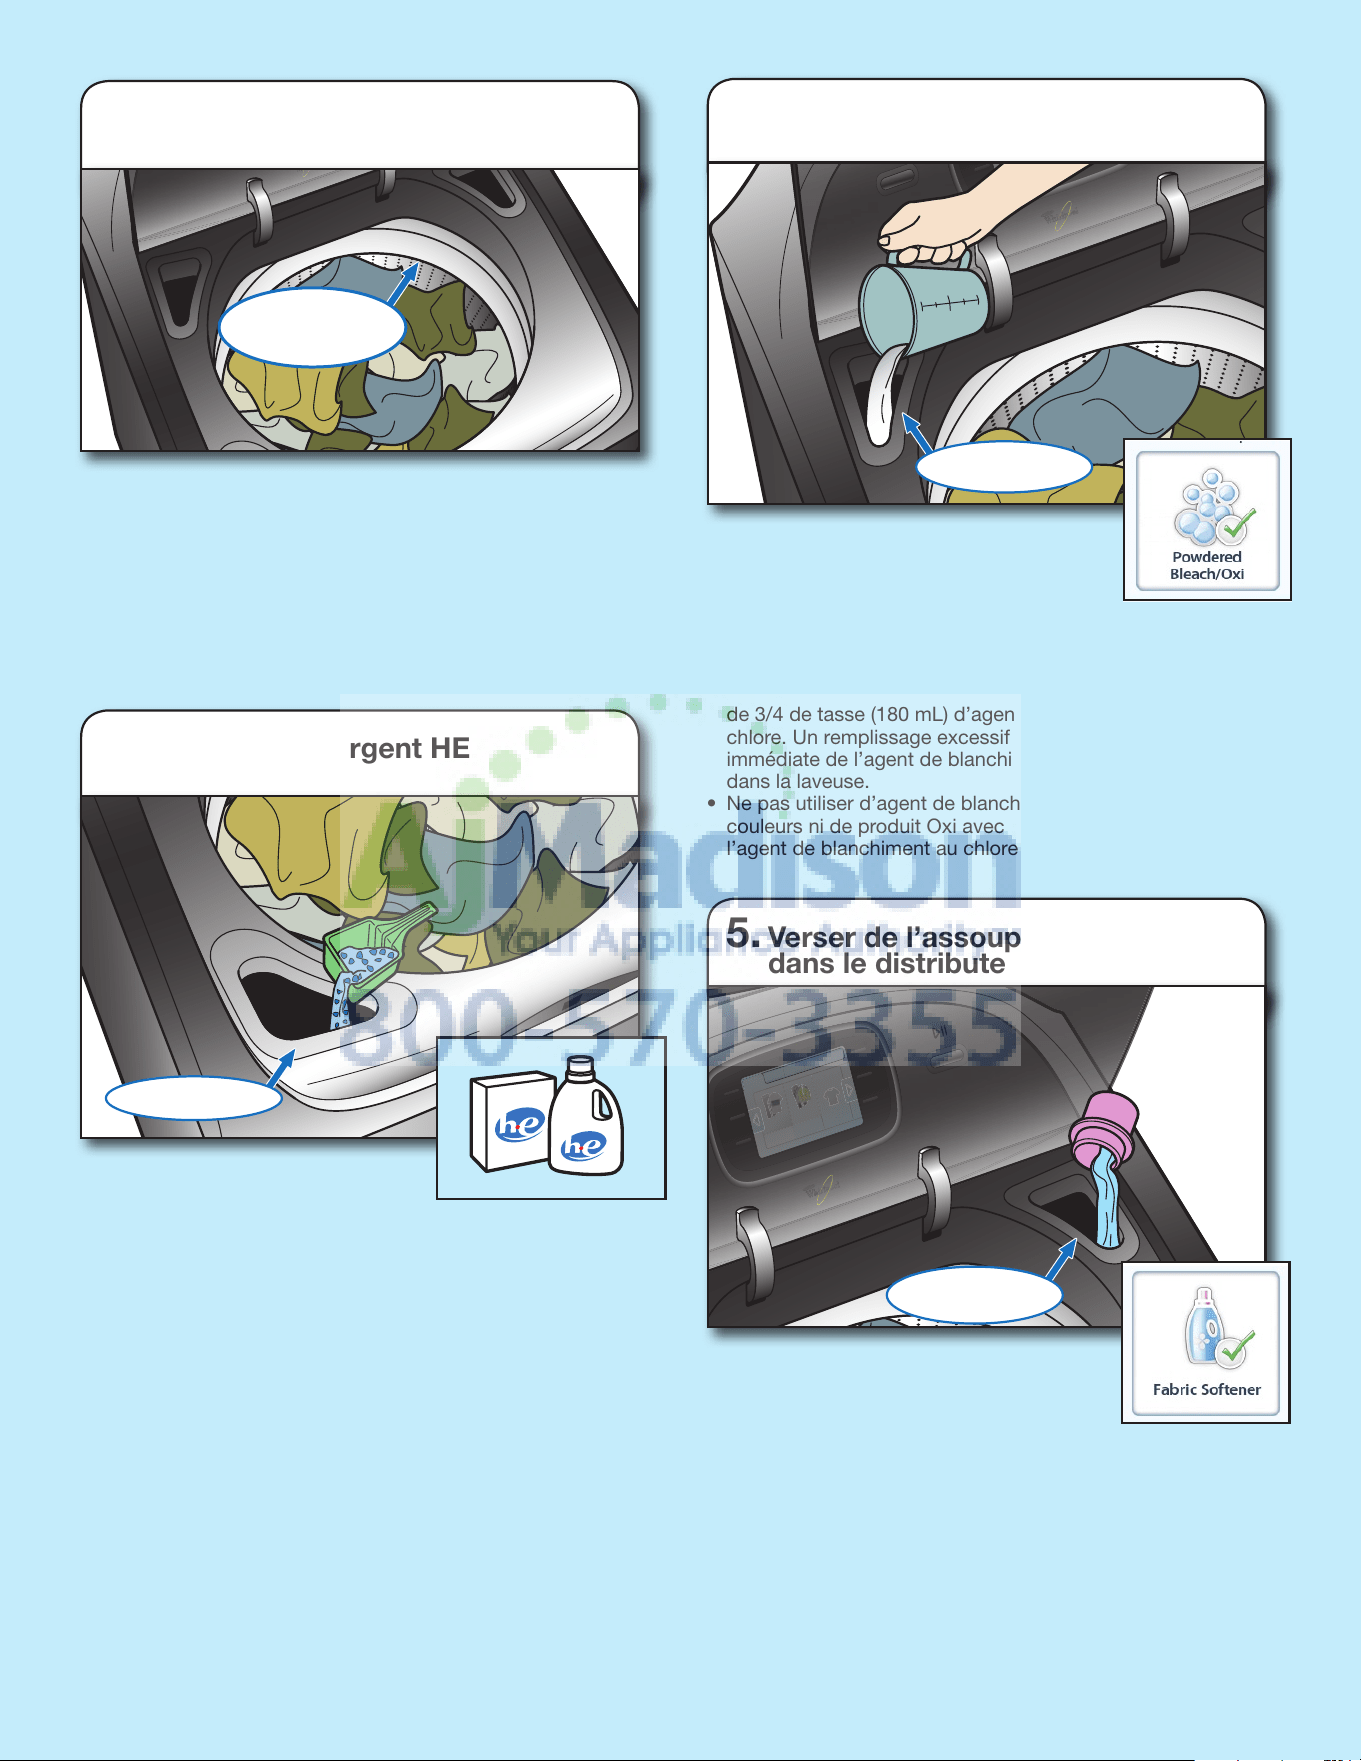
Fabric Softener
5. Add fabric softener to dispenser
Pour a measured amount of liquid fabric
softener into dispenser, always follow
manufacturer’s directions for correct
amount of fabric softener based on your
load size. Then select Fabric Softener option
under Oxi/Fabric Softener.
IMPORTANT: Fabric Softener option must be selected
to ensure proper distribution at correct time in cycle.
Do not overll or dilute.
NOTE: Do not use liquid fabric softener dispenser balls in
this washer. They will not dispense correctly.
Use the touch screen to select the desired cycle. Cycles
are grouped in tabs by type, and the last 7 cycles used will
appear in the Recent tab. Touch the
and arrows to
scroll left or right.
The Normal Clothes cycle is recommended for washing
normally soiled cottons, linens, and mixed fabric loads.
For additional information on cycles, options, and features,
touch Learn More on your washer display.
6. Select cycle
Add a measured amount of HE
detergent into detergent dispenser.
IMPORTANT: Use only High Efciency detergents. The package
will be marked “HE” or “High Efciency.”
Do not attempt to remove the dispensers or trim for cleaning.
The dispensers and trim are not removable.
Detergent
3. Add HE detergent to dispenser
Bleach
4. Add chlorine bleach or Oxi
product to dispenser
Add chlorine bleach or Oxi laundry boost
product to the dispenser. When using
powdered chlorine bleach or Oxi
products, select the Powdered Bleach/Oxi
option under Oxi/Fabric Softener.
• Donotoverll,dilute,orusemorethan3/4 cup (180 mL)
of liquid chlorine bleach. Overlling will cause the bleach
or Oxi product to dispense immediately into the washer.
• Donotusecolor-safebleachorOxiproductsinthesame
cycle with liquid chlorine bleach.
5
Washer Care and Troubleshooting
Because some water may stay in the hoses, freezing can
damage your washer. If storing or moving your washer during
freezing weather, winterize it.
Winterizing your washer
1. Shut off both water faucets. Disconnect and drain water inlet
hoses. Pour 1 qt (1 L) of R.V.-type antifreeze into the basket.
2. Run washer on a drain and spin setting for about 30 seconds
to mix the antifreeze and remaining water.
3. Unplug washer or disconnect power.
Storage, non-use, or vacation care
Operate your washer only when you are at home. If you will be
on vacation or not using your washer for an extended period of
time, you should:
1. Unplug washer or disconnect power.
2. Turn off the water supply to the washer. This helps avoid
ooding (due to a water pressure surge) while you are away.
To use washer again
Refer to the Installation Instructions included with your washer
to reinstall and use washer after winterizing, storage or moving.
Upon reinstallation, ush water pipes and hoses by running one
washer cycle without clothes.
Moving and Storage
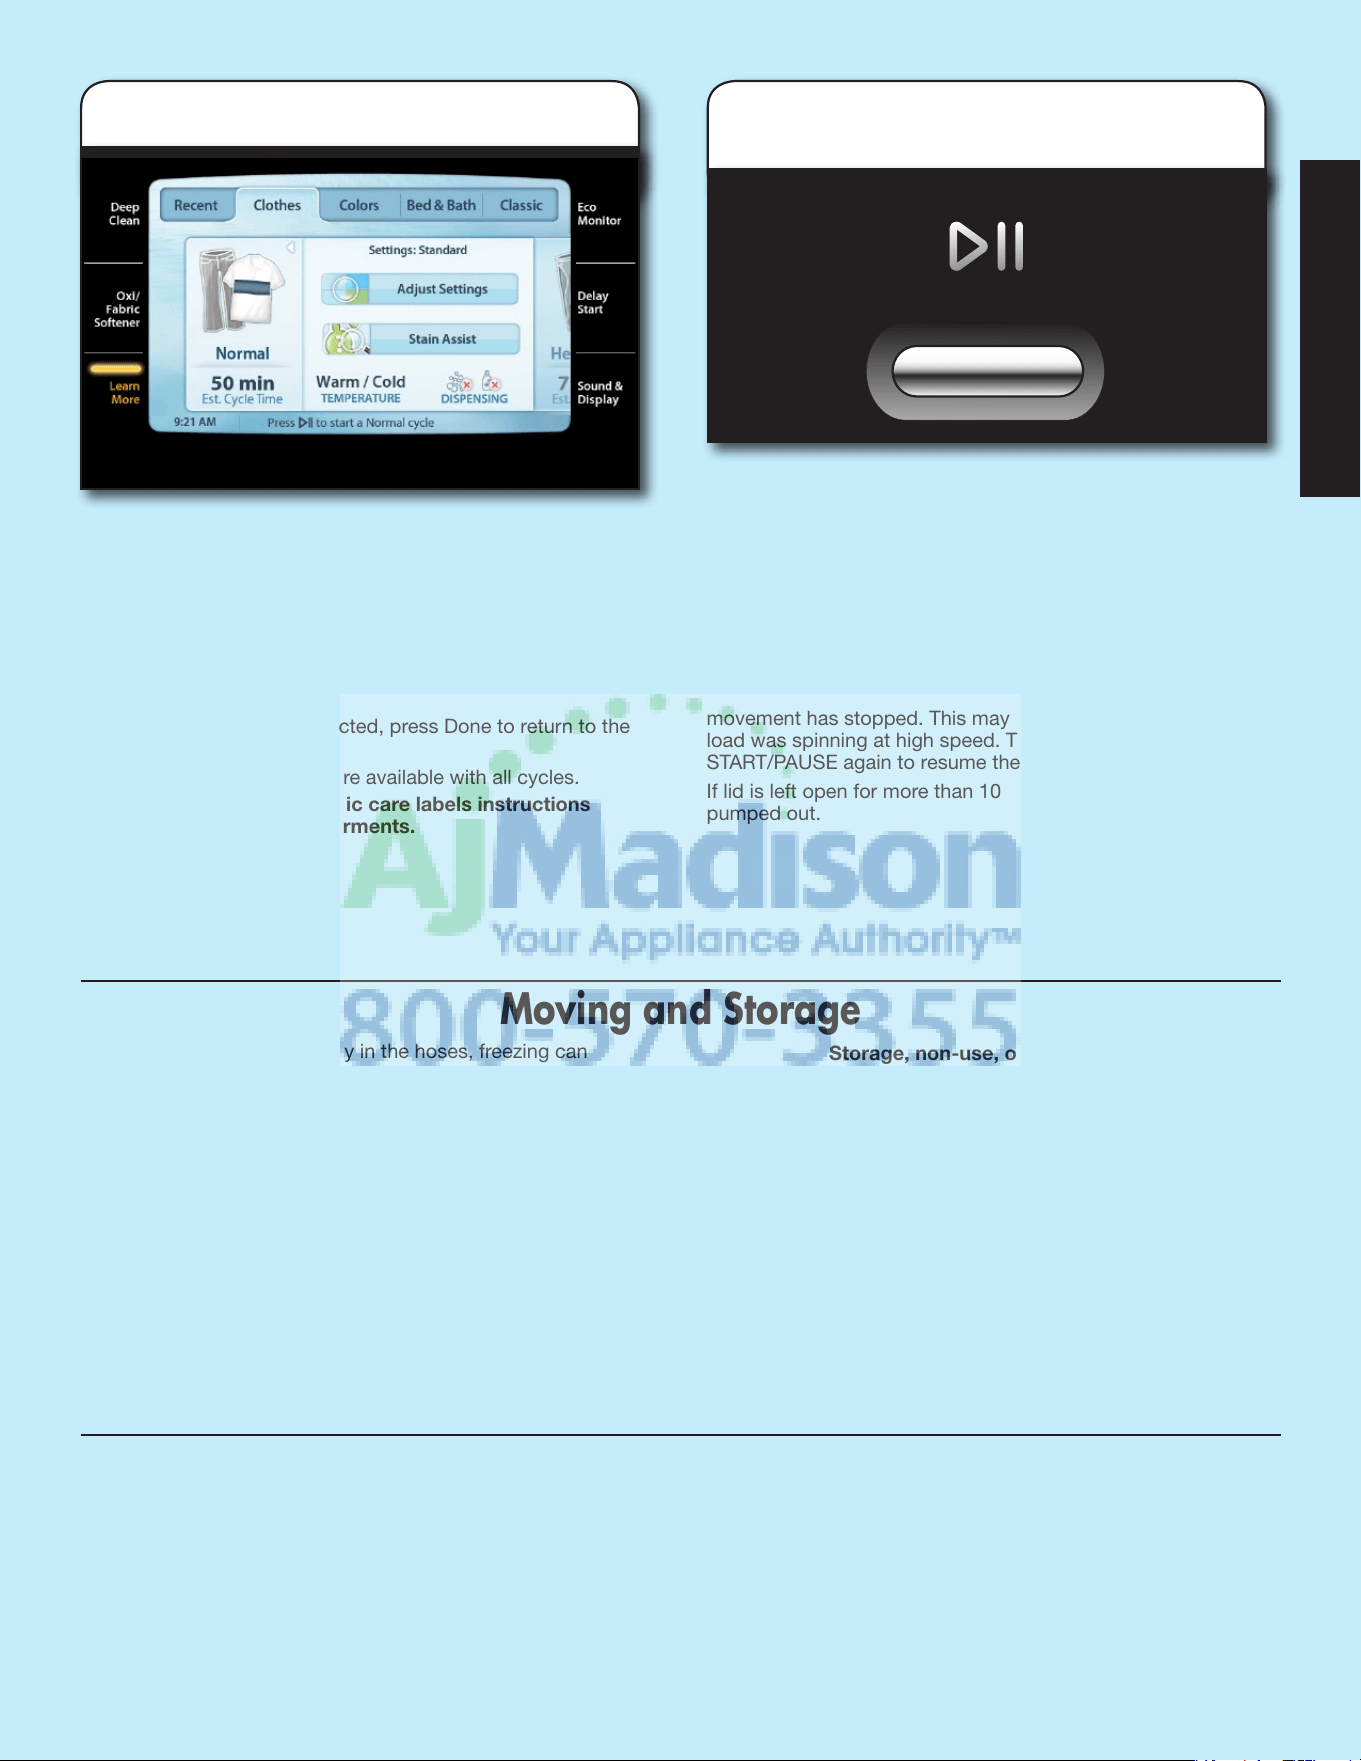
7. Select cycle settings and options
You may choose cycles from the Recent tab, with any custom
settings you have selected. Or select a cycle from the Clothes,
Colors, Bed & Bath, or Classic tab to use default settings or
choose new custom settings.
Once you have selected the cycle, default settings for the cycle
will be displayed. If you wish to change the default settings,
you may adjust the settings using the adjustment palette, by
selecting the desired settings individually, or use Stain Assist
to get recommended settings for the stain. Once the desired
settings and options are selected, press Done to return to the
main cycle screen.
Not all settings and options are available with all cycles.
Always read and follow fabric care labels instructions
to avoid damage to your garments.
8. Touch START/PAUSE to begin
wash cycle
Touch the START/PAUSE button to start the wash cycle.
When the cycle has nished, a “CLEAN” message will be
displayed and the end of cycle signal will sound (if set).
Promptly remove garments when cycle is done to avoid
odor, reduce wrinkling, and rusting of metal hooks, zippers,
and snaps.
NOTE:
If you need to open the lid to add 1 or 2 missed garments,
you may do so while Add a Garment is displayed.
Press START/PAUSE; the lid will unlock once the washer
movement has stopped. This may take several minutes if the
load was spinning at high speed. Then close lid and press
START/PAUSE again to resume the cycle.
If lid is left open for more than 10 minutes the water will be
pumped out.
Inlet Hoses
Whirlpool Corporation recommends replacing your inlet hoses
after every 5 years of use to reduce the risk of hose failure.
Additionally, periodically inspect and replace inlet hoses if
bulges, kinks, cuts, wear, or leaks are found. When replacing
your inlet hoses, mark the date of replacement on the label with
a permanent marker.
English
6
Warranty
LIMITED WARRANTY
For one year from the date of purchase, when this major appliance is operated and maintained according to instructions attached to or
furnished with the product, Whirlpool Corporation or Whirlpool Canada LP (hereafter “Whirlpool”) will pay for Factory Specied Parts and repair
labor to correct defects in materials or workmanship that existed when this major appliance was purchased. Service must be provided by a
Whirlpool designated service company. YOUR SOLE AND EXCLUSIVE REMEDY UNDER THIS LIMITED WARRANTY SHALL BE PRODUCT
REPAIR AS PROVIDED HEREIN. This limited warranty is valid only in the United States or Canada and applies only when the major appliance
is used in the country in which it was purchased. Proof of original purchase date is required to obtain service under this limited warranty.
This limited warranty does not cover:
1. Replacement parts or repair labor if this major appliance is used
for other than normal, single-family household use or when it
is used in a manner that is inconsistent to published user or
operator instructions and/or installation instructions.
2. Service calls to correct the installation of your major appliance,
to instruct you on how to use your major appliance, to replace
or repair house fuses, or to correct house wiring or plumbing.
3. Service calls to repair or replace appliance light bulbs, air lters,
or water lters. Consumable parts are excluded from warranty
coverage.
4. Damage resulting from accident, alteration, misuse, abuse,
re, ood, acts of God, improper installation, installation not
in accordance with electrical or plumbing codes, or use of
products not approved by Whirlpool.
5. Cosmetic damage, including scratches, dents, chips, or other
damage to the nish of your major appliance, unless such
damage results from defects in materials or workmanship and is
reported to Whirlpool within 30 days from the date of purchase.
6. Pick up and delivery. This major appliance is intended to be
repaired in your home.
7. Repairs to parts or systems resulting from unauthorized
modications made to the appliance.
8. Expenses for travel and transportation for product service if your
major appliance is located in a remote area where service by an
authorized Whirlpool servicer is not available.
9. The removal and reinstallation of your major appliance if it
is installed in an inaccessible location or is not installed in
accordance with Whirlpool’s published installation instructions.
10. Replacement parts or repair labor on major appliances with
original model/serial numbers that have been removed, altered,
or cannot be easily determined.
ITEMS EXCLUDED FROM WARRANTY
DISCLAIMER OF IMPLIED WARRANTIES
IMPLIED WARRANTIES, INCLUDING ANY IMPLIED WARRANTY OF MERCHANTABILITY OR IMPLIED WARRANTY OF FITNESS FOR
A PARTICULAR PURPOSE, ARE LIMITED TO ONE YEAR OR THE SHORTEST PERIOD ALLOWED BY LAW. Some states and provinces
do not allow limitations on the duration of implied warranties of merchantability or tness, so this limitation may not apply to you. This
warranty gives you specic legal rights, and you also may have other rights that vary from state to state or province to province.
If outside the 50 United States and Canada, contact your authorized Whirlpool dealer to determine if another warranty applies.
If you need service, rst see the Frequently Asked Questions portion of our website. If after reviewing our website, you need additional
assistance, or if you would like to order Whirlpool FSP
®
Factory Specied Parts, you may call Whirlpool.
In the U.S.A., call 1-800-253-1301. In Canada, call 1-800-807-6777. 07/08
LIMITATION OF REMEDIES; EXCLUSION OF INCIDENTAL AND CONSEQUENTIAL DAMAGES
YOUR SOLE AND EXCLUSIVE REMEDY UNDER THIS LIMITED WARRANTY SHALL BE PRODUCT REPAIR AS PROVIDED HEREIN.
WHIRLPOOL SHALL NOT BE LIABLE FOR INCIDENTAL OR CONSEQUENTIAL DAMAGES. Some states and provinces do not allow
the exclusion or limitation of incidental or consequential damages, so these limitations and exclusions may not apply to you. This
warranty gives you specic legal rights, and you also may have other rights that vary from state to state or province to province.
7
Français
Sécurité de la laveuse
8
Utilisation de la laveuse
1. Appuyer sur MISE SOUS TENSION
pour mettre en marche la laveuse
Appuyer sur MISE SOUS TENSION pour mettre en marche la
laveuse.
Nettoyer avec moins d’eau
La nouveauté la plus agrante de cette nouvelle laveuse est
son système de lavage à faible consommation d’eau avec
impulseur. La laveuse ajuste automatiquement le niveau d’eau
en fonction de la taille de la charge - nul besoin de sélecteur
de niveau d’eau.
Laveuse traditionnelle de
type agitateur
Laveuse à faible
consommation d’eau avec
système de lavage à impulseur
Impulseur
IMPORTANT : Vous ne verrez pas de panier de laveuse rempli
d’eau, comme avec votre précédente laveuse de type agitateur.
Les vêtements ne doivent pas être entièrement submergés.
9
Charger les vêtements sans les tasser et de façon uniforme
le long de la paroi du panier. Pour de meilleurs résultats,
ne pas remplir au-delà de la hauteur de charge maximale
recommandée. Essayer de mélanger différents types d’articles
pour réduire l’emmêlement.
IMPORTANT : Ne pas surcharger la laveuse. Les articles
doivent pouvoir se déplacer librement. Une surcharge peut
entraîner une mauvaise performance de lavage et augmenter le
froissement et l’emmêlement.
Hauteur
maximale de charge
recommandée
2. Charger les vêtements
dans la laveuse
Assouplissant
pour tissu
5. Verser de l’assouplissant pour tissu
dans le distributeur
Verser une mesure d’assouplissant pour
tissu liquide dans le distributeur – toujours
suivre les instructions du fabricant
concernant la dose d’assouplissant pour tissu
à utiliser en fonction de la taille de la charge. Sélectionner
ensuite l’option Assouplissant pour tissu (Fabric Softener)
sous Oxi/assouplissant pour tissu (Oxi/Fabric Softener).
IMPORTANT : L’option Assouplissant pour tissu (Fabric
Softener) doit être sélectionnée pour que le produit soit
distribué correctement et au moment adéquat du programme.
Ne pas remplir le distributeur excessivement ni diluer le produit.
REMARQUE : Ne pas utiliser de boules distributrices
d’assouplissant pour tissu dans cette laveuse. Elles ne
distribueront pas leur contenu correctement.
Ajouter une mesure de détergent
HE dans le distributeur de détergent.
IMPORTANT : Utiliser uniquement des détergents Haute
efcacité. L’emballage portera la mention « HE » ou « High
Efciency » (haute efcacité).
Ne pas tenter de retirer les distributeurs ou la garniture
pour le nettoyage. Les distributeurs et la garniture
ne peuvent pas être retirés.
Détergent
3. Ajouter du détergent HE
au distributeur
Agent de
blanchiment
4. Ajouter de l’agent de blanchiment
ou du produit Oxi au distributeur
Ajouter de l’agent de blanchiment au chlore
ou un activateur de linge Oxi au distributeur.
Lorsqu’on utilise de l’agent de blanchiment
au chlore ou des produits Oxi en poudre,
sélectionner l’option Agent de blanchiment/Oxi en poudre
(Powdered Bleach/Oxi) sous Oxi/assouplissant pour tissu (Oxi/
Fabric Softener).
• Nepasremplirexcessivementledistributeurniutiliserplus
de 3/4 de tasse (180 mL) d’agent de blanchiment liquide au
chlore. Un remplissage excessif entraînera la distribution
immédiate de l’agent de blanchiment ou du produit Oxi
dans la laveuse.
• Nepasutiliserd’agentdeblanchimentsansdangerpourles
couleurs ni de produit Oxi avec un programme utilisant de
l’agent de blanchiment au chlore liquide.
10
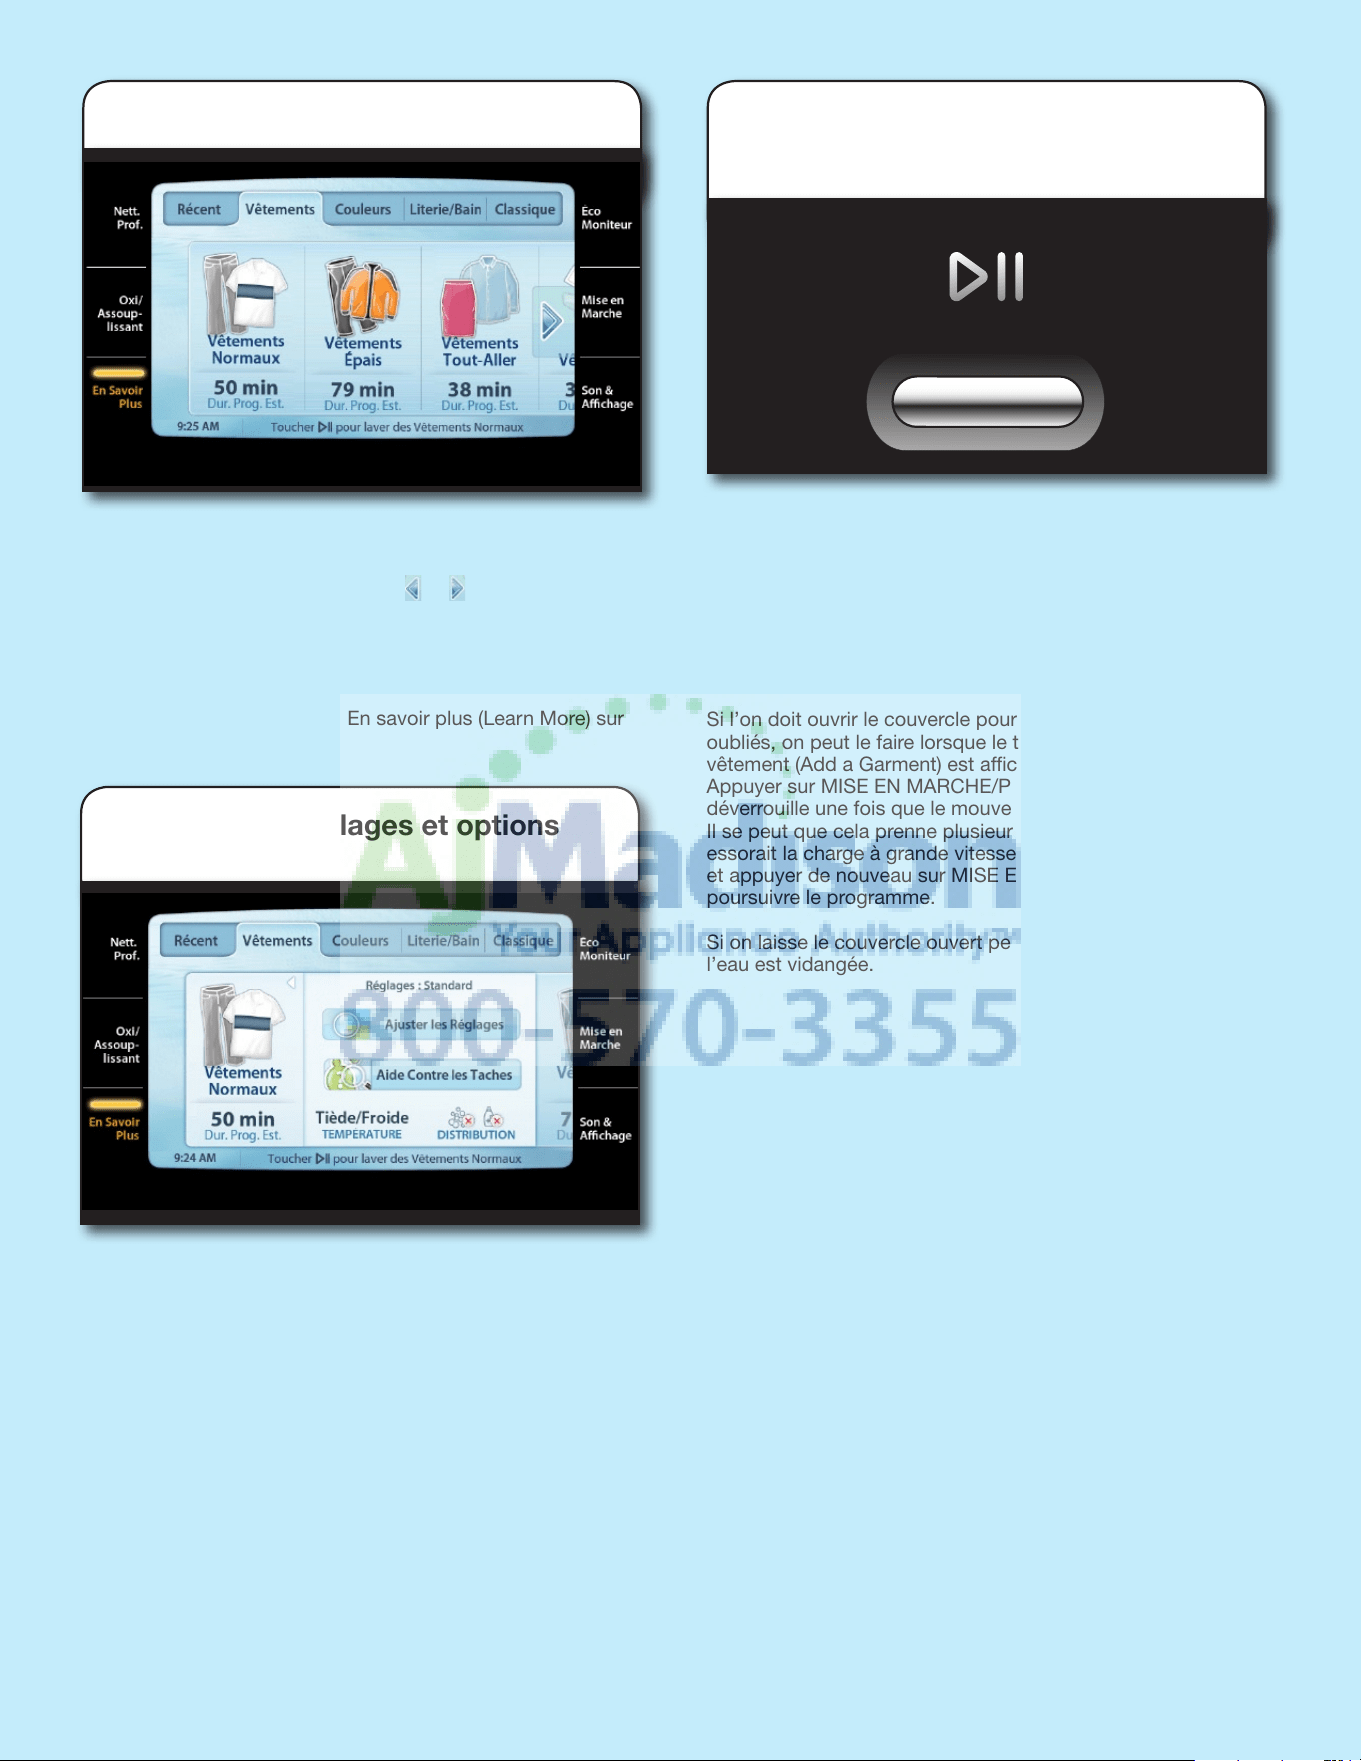
7. Choisir les réglages et options
du programme
On peut choisir des programmes à partir de l’onglet Récent
(recent), avec n’importe quel réglage personnalisé sélectionné.
On peut aussi choisir un programme à partir de l’onglet
Vêtements (clothes), Couleurs (colors), Literie et bain (Bed &
Bath), ou Classique (classic) pour utiliser les réglages par défaut
ou choisir de nouveaux réglages personnalisés.
Après avoir sélectionné un programme, les réglages par défaut
correspondant à ce programme s’afchent. Si l’on souhaite
modier les réglages par défaut, on peut ajuster les réglages à
l’aide de la palette d’ajustement, en sélectionnant les réglages
souhaités individuellement, ou en utilisant Aide anti-taches
(Stain assist) pour obtenir les réglages recommandés pour la
tache concernée. Une fois les réglages et options souhaités
sélectionnés, appuyer sur Terminé (done) pour revenir à l’écran
principal des programmes.
Tous les réglages et options ne sont pas disponibles avec tous
les programmes.
Toujours lire et suivre les instructions des étiquettes de soin
des tissus pour éviter d’endommager les vêtements.
8. Appuyer sur MISE EN MARCHE/
PAUSE pour démarrer le
programme de lavage
Appuyer sur le bouton MISE EN MARCHE/PAUSE (start/
pause) pour démarrer le programme de lavage. Lorsque le
programme est terminé, le message « PROPRE » s’afche
et le signal de n de programme retentit (si activé).
Retirer rapidement les vêtements une fois le programme
terminé pour éviter la formation d’odeurs, réduire le
froissement et empêcher les crochets métalliques, fermetures
à glissière et bouton-pression de rouiller.
REMARQUE :
Si l’on doit ouvrir le couvercle pour ajouter 1 ou 2 vêtements
oubliés, on peut le faire lorsque le témoin lumineux Ajouter un
vêtement (Add a Garment) est afché.
Appuyer sur MISE EN MARCHE/PAUSE; le couvercle se
déverrouille une fois que le mouvement de la laveuse a cessé.
Il se peut que cela prenne plusieurs minutes si la laveuse
essorait la charge à grande vitesse. Ouvrir ensuite le couvercle
et appuyer de nouveau sur MISE EN MARCHE/PAUSE pour
poursuivre le programme.
Si on laisse le couvercle ouvert pendant plus de 10 minutes,
l’eau est vidangée.
Utiliser l’écran tactile pour sélectionner le programme désiré.
Les programmes sont regroupés sous des onglets par type et
les 7 derniers programmes utilisés apparaissent dans l’onglet
Récent (recent). Toucher les èches
et pour faire déler les
options vers la gauche ou vers la droite.
Le programme Vêtements normaux (Normal Clothes) est
recommandé pour le nettoyage d’articles en coton, de linge
de maison et de charges de tissus mixtes normalement sales.
Pour plus d’informations sur les programmes, options et
caractéristiques, appuyer sur En savoir plus (Learn More) sur
l’afchage de la laveuse.
6. Sélectionner le programme

Entretien de la laveuse et dépannage
Pour des instructions supplémentaires sur l’entretien de la laveuse et pour des conseils utiles, consulter la page de la Foire
Aux Questions de notre site Web. Ceci vous évitera peut-être le coût d’une intervention de dépannage.
Aux États-Unis : www.whirlpool.com • Au Canada : www.whirlpool.ca
L’eau qui peut rester dans les tuyaux risque d’abîmer la
laveuse en temps de gel. Si la laveuse doit faire l’objet d’un
déménagement ou de remisage au cours d’une période de gel,
préparer l’appareil pour l’hiver.
Hivérisation de votre laveuse
1. Fermer les deux robinets d’eau. Débrancher et vidanger les
tuyaux d’arrivée d’eau. Verser 1 pinte (1 L) d’antigel pour
véhicule récréatif dans le panier.
2. Faire fonctionner la laveuse au réglage vidange et essorage
pendant 30 secondes environ pour mélanger l’antigel à l’eau
restante.
3. Débrancher la laveuse ou déconnecter la source de courant
électrique.
Entretien en cas d’entreposage, de non-utilisation
ou en période de vacances
Faire fonctionner la laveuse seulement lorsqu’on est présent.
Si vous devez partir en vacances ou ne pas utiliser la laveuse
pendant une période prolongée, vous devez exécuter les
opérations suivantes :
1. Débrancher la laveuse ou déconnecter la source de courant
électrique.
2. Fermer l’alimentation en eau de la laveuse. Ceci aide à éviter
les inondations (dues à une augmentation de la pression)
quand l’utilisateur est absent.
Remise en marche de la laveuse
Consulter les instructions d’installation comprises avec
la laveuse pour réinstaller et utiliser la laveuse après une
hivérisation, un entreposage ou un déménagement. Lors de la
réinstallation, vider les conduits et tuyaux en faisant fonctionner
un programme sans vêtements.
Déménagement et entreposage
Garantie
GARANTIE LIMITÉE
Pendant un an à compter de la date d’achat, lorsque ce gros appareil ménager est utilisé et entretenu conformément aux instructions
jointes à ou fournies avec le produit, Whirlpool Corporation ou Whirlpool Canada LP (ci-après désignées “Whirlpool”) paiera pour les
pièces spéciées par l’usine et la main-d’oeuvre pour corriger les vices de matériaux ou de fabrication qui existaient déjà lorsque ce
gros appareil ménager a été acheté. Le service doit être fourni par une compagnie de service désignée par Whirlpool. LE SEUL ET
EXCLUSIF RECOURS DU CLIENT DANS LE CADRE DE LA PRÉSENTE GARANTIE LIMITÉE CONSISTE EN LA RÉPARATION PRÉVUE
CI-DESSUS. Cette garantie limitée est valide uniquement aux États-Unis ou au Canada et s’applique exclusivement lorsque le gros
appareil ménager est utilisé dans le pays où il a été acheté. Une preuve de la date d’achat d’origine est exigée pour obtenir un service
dans le cadre de la présente garantie limitée.
La présente garantie limitée ne couvre pas :
1. Les pièces de rechange ou la main d’oeuvre lorsque ce
gros appareil ménager est utilisé à des ns autres que
l’usage unifamilial normal ou lorsque les instructions
d’installation et/ou les instructions de l’opérateur ou de
l’utilisateur fournies ne sont pas respectées.
2. Les visites de service pour rectier l’installation du gros
appareil ménager, montrer à l’utilisateur comment utiliser
l’appareil, remplacer ou réparer des fusibles ou rectier le
câblage ou la plomberie du domicile.
3. Les visites de service pour réparer ou remplacer les
ampoules électriques, les ltres à air ou les ltres à eau de
l’appareil. Les pièces consomptibles ne sont pas couvertes
par la garantie.
4. Les dommages imputables à : accident, modication,
usage impropre ou abusif, incendie, inondation, actes de
Dieu, installation fautive ou installation non conforme aux
codes d’électricité ou de plomberie, ou l’utilisation de
produits non approuvés par Whirlpool.
5. Les défauts apparents, notamment les éraures, les
bosses, ssures ou tout autre dommage au ni du gros
appareil ménager, à moins que ces dommages soient dus à
des vices de matériaux ou de fabrication et soient signalés à
Whirlpool dans les 30 jours suivant la date d’achat.
6. L’enlèvement et la livraison. Ce gros appareil ménager est
conçu pour être réparé à domicile.
7. Les réparations aux pièces ou systèmes résultant d’une
modication non autorisée faite à l’appareil.
8. Les frais de déplacement et de transport pour le service
d’un produit si votre gros appareil ménager est situé dans
une région éloignée où un service d’entretien Whirlpool
autorisé n’est pas disponible.
9. La dépose et la réinstallation de votre gros appareil ménager
si celui-ci est installé dans un endroit inaccessible ou n’est
pas installé conformément aux instructions d’installation
fournies par Whirlpool.
10. Les pièces de rechange ou la main d’oeuvre pour les gros
appareils ménagers dont les numéros de série et de modèle
originaux ont été enlevés, modiés ou qui ne peuvent pas
être facilement identiés.
ÉLÉMENTS EXCLUS DE LA GARANTIE
CLAUSE D’EXONÉRATION DE RESPONSABILITÉ AU TITRE DES GARANTIES IMPLICITES
LES GARANTIES IMPLICITES, Y COMPRIS LES GARANTIES APPLICABLES DE QUALITÉ MARCHANDE OU D’APTITUDE À UN
USAGE PARTICULIER, SONT LIMITÉES À UN AN OU À LA PLUS COURTE PÉRIODE AUTORISÉE PAR LA LOI. Certains États et
certaines provinces ne permettent pas de limitation sur la durée de garanties implicites de qualité marchande ou d’aptitude à un
usage particulier, de sorte que la limitation ci-dessus peut ne pas être applicable dans votre cas. Cette garantie vous confère des
droits juridiques spéciques, et vous pouvez également jouir d’autres droits qui peuvent varier d’une juridiction à l’autre.
Si vous résidez à l’extérieur du Canada et des 50 États des États-Unis, contactez votre marchand Whirlpool autorisé pour déterminer si
une autre garantie s’applique. Si vous avez besoin d’une intervention d’entretien ou de réparation, consulter d’abord la section Foire Aux
Questions de notre site Web. Si vous avez toujours besoin d’aide après avoir consulté notre site Web ou si vous souhaitez commander des
pièces spéciées par l’usine Whirlpool FSP
®
, vous pouvez appeler Whirlpool.
Aux É.-U., composer le 1-800-253-1301. Au Canada, composer le 1-800-807-6777. 7/08
LIMITATION DES RECOURS, EXCLUSION DES DOMMAGES FORTUITS OU INDIRECTS
LE SEUL ET EXCLUSIF RECOURS DU CLIENT DANS LE CADRE DE LA PRÉSENTE GARANTIE LIMITÉE CONSISTE EN LA
RÉPARATION PRÉVUE CI-DESSUS. WHIRLPOOL N’ASSUME AUCUNE RESPONSABILITÉ POUR LES DOMMAGES FORTUITS OU
INDIRECTS. Certains États et certaines provinces ne permettent pas l’exclusion ou la limitation des dommages fortuits ou indirects
de sorte que ces limitations et exclusions peuvent ne pas être applicables dans votre cas. Cette garantie vous confère des droits
juridiques spéciques, et vous pouvez également jouir d’autres droits qui peuvent varier d’une juridiction à l’autre.
W10310051B
W10310052A-SP
© 2010 02/10
All rights reserved Printed in U.S.A.
Tous droits réservés. Imprimé aux É.-U.
®
Registered Trademark/™ Trademark of Whirlpool, U.S.A.,
Whirlpool Canada LP Licensee in Canada
®
Marque déposée/™Marque de commerce de Whirlpool U.S.A.,
Emploi sous licence par Whirlpool Canada LP au Canada.