Loading ...
Loading ...
Loading ...
21INSTALLATION
ENGLISH
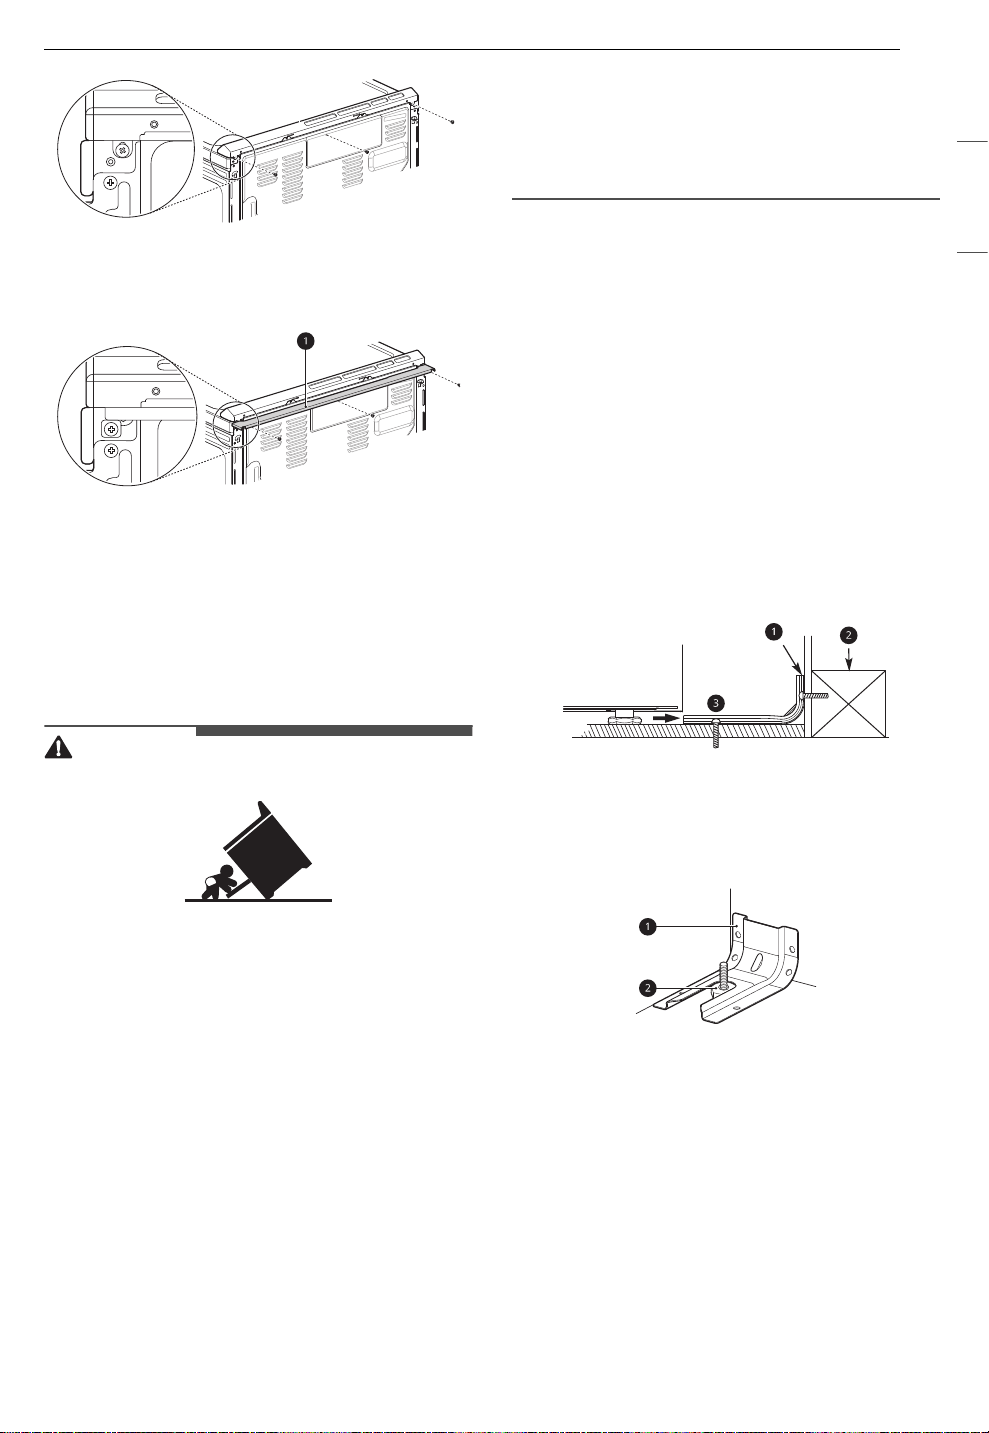
2 Attach the rear top plate and filler assembly
as shown, using three screws removed in step
1.
a Rear filler
Anti-tip Device
Installing the Anti-Tip Device
Tip Hazard
WARNING
• A child or adult can tip the range and be killed.
• Install the anti-tip device to the structure and/or
the range. Verify the anti-tip device has been
properly installed and engaged by following the
guide on the anti-tip bracket template.
• Engage the range to the anti-tip device by
following the guide on the anti-tip bracket
template. Ensure the anti-tip device is re-
engaged when the range is moved by following
the guide on the anti-tip bracket template.
• Re-engage the anti-tip device if the range is
moved. Do not operate the range without the
anti-tip device in place and engaged.
• See installation instructions for details.
• Failure to follow these instructions can result in
death or serious burns to children or adults.
• Range must be secured with an approved anti-
tip device.
• The range could be tipped by standing, sitting or
leaning on an open door if the range or anti-tip
device is not properly installed.
• The use of this device does not preclude tipping
of the range when not properly installed.
• After installing the anti-tip device, verify that it is
in place by carefully attempting to tilt the range
forward.
• This range has been designed to meet all
recognized industry tip standards for all normal
conditions.
• The installation of the anti-tip device must meet
all local codes for securing the appliance.
Using the Anti-Tip Bracket Template
• The anti-tip bracket is packaged with an
installation template. The instructions include
necessary information to complete the
installation. Read and follow the range
installation instruction sheet.
•Screws c must enter wood or concrete.
a Anti-tip bracket
b Wall plate
Engaging the Anti-tip Device
a Anti-tip bracket
b Leveling leg
1 Slide the range against the wall, making sure
the back leg slides into and engages the anti-
tip bracket.
• Make sure the back leg slides into and
engages the anti-tip bracket.
2 Check for proper installation by grasping the
front edge of the cooktop and carefully
attempting to tilt the range forward.
en-us_main.book.book Page 21 Thursday, March 2, 2023 10:07 AM
Loading ...
Loading ...
Loading ...