Loading ...
Loading ...
Loading ...
34 - INSTALLATION 91477A886/A
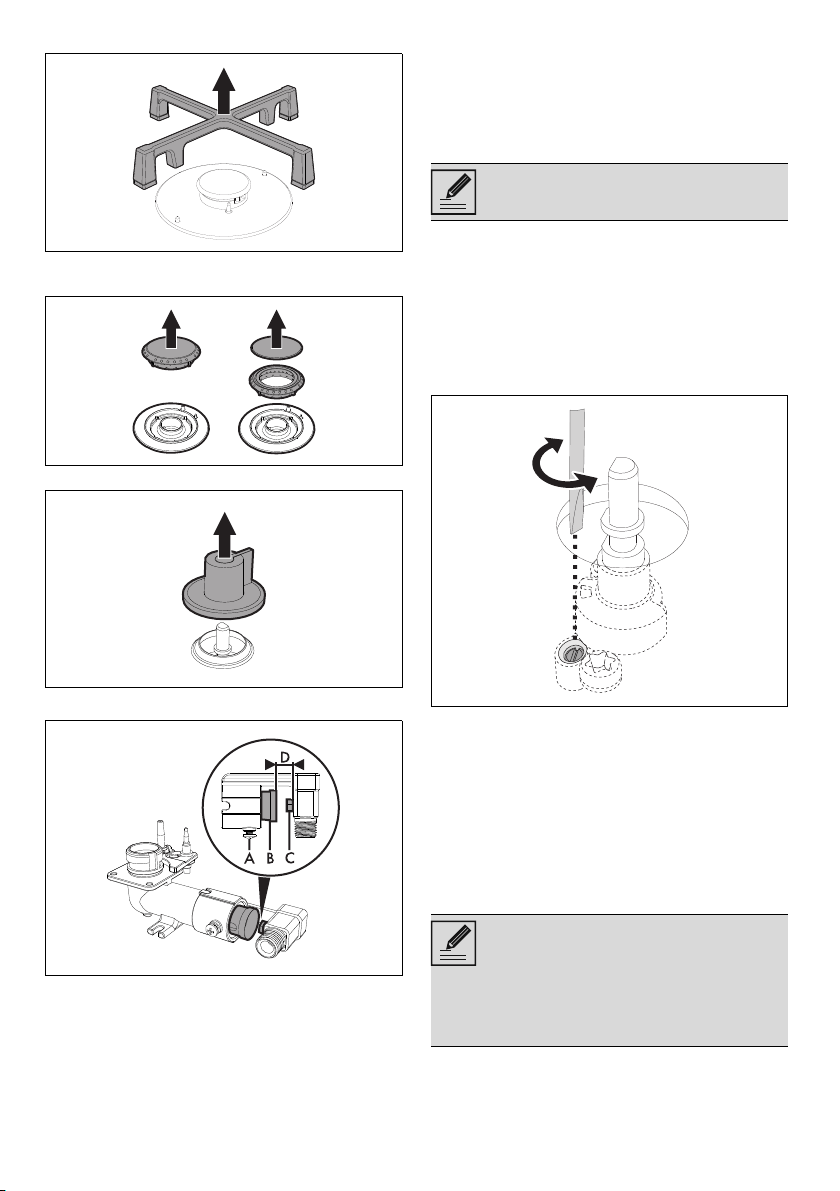
1. Remove the grids from the hob top.
2. Remove the flame-spreader crowns and
relative burner caps.
3. Pull the knobs upwards to remove them.
Replacing nozzles
4. 1. Loosen the screw A and push the air
regulator B as far as it will go.
5. Use a spanner to remove the nozzles C and
install the new ones for the required gas
supply, following the indications given in the
relevant tables (see "Gas types and
countries").
6. Adjust the air flow by moving the air
regulator B to obtain the distance D given in
the corresponding table (see "Gas types
and countries").
7. After adjusting each burner, reassemble the
appliance correctly.
Adjusting the minimum setting for natural or
town gas
1. Light the burner and turn it to the minimum
position.
2. Remove the gas tap knob and turn the
adjustment screw next to the gas cock
spindle (depending on the model) until the
correct minimum flame is achieved.
3. Refit the knob and verify that the burner
flame is stable.
4. Turn the knob rapidly from the maximum to
the minimum setting: The flame should not go
out.
5. Repeat the operation on all the gas taps.
Adjusting the minimum setting for LPG
Tighten the screw located at the side of the cock
spindle clockwise all the way.
Lubricating the gas cocks
Over time the gas cocks may become difficult to
turn and get blocked. Clean them internally and
The maximum tightening torque must not
exceed 3 Nm.
Following adjustment to a gas other
than the one originally set in the factory,
replace the gas setting label on the
appliance with the one corresponding
to the new gas. The label is inserted
inside the nozzle pack (where present).
Loading ...
Loading ...
Loading ...