Loading ...
Loading ...
Loading ...
12
1-877-646-5288
13ninjakitchen.com
USING THE DRIP STOP
The drip stop is used to close o the brew basket
to prevent any coee from dispensing. You will
need to manually open and close the drip stop
by moving the lever to your desired position. It
can be closed and reopened at any point before,
during, or after a brew.
If the Drip Stop is closed mid-brew the brewer
will pause the brew, and after 30 seconds it will
give you a friendly audible reminder to reopen
the Drip Stop. After 5 minutes, the brew will be
canceled.
NOTE: If the Drip Stop is closed before you
begin a brew, the brewer will notify you with
3 beeps and the Drip Stop indicator will
illuminate. Move the Drip Stop to the open
position and press START BREW to begin
your brew.
NOTE: Remember to open the Drip Stop
when you are ready to brew again. If you
forget, your brewer will give you a friendly
audible reminder.
CLOSING THE DRIP STOP AFTER A BREW
When the brew cycle is complete, set the Drip
Stop to the closed position to stop dripping from
the brew basket.
CLOSED OPEN
WARNING: To avoid contact with steam and hot
surfaces. DO NOT reach across top of brewer
to froth.
INTEGRATED FROTHER
The Integrated Frother does not heat milk.
1 Add milk to your cup until it is about
1
/3 full.
• For cold froth, continue to Step 2.
• For hot froth, microwave for
45–60 seconds.
NOTE: Frother does not heat liquid.
4 Remove the frother whisk by twisting it to the
left. Keep your cup below the whisk while you
carry it to your sink or dishwasher for easy
cleaning.
FOR HOT FROTH
2 Swing the arm of the frother toward the front
of the brewer. Install the frother whisk by
twisting it to the right.
3 Hold the cup under the frother and submerge
the whisk just below the surface of the milk.
Press and hold the button on top of the
frother and froth for 30–45 seconds.
CLEANING & MAINTENANCE
USING THE NINJA® ESPRESSO &
COFFEE BARISTA SYSTEM – CONT.
CLEANING AFTER A BREW
Dishwasher Safe Parts:
Brew basket, glass carafe and brew-through lid,
water reservoir and lid, frother whisk, Ninja smart
scoop, capsule bin, adjustable cup tray, cup tray
base, and permanent filter (not included, sold
separately) are dishwasher safe.
CLEANING THE FROTHER
Clean the frother whisk after each use. Hand-wash
thoroughly or place on top rack of dishwasher.
CLEANING THE WATER RESERVOIR
NOTE: For best results, we recommend rinsing
the reservoir after brewing and refilling with
fresh water prior to the next brew.
Empty the reservoir and hand-wash or place in
dishwasher. For a better clean, we recommend
placing it in the bottom rack of the dishwasher
standing upright with the opening facing
downward. We recommend doing this weekly.
CLEANING THE CARAFE
We recommend cleaning your carafe after each use
with warm, soapy water.
To clean the carafe more thoroughly, we
recommend using a soft foam brush.
DO NOT use a wire brush.
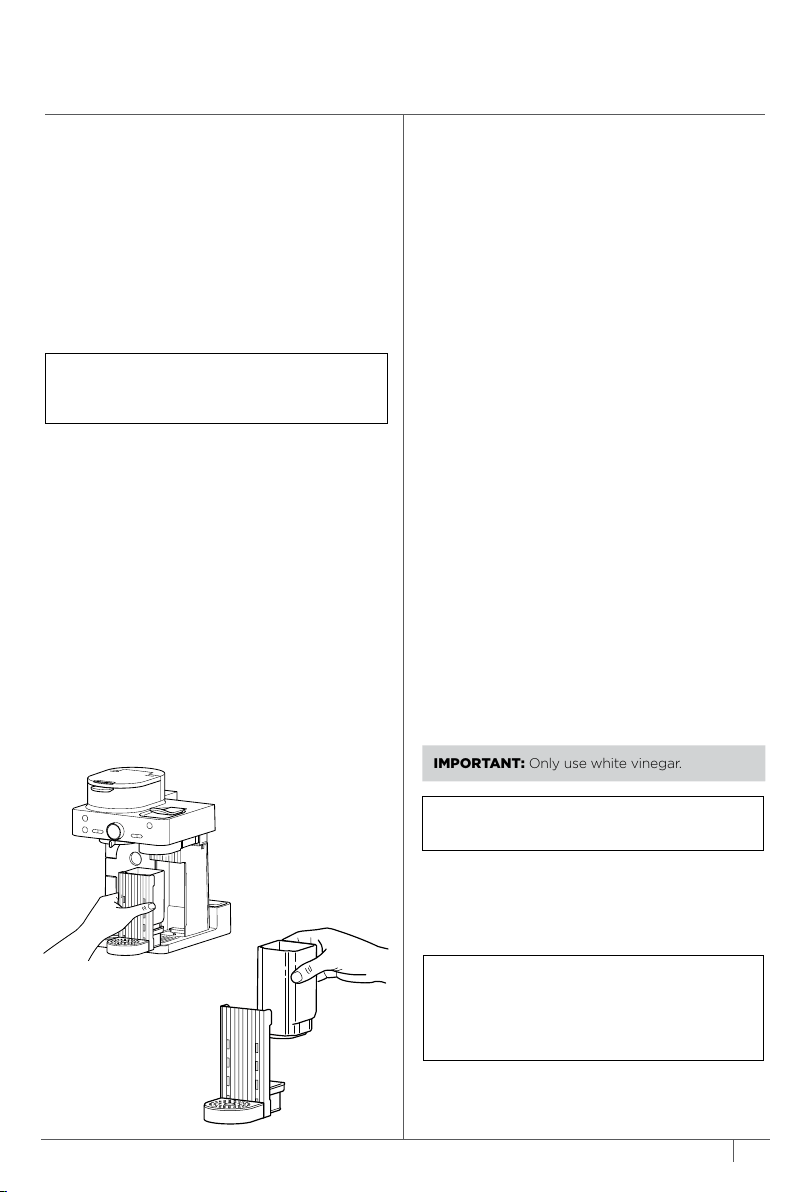
CLEANING THE CAPSULE BIN
Remove the cup tray, cup tray base, and capsule
bin from under the capsule outlet. Discard the
used capsules from the capsule bin. Hand-wash
the cup tray, cup tray base, and capsule bin or
place on top rack of dishwasher.
CLEANING THE BREW BASKET
If brewing grounds, allow the brewer to cool,
then remove the brew basket by pinching the
handle and lifting straight up. If using a paper
filter, discard the filter by dumping the brew
basket upside down into a waste-bin.
CLEANING & DESCALING YOUR BREWING
SYSTEM
Your Ninja Espresso & Coee Barista System oers
two sides to choose from: Grounds and Capsules.
Either side that you use will eventually need to
be cleaned with a clean cycle. The clean cycle is
used for descaling the brewer when calcium scale
buildup is aecting the performance of the brewer
and/or the flavor of your coee.
When cleaning is needed in Grounds mode,
the Intelligent Clean Cycle Indicator will
automatically illuminate orange under the
Grounds Button. If the indicator is ignored, your
brewer may stop mid-brew and display “CLn,”
indicating it needs immediate cleaning.
Descaling Grounds Side:
1 Place the empty carafe beneath the brew
basket.
2 Use a descaling solution specifically formulated
for coeemaker cleaning and follow the
directions on the package. Fill the water
reservoir up to, but not exceeding, the Full line.
OR
Fill the water reservoir to the Travel Mug line (16
oz.) with white vinegar, then fill the rest of the
reservoir with water up to, but not exceeding,
the Full line.
3 Once the water reservoir is filled with the
cleaning solution and water mixture, press the
Grounds Button then press the CLEAN button.
4 Press START BREW to begin the cleaning cycle.
IMPORTANT: Only use white vinegar.
NOTE: Running a water-only clean cycle will
not descale the brewer properly.
NOTE: To cancel the clean cycle, press the
Power button or CLEAN button once. The
brewer will beep and stop brewing through
the cleaning mixture. Continue to follow the
instructions starting at Step 6.
Loading ...
Loading ...
Loading ...