User Guide
Smart Light Switch 1 Gang 1 Way
Tapo S210
©2023 TP-Link 1910013286 REV1.0.0

Contents
About This Guide ···········································································1
Introduction ······················································································2
Appearance ······················································································3
Set Up Your Switch ·······································································4
Main Device Controls ··································································6
Schedule ····························································································8
Away Mode ····················································································· 10
Timer ··································································································12
Check Runtime·············································································14
Device Sharing ·············································································15
Smart Actions ···············································································16
Device Settings ···········································································21
How to Reset Your Switch ······················································22
Authentication ··············································································24
1
About This Guide
This guide provides a brief introduction to the Smart Light Switch 1 Gang 1 Way and the Tapo app, as well as regulatory information.
Please note that features available in Tapo may vary by model and software version. Tapo availability may also vary by region. All images, steps, and
descriptions in this guide are only examples and may not reect your actual Tapo experience.
Conventions
In this guide, the following convention is used:
Convention Description
Blue
Key information appears in blue, including management page text such as menus, items, buttons and so on.
Underline
Hyperlinks are in blue and underlined. You can click to redirect to a website.
Note:
Ignoring this type of note might result in a malfunction or damage to the device.
More Info
• Specications can be found on the product page at https://www.tapo.com.
• Our Technical Support and troubleshooting information can be found at https://www.tapo.com/support/.
• The switch installation and setup video can be found at https://www.tp-link.com/support/download/tapo-s210/.
• The installation guide can be found at https://www.tp-link.com/support/faq/3360/.

2
Introduction
Make your traditional lighting smart with the Tapo Smart Switch. Turn your lights on and o with your voice, or control them from your phone. Thanks to
the switch's battery-powered design with 1+ year battery life, enjoy the smart lifestyle without rewiring your home or replacing your current bulbs.
The Tapo smart switch works with an Tapo hub. Make sure you have set up your hub rst.
Remote Control Voice ControlSchedule & Timer Tool-Free Battery
Replacement
No Neutral
Required
Low-Battery
Reminder
• Remote Control – Instantly turn the light on/o wherever you are through the Tapo app.
• Schedule – Set a schedule to turn on the lights for you in advance.
• Timer – Set a countdown timer to turn o the lights after sleeping.
• Voice Control – Manage your lights with voice commands via Amazon Alexa or the Google Assistant.
• Low Battery Reminder – Send notications when the battery power is low.
• No Neutral Wire Required – Super easy wiring. No neutral wire required. No rewiring required.
• Tool-Free Battery Replacement – Easily replace batteries after installation, no need of other tools.
3
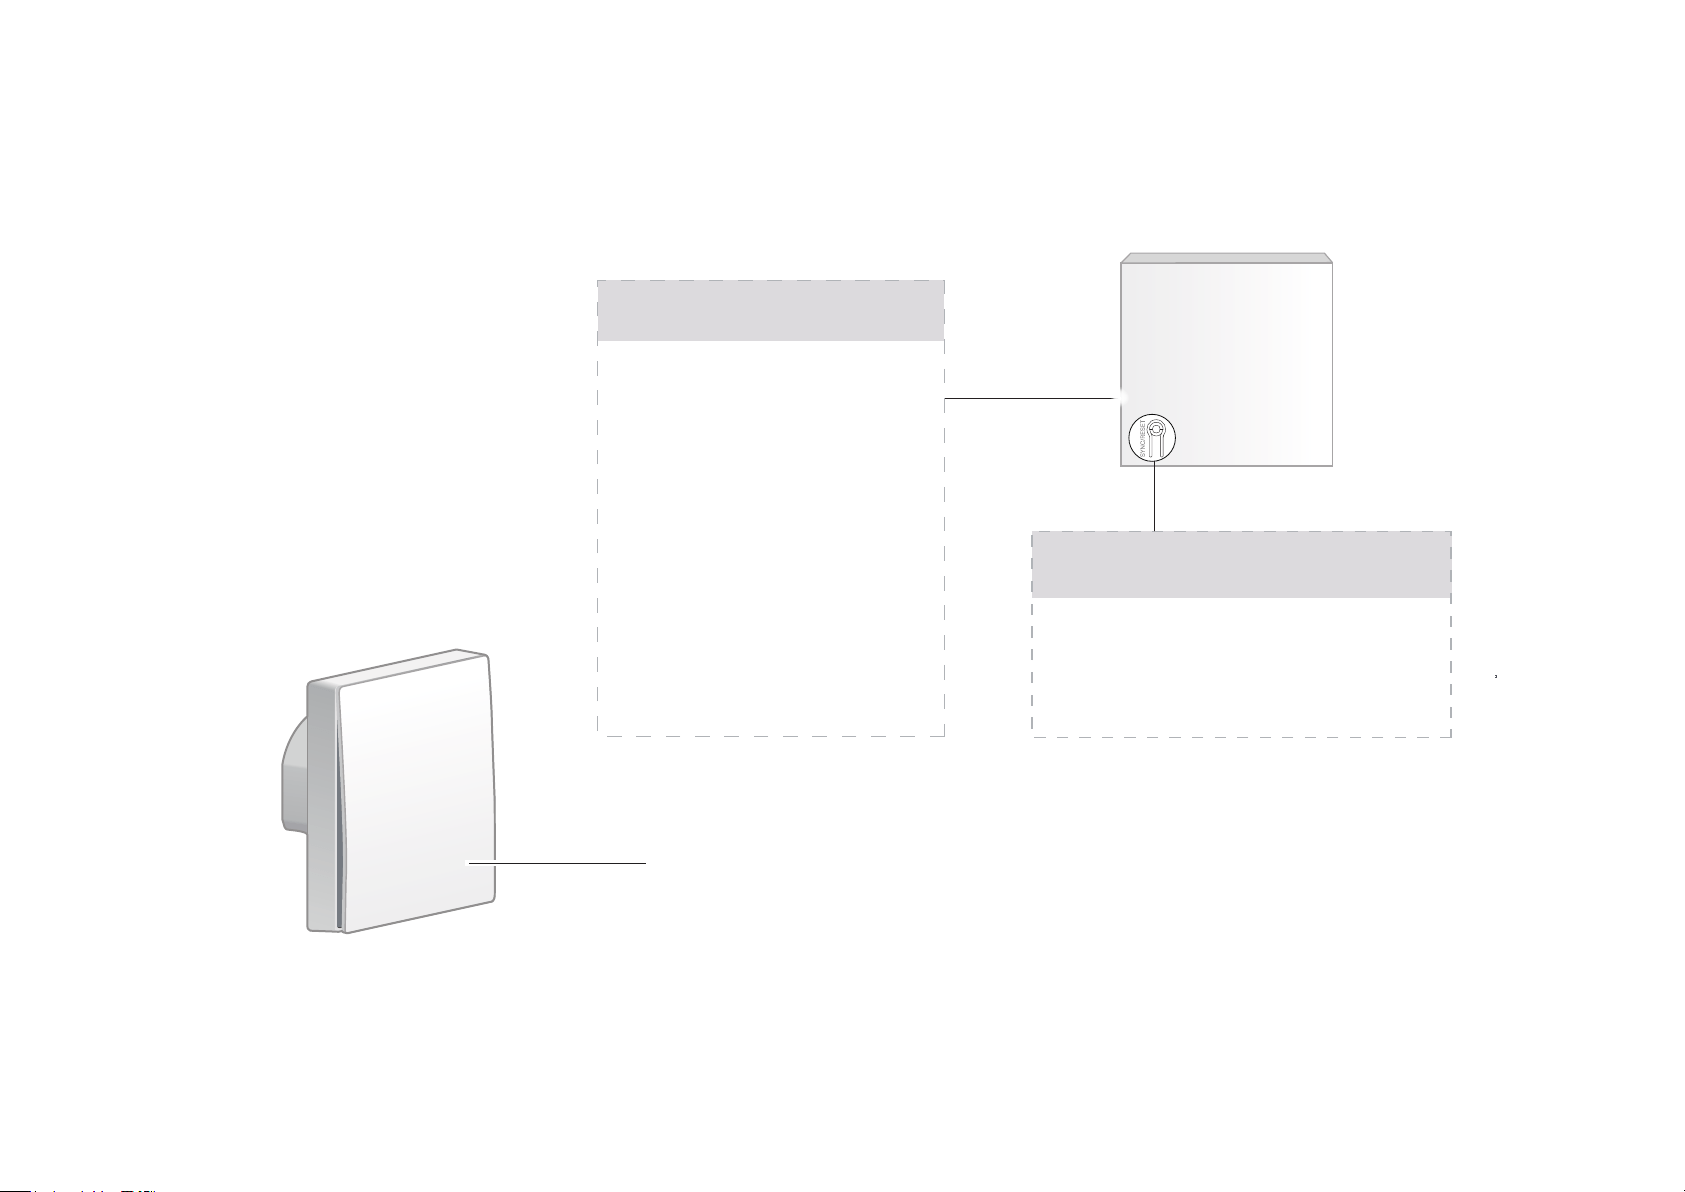
Appearance
Control the light connected to the switch.
Switch
Blinking red quickly:
Ready for connecting
to the hub.
LED
Solid red for 5s:
Connected to the hub.
Low battery.
Blinking 3 times when
pressing the switch:
Press and hold for 5s:
SYNC/RESET button
Reset the switch and get ready
for connecting to the hub.
4
Set Up Your Switch
Tapo Smart Light Switch works with an Tapo hub. You need to set up your hub rst, then add your switch to the app. Follow the steps below to get
started with your Tapo Smart Light Switch.
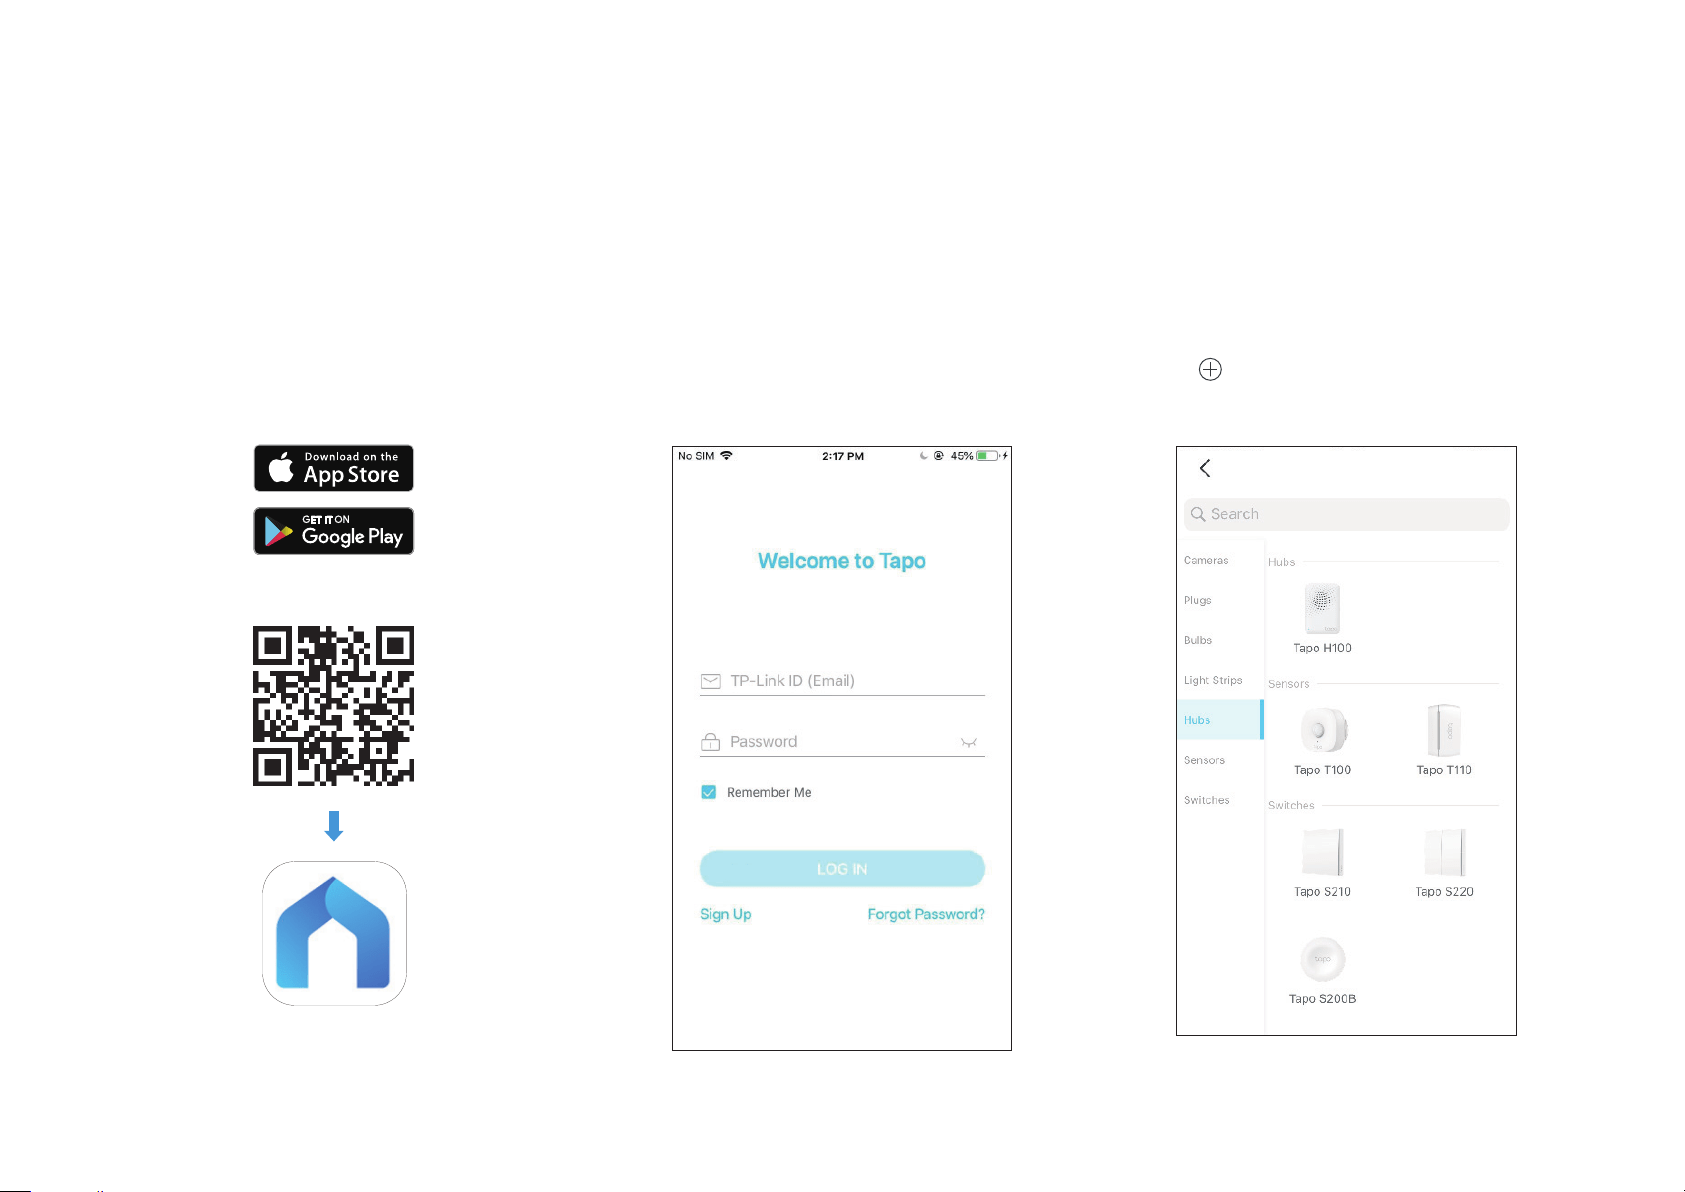
Step 1. Download Tapo App
Get the Tapo app from the App Store or
Google Play, or by scanning the QR code
below.
OR
Step 2. Log In
Open the app, and log in with your TP-Link ID.
If you don't have an account, create one rst.
Step 3. Add Tapo Hub First
Tap the button in the app and select your
hub. Then follow app instructions to set up
your hub.
5
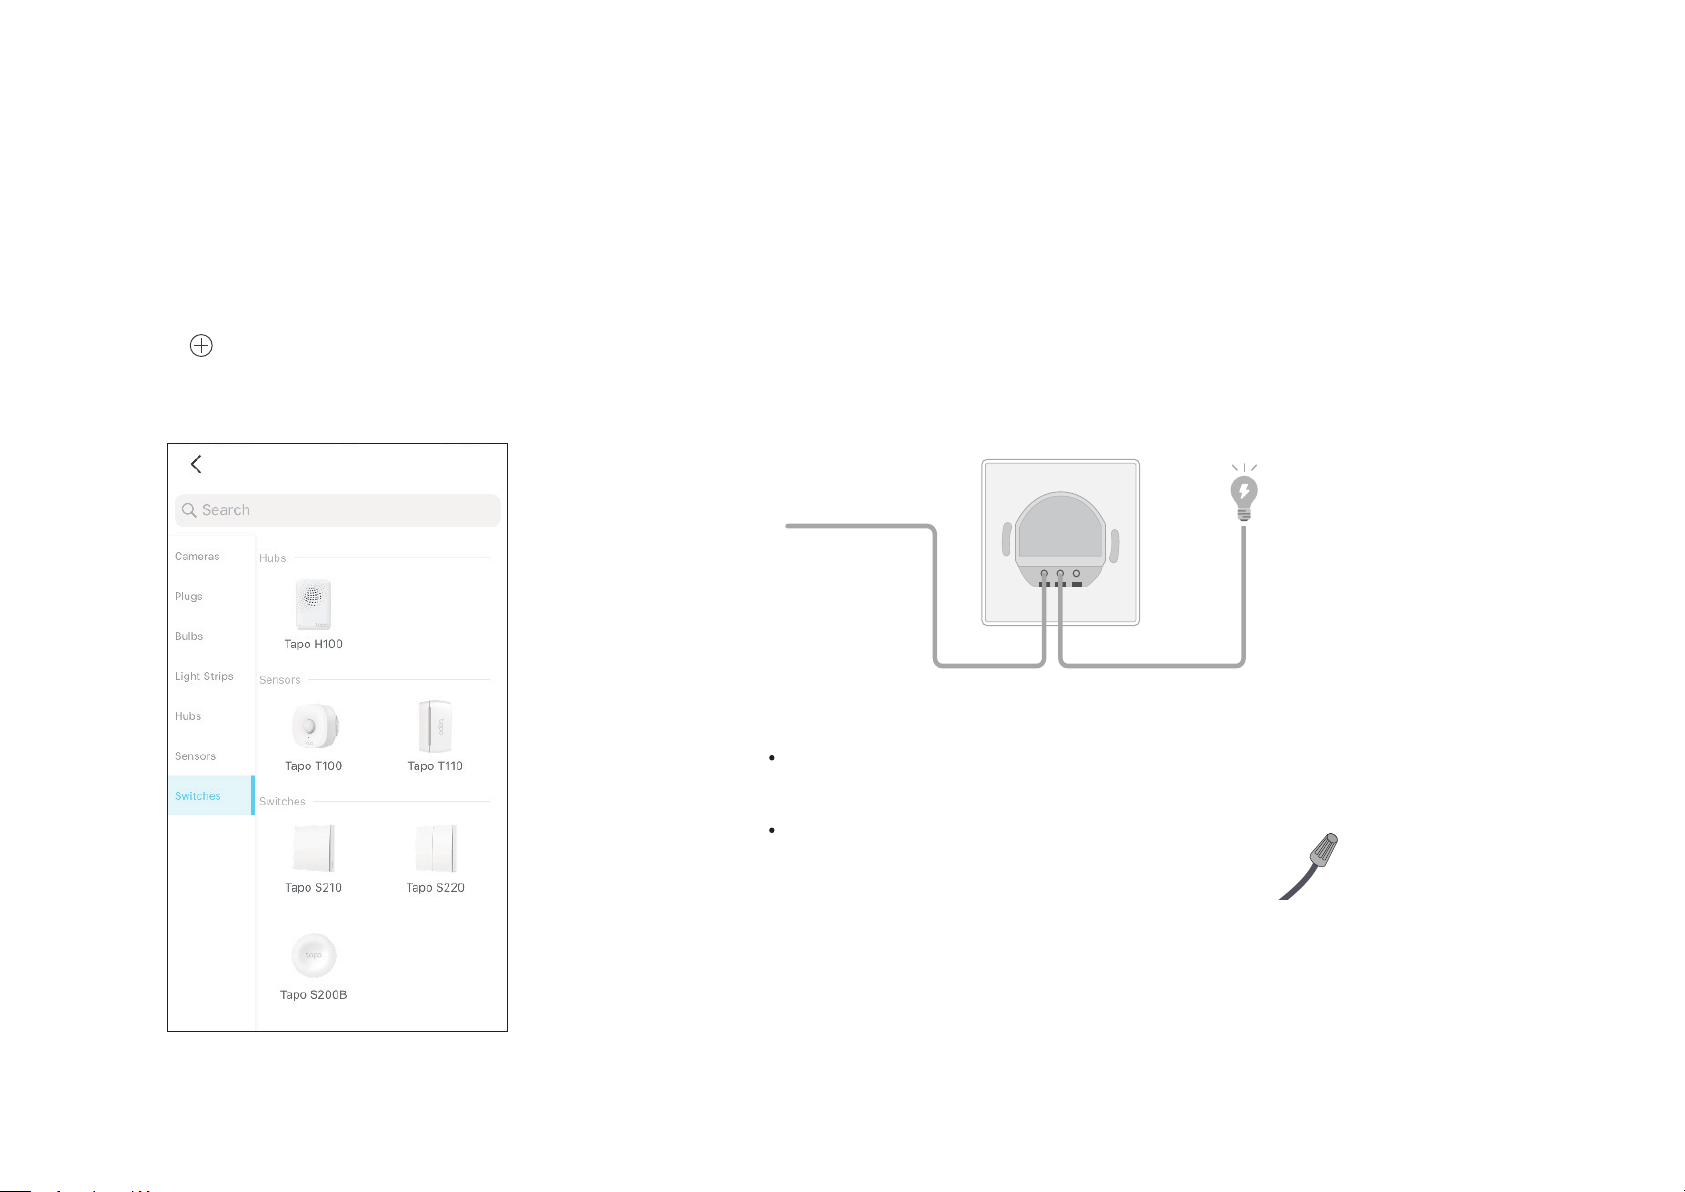
Step 4. Add Your Switch
Tap the button in the app and select your
switch. Then follow app instructions to set up
your switch.
Step 5. Wire Your Switch
Follow app instructions to wire your switch, or check the wiring diagram below.
Please make sure no bare wires are exposed after wiring. The recommended wire stripping length
is 7-8.5 mm.
The hot / line wire is usually connected to the terminal “C” or “L”
of your dumb switch.
If the dumb switch is connected with a Neutral wire,
cover it with the provided wire nut.
Lin
Lout1 Lout2
Hot / Line
Lout
Lin
6
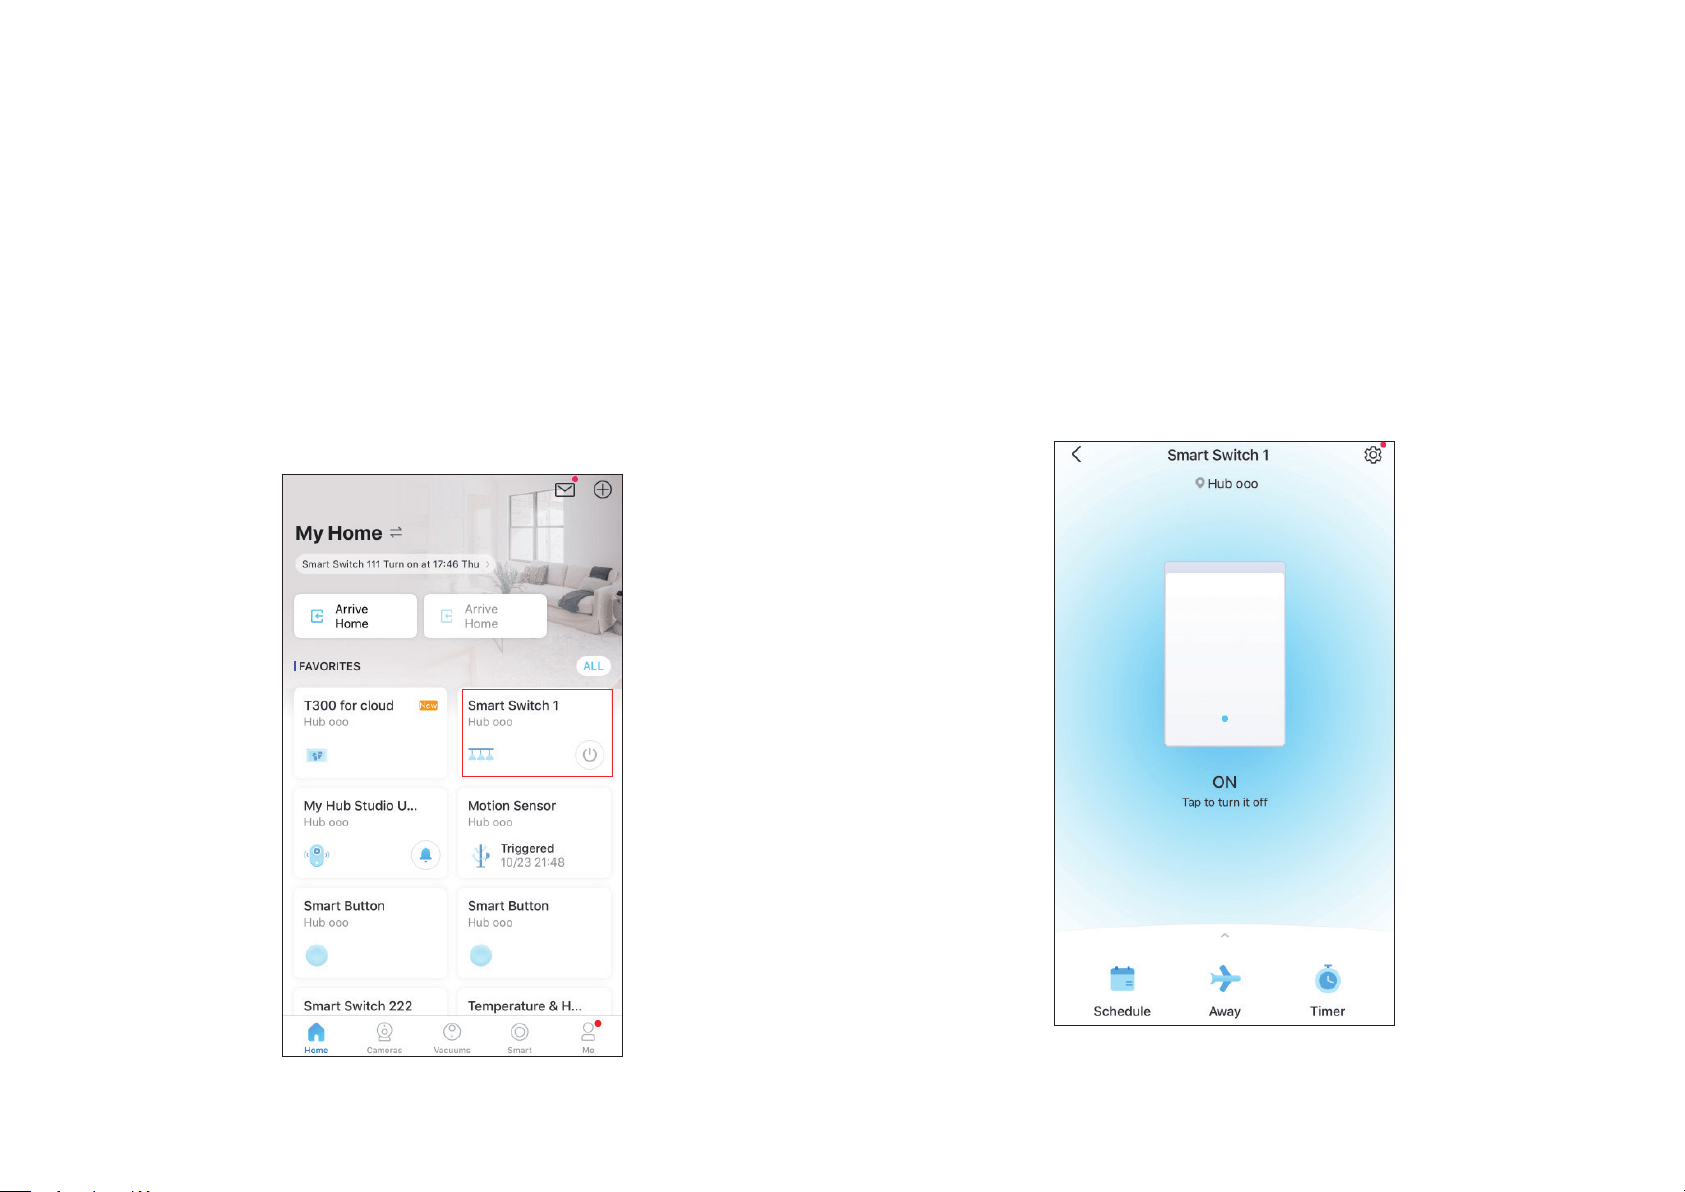
Home Page
This page lists all your devices you've added and you can view them
directly and manage them easily. Tap your switch to enter the Status
page.
Main Device Controls
After setting up your device successful, you will see your switch listed on the home page. You can manage it from anywhere at any time with the Tapo
app.
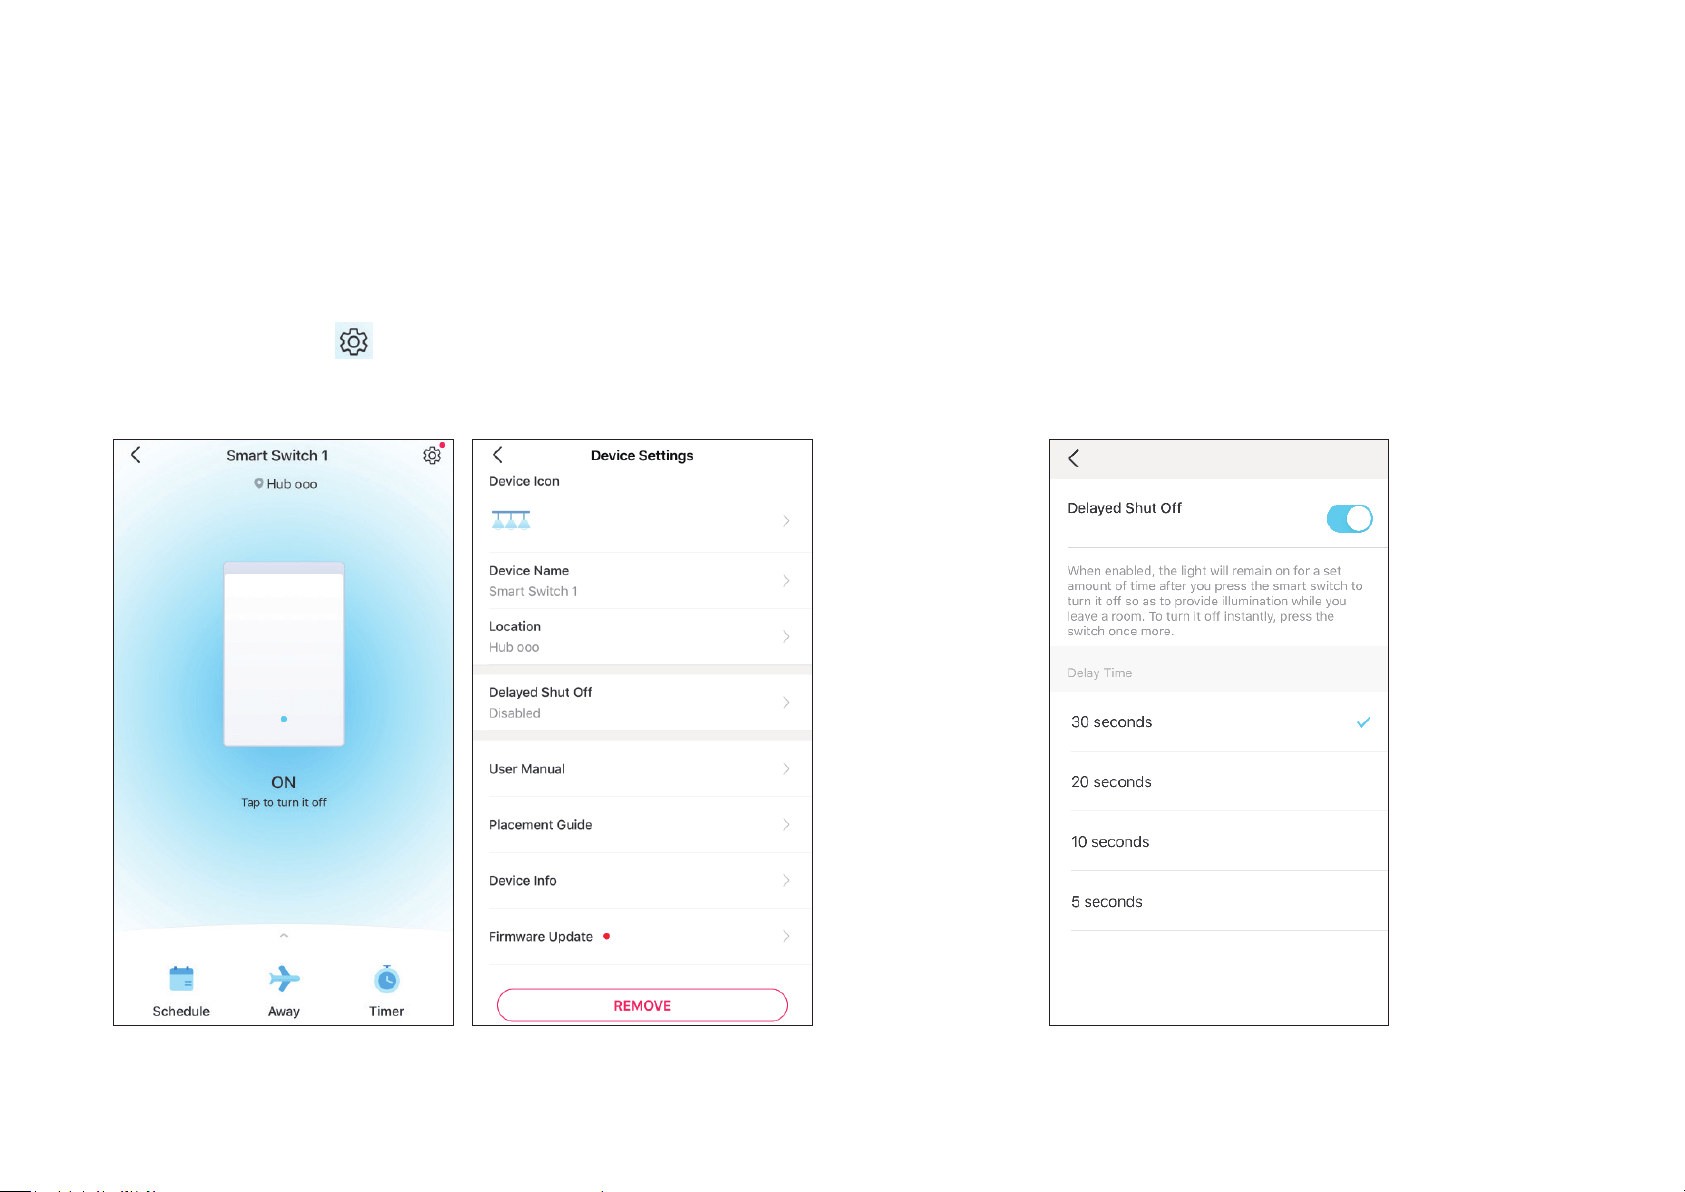
Status Page
You can turn on or o your device in this page. You can also congure
advanced features like Schedule, Away Mode, Timer to control your device
according to your daily rountine.
7
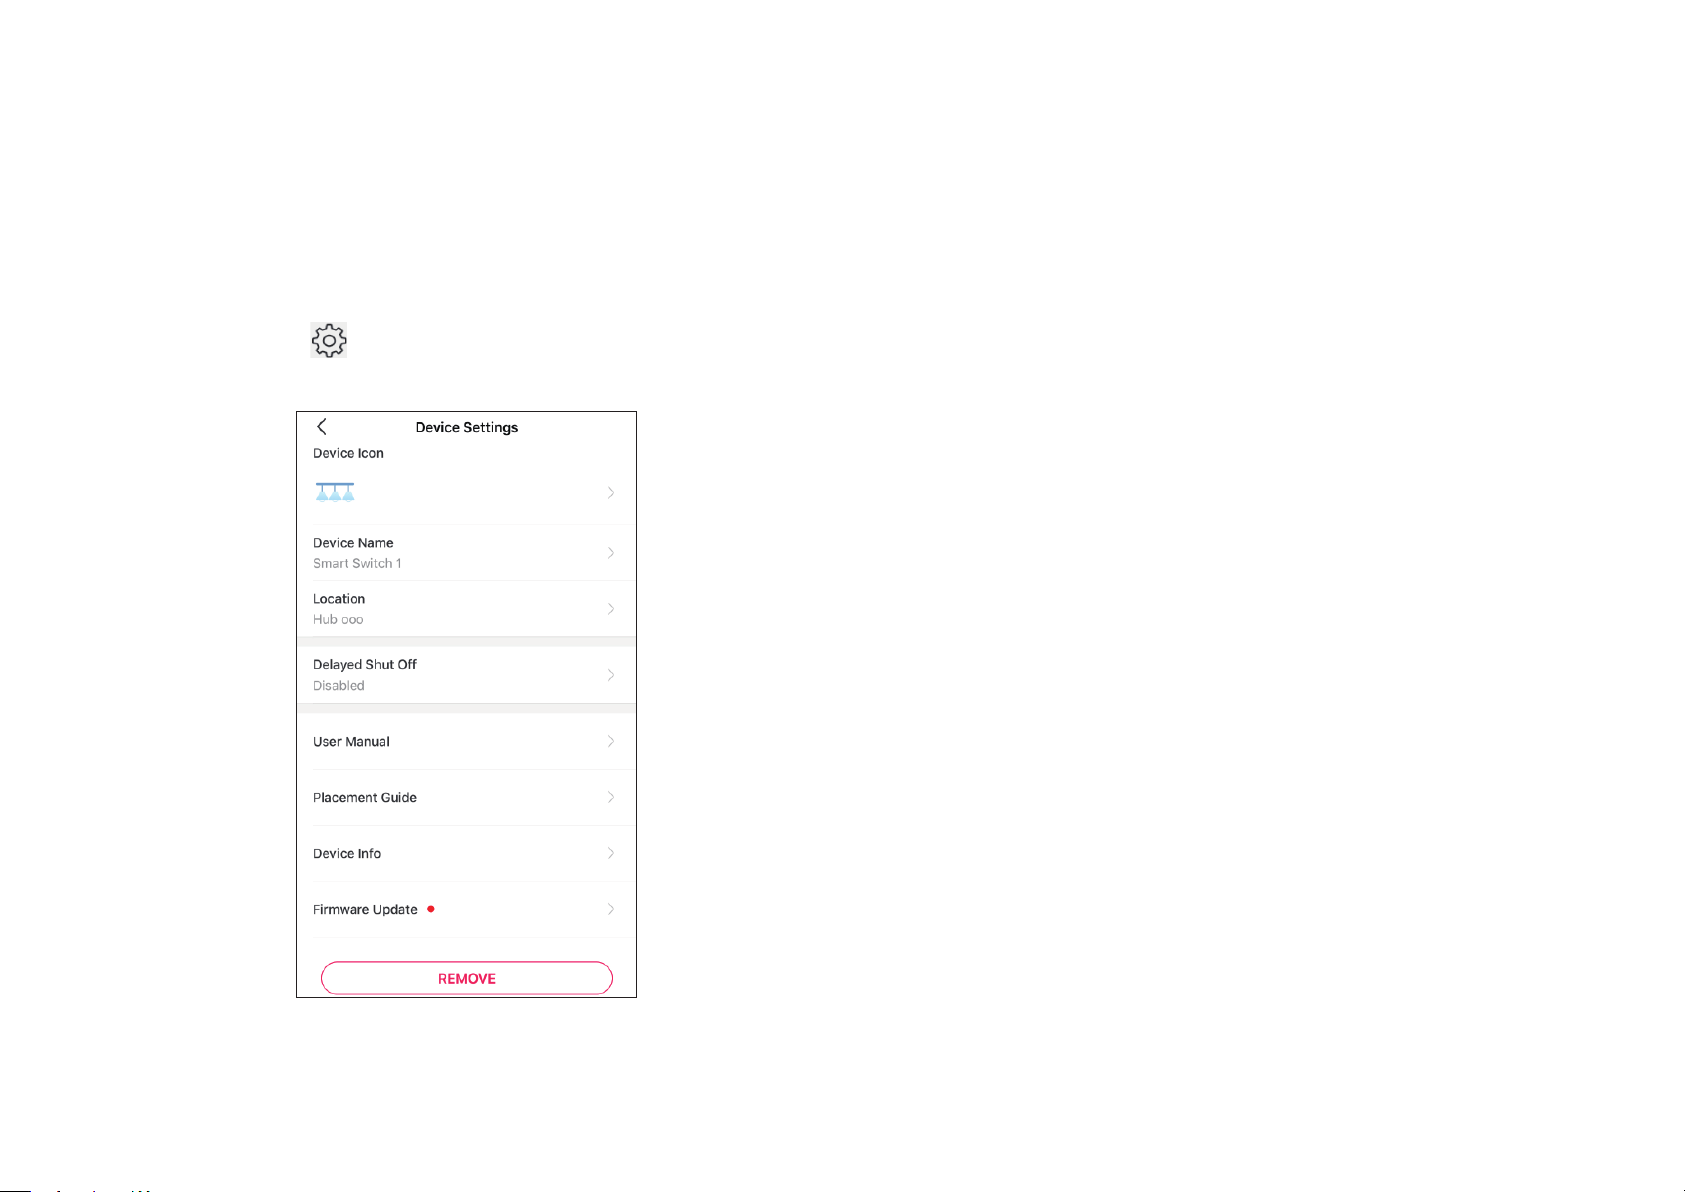
Switch Settings
On Status page, tap to enter the Device Settings page. You can
change your device name and icon, set Delayed Shut O, etc.
8
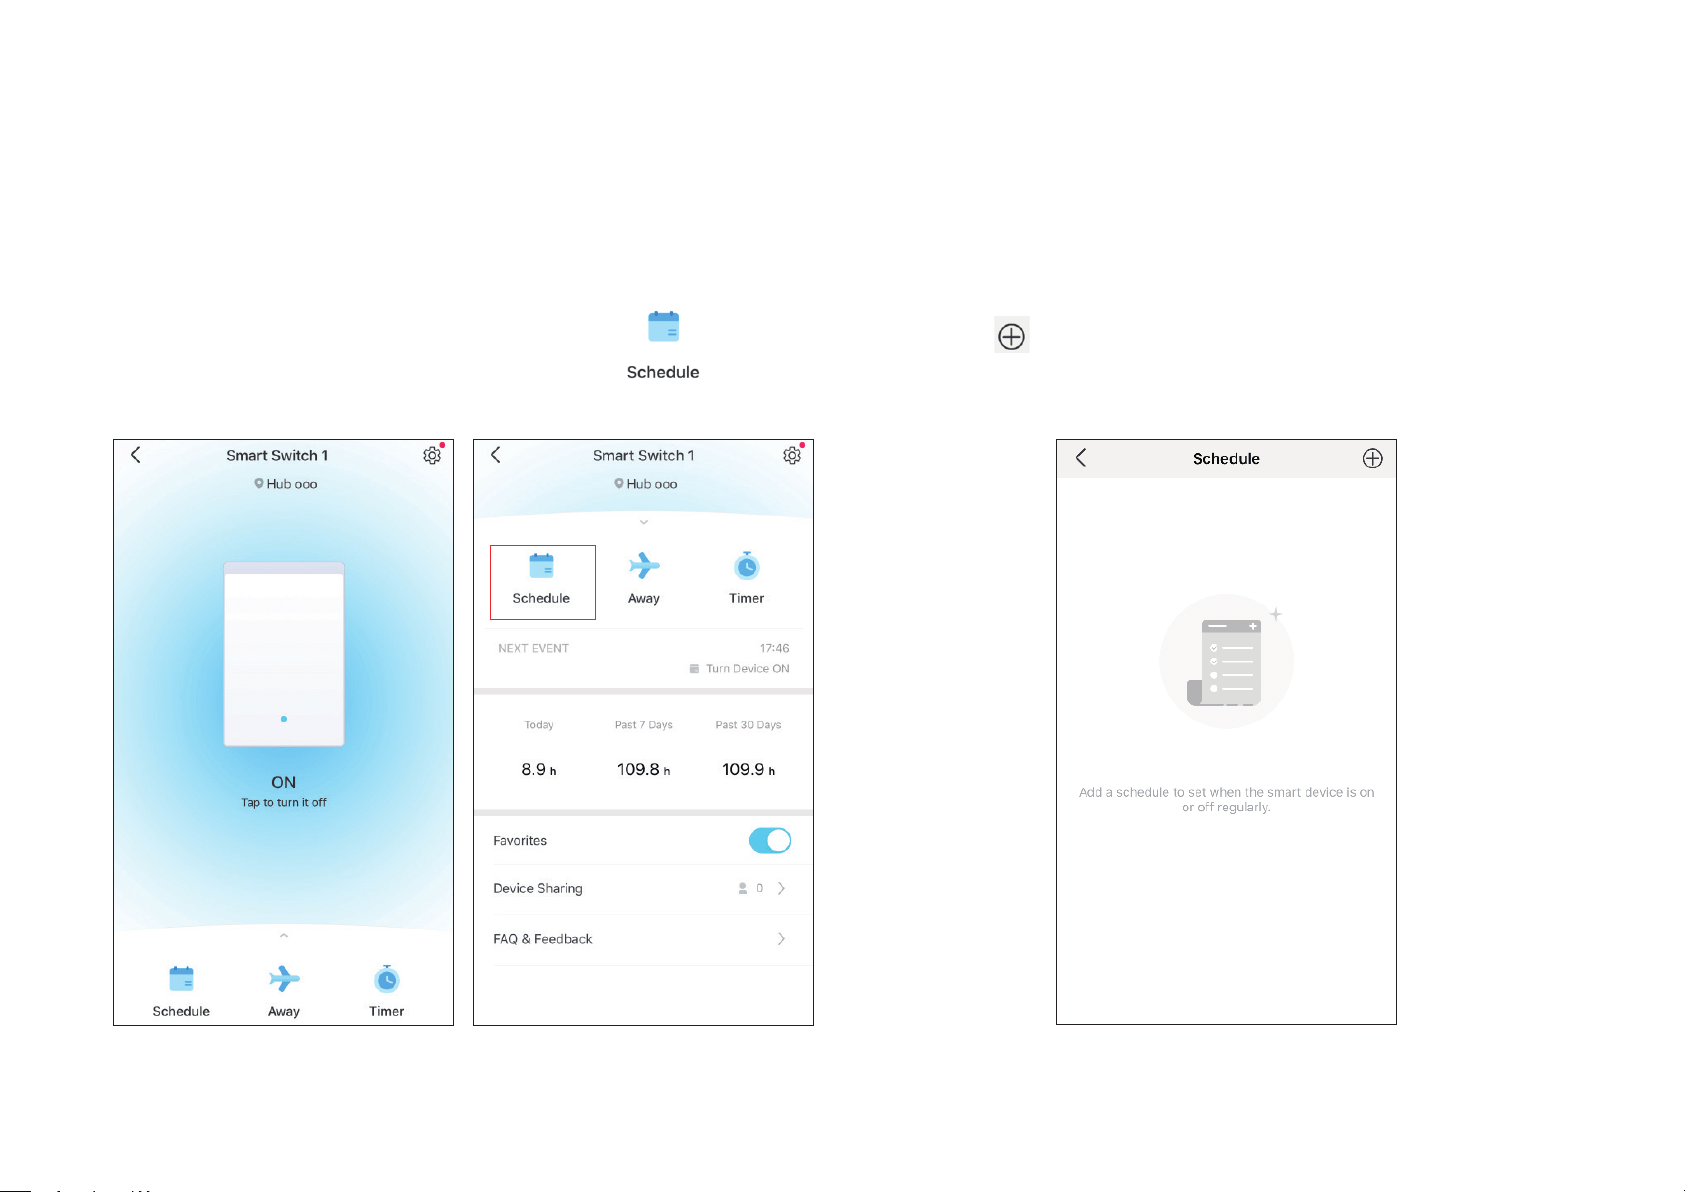
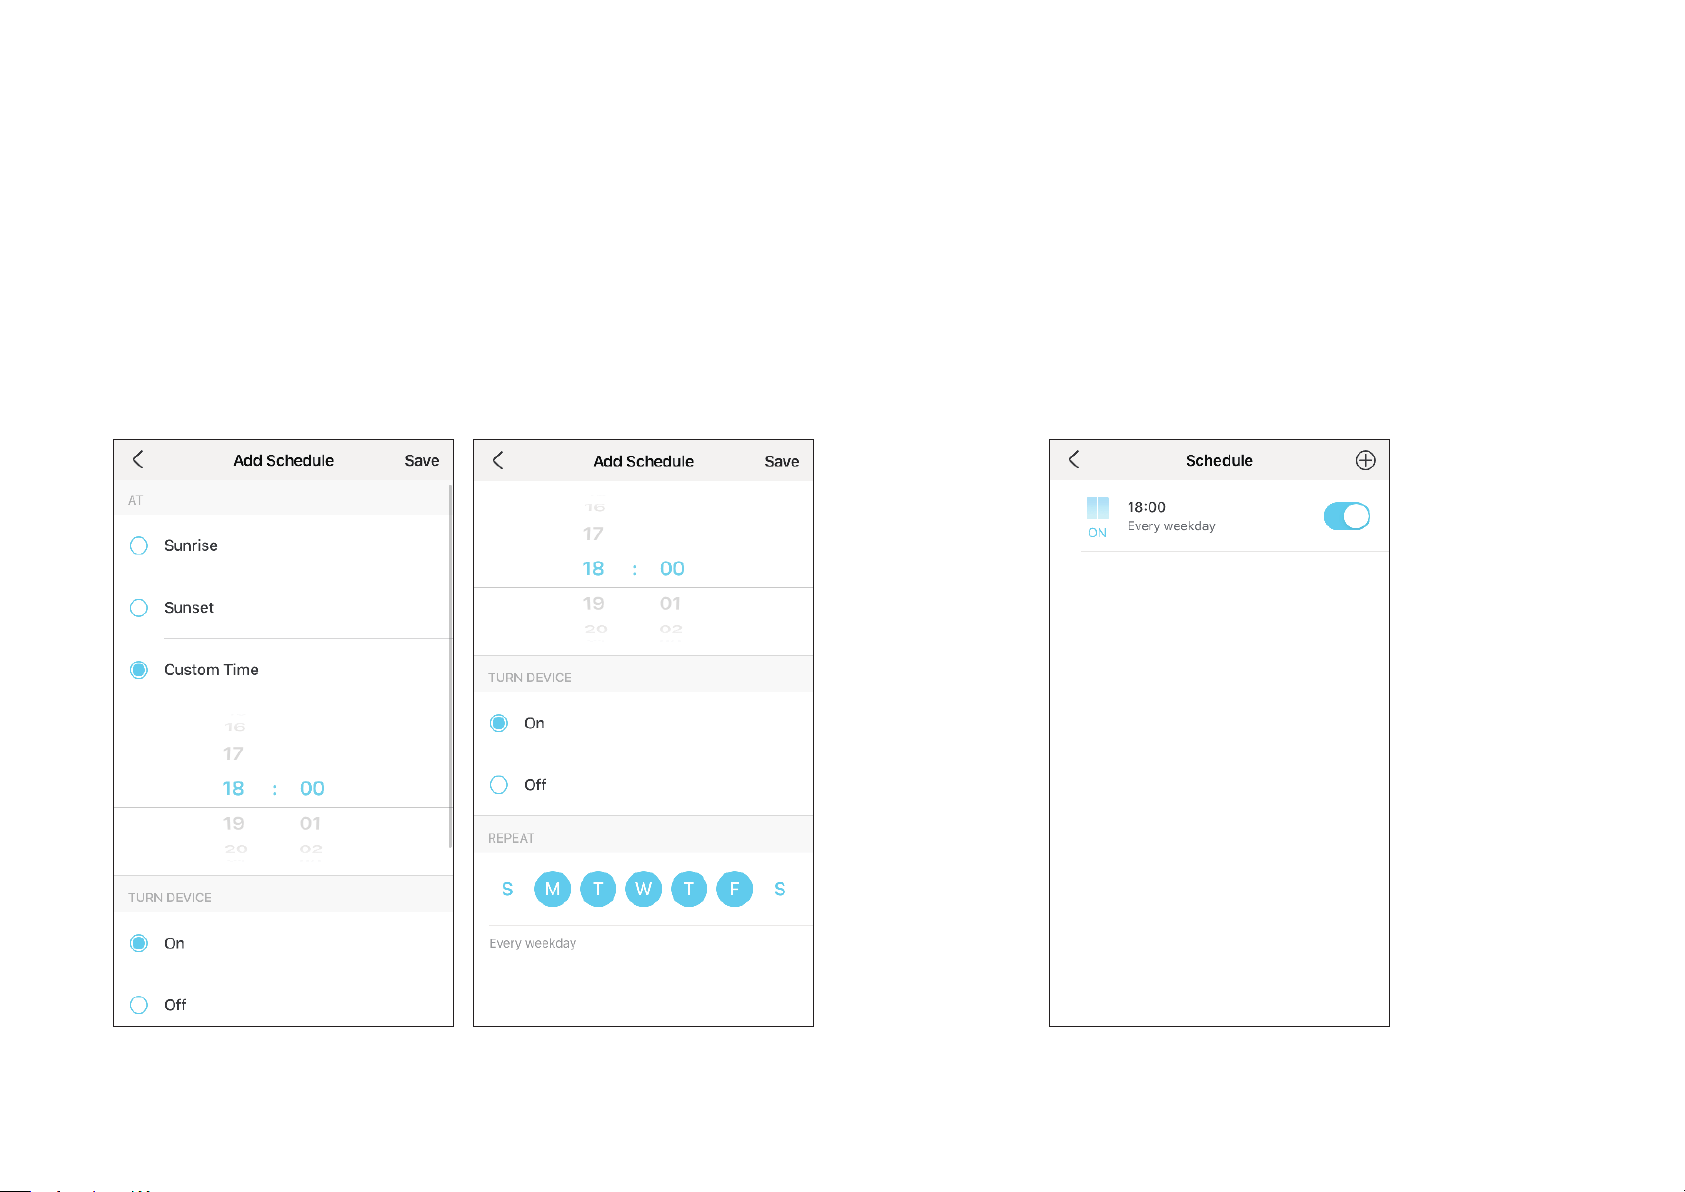
Step 1: Go to Status page and swipe upforward. Tap
to set a
schedule.
Step 2: Tap
on the top right corner.
Schedule
Set schedules for your switch to automatically turn on/o at set times to simplify your daily routine.
9
Step 3: Set the time and frequency to turn on/o your device
automatically.
Done!
You can see the set schedule listed in the Schedule page.
10
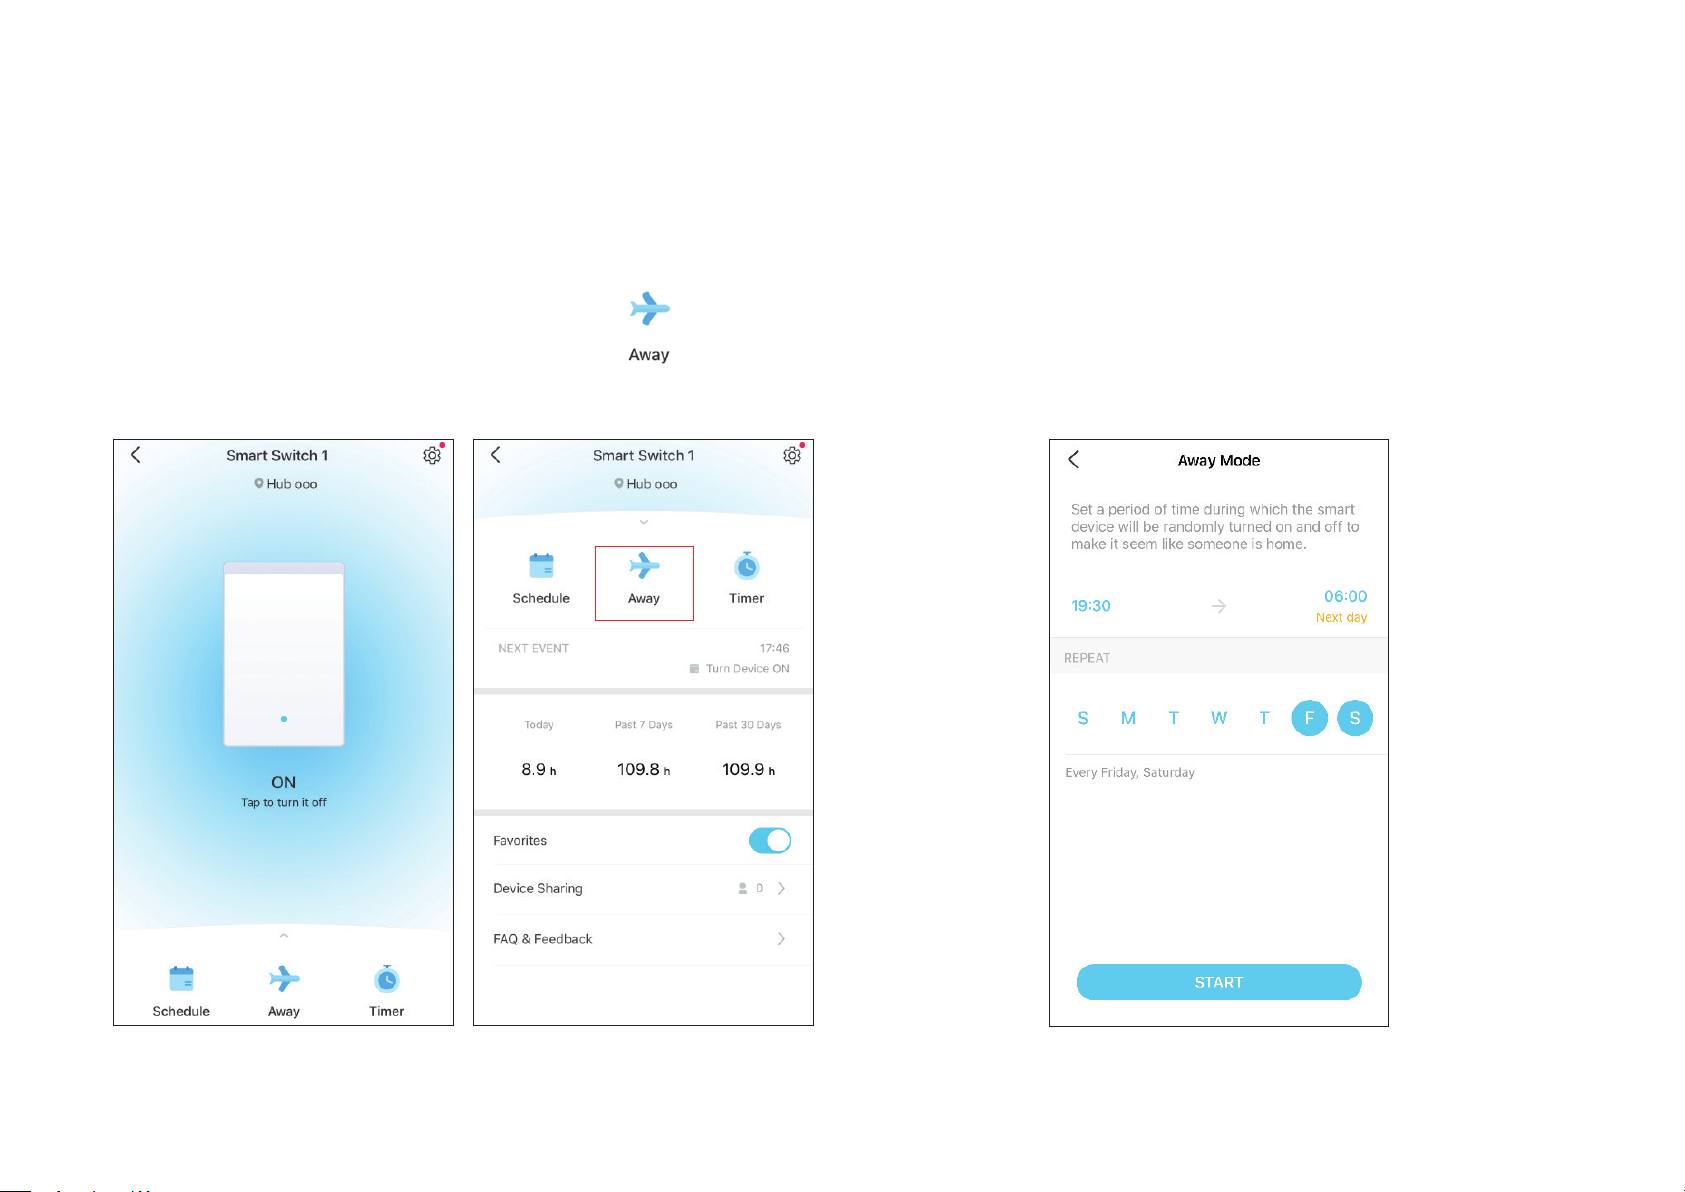
Step 1: Go to Status page and swipe upforward. Tap
to set Away
Mode.
Step 2: Set the time period and the repeating frequency.
Away Mode
Set your device to turn on and o randomly during a set time period to make the appearance that someone is at home.
11
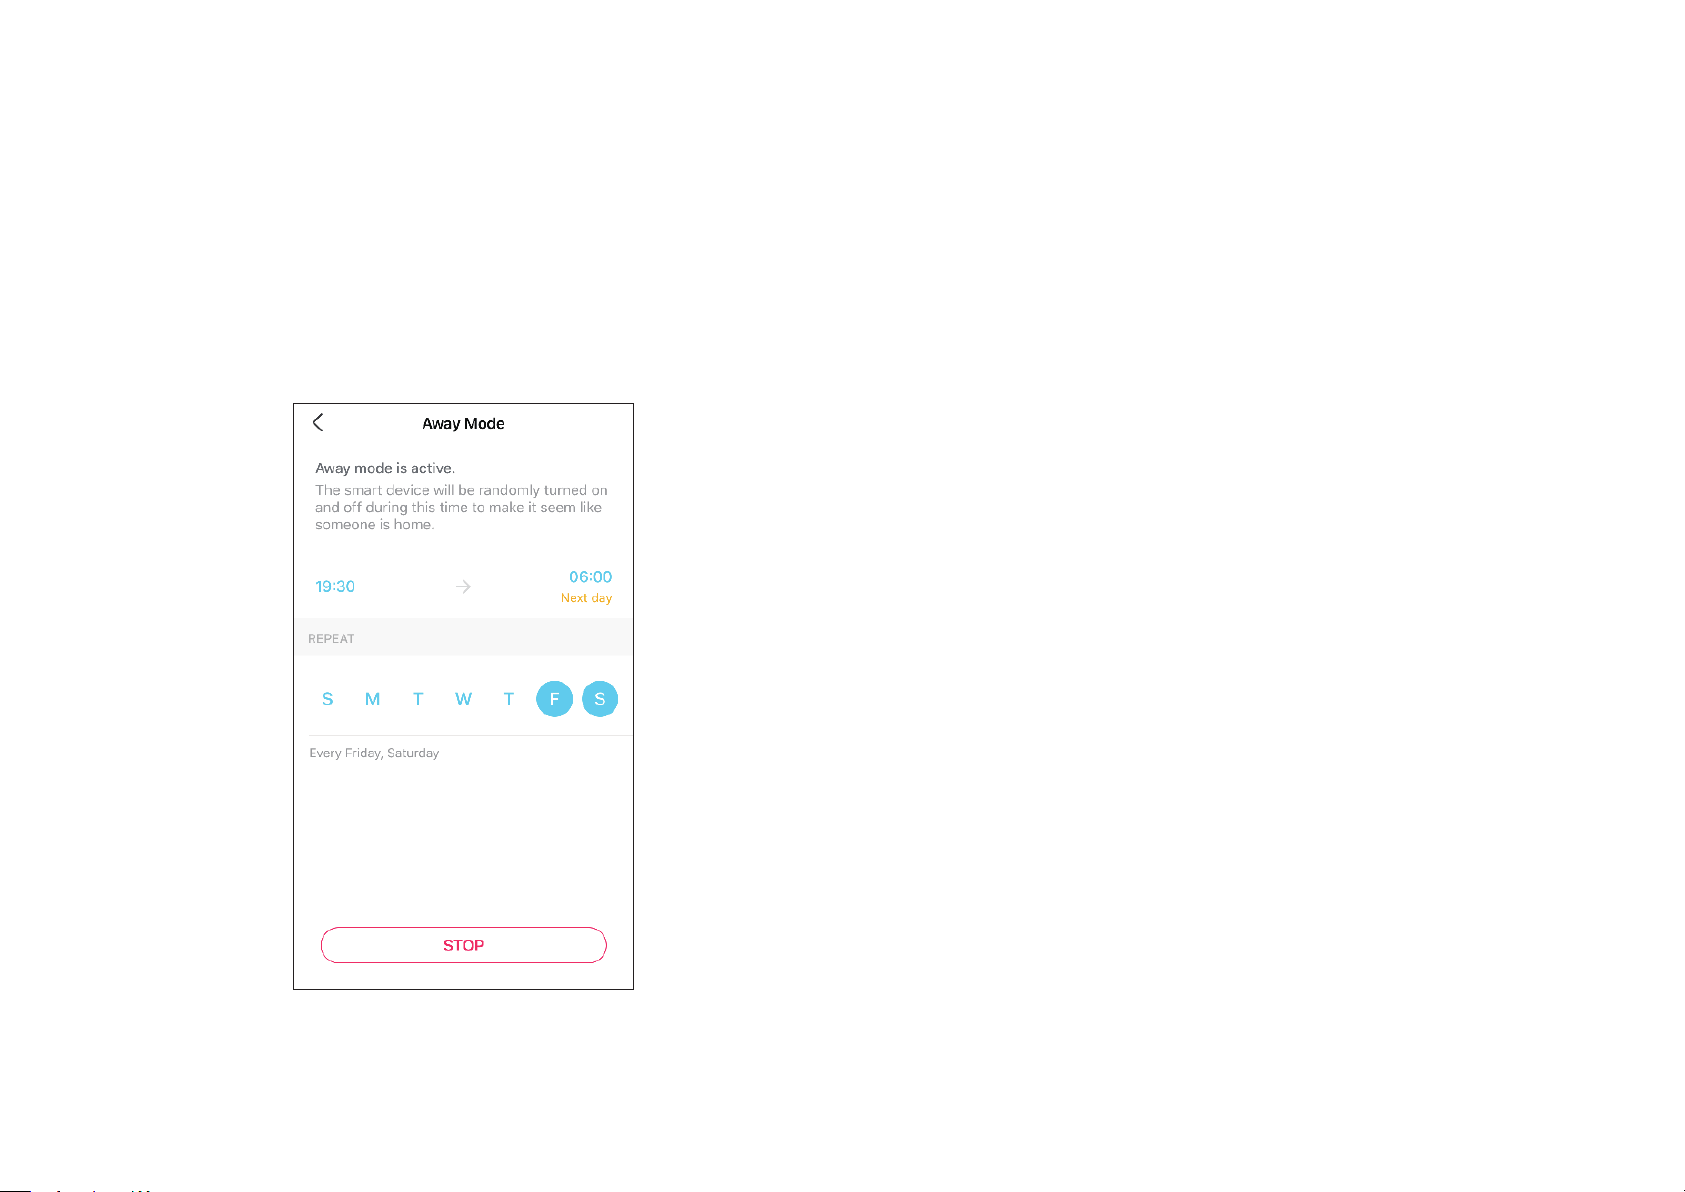
Done!
Away Mode is active. Your device will be turned on and o randomly
during the time period.
12
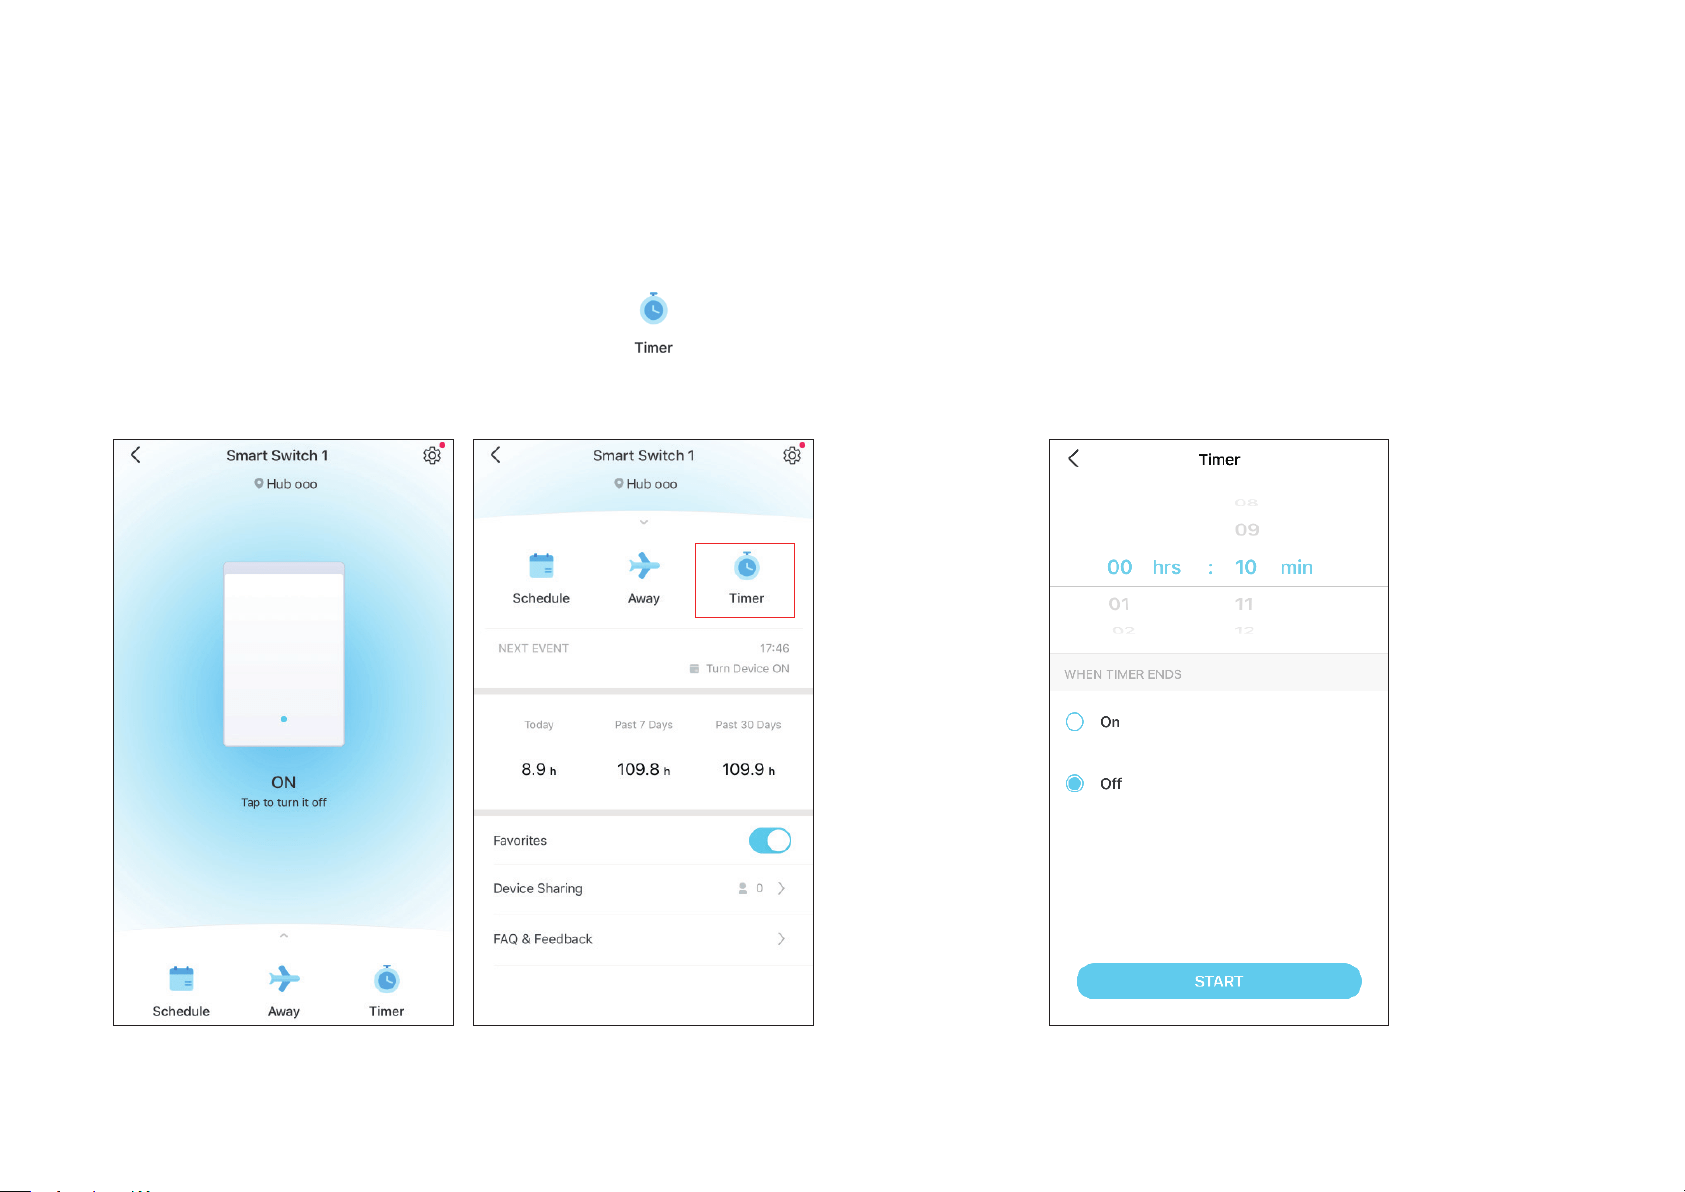
Step 1: Go to Status page and swipe upforward. Tap
to set a
countdown timer.
Step 2: Set the time period and whether to turn on or o the switch after
the time ends.
Timer
Set a countdown timer for your device to automatically turn on/o after the timer ends.
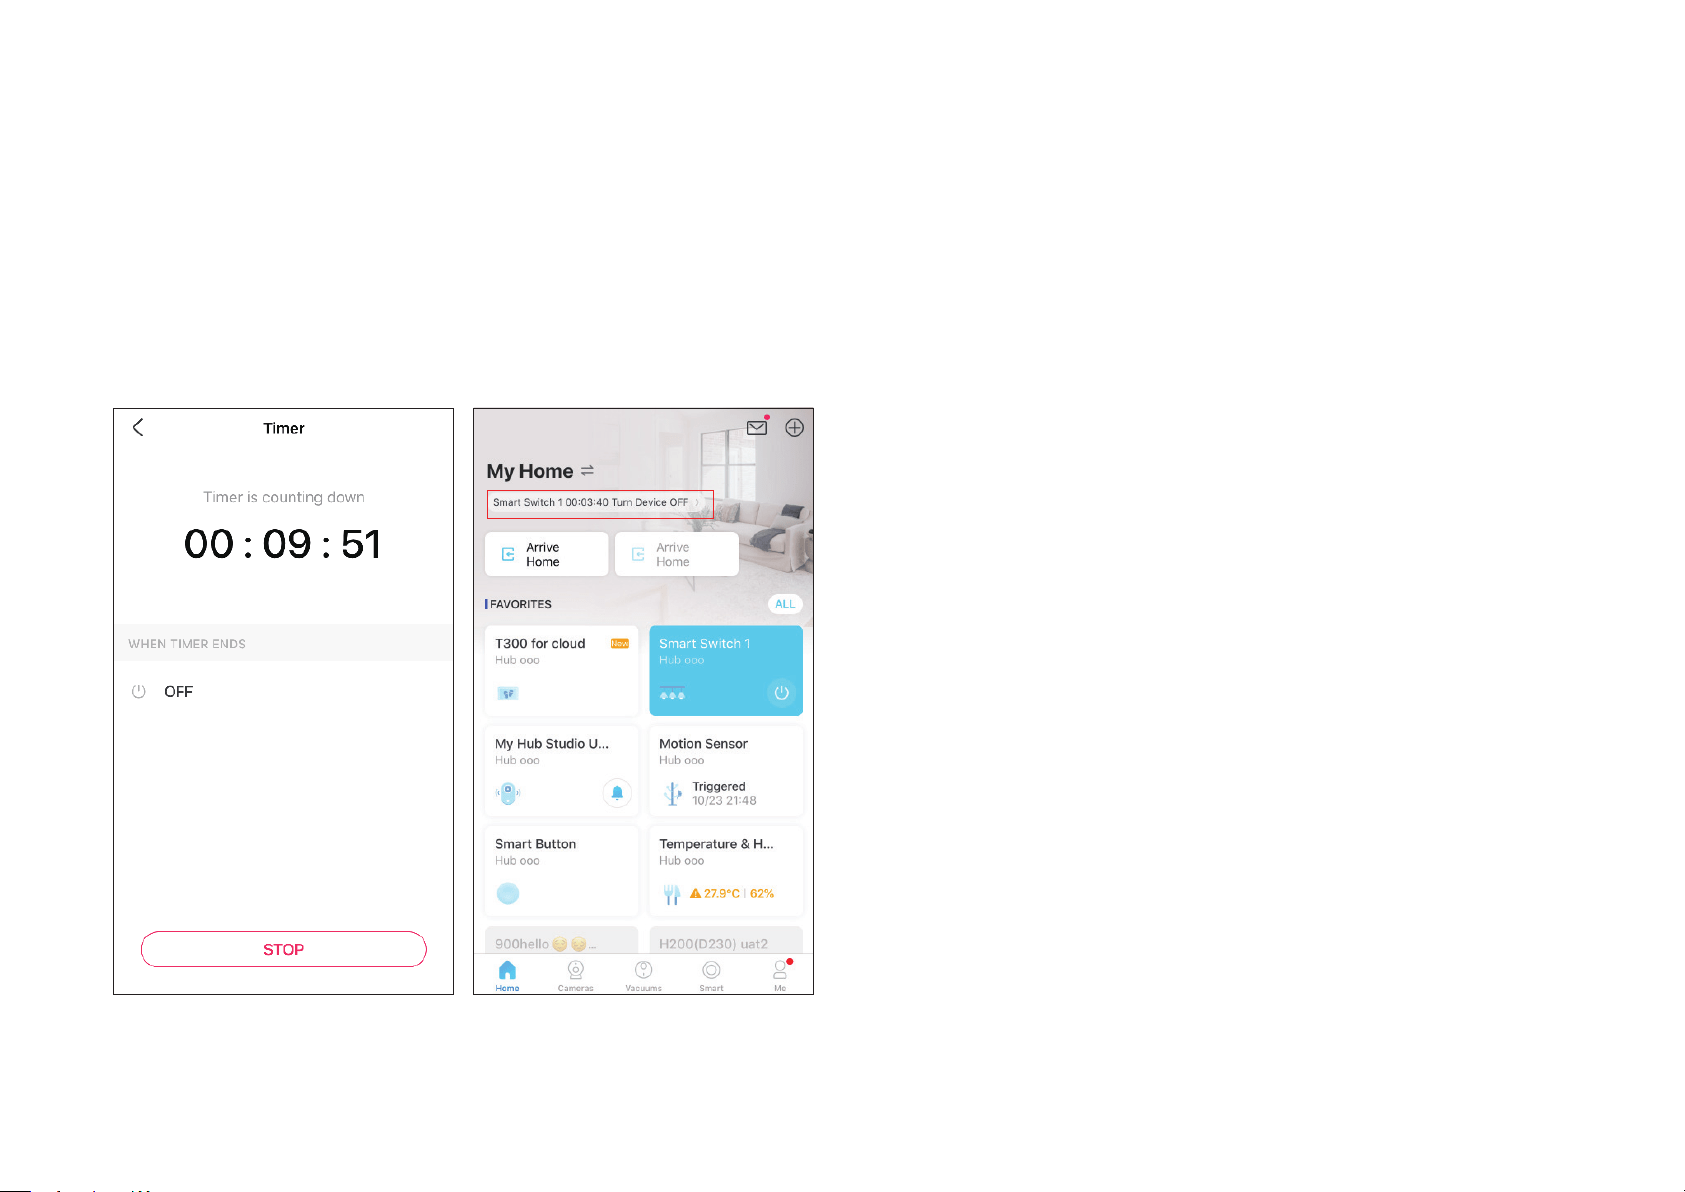
13
Done!
The timer is counting down. You can also see the time counting down in
the Home page.
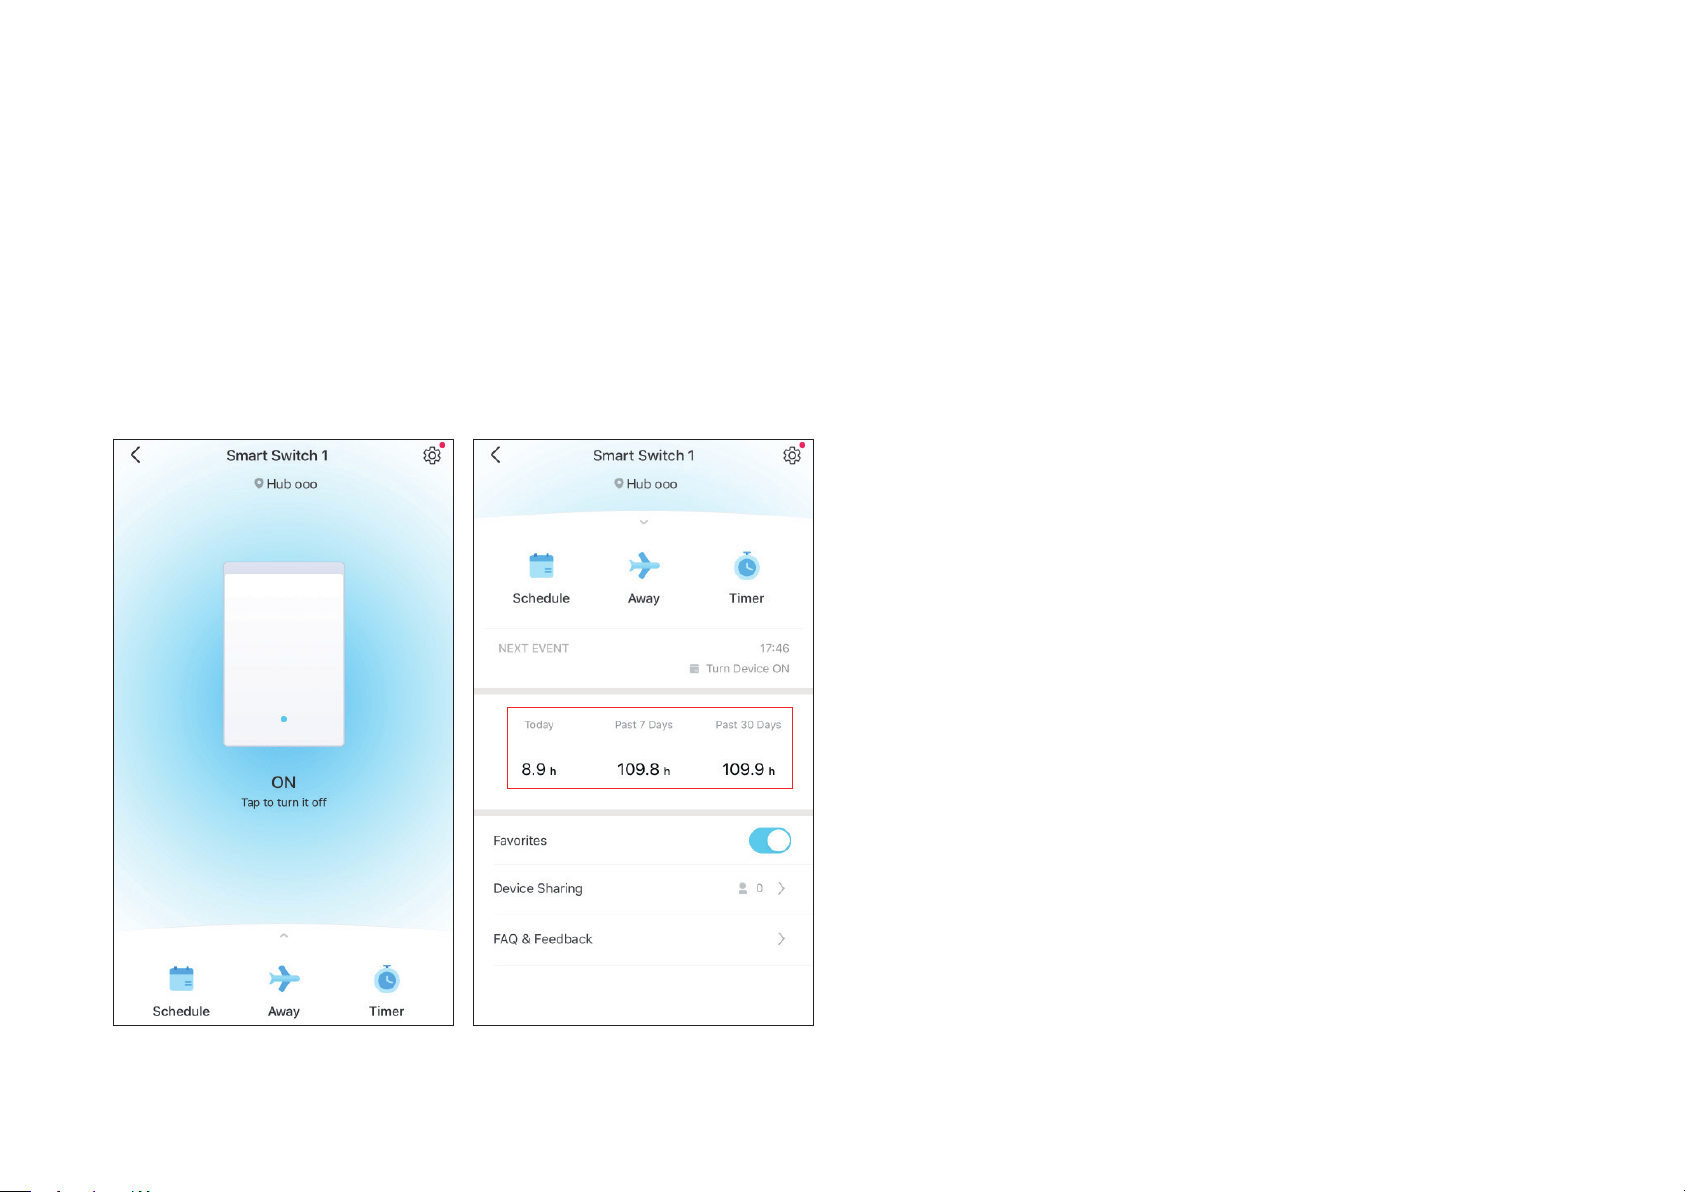
14
Go to Status page and swipe upforward. You can the runtime for today,
past 7 days and past 30 days.
Check Runtime
Check how long the switch has been running today, for the past 7 days, or for the past 30 days.
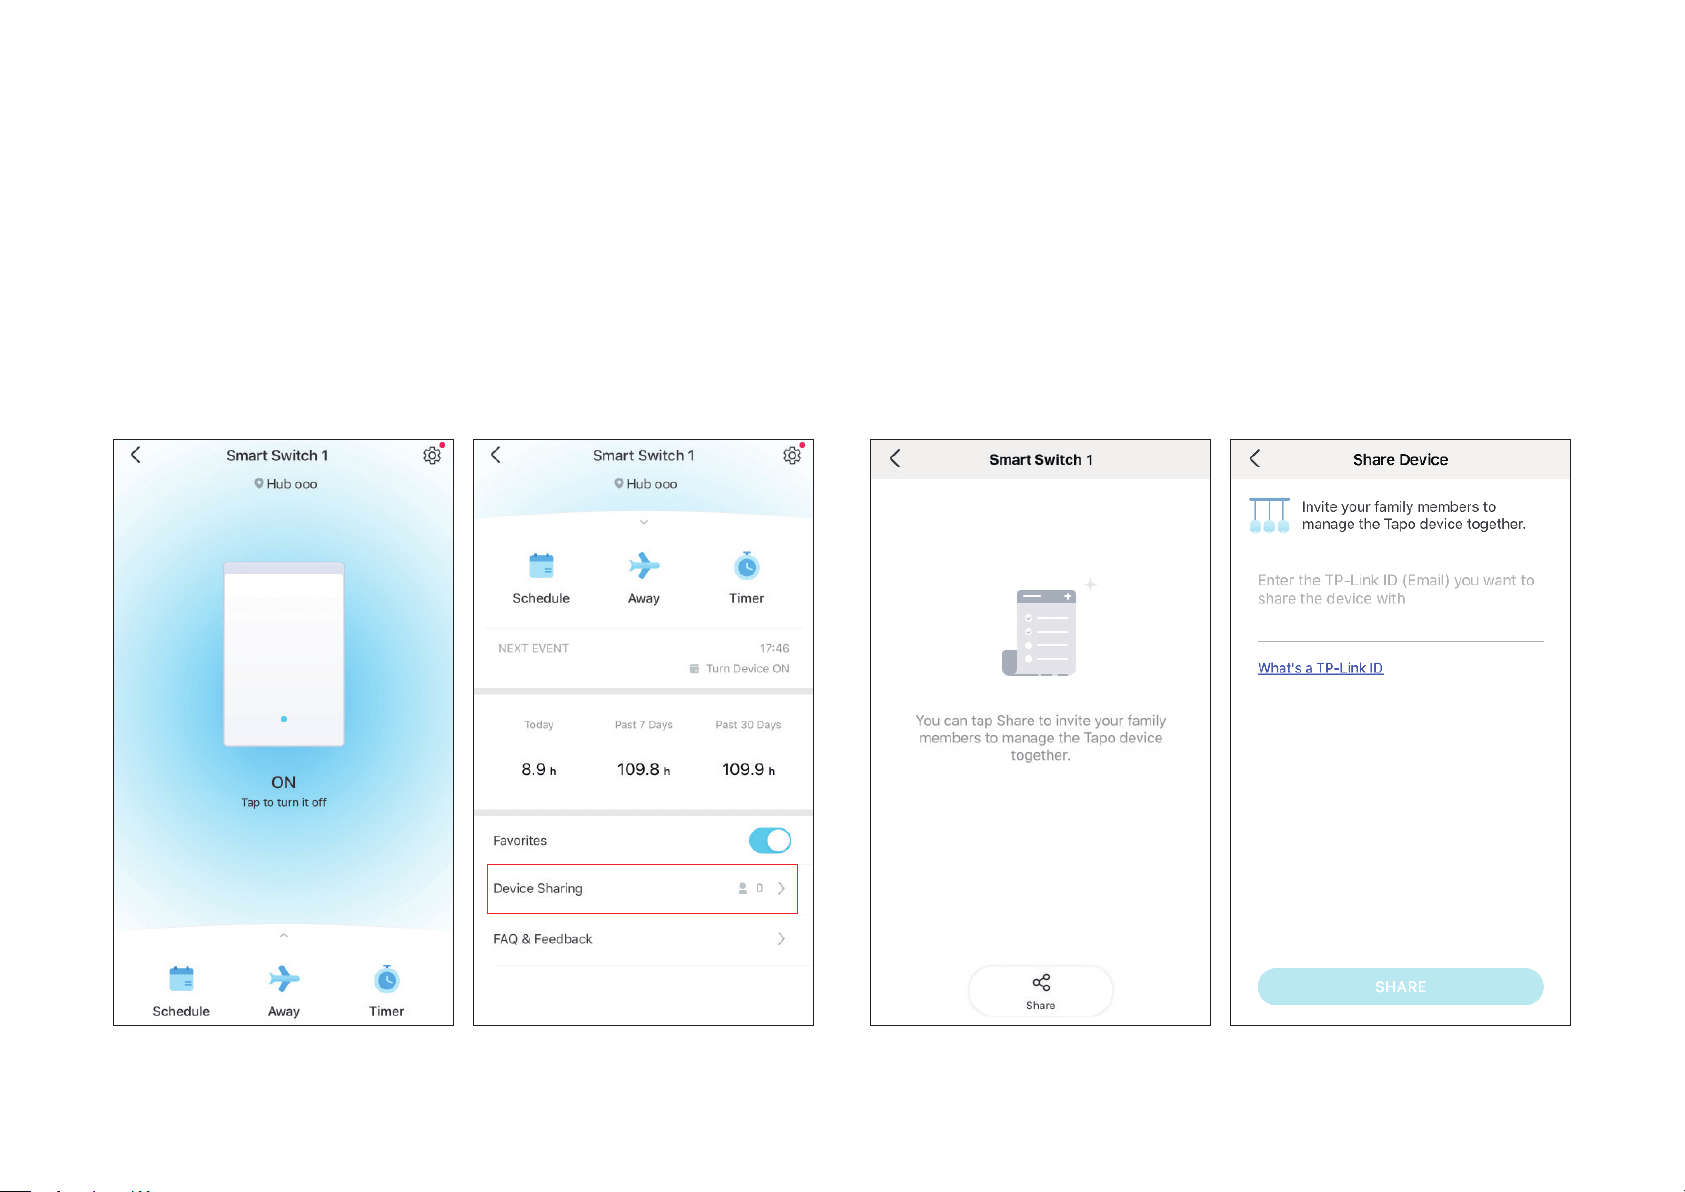
15
Go to Status page and swipe upforward. Then tap Device Sharing.
Tap Share and then enter the TP-Link ID of your family member.
Device Sharing
Share your device to your family by entering their TP-Link ID.
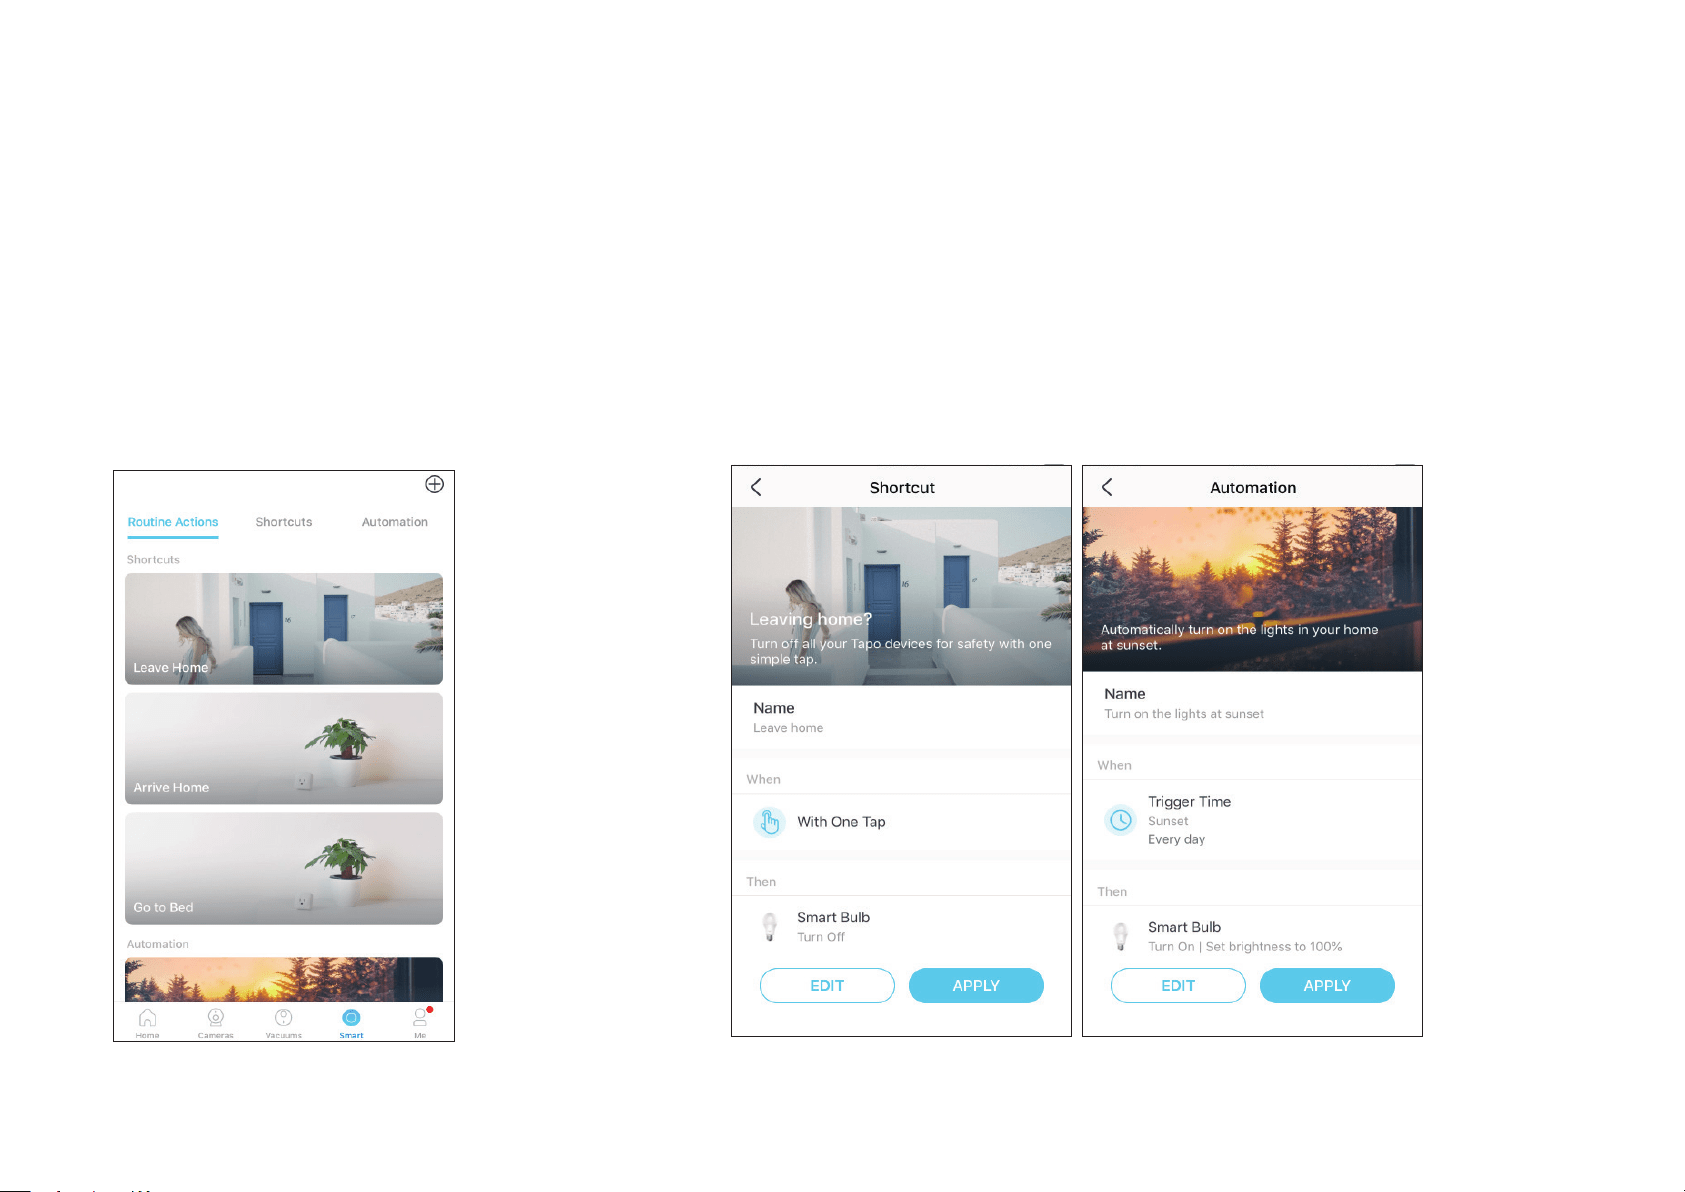
16
Option 1: Edit based on the routine actions
1. Go to the Smart Actions page and you will see the
Featured Actions (Shortcut or Automation).
2. Tap on a featured action. Tap EDIT to change the settings as needed and tap APPLY
to save changes.
Smart Actions
Smart Actions automate repetitive tasks, allowing you to blaze through tedium with utmost ease. Set everything up once and never have to worry about
it again. With Smart Actions, giving your home that level of intelligence is a snap. Shortcut lets you perform an action with a simple tap. Automation
allows you to automate tasks to be performed at a set time. e.g. The light will light on at sunset.
17
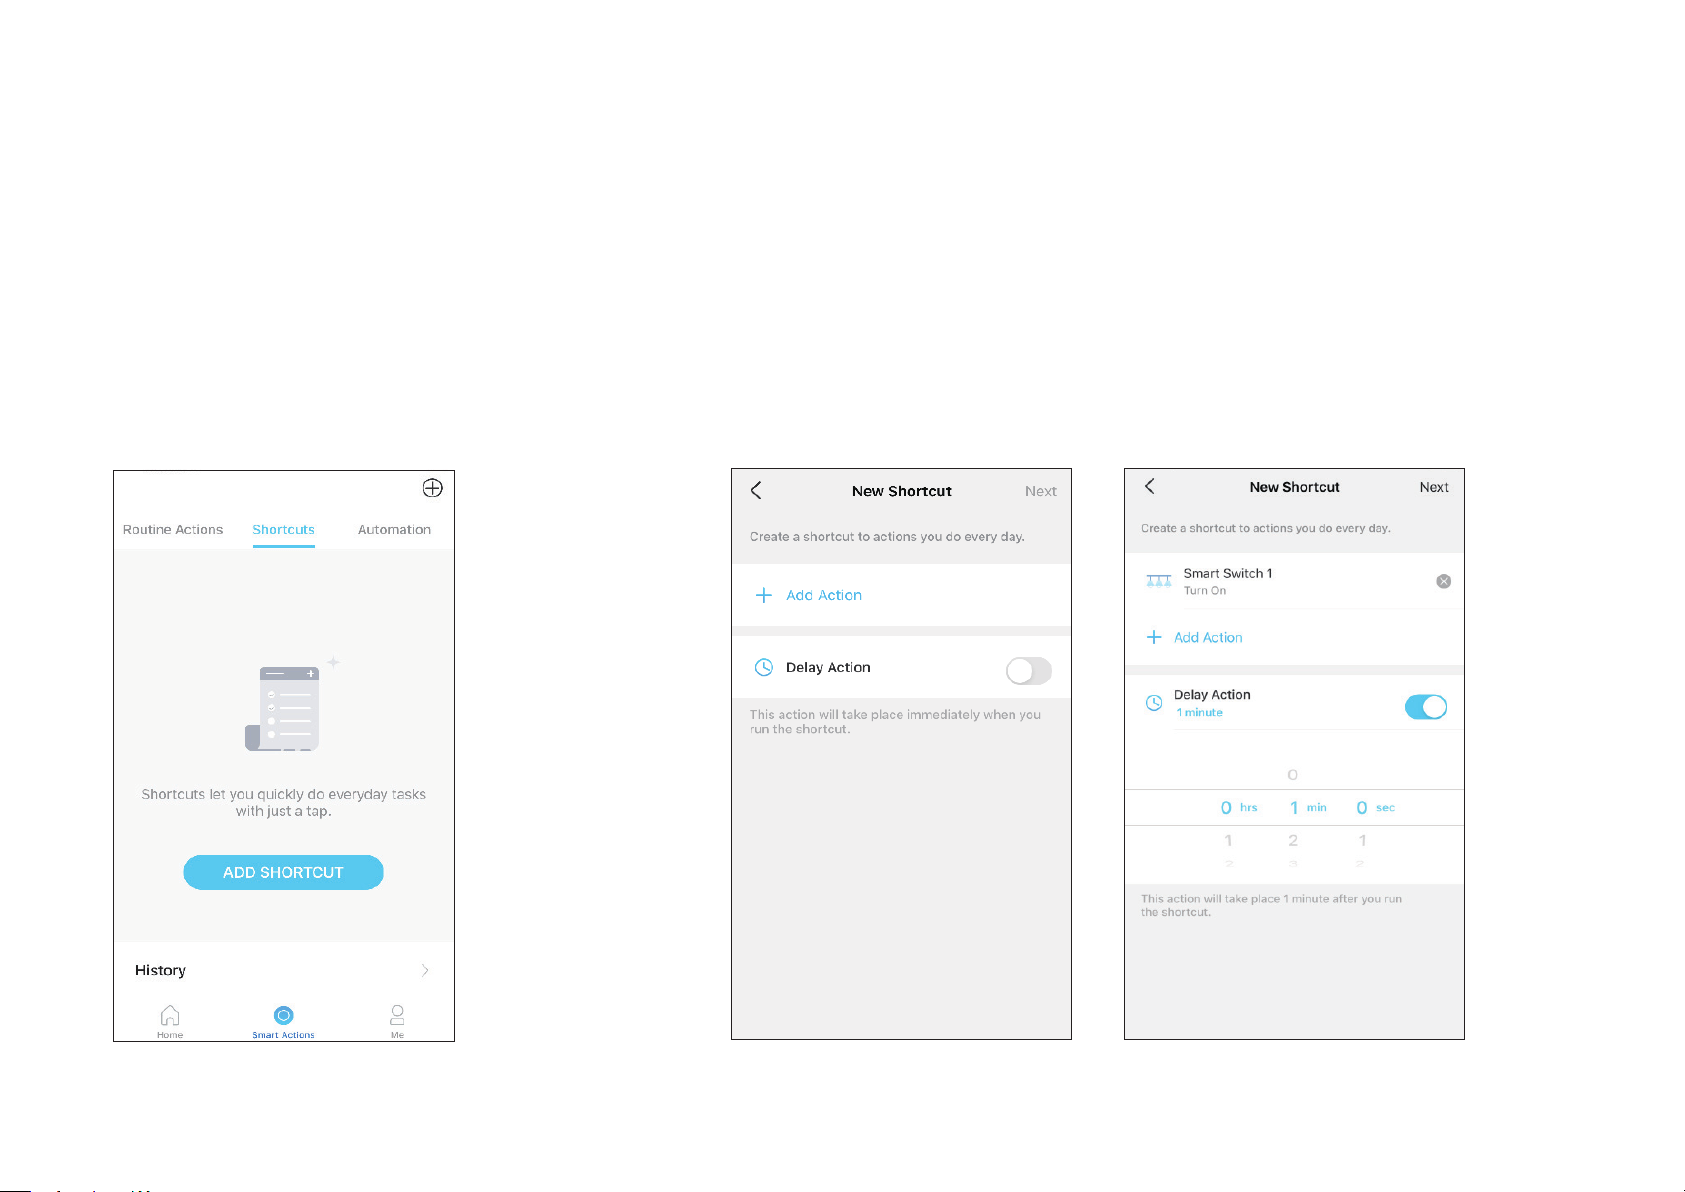
Option 2: Create your own shortcuts
1. Go to Shortcuts page. Tap + on the top right to add a
shortcut.
2. Add an action and choose whether to delay the action.
18
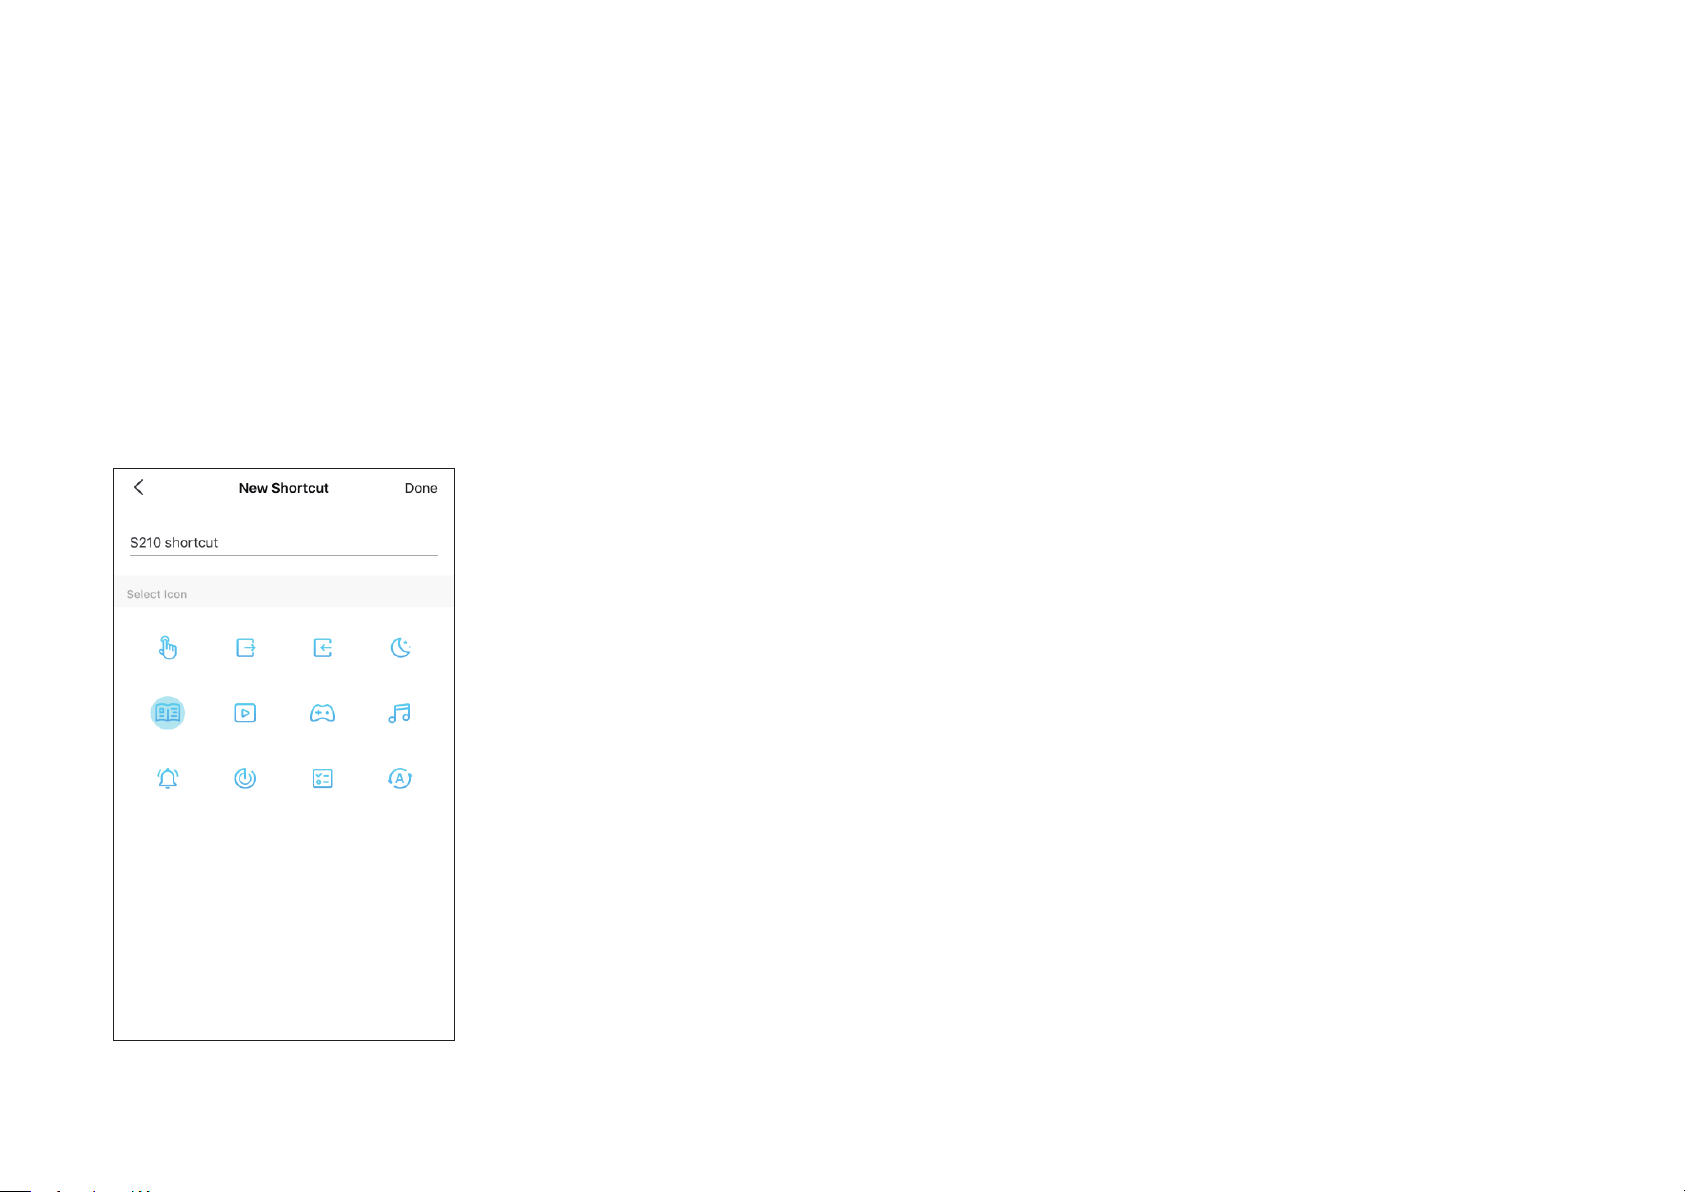
3. Name your shortcut and choose an icon and tap Done to
save all the settings.
19
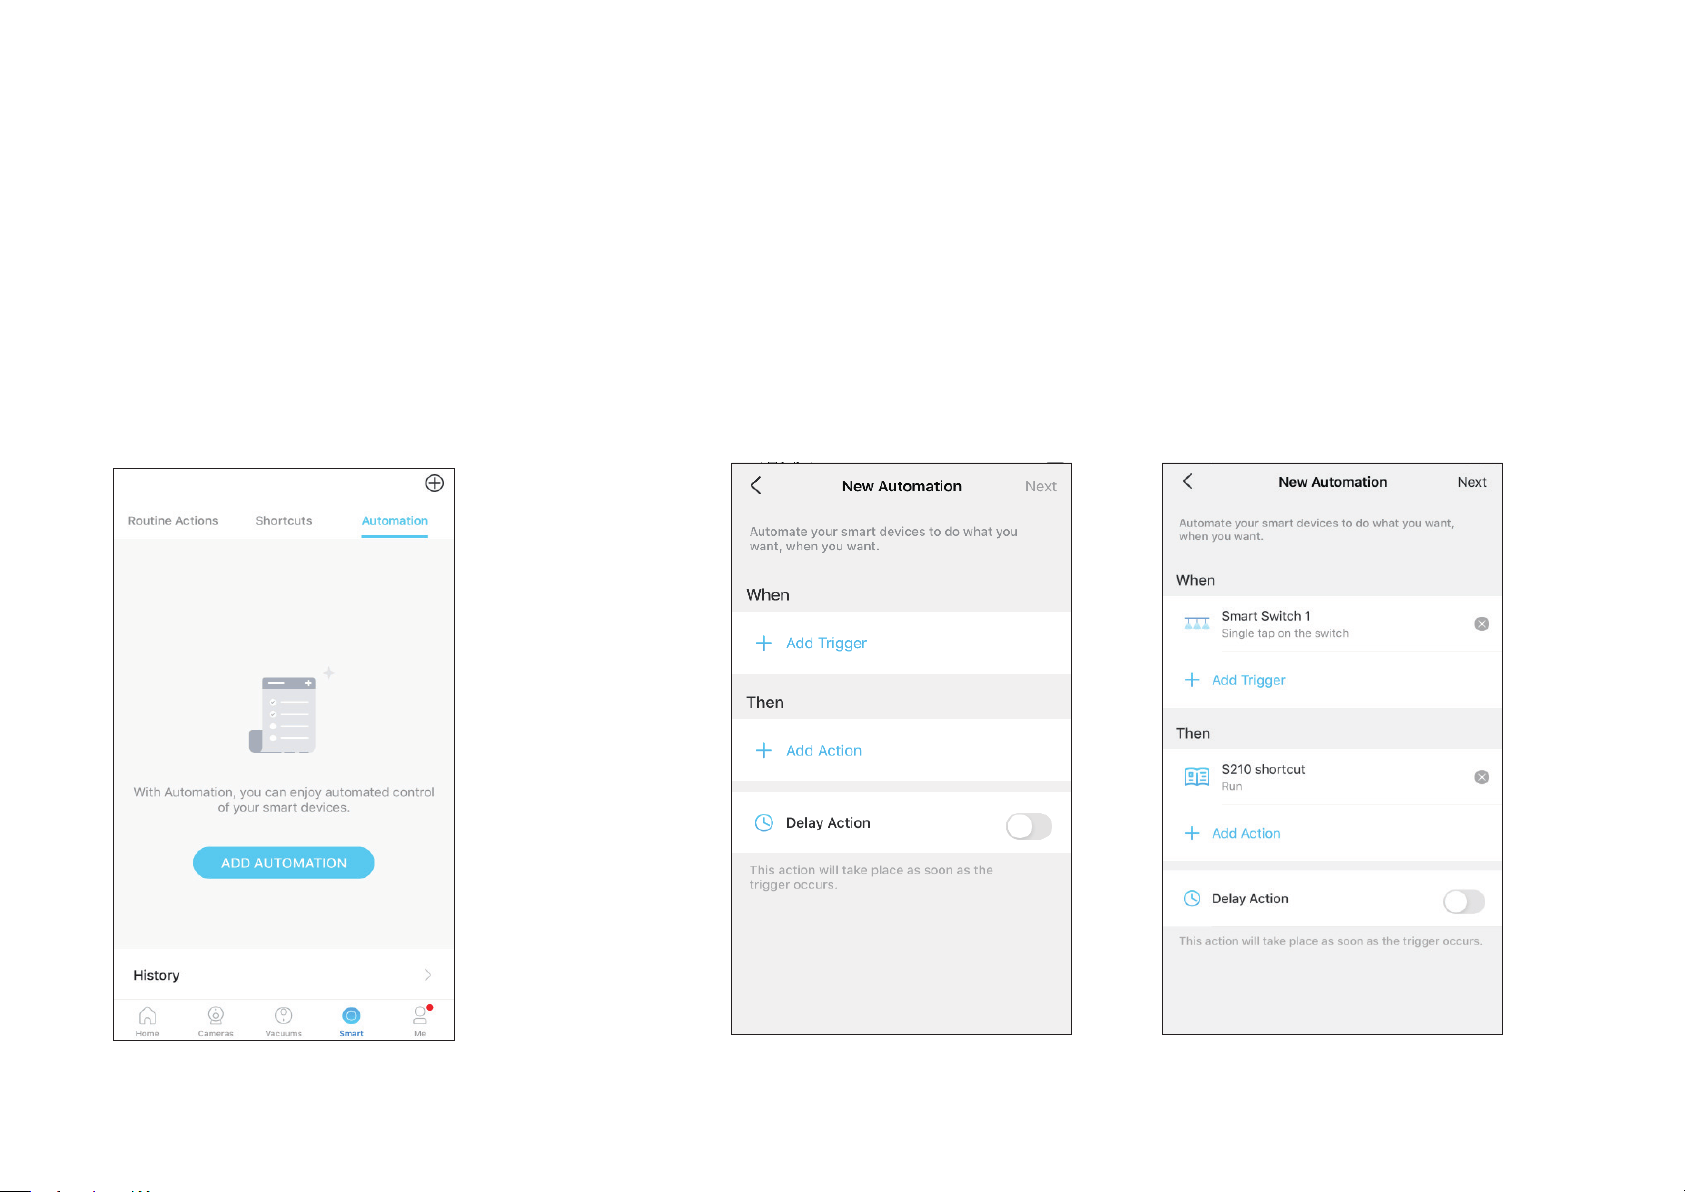
Option 3: Create your own actions
1. Go to Automation page. Tap + on the top right to add a
simple and smart action.
2. Name the new action. Tap + to add conditions (When) like the trigger time, and tap +
to add tasks (Then) like turning on the switch.
20
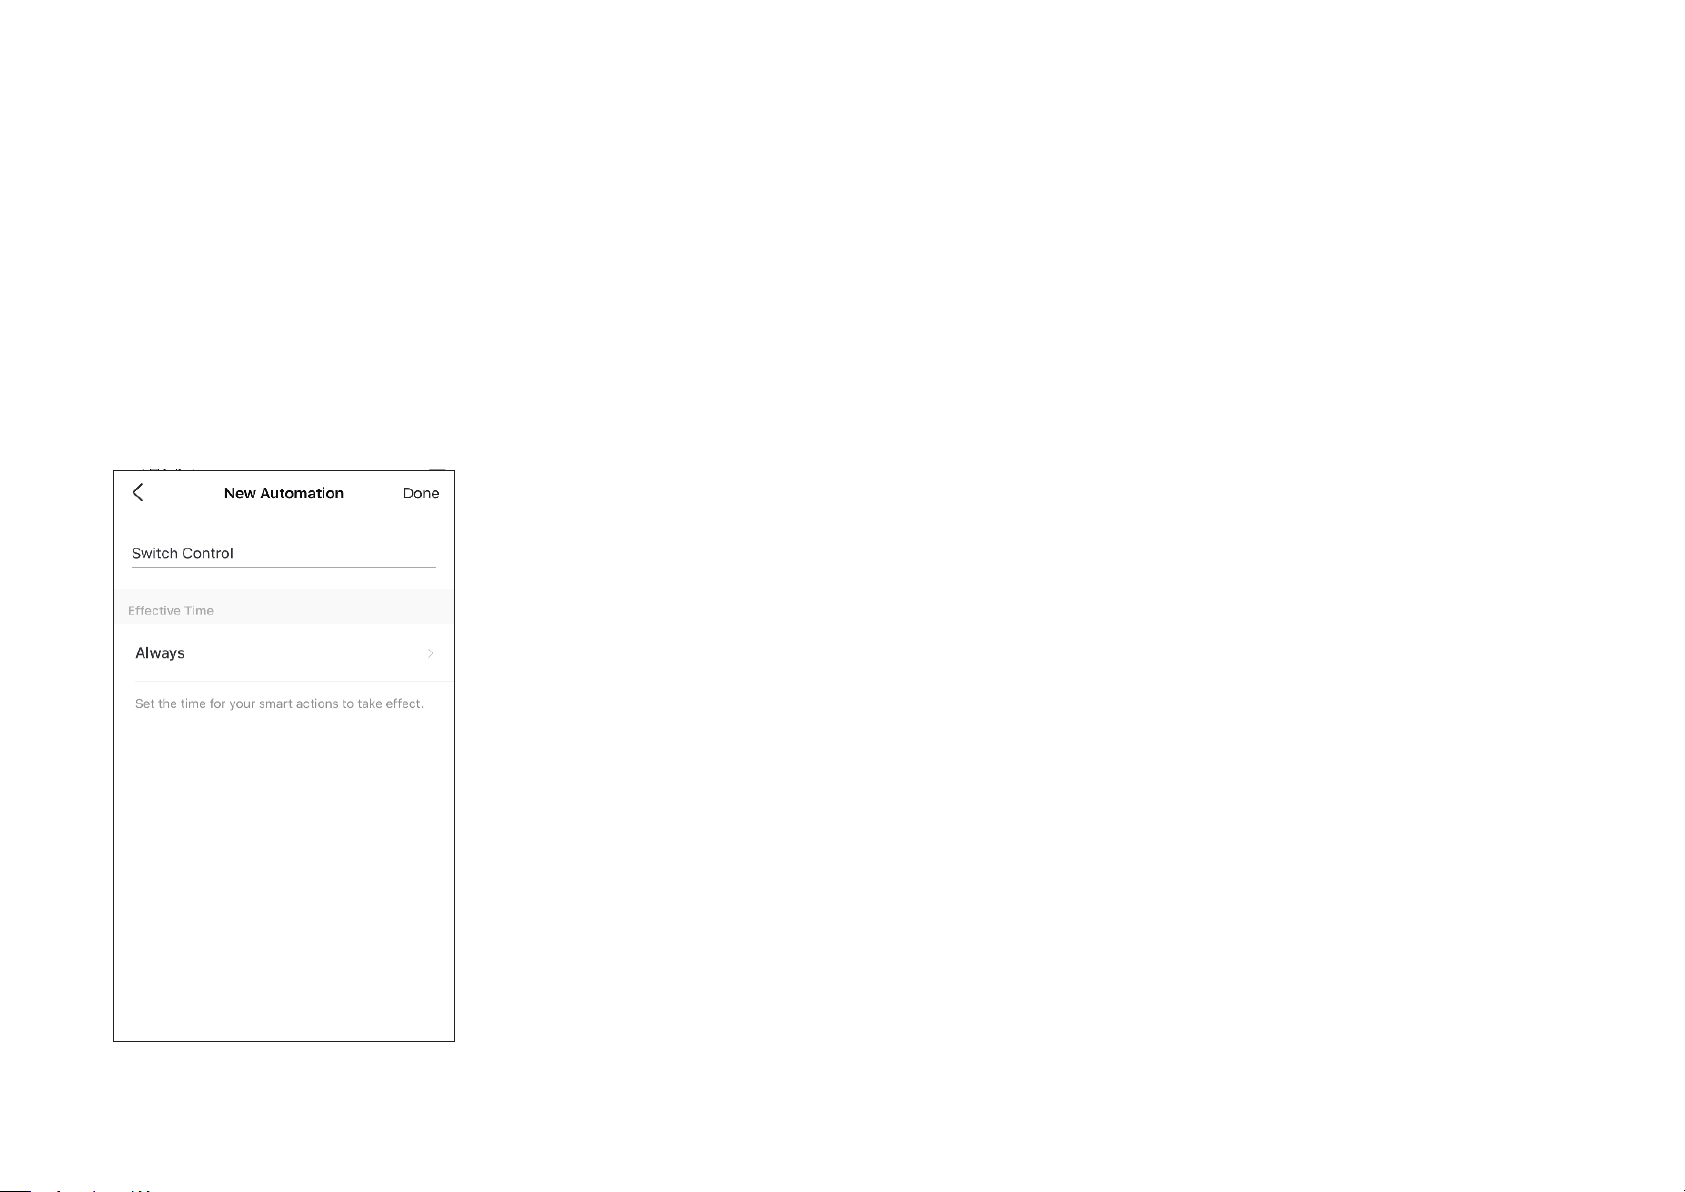
3. Name your automation and set the eective time for the
automation. Tap Done to save all the settings.
21
1: Change Device name, icon and location
In the Status page, tap
to go to the Device Settings page. Then you
can change the device icon, name, and its location.
2: Set Delayed Shut O
When Delayed Shut O is enabled, you can press the switch to make
your light remain on for a set amount of time before going o. To turn the
light o instantly, press the switch once more.
Device Settings
In the Device Settings page, you can edit the basic information, set delayed shut o and double tap eect, update rmware and more.
22
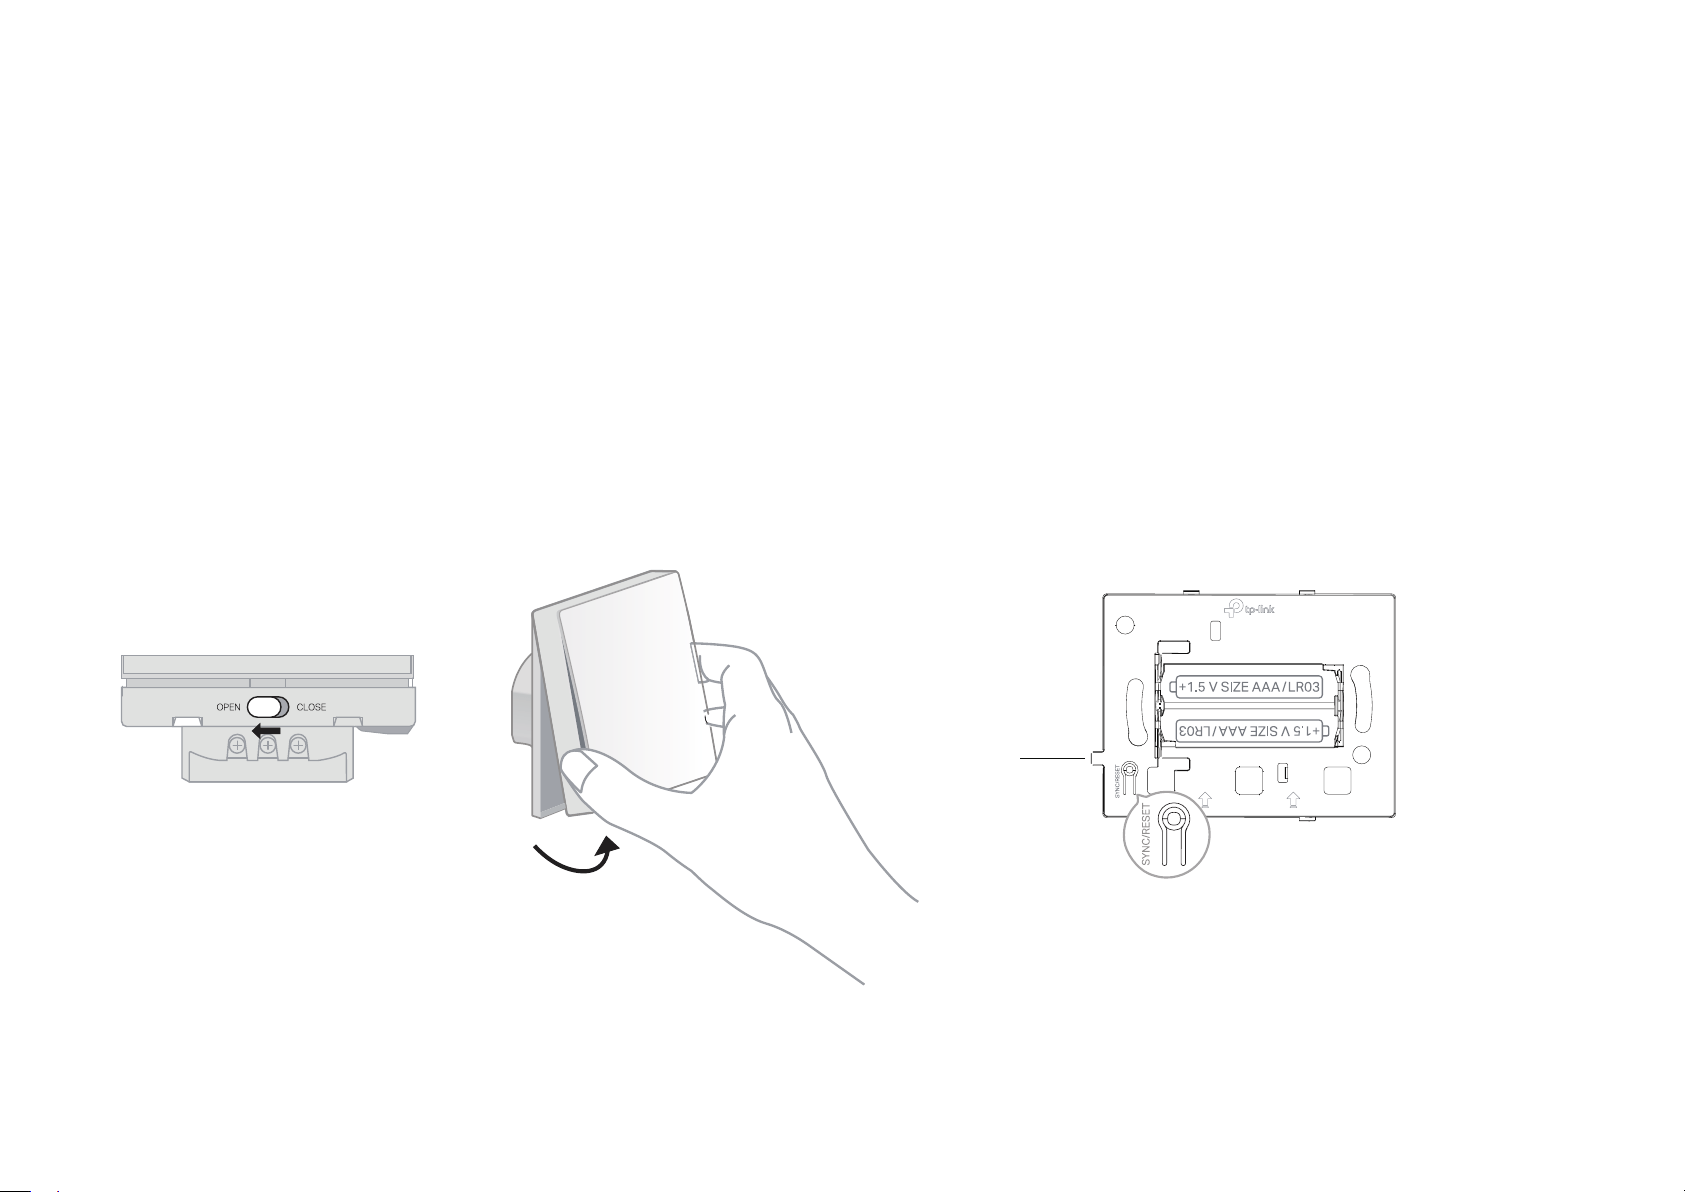
How to Reset Your Switch
There are two methods to reset your switch.
Method 1: Press the SYNC/RESET button on the switch
1. Slide the lock to the OPEN position. Then hold the faceplate and pull it away from the back to remove the faceplate.
2. Press the SYNC/RESET button for about 5 seconds until the LED blinks red quickly.
Step 1 Step 2
1
SYNC/RESET Button
LED
23
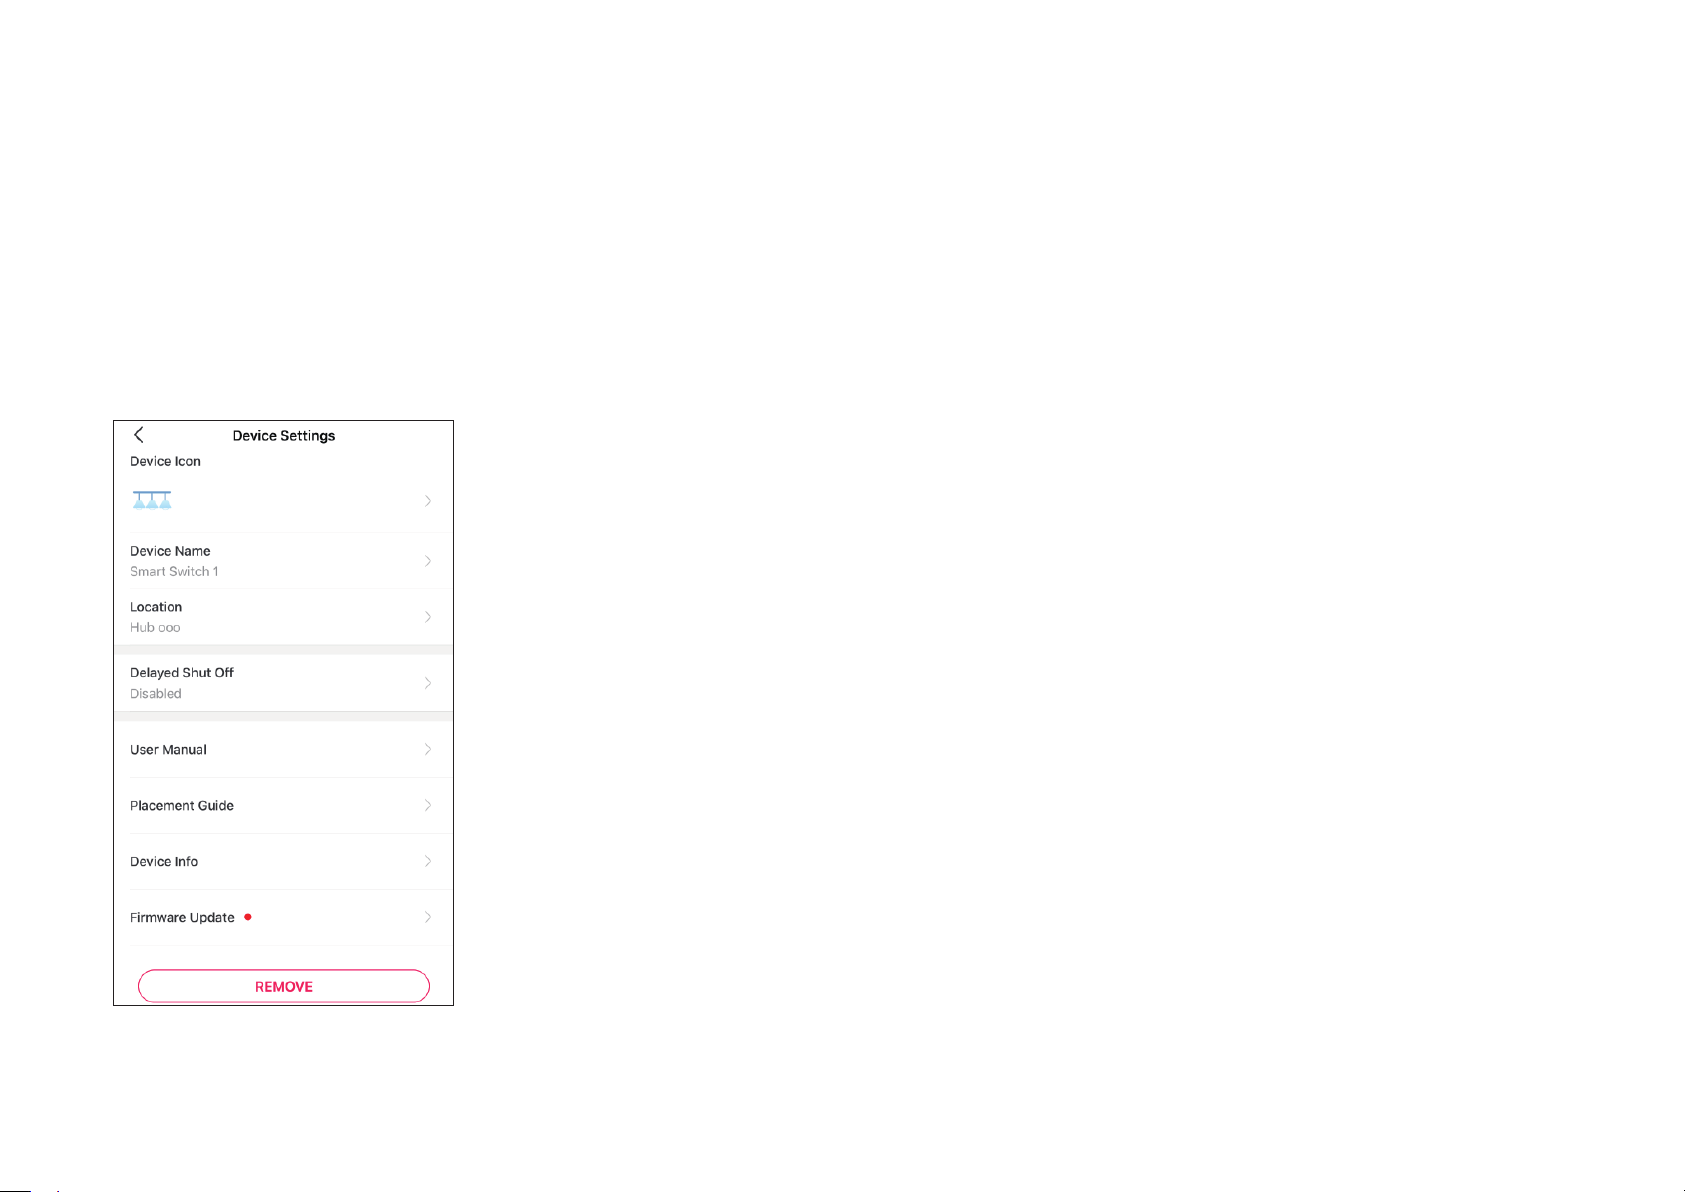
Method 2: Remove the device in the Settings page
Go to the Settings page of your switch. Tap REMOVE to remove your switch from Tapo.

24
Authentication
CE Mark Warning
This is a class B product. In a domestic environment, this product may cause radio interference, in which case the user may be required to take
adequate measures.
OPERATING FREQUENCY / NOMINAL OPERATING FREQUENCY (the maximum transmitted power)
863~865MHz / 863.35MHz / 25mW (e.r.p)
863~865MHz / 864.35MHz / 25mW (e.r.p)
868~868.6MHz / 868.35MHz / 25mW (e.r.p)
EU Declaration of Conformity
TP-Link hereby declares that the device is in compliance with the essential requirements and other relevant provisions of directives 2014/53/EU,
2009/125/EC, 2011/65/EU and (EU)2015/863.
The original EU declaration of conformity may be found at https://www.tapo.com/en/support/ce/
RF Exposure Information
This device meets the EU requirements (2014/53/EU Article 3.1a) on the limitation of exposure of the general public to electromagnetic fields by way
of health protection.
The device complies with RF specifications when the device used at 20 cm from your body.
UK Declaration of Conformity
TP-Link hereby declares that the device is in compliance with the essential requirements and other relevant provisions of the Radio Equipment
Regulations 2017.
25
The original UK declaration of conformity may be found at https://www.tapo.com/support/ukca/
Продукт сертифіковано згідно с правилами системи УкрСЕПРО на відповідність вимогам нормативних документів та вимогам,
що передбачені чинними законодавчими актами України.
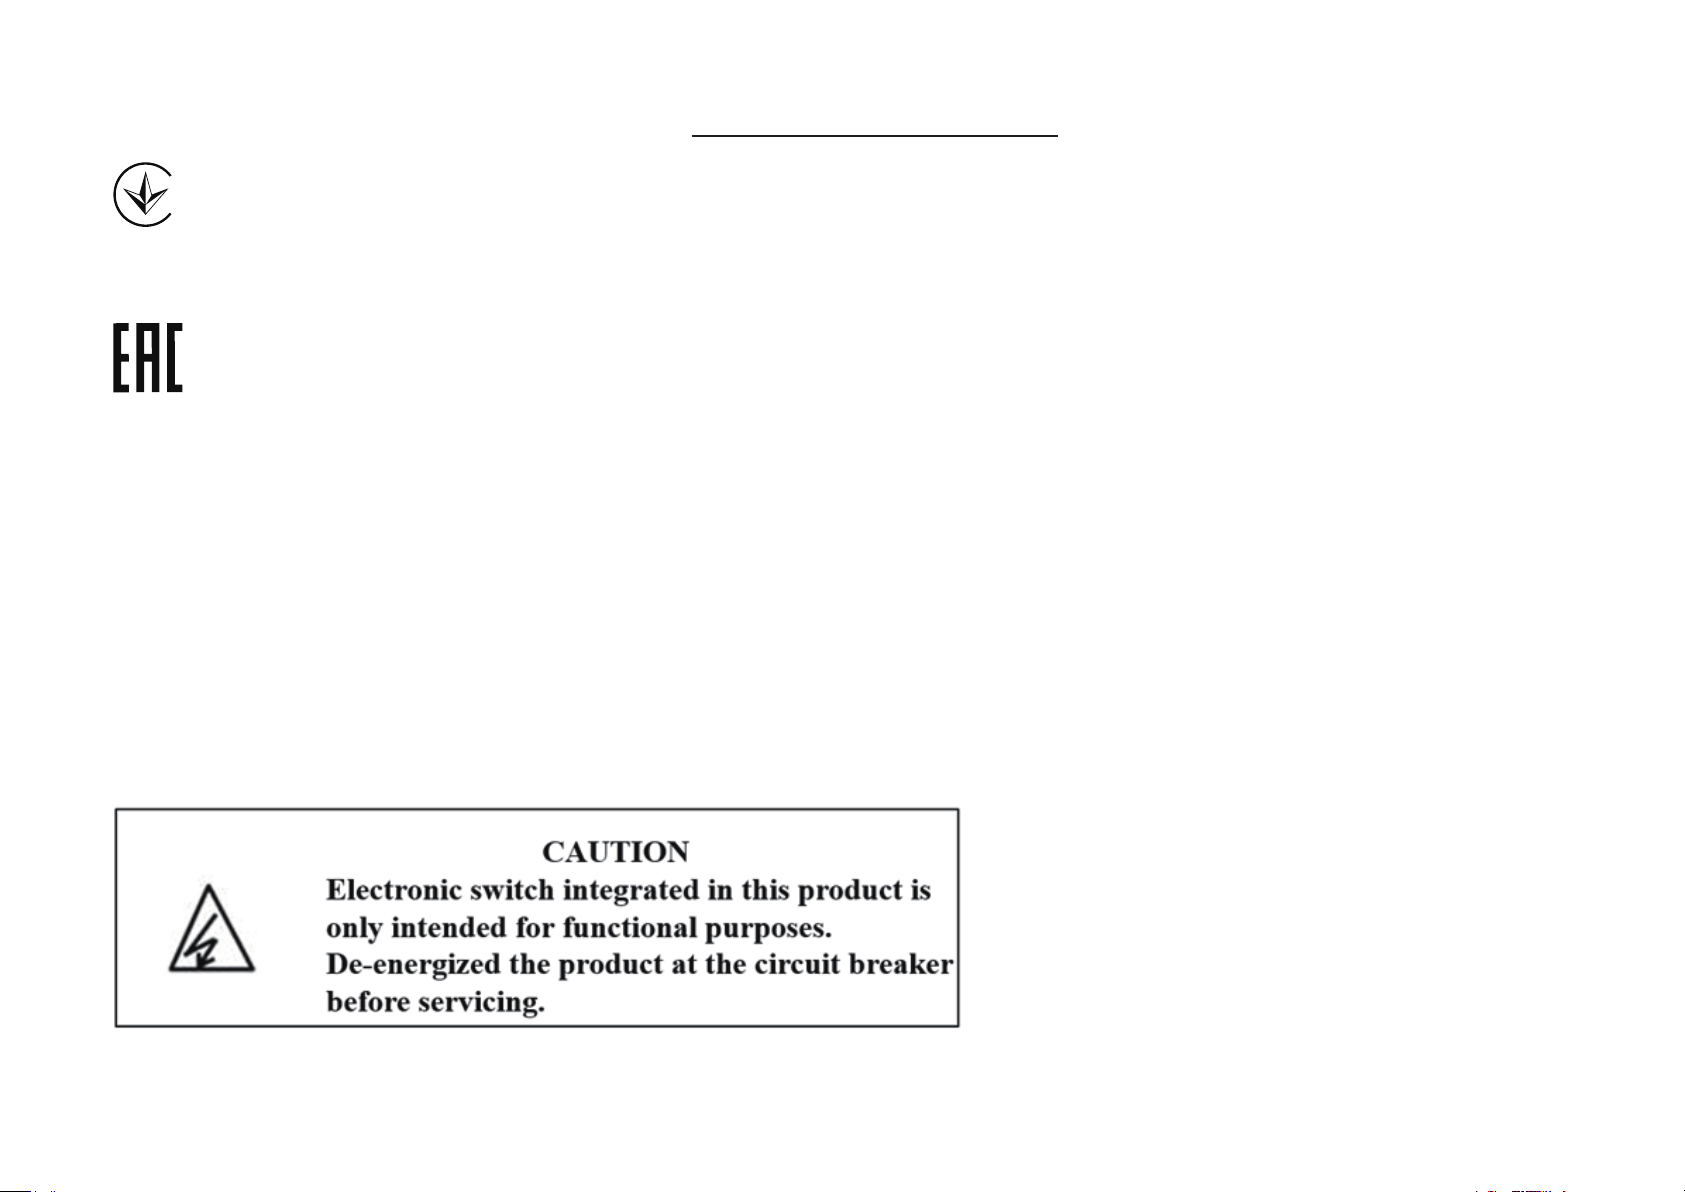
Safety Information
Before installing, servicing or removing the switch, read and follow all safety precautions including the following:
• Follow all national and local safety regulations and practices. If you are uncertain or uncomfortable when performing the installation, consult a
qualified electrician.
• CAUTION – Risk of Electric Shock – More than one disconnect switch may be required to de-energize the equipment and luminaire before servicing.
A circuit breaker which disconnects the Line and Neutral conductor simultaneously is suitable. Ensure power is off at the circuit breaker before
removing or installing any switch. Use a non-contact voltage tester to ensure the power is off.
• Do not install the Smart Switch with wet hands or when standing on wet or damp surfaces.
• Keep the device away from water, fire, humidity or hot environments.
• Do not attempt to disassemble, repair, or modify the device. If you need service, please contact us.
• Do not use the device where wireless devices are not allowed.

26
CAUTION!
Avoid replacement of a battery with an incorrect type that can defeat a safeguard. Avoid disposal of a battery into fire or a hot oven, or
mechanically crushing or cutting of a battery, that can result in an explosion. Do not leave a battery in an extremely high temperature surrounding
environment that can result in an explosion or the leakage of flammable liquid or gas; Do not leave a battery subjected to extremely low air
pressure that may result in an explosion or the leakage of flammable liquid or gas.
Explanation of the symbols on the product label
Symbol Explanation
Direct current
Alternating current
Indoor use only
RECYCLING
This product bears the selective sorting symbol for Waste electrical and electronic equipment (WEEE). This means that this product must be handled pursuant to
European directive 2012/19/EU in order to be recycled or dismantled to minimize its impact on the environment.
User has the choice to give his product to a competent recycling organization or to the retailer when he buys a new electrical or electronic equipment.
µ
Switch of micro-gap / micro-disconnection construction
