Loading ...
Loading ...
Loading ...
Aboutthe automatic icemaker, ge.com
A newly installed refrigerator may take 12to 24 hours to begin making ice.
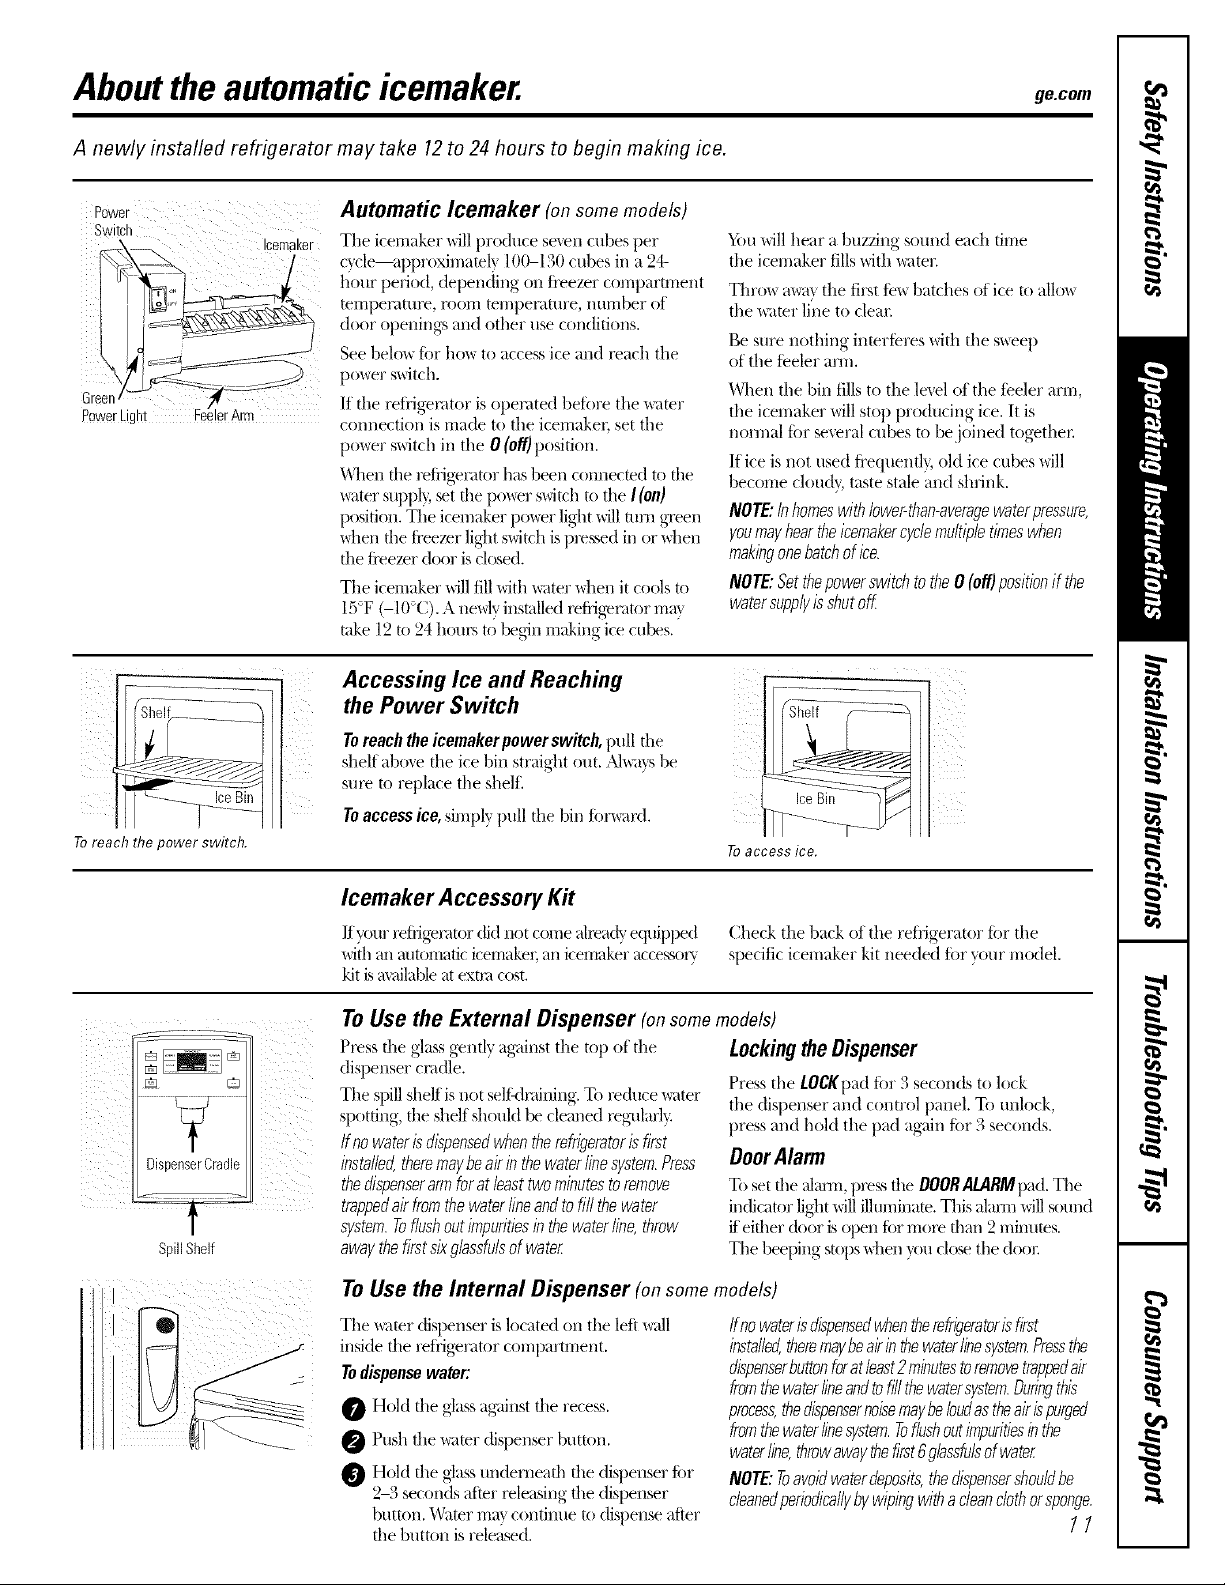
Automatic Icemaker (onsomemodels)
Icemaker
b ¸
Green
PowerLight
Tile icemaker will produce seven cubes per
c}cle--approxinmml) 100--130 cubes in a 24-
]lour peliod, depending on ti'eezer compartment
[el-i-|pel;ittll'e, I'OO1T| tel//pel;Itt/re, ntll-i-|ber of
door openings and other use conditions.
See belo_ for ho_ to access ice and x>ach the
po_er switch.
If file retiigemtor is operated betore the _mr
connection is made to tile icemaker, set the
po_er switch in the 0 (off)position.
_Almn the mfiigerau)r has been connecmd to the
_ter supl% _t tile po_r switch to file I(on)
position. Tile icemaker po_r light will mm green
\dmn the fi'eezer light switch is pm,_sed in or \allen
the ti'eezer door is cl(xsed.
The icemaker will fill xqth water when it cools to
lS°F (-I0°C). A needy installed refiigemtor ma x
rake 12 to 24 houx_ to l_g6n making ice cul_s.
_i)tl will hear a buzzing sound each time
the icemaker fills xdth water.
Tim)w mva_the first tew batches of ice to allow
the x_aterli}/e to clear.
Be sure nothing interteres with the sweep
of the teeler ann.
When the bin fills to tile level of the teeler arm,
the icemaker will stop producing ice. It is
normal tbr several cubes u) bejoined togethex:
If ice is not used fl'equentlBold ice cubes will
become cloud}, taste stale and shrink.
NOTE:Inhomeswithlower-than-averagewaterpressure,
youmayheartheicemakercyclemultipletimeswhen
makingonehatchofice.
NOTE:Setthepowerswitchtothe0 (off)positionif the
watersupplyisshutoff.
Toreach thepowerswitch.
Accessing Ice and Reaching
the Power Switch
To reachtheicemakerpower switch, pull the
shelf aboxe tile ice bin straight out. ,_'_,;1}s be
sure to replace the shelt:
To accessice, simply pull the bin fiwward.
> .....->--YI
Toaccess ice.
Icemaker Accessory Kit
If your reIfigemtor dkl not come aheadyequipped
with an automatic icemake_; an icemaker accessory
kit is a_dlable at extra cost.
Check the back of the reti'igerator tar the
specific icemaker kit needed for your model.
i II!IIIII I !
7
DispenserCradle
SpillShelf
To Use the External Dispenser (on some models)
Press file glassgen@ ag_linstthe tot/of file
dispenser cnldle.
The spill shelf is not self:dnlining.To i_(hme water
spotting, the shdf should be cleaned x_g-ularl_:
Ifnowaterisdispensedwhentherefrigeratorisfirst
installed,theremaybeairin thewaterlinesystem.Press
thedispenserarmfuratleasttwominutestoremove
trappedairfromthewaterlineandtofill thewater
system.Toflushoutimpuritiesinthewaterfine,throw
awaythefirstsixgbssfulsofwater
LockingtheDispenser
Press the LOCKpadtar 3 seconds to lock
the dispenser and control panel. To unlock,
press and hold the pad ag'ain tar 3 seconds.
DoorAlarm
To set the almm, p)_ the DOORALARMIlad.The
in(ficator light will illuminate. This alam-i will sound
ffeither (k)or is open tar rrlol_ than 2 minums.
Tile beeping stops \dmn }ou close the deal:
To Use the Internal Dispenser (onsomemodels)
The x_ater disi)enser is located on tile left x_dl
inside tile reti'igerator compartment.
Todispensewater:
Hold file <glassag'<dnst file recess.
O Push the wamr dispenser button.
Hold die glass underneath the disllenser for
2-3 seconds alter _leasing the dispenser
button. Water rriat continue to dispense atier
the button is telex;seal.
finewaterisdispensedwhentherefrigeratorisfirst
installed,theremaybeairinthewaterlinesystem.Pressthe
dispenserbuttonforatleast2minutestoremovetrap_dair
fromthewaterlineandtofill thewatersystem.Duringthis
process,thedispensernoisemaybeloudastheairispurged
fromthewaterlinesystem.Toflushoutimpuritiesinthe
waterline,throwawaythefirst6glassfulsofwater
NOTE:Toavoidwaterdeposits,thedispensershouldbe
cleanedperiodicallybywipingwitha cleanclothorsponge.
11
Loading ...
Loading ...
Loading ...