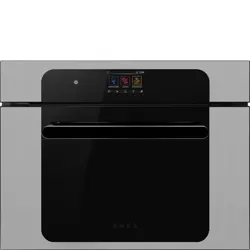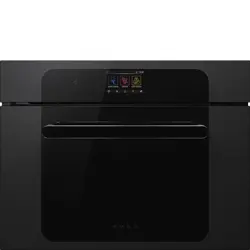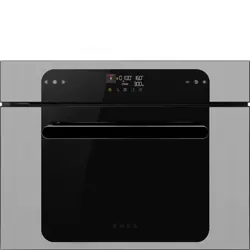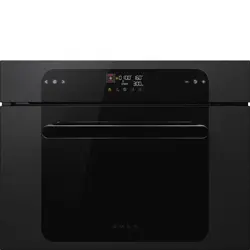

SF4400MCX1
IT
EN
FR
DE
NL
ES
PT
RU
PL
MANUALE D’USO
FORNO DA INCASSO
INSTRUCTION MANUAL
BUILT-IN OVEN
MANUEL D’UTILISATION
FOUR ENCASTRABLE
GEBRAUCHSANWEISUNG
EINBAUBACKOFEN
GEBRUIKSAANWIJZING
INBOUWOVEN
MANUAL DE USO
HORNO EMPOTRADO
РУКОВОДСТВО ПО ЭКСПЛУАТАЦИИ
ВСТРАИВАЕМЫЙ ДУХОВОЙ ШКАФ
INSTRUKCJA UŻYTKOWNIKA
PIEKARNIK DO ZABUDOWY
MANUAL DE UTILIZAÇÃO
FORNO DE ENCASTRAR

ITALIANO
1
Gentile Cliente, desideriamo ringraziarLa per la fiducia accordataci.
Scegliendo un nostro prodotto, Lei ha optato per soluzioni in cui la ricerca estetica, abbinata ad una
progettazione tecnica innovativa, offre oggetti unici che diventano elementi d’arredo.
AugurandoLe di apprezzare appieno le funzionalità del Suo elettrodomestico, Le porgiamo i nostri più cordiali
saluti.
1
ENGLISH
1
Dear customer, we would like to thank you for your confidence in us.
By choosing one of our products, you have opted for solutions where research for beauty meets innovative
technical design to provide unique objects which become pieces of furniture.
We hope you get the most out of your household appliance.
Kindest regards.
1
FRANÇAIS
1
Cher Client, nous souhaitons vous remercier pour la confiance que vous nous accordez.
En choisissant l’un de nos produits, vous avez opté pour des solutions dont la recherche esthétique, associée à
une conception technique innovante, offre des objets uniques qui deviennent des éléments de décoration. Tout en
vous souhaitant d'apprécier pleinement les fonctions de votre appareil électroménager, nous vous présentons nos
salutations les plus cordiales.
1
DEUTSCH
1
Sehr geehrter Kunde, wir danken Ihnen für Ihr Vertrauen.
Mit der Wahl eines unserer Produkte haben Sie sich für Lösungen entschieden, deren Ästhetik und innovativer
technischer Entwurf Einrichtungsgegenstände von besonderem Design schaffen.
In der Hoffnung, dass Sie die Funktionen Ihres Haushaltsgerätes voll und ganz genießen und schätzen werden,
verbleiben wir mit freundlichen Grüßen.
1
NEDERLANDS
1
Geachte klant, we danken u hartelijk voor het in ons gestelde vertrouwen.
Door voor een van onze producten te kiezen hebt u gekozen voor oplossingen met een esthetiek en innovatief
technisch ontwerp die resulteren in unieke voorwerpen die een onderdeel van uw meubilair zullen worden.
We hopen dat u de functionaliteiten van uw huishoudtoestel ten volle zal waarderen.
Met hoogachting
1
ESPAÑOL
1
Estimado Cliente, deseamos darle las gracias por la confianza que ha depositado en nosotros.
Al elegir uno de nuestros productos, usted ha optado por soluciones en que la búsqueda estética, combinada
con una proyectación técnica innovadora, ofrece objetos únicos que se convierten en elementos de decoración.
Deseándole que pueda apreciar plenamente las funcionalidades de su electrodoméstico, le enviamos nuestros
saludos más cordiales.
1
PORTUGUÊS
1
Caro Cliente, queremos agradecer-lhe pela confiança que em nós deposita.
Ao escolher um produto nosso, optou por soluções em que a procura estética, combinada com uma concepção
técnica inovadora, oferece objetos únicos que se transformam em elementos de decoração. Desejando-lhe que
desfrute totalmente das funcionalidades do seu eletrodoméstico, enviamos-lhe os nossos mais sinceros
cumprimentos.
1
РУССКИЙ
1
Уважаемый клиент! Благодарим вас за оказанное нам доверие.
Приобретенная вами продукция нашей марки предоставляет решения, в которых изысканная эстетика в
сочетании с инновационным техническим дизайном воплощена в уникальные изделия, идеально
сочетающиеся с элементами интерьера.
Надеемся, что вы в полной мере оцените разнообразные функции вашего электроприбора. Выражаем
вам наше глубокое уважение.
1
POLSKI
1
Szanowni Klienci, dziękujemy za okazane nam zaufanie.
Wybierając jeden z naszych produktów, wybrali Państwo rozwiązanie, które łącząc walory estetyczne z
innowacyjnym wzornictwem technicznym, oferuje unikatowe przedmioty wyposażenia wnętrz.
Mamy nadzieję, że będą Państwo mogli w pełni korzystać z funkcjonalności tego urządzenia.
Serdecznie pozdrawiamy.
1

Contents
61
EN
1 Instructions 63
1.1 General safety instructions 63
1.2 Instructions for using microwaves 64
1.3 To Reduce the Risk of Injury to Persons Grounding Installation 66
1.4 Manufacturer liability 66
1.5 Appliance purpose 66
1.6 Identification plate 66
1.7 Energy and environment tips 67
1.8 Disposal 67
1.9 This user manual 68
1.10 How to read the user manual 68
2 Description 69
2.1 Names of Oven Parts and Accessories 69
2.2 Specifications 70
3 Use 71
3.1 Turntable 71
3.2 Utensils 72
3.3 Materials you can use in microwave oven 73
3.4 Materials to be avoided in microwave oven 74
3.5 Your new appliance 74
3.6 Before using the appliance for the first time 78
3.7 Setting the oven 78
3.8 The microwave 80
3.9 MicroCombi operation 82
3.10 Automatic programmes 83
3.11 Defrosting programmes 84
3.12 Setting the time-setting options 85
3.13 Childproof lock 86
3.14 Memory Function 87
3.15 Quick Start 87
4 Expert Cooking Guide 88
4.1 Defrosting, heating up and cooking with the microwave 88
4.2 Defrosting, heating up or cooking frozen food 90
4.3 Heating food 92
4.4 Cooking food 94
4.5 Popcorn for the microwave 95
4.6 Microwave tips 96
4.7 Cakes and pastries 96
4.8 Baking tips 99
4.9 Roasting and grilling 100
4.10 Tips for roasting and grilling 107
4.11 Bakes, gratins, toast with toppings 108

Contents
62
4.12 Convenience products, frozen 109
5 Cleaning and maintenance 110
5.1 Cleaning agents 110
5.2 Malfunction table 112
5.3 Acrylamide in foodstuffs 113
6 Installation 114
6.1 Fitted units 114
6.2 Installation dimensions 115
6.3 Important information 117
We advise you to read this manual carefully, which contains all the instructions for
maintaining the appliance’s aesthetic and functional qualities.
For further information on the product: www.smeg.com

Instructions
63
EN
1 Instructions
IMPORTANT SAFETY INSTRUCTIONS
PLEASE READ CAREFULLY AND RETAIN FOR FUTURE USE.
1.1 General safety instructions
Risk of personal injury
• WARNING: If the door or the
door seal is damaged, the oven
must not be used until it has been
repaired by a competent person.
• WARNING: It is hazardous for
anyone other than a competent
person to carry out any service or
repair operation which involves
the removal of a cover which
offers protection against
exposure to microwave energy.
• WARNING: Liquids and other
foods must not be heated in
sealed containers since they are
liable to explode.
• WARNING: During use the
appliance and its accessible
parts become very hot.
• Never touch the heating elements
during use.
• Keep children under eight years
of age at a safe distance if they
are not constantly supervised.
• This appliance may be used by
children aged at least 8 and by
people of reduced physical and
mental capacity, or lacking in
experience in the use of electrical
appliances, as long they are
supervised or instructed by adults
who are responsible for their safety.
• Children must never play with the
appliance.
• The appliance must never be
cleaned by unsupervised
children.
• Switch off the appliance
immediately after use.
• If smoke is emitted, switch off or
unplug the appliance and keep
the door closed in order to stifle
any flames.
• Never attempt to extinguish a
flame or fire with water.
• Have qualified personnel carry
out installation and assistance
interventions according to the
standards in force.
• Do not modify this appliance.
• Do not insert pointed metal
objects (cutlery or utensils) into
the slots in the appliance.
• Do not try to repair the appliance
yourself or without the intervention
of a qualified technician.
• If the power supply cable is
damaged, contact technical
support immediately and they will
replace it.

Instructions
64
Risk of damaging the appliance
• Do not use abrasive or corrosive
detergents on glass parts (e.g.
powder products, stain removers
and metallic sponges).
• Use wooden or plastic utensils.
• Do not use a steam jet to clean
the appliance.
• Do not obstruct ventilation
openings and heat dispersal slots.
• Never leave the appliance
unattended during cooking
operations where fats or oils
could be released.
• Do not use the appliance to heat
rooms for any reason.
• Do not rest any weight or sit on
the open door of the appliance.
• Take care that no objects are
stuck in the doors.
1.2 Instructions for using
microwaves
• Check the appliance visually
during the cooking of foods in
plastic or paper containers.
• Use the microwave only for the
preparation of food for
consumption. Other types of
applications are strictly forbidden
(e.g. drying clothes, warming
slippers, sponges, wet cloths or
the like, dehydrating foods)
because they can lead to the risk
of injury or fire.
• Clean the appliance constantly
and remove any food residue.
• Do not use the microwave to dry
food.
• Do not use the microwave to heat
oils or fry.
• Do not use the appliance to heat
foods or beverages containing
alcohol.
• Baby food should not be heated
in sealed containers. Remove the
cover or the teat (in the case of
baby bottles). Always check the
preparation's temperature once
heating has completed, it should
not be too high. For an even
temperature and to avoid
scalding stir or shake the contents.

Instructions
65
EN
• Do not heat eggs in their shells or
whole hard boiled eggs; they
may explode even after the
heating process has completed.
• Before cooking food with a hard
skin or peel (e.g. potatoes,
apples, etc.) it is necessary to
puncture the skin.
• Do not heat food contained within
food packages.
• Do not use the microwave
functions when the oven is empty.
• Use cookware and utensils that
are suitable for use in a
microwave oven.
• Do not use aluminium containers
to cook food.
• Do not use dishes with metallic
decorations (gold-plated or
silver).
• The appliance operates in the
2.4GHz ISM band.
• In compliance with the provisions
relating to electromagnetic
compatibility the appliance
belongs to group 2 and class B
(EN 55011).
The instructions for use for fixed
appliances and built-in appliances
being used equal or higher than
900 mm above the floor and having
detachable turntables shall state
that care should be taken not to
displace the turntable when
removing containers from the
appliance. This is not applicable for
appliances with horizontal bottom
hinged door.
This appliance complies with the
standards and directives currently in
force concerning safety and
electromagnetic compatibility. It is
however recommended for
pacemaker wearers to maintain a
minimum distance of 20-30cm
between the microwave when it is
operating and the pacemaker.
Consult the pacemaker manufacturer
for more information.

Instructions
66
1.3 To Reduce the Risk of Injury to
Persons Grounding Installation
1. A short power-supply cord is provided to
reduce the risks resulting from becoming
entangled in or tripping over a longer
cord.
2. If a long cord set or extension cord is
used:
• The marked electrical rating of the cord
set or extension cord should be at least
as great as the electrical rating of the
appliance.
• The extension cord must be a grounding-
type 3-wire cord.
• The long cord should be arranged so
that it will not drape over the counter top
or tabletop where it can be pulled on by
children or tripped over unintentionally.
1.4 Manufacturer liability
The manufacturer declines all liability for
damage to persons or property caused by:
• Use of the appliance other than the one
envisaged;
• Non-observance of the user manual
provisions;
• Tampering with any part of the
appliance;
• Use of non-original spare parts.
1.5 Appliance purpose
• This appliance is intended for cooking
food in the home environment. Every
other use is considered inappropriate. It
cannot be used:
• in employee kitchens, shops, offices
and other working environments.
• in farms/agritourism establishments.
• by guests in hotels, motels and
residential environments.
• in bed and breakfast establishments.
• The appliance is not designed to
operate with external timers or with
remote-control systems.
1.6 Identification plate
• The identification plate bears the
technical data, serial number and brand
name of the appliance. Do not remove
the identification plate for any reason.
Power voltage
Danger of electrocution
• Electric Shock Hazard Touching some of
the internal components can cause
serious personal injury or death. Do not
disassemble this appliance.
• Electric Shock Hazard
• Improper use of the grounding can result
in electric shock.
• Do not plug into an outlet until appliance
is properly installed and grounded.
• This appliance must be grounded. In the
event of an electrical short circuit,
grounding reduces the risk of electric
shock by providing an escape wire for
the electric current.
• Consult a qualified electrician or
serviceman if the grounding instructions
are not completely understood or if
doubt exists as to whether the appliance
is properly grounded.
• If it is necessary to use an extension
cord, use only a 3-wire extension cord.

Instructions
67
EN
1.7 Energy and environment tips
Here you can find tips on how to save
energy when baking and roasting and how
to dispose of your appliance properly.
Saving energy
• Only preheat the oven if this is specified
in the recipe or in the operating
instruction tables.
• Use dark, black lacquered or enamelled
baking tins. They absorb the heat
particularly well.
• Open the oven door as infrequently as
possible while you are cooking, baking
or roasting.
• It is best to bake several cakes one after
the other. The oven is still warm. This
reduces the baking time for the second
cake.
• You can also place two loaf tins next to
each other.
1.8 Disposal
TThis appliance complies with
European Directive 2002/96/EC
on Waste Electrical and Electronic
Equipment (WEEE). The directive gives a
framework for the collection and recycling of
old appliances, which is valid across the EU.
To dispose of the appliance:
• Cut the power supply cable and remove
it along with the plug (if present).
• Deliver the appliance to the appropriate
recycling centre for electrical and
electronic equipment waste, or return it
to the retailer when purchasing an
equivalent product, on a one for one
basis.
Our appliances are packed in non-
polluting and recyclable materials.
• Deliver the packing materials to the
appropriate recycling centre.
Power voltage
Danger of electrocution
• Disconnect the main power supply.
• Disconnect the power cable from the
electrical system.
Plastic packaging
Danger of suffocation
• Do not leave the packaging or any part
of it unattended.
• Do not let children play with the
packaging plastic bags.
Instructions
68
1.9 This user manual
This user manual is an integral part of the
appliance and must therefore be kept in its
entirety and within the user’s reach for the
whole working life of the appliance.
• Read this user manual carefully before
using the appliance.
1.10 How to read the user manual
This user manual uses the following reading
conventions:
1. Use instruction sequence.
• Single use instruction.
Instructions
General information on this user
manual, on safety and final
disposal.
Description
Description of the appliance and its
accessories.
Use
Information on the use of the
appliance and its accessories,
cooking advice.
Cleaning and maintenance
Information for proper cleaning and
maintenance of the appliance.
Installation
Information for the qualified
technician: Installation, operation
and inspection.
Safety instructions
Information
Advice
Description
69
EN
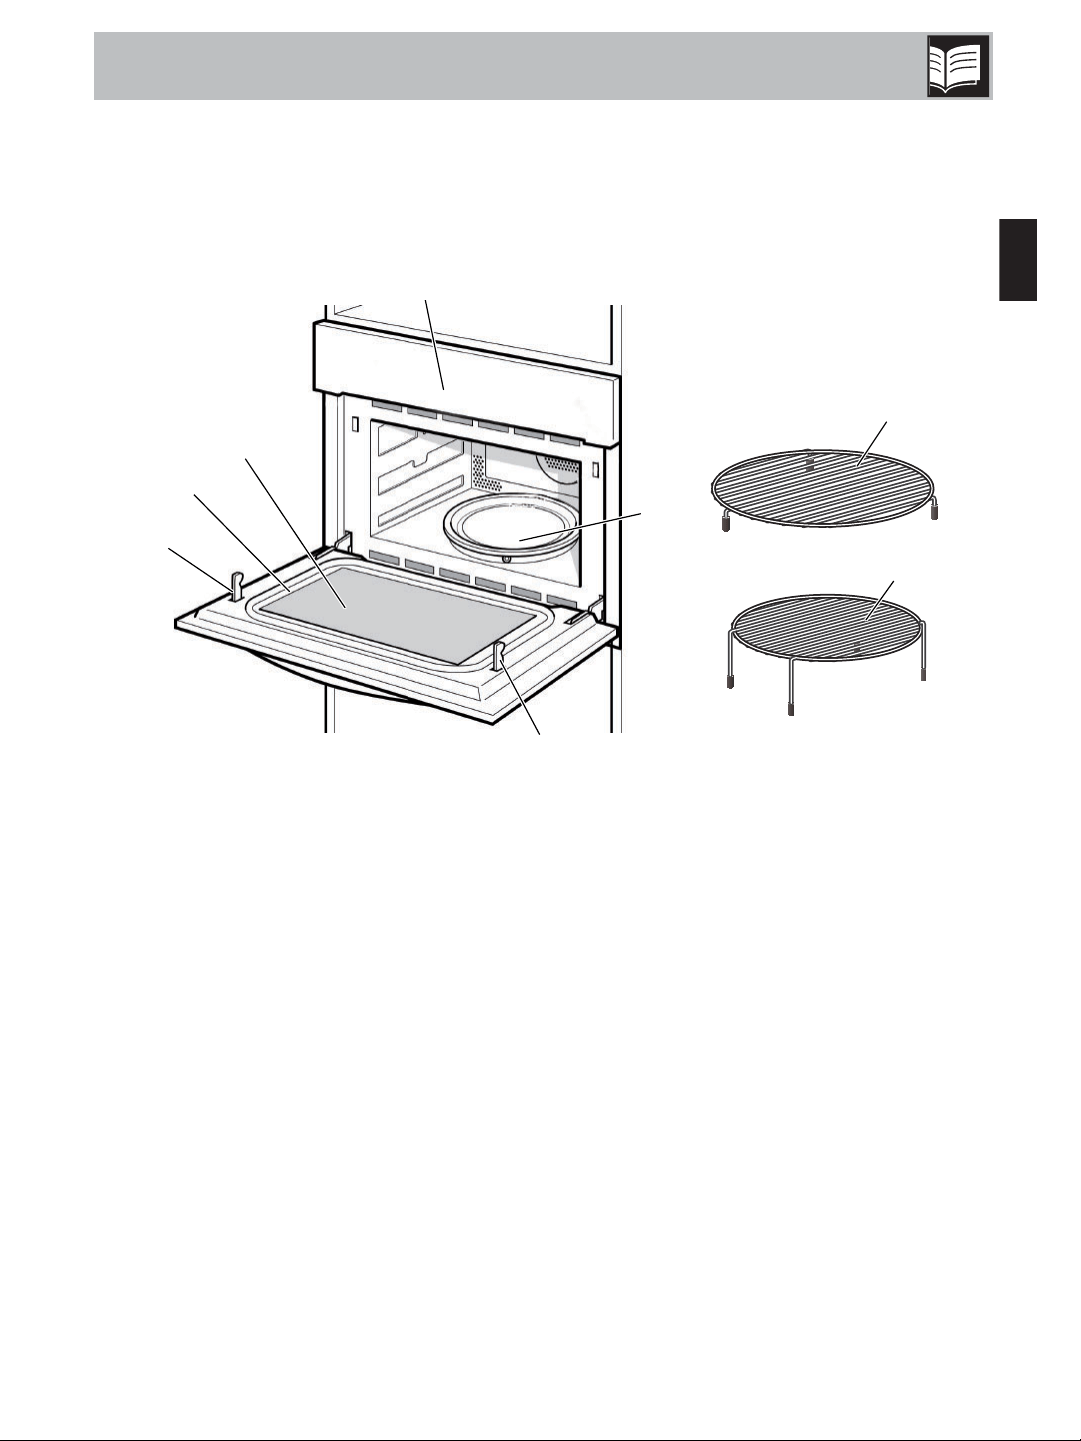
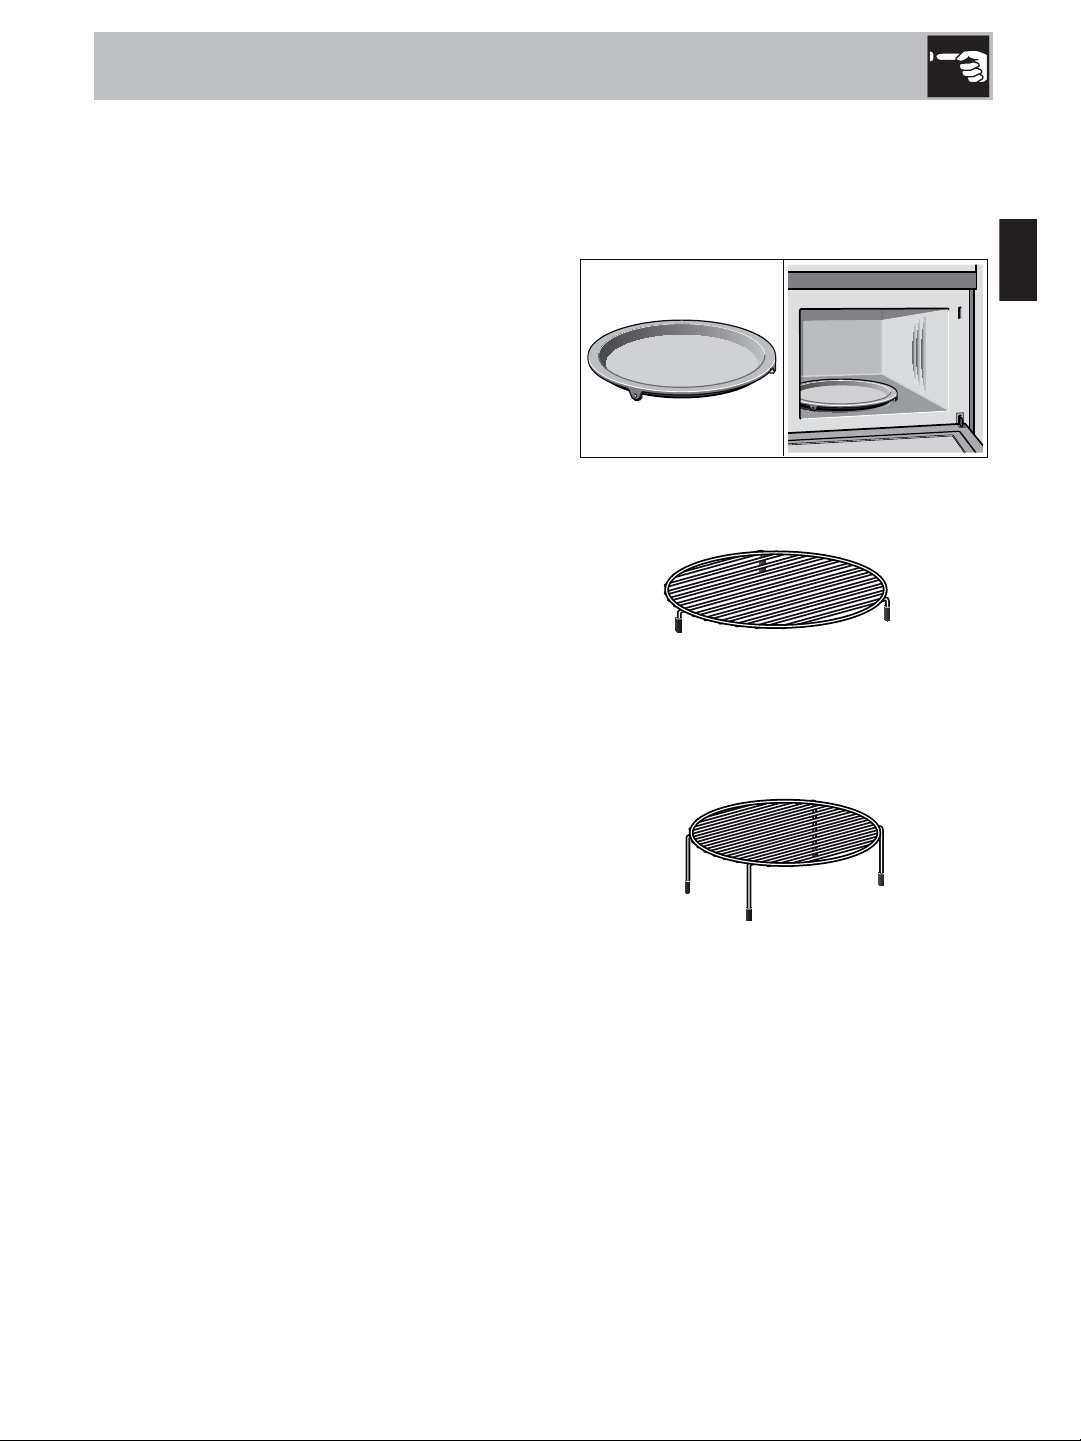
2 Description
2.1 Names of Oven Parts and Accessories
1 Control panel
2 Glass tray
3 Observation window
4 Door assembly
5 Safety interlock system
6 Lower wire rack
7 Higher wire rack
1
3
6
7
4
5
5
2

Description
70
2.2
Specifications
Model: SF4400MCX1
Rated Voltage: 230V~50 Hz
Rated Output Power
(Microwave):
900 W
Oven Capacity: 44 L
Turntable Diameter: Ø 360 mm
External Dimensions: 597x x454mm
Net Weight: Approx. 36 kg
568
Use
71
EN
3 Use
Remove the oven and all materials from the
carton and oven cavity.
Your oven comes with the following
accessories:
• Glass tray.
• Lower wire rack.
• Higher wire rack.
• Turntable ring assembly.
• Instruction Manual.
3.1 Turntable
As a surface for the wire rack.
Food which particularly requires a lot of
heat from underneath can be prepared
directly on the turntable.
The turntable can turn clockwise or anti-
clockwise.
• Never use the microwave without the
turntable.
• The turntable can withstand max. 5 kg.
• The turntable must turn when using all
types of heating.
• Never place the glass tray upside down.
The glass tray should never be restricted.
• Both glass tray and turntable ring
assembly must always be used during
cooking.
• All food and containers of food are
always placed on the glass tray for
cooking.
• If glass tray or turntable ring assembly
cracks or breaks, contact your nearest
authorized service center.
• Type and quantity of accessories is suject
to actual demand.
Turntable Installation
Place the turntable on the drive in the centre
of the cooking compartment. Ensure that it is
properly fitted.
Lower wire rack
For the microwave and for baking and
roasting in the oven.
Higher wire rack
For grilling, e.g. steaks, sausages and for
toasting bread.
As a support for shallow dishes.
Cleaning the accessories
Before you use the accessories for the first
time, clean them
thoroughly with hot soapy water and a soft
dish cloth.

Use
72
3.2 Utensils
See the instructions on “Materials you can
use in microwave oven”. There may be
certain non-metallic utensils that are not safe
to use for microwaving. If in doubt, you can
test the utensil in question following the
procedure below.
Utensil Test:
1. Fill a microwave-safe container with 1
cup of cold water (250 ml) along with
the utensil in question.
2. Cook on maximum power for 1 minute.
3. Carefully feel the utensil. If the empty
utensil is warm, do not use it for
microwave cooking.
4. Do not exceed 1 minute cooking time.
Caution
Personal Injury Hazard
It is hazardous for anyone other than a
competent person to carry out any service
or repair operation that involves the
removal of a cover which gives protection
against exposure to microwave energy.

Use
73
EN
3.3 Materials you can use in microwave oven
Utensils Remarks
Browning dish
Follow manufacturer's instructions. The bottom of browning dish must be at least 3/16
inch (5mm) above the turntable. Incorrect usage may cause the turntable to break.
Dinnerware
Microwave-safe only. Follow manufacturer's instructions. Do not use cracked or
chipped dishes.
Glass jars
Always remove lid. Use only to heat food until just warm. Most glass jars are not heat
resistant and may break.
Glassware
Heat-resistant oven glassware only. Make sure there is no metallic trim. Do not use
cracked or chipped dishes.
Oven cooking bags
Follow manufacturer's instructions. Do not close with metal tie. Make slits to allow
steam to escape.
Paper plates and cups
Use for short-term cooking/warming only. Do not leave oven unattended while
cooking.
Paper towels
Use to cover food for reheating and absorbing fat. Use with supervision for a short-
term cooking only.
Parchment paper Use as a cover to prevent splattering or a wrap for steaming.
Plastic
Microwave-safe only. Follow the manufacturer's instructions. Should be labeled
"Microwave Safe". Some plastic containers soften, as the food inside gets hot. "Boiling
bags" and tightly closed plastic bags should be slit, pierced or vented as directed by
package.
Plastic wrap
Microwave-safe only. Use to cover food during cooking to retain moisture. Do not
allow plastic wrap to touch food.
Thermometers Microwave-safe only (meat and candy thermometers).
Wax paper Use as a cover to prevent splattering and retain moisture.
Use
74
3.4 Materials to be avoided in microwave oven
3.5 Your new appliance
Use this section to familiarise yourself with
your new appliance.
The control panel and the individual
operating controls are explained. You will
find information on the cooking
compartment and the accessories.
Control panel
Utensils Remarks
Aluminum tray May cause arcing. Transfer food into microwave-safe dish
Food carton with metal
handle
May cause arcing. Transfer food into microwave-safe dish.
Metal or metal- trimmed
utensils
Metal shields the food from microwave energy. Metal trim may cause arcing.
Metal twist ties May cause arcing and could cause a fire in the oven.
Paper bags May cause a fire in the oven.
Plastic foam
Plastic foam may melt or contaminate the liquid inside when exposed to high
temperature.
Wood Wood will dry out when used in the microwave oven and may split or crack
hr
min
Use
75
EN
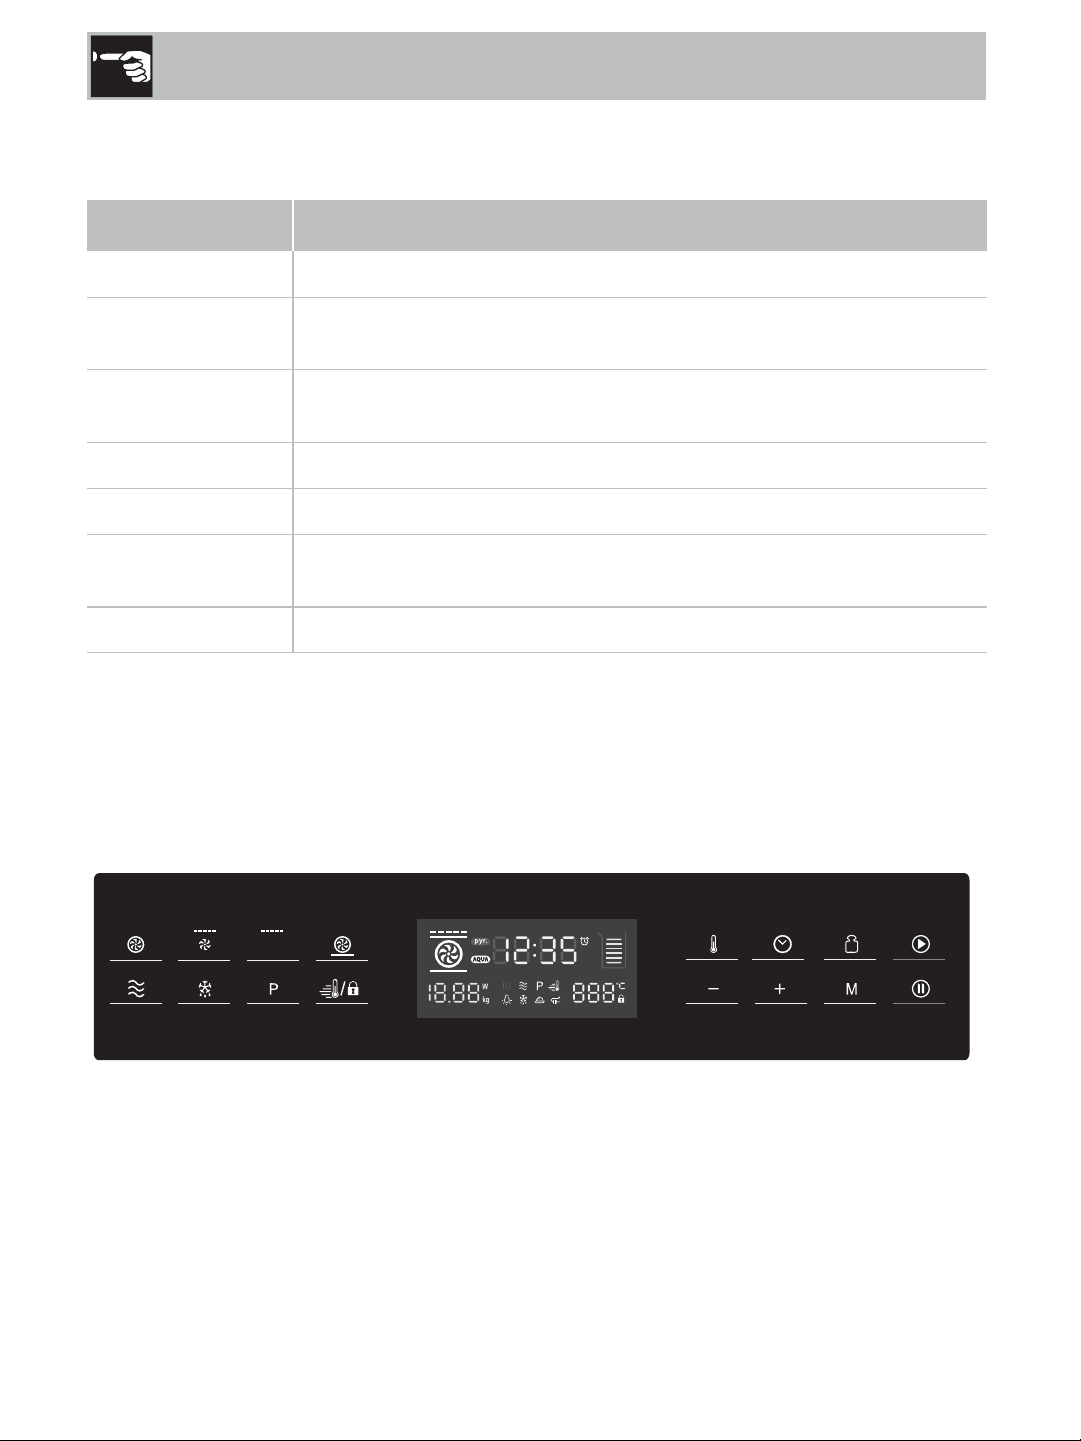
Touch keys and display
The touch keys are used to set the various
additional functions. On the display, you
can read the values that you have set.
Simbol Function
MICROWAVE
CIRCULAIRE
FAN WITH GRILL
GRILL
CIRCULAIRE + BOTTOM
MEMORY
PARAMETER ADJUSTMENT
/
TEMPERATURE/WEIGHT
AUTO-PROGRAMS
DEFROST
TOUCH AND HOLD:CHILDPROOF LOCK
TOUCH BRIEFLY:RAPID PREHEATING
CLOCK
START
TOUCH BRIEFLY:STOP
TOUCH TWICE:CANCEL
Use
76
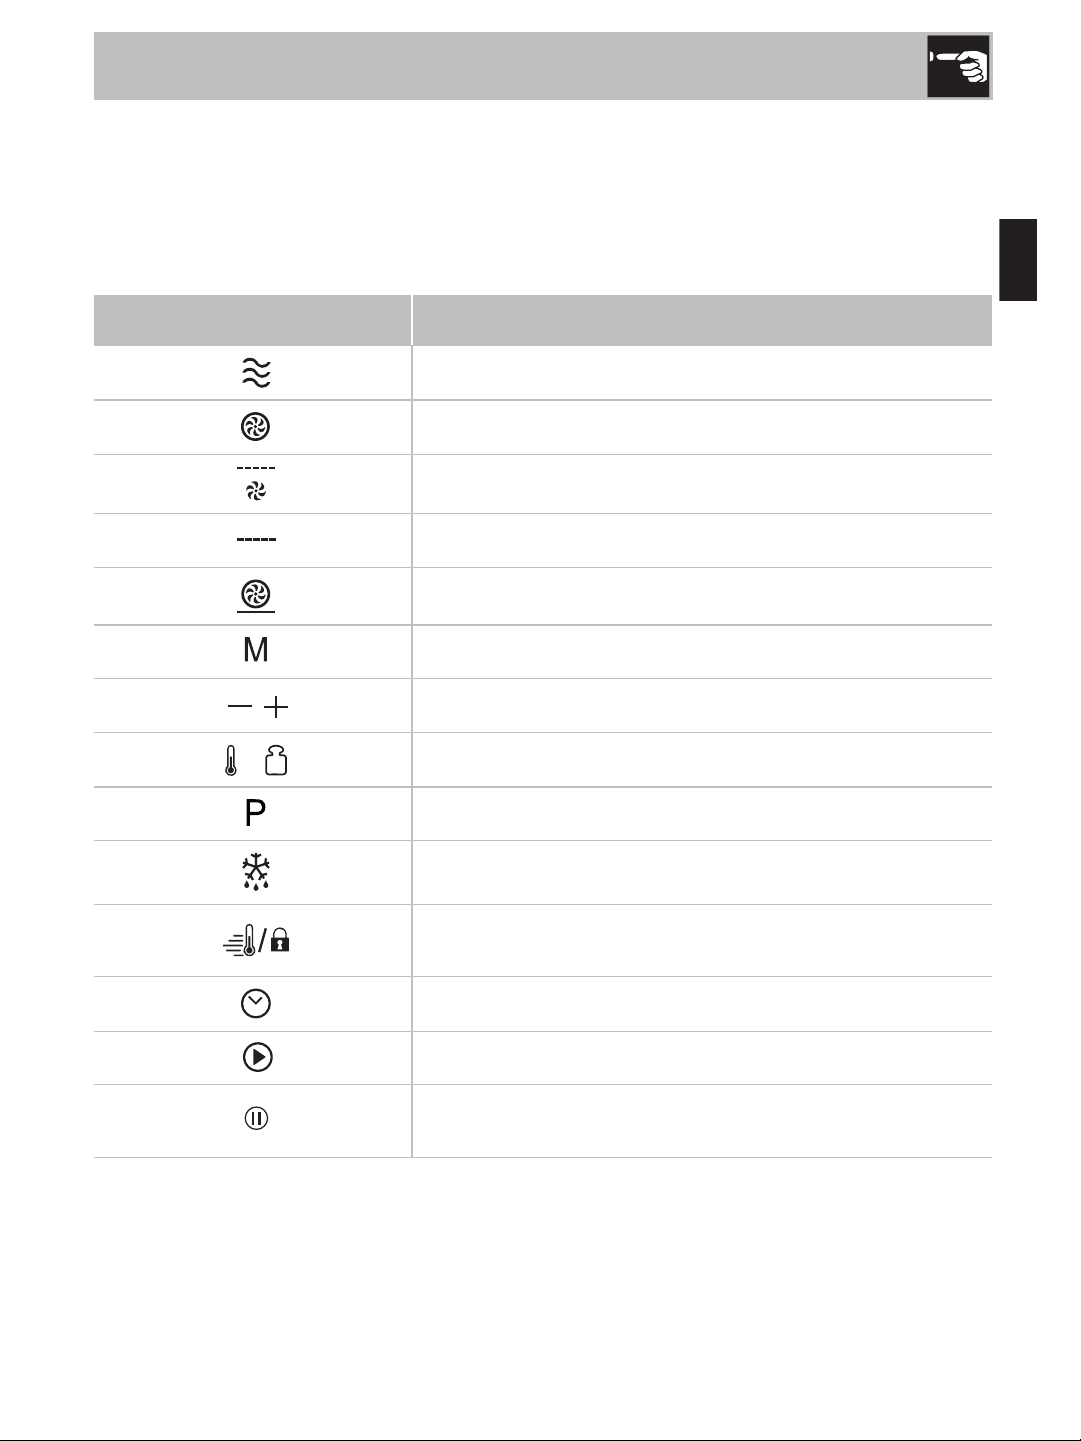
Function and screen display
Use the function keys to set the type of
heating.
Function Use
CIRCULAIRE
For baking sponge cakes in baking tins, flans and
cheesecakes as well aas cakes, pizza and small baked
items on the baking tray.50°C can maintain the taste of
food after heat preservation of 1-2 hours.
FAN WITH GRILL
Poultry goes brown and crispy. Baked casseroles and
grilled dishes work out best using this setting.
CIRCULAIRE + BOTTOM
For frozen convenience products and dishes which require a
lot of heat from underneath.
GRILL
Select between the levels high, medium or low. This is ideal
if you wish to grill several steaks, sausages, pieces of fish or
slices of bread.
+
CIRCULAIRE + MICROWAVE
Use this function to roast meals quickly. And at the same
time use the function of 3D Hot air
+
FANWITH GRILL + MICROWAVE
Poultry goes brown and crispy. Baked casseroles and
grilled dishes
work out best using this setting. And use the
function to roast meals evenly.
+
CIRCULAIRE + BOTTOM +
MICROWAVE
Use this function to roast meals quickly.
And at the same time use the function of Pizza setting.
+
GRILL + MICROWAVE
Use this function to cook meals quickly and at the same time
give the meal a brown crust.
DEFROST 2 defrosting programmes
AUTO-PROGRAMS
13 cooking programmers
The type of heating and cooking time are set by weight
MICROWAVE Defrost, reheat and cooking.

Use
77
EN
Parameter adjustment
Use the adjusting keys to set the
parameters.
Cooling fan
Your appliance has a cooling fan. The
cooling fan switches on during operation.
The hot air escapes above the door.
The cooling fan continues to run for a
certain time after operation.
Parameter Function
AUTO MENU
Select 13 automatic programmes.
From P 01 to P 13 .
TEMPERATURE
Select the temperature of cooking( °C).
: 50,100,105,110...230
: 100,105,110...230
: 100,105,110...230
+ : 50,100,105,110...230
+ : 100,105,110...230
+ : 100,105,110...230
WEIGHT Set the weight of cooking
TIME Set the time of cooking
MICROWAVE
Select microwave power.100W,300W
450W,700W and 900W
Do not cover the ventilation slots.
Otherwise, the appliance will
overheat.
The appliance remains cool during
microwave operation. The cooling
fan will still switch on. The fan may
run on even when microwave
operation has ended.
Condensation may appear on the
door window, interior walls and
floor. This is normal and does not
adversely affect microwave
operation. Wipe away the
condensation after cooking.
Use
78
3.6 Before using the appliance for the
first time
Here you will find everything you need to
do before using your oven to prepare food
for the first time. First read the section on
“General safety instructions”.
Setting the clock
Once the appliance is connected, “00:00”
will blink, buzzer will ring once. Set the
clock.
1. Touch “
“ key between 00:00 and
23:59.
2. Touch the key.
The time is set.
Heating up the oven
To remove the new cooker smell, heat up
the oven when it is empty and closed. One
hour with
3D Hot air at 230 °C is ideal.
Ensure that no packaging remnants have
been left in the cooking
compartment.
1. Touch the
key to set hot air function.
2.
Touch “ “ key
to set the
temperature to 230 °C.
3. Touch the key. Touch “ “ key to
set the cooking time to 60 minutes.
4. Touch the
key. The oven begins to
heat up.
3.7 Setting the oven
There are various ways in which you can set
your oven. Here we will explain how you
can select the desired type of heating and
temperature or grill setting. You can also
select the oven cooking time for your dish.
Please refer to the section on Setting the
time-setting options.
Setting the type of heating and
temperature
Example:
3D Hot air at 200 °C for 25
minutes.
1. Touch the
key to set hot air function.
2. The default temperature 180 °C will
blink.
3. Touch “
“key to set the temperature
to 200 °C.
4. Touch
the key. Touch key “ “ to
set the cooking time to 25 minutes.
5. Touch the
key. The oven begins to
heat up.
Opening the oven door during operation
Operation is suspended. After closing the
door, touch the
key. Operation
continues.
Pausing operation
Touch the
key to pause operation. Then
touch the key
to continue operation.
Changing the cooking time
This can be done at any time. Touch the
key. Touch key " " to change the
cooking time.
Use
79
EN
Changing the temperature
This can be done at any time.
Touch
the for the new temperature setting.
Touch “
“ key to set the temperature.
Cancelling operation
Touch the
twice to cancel operation.
Rapid Preheating
With rapid preheating, your oven reaches
the set temperature particularly quickly.
Rapid Preheating is available for the
following types of heating:
To ensure an oven cooking result, only put
your food in the cooking compartment
when the preheating phase is complete.
1. Setting the type of heating and
temperature.
2. Touch the
key.
3. The symbol
lights up in the display.
4. Touch the
key.
The oven begins to heat up.
The preheating process is complete
A signal sounds. The symbol
in the
display blinks. Put your dish in the oven.
Cancelling rapid preheating
During setting the rapid preheating function,
touch the can cancel the function.
During rapid preheating, touch the
or
can cancel the function. Also you
can open the door to cancel the function.
CIRCULAIRE
FAN WITHGRILL
+
CIRCULAIRE +
MICROWAVE
+
FANWITH GRILL +
MICROWAVE
CIRCULAIRE + BOTTOM
+
CIRCULAIRE+ BOTTOM +
MICROWAVE
• The rapid preheating function only
works if you have already chosen
one of the modes above.During
preheating, the microwave
function is switched off.
• Only when you can hear alarm
and preheating icon is blinking
you can open the door and put
food inside.

Use
80
3.8 The microwave
Microwaves are converted to heat in
foodstuffs. The microwave can be used
solo, i.e. on its own, or in combination with
a different type of heating. You will find
information about ovenware and how to set
the microwave.
Notes regarding ovenware
Suitable ovenware
Suitable dishes are heat-resistant ovenware
made of glass, glass ceramic, porcelain,
ceramic or heat-resistant plastic. These
materials allow microwaves to pass
through.
You can also use serving dishes. This saves
you having to transfer food from one dish to
another. You should only use ovenware with
decorative gold or silver trim if the
manufacturer guarantees that they are
suitable for use in microwaves.
Unsuitable ovenware
Metal ovenware is unsuitable. Metal does
not allow microwaves to pass through.
Food in covered metal containers will
remain cold.
Ovenware test
Do not switch on the microwave unless
there is food inside. The following
ovenware test is the only exception to this
rule.
Perform the following test if you are unsure
whether your ovenware is suitable for use in
the microwave:
1. Heat the empty ovenware at maximum
power for ½ to 1 minute.
2. Check the temperature occasionally
during that time.
The ovenware should still be cold or warm
to the touch.
The ovenware is unsuitable if it becomes hot
or sparks are generated.
In the Expert Cooking Guide, you
will find examples for defrosting,
heating and cooking with the
microwave oven.
The step quantities for the
adjustment time of the coding
switch are as follow:
0-1 min: 1 second
1-5 min: 10 seconds
5-15 min: 30 seconds
15-60 min: 1 minute
60 min: 5 minutes
Use
81
EN
Microwave power settings
Use the
key to set the desired
microwave power.
Setting the microwave
Example: Microwave power setting 300 W,
cooking time 17 minutes
1. Touch the microwave key. The default
microwave power 900W will appear
and the default cooking time will blink.
2. Touch the
key, the default microwave
power will blink. Touch “
“ key to
adjust the microwave power to 300W.
3. Touch the key, the default cooking
time will blink. Touch “
“ key to
adjust the cooking time to 17 minutes
4. Touch the
key.
Operation begins. The cooking time starts
counting down in the display.
The cooking time has elapsed
A signal sounds. Microwave operation has
finished.
Opening the oven door during operation
Operation is suspended. After closing the
door, touch the
key. Operation
continues.
Changing the cooking time
This can be done at any time. Touch the
key.Touch “
“ key to change the
cooking time.
Changing the microwave power setting
This can be done at any time.
Touch the
key for the new microwave
power setting. Touch “
“ key to set the
microwave power.
Pausing operation
Touch the
key briefly. The oven is
paused. Touch the
key again to continue
operation.
Cancelling operation
Touch the key
twice to cancel operation.
100 W
• Defrosting sensitive/delicate foods
• Defrosting irregularly-shaped foods
• Softening ice cream
• Allowing dough to rise
300 W
• Defrosting
• Melting chocolate and butter
450 W • cooking rise, soup
700 W
• Reheating
• Cooking mushrooms shell fish
• Cooking dishes containing eggs and
cheese
900 W
• Boiling water, reheating
• Cooking chicken, fish, vegetables
• When you touch a key, the
selected power lights up.
• The microwave power can be set
to 900 watts for a maximum of 30
minutes. With all other power
settings a maximum cooking time
of 1 hour 30 minutes is possible.
• When you touch the microwave
key , the highest microwave
power setting always lights up as
the suggested setting.
• If you open the appliance door
during cooking, the fan may
continue to run.
Use
82
3.9 MicroCombi operation
This involves simultaneous operation of the
grill and the microwave. Using the
microwave makes your dishes ready more
quickly, but they are still nicely browned.
You can switch on all microwave power
settings.
Exception: 900 watts
Setting Microwave Combi operation
Example: microwave 100 W, 17 minutes
and hot air 190 °C.
1. Touch the
key to set hot air function.
2. The default temperature 180°C will
blink. Touch “
“ key to set the
temperature to 190 °C.
3. Touch the
key to enter + mode.
The default microwave power 300W
will blink, and then touch “
“ key to
set the microwave power to 100W .
4. Touch the
key. Touch “ “ key to
set the cooking time to 17 minutes.
5. Touch the
key.
Appliance operation begins. The cooking
time starts counting down.
The cooking time has elapsed
A signal sounds. Combination mode has
finished.
Opening the oven door during cooking
Operation is suspended. After closing the
door, touch the key briefly. The progra
Pausing operation
Touch the
key briefly. The oven is
paused. Touch the key again to continue
operation.
Changing the cooking time
This can be done at any time. Touch the
key.Touch “
“ key to change the
cooking time.
Changing the microwave power setting
This can be done at any time.
Touch the
for the new microwave power
setting. Touch key “
“ to set the
microwave power.
Changing the temperature
This can be done at any time.
Touch the
for the new temperature setting.
Touch “
“ key to set the temperature.
Cancelling operation
Touch the
key twice to cancel operation.
mme will then continue.
-
Use
83
EN
3.10 Automatic programmes
The automatic programmes enable you to
prepare food very easily. You select the
programme and enter the weight of your
food. The automatic programme makes the
optimum setting. You can choose from 13
programmes.
Always place the food in the cold cooking
compartment.
Setting a programme
When you have selected a programme, set
the oven. The temperature selector must be
in the off position.
Example: Programme 3 with a weight of 1
kilogramme.
1. Touch the
key. The first programme
number appears in the display.
2. Touch “
programme number P03.
3. Touch the key.
4. Touch “
“ key to set the weight,
cooking time will shown.
5. Touch the
key. The programme starts.
You can see the cooking time counting
down.
Auto Menu
Programme Category Item
P1** Vegetables Fresh vegetables
P2** Side dishes Potatoes-peeled/cooked
P3* Side dishes
Potatoes-roasted
If you hear a beep,turn the food.The combi microwave oven starts the next
fase automatically.
P4 Poultry/Fish
Chicken pieces
If you hear a beep,turn the food.The combi microwave oven starts the next
fase automatically
P5* Bakery Cake
P6* Bakery Apple pie
P7* Bakery quiche
P8** Reheat Drink/soup
P9** Reheat Plated meal
P10** Reheat Sauce/stew/dish
P11* Convenience Frozen-Pizza
" or key to select the
Use
84
Programme has ended
A signal sounds. The oven stops heating.
Changing the programme
Once you have started the programme, the
programme number and weight cannot be
changed.
Cancelling the programme
Touch the
key to cancel operation.
Changing the cooking time
If using automatic programmes, you cannot
change the cooking time.
3.11 Defrosting programmes
You can use the 2 defrosting programmes
to defrost meat, poultry and bread.
1. Touch the
key. The first programme
number appears in the display.
2. Touch “
“ key to select the
programme number.
3. Touch the key.
4. Touch “
“ key to set the weight,
cooking time will shown.
5. Touch the key. The programme starts.
You can see the cooking time counting
down.
Preparing food
• Use food that has been frozen at -18 °C
and stored in portion sized quantities that
are as thin as possible.
Take the food to be defrosted out of all
packaging and weigh it. You need to
know the weight to set the programme.
• Liquid will be produced when defrosting
meat or poultry. Drain off this liquid when
turning meat and poultry and under no
circumstances use it for other purposes or
allow it to come into contact with other
foods.
Ovenware
• Place the food in a microwaveable
shallow dish, e.g. a china or glass plate,
but do not cover.
P12* Convenience
Frozen-Oven chips
If you hear a beep,turn the food.The combi microwave oven starts the next
fase automatically.
P13* Convenience Frozen-Lasagna
Programme Category Item
• The programmes with a * are
preheated.During preheating,
the cooking time pauses and the
preheating symbol is on. After
preheating, you will hear an
alarm and the preheating
symbol will blink.
• The programmes with ** only
use the microwave function.
Use
85
EN
• When defrosting chicken and chicken
portions (d 01), an audible signal will
sound on two occasions to indicate that
the food should be turned.
Resting time
• The defrosted food should be left to
stand for an additional 10 to 30 minutes
until it reaches an even temperature.
Large pieces of meat require a longer
standing time than smaller pieces. Flat
pieces of meat and items made from
minced meat should be separated from
each other before leaving to stand.
After this time, you can continue to
prepare the food, even though thick
pieces of meat may still be frozen in the
middle.
The giblets can be removed from poultry
at this point.
3.12 Setting the time-setting options
Your oven has various time-setting options. You
can use the
key to call up the menu and
switch between the individual functions. A time-
setting option that has already been set can
be changed directly with the “
“
key.
Setting the timer
You can use the timer as a kitchen timer. It
runs independently of the oven. The timer
has its own audible signal. In this way, you
can tell whether it is the timer or a cooking
time which has elapsed.
1. In waiting state.Touch
key to enter
kitchen timer. “00:00” will display.
2. Touch
“
“
key to a just the timer time.
The maximum time is 5 hours.
3. Touch
key to start timer.
The timer duration has elapsed
A signal sounds.
Cancelling the timer duration
Touch the
key to cancel the timer
duration.
Setting the cooking time
The cooking time for your meal can be set
on the oven. When the cooking time has
elapsed, the oven switches itself off
automatically. This means that you do not
have to interrupt other work to switch off the
oven. The cooking time cannot be
accidentally exceeded.
The oven starts. The cooking time counts
down in the display.
The cooking time has elapsed
An audible signal sounds. The oven stops
heating.
Programme
no.
Defrost
Weight range
in kg
d 01* meat, poultry and fish 0.20 - 1.00
d 02* bread, cake and fruit 0.10 - 0.50
*During defrosting, place the food on the Lower
wire rack
Use
86
Setting the clock
Once the appliance is connected, “00:00”
will blink, buzzer will ring once. Set the
clock.
1. Touch
“
“
key between 00:00 and
23:59
2. Touch the key. The time is set.
Changing the clock
1. Touch and hold the
key for 3 seconds
in waiting state. The actual time
disappear and then the time will blink in
the display.
2. Touch
“
“
key to set the new time
and touch the
key to confirm the
setting.
3.13 Childproof lock
The oven has a childproof lock to prevent
children switching it on accidentally.
The oven will not react to any settings. The
timer and clock can also be set when the
childproof lock has been switched on.
Switching on the childproof lock
Requirement: No cooking time should be
set and the function selector is in the off
position.
Touch and hold the
key for approx.
3 seconds.
The symbol appears in the display. The
childproof lock is activated.
Switching off the childproof lock
Touch and hold the
key for approx.
3 seconds.
The symbol on the display goes out. The
childproof lock is deactivated.
Childproof lock with other cooking
operations
When other cooking programmes have
been set, the childproof lock is not
operational.

Use
87
EN
3.14 Memory Function
1. When finish cooking setting but don't
touch
key touch key to enter
memory cooking mode. The cooking
time and current memory segment will
display alternately in the screen. Others
retain original setting.
2. Touch
key once again to choose
memory N1-N3 procedure. The screen
will display N1, N2, N3 alternately.
When finish choice, stop pressing.
3. Touch
key to start memory cooking. If
no need, touch
key to cancel and the
screen return to display cooking time.
4. If the current memory segment was
already memory cooking, the previous
memories will be covered when you
memory at this segment again.
Using the memory function
1. In waiting state, touch
key, the screen
will display the cooking program you
have set. The cooking time and memory
segment will display alternately. If no
memory segment you have set, it will
display the current memory segment.
2. Touch
key repeatedly to choose
memory N1-N3 procedure. The screen
will display N1,N2,N3.
3. Touch
key to start memory cooking.
3.15 Quick Start
1. In waiting state, touch key to start 30
seconds' cooking with 900W
microwave power.
2. During cooking (except Auto Cook and
Defrost), each added touch of
key
can increase 30 seconds cooking time
up to the corresponding MAX. cooking
time.

Use
88
4 Expert Cooking Guide
Here you will find a selection of recipes and
the ideal settings for them. We will show
you which type of heating and which
temperature or microwave power setting is
best for your meal.
You can find information about suitable
accessories and the height at which they
should be inserted. There are also tips
about ovenware and preparation methods.
4.1 Defrosting, heating up and
cooking with the microwave
The following tables provide you with
numerous options and settings for the
microwave.
The times specified in the tables are only
guidelines. They may vary according to the
ovenware used, the quality, temperature
and consistency of the food.
Time ranges are often specified in the
tables. Set the shortest time first and then
extend the time if necessary.
It may be that you have different quantities from
those specified in the tables. A rule of thumb
can be applied: Double amount - just under
double the cooking time, half amount - half the
cooking time.
Defrosting
• The values in the table always
apply to food placed into the
cooking compartment when it is
cold and empty. Only preheat
the appliance if the table
specifies that you should do so.
Before using the appliance,
remove all accessories from the
cooking compartment that you
will not be using.
• Do not line the accessories with
greaseproof paper until after
they have been preheated.
• The times specified in the tables
are only guidelines. They will
depend on the quality and
composition of the food.
• Use the accessories supplied.
Additional accessories may be
obtained from specialist retailers
or from the after-sales service.
• Always use an oven cloth or
oven gloves when taking
accessories or ovenware out of
the cooking compartment.
• Place the frozen food in an open
container on the lower wire
rack.
• Delicate parts such as the legs
and wings of chicken or fatty
outer layers of roasts can be
covered with small pieces of
aluminium foil. The foil must not
touch the cooking compartment
walls. You can remove the foil
half way through the defrosting
time.
• Turn or stir the food once or
twice during the defrosting time.
Large pieces of food should be
turned several times. When
turning, remove any liquid that
has resulted from defrosting.
• Place the food directly on the
turntable.

Use
89
EN
• Leave defrosted items to stand at
room temperature for a further
10 to 60 minutes so that the
temperature can stabilise. The
giblets can be removed from
poultry at this point.
Defrost Weight
Microwave power setting in watts,
cooking time in minutes
Notes
Whole pieces of meat
(beef, veal or pork - on the
bone or boned)
800 g 300 W, 15 mins + 100 W, 10-20 mins
Turn several times1 kg 300 W, 20 mins + 100 W, 15-25 mins
1.5 kg 300 W, 30 mins + 100 W, 20-30 mins
Meat in pieces or slices of
beef, veal or pork
200 g 300 W, 3 mins + 100 W, 10-15 mins
Separate any defrosted
parts when turnig
500 g 300 W, 5 mins + 100 W, 15-20 mins
800 g 300 W, 8 mins + 100 W, 15-20 mins
Minced meat, mixed
200 g 100 W, 10-15 mins
Freeze food flat if possible
Turn several times, remove
any defrosted meat
500 g 300 W, 5 mins + 100 W, 10-15 mins
800 g 300 W, 8 mins + 100 W, 15-20 mins
Poultry or poultry portions
600 g 300 W, 8 mins + 100 W, 10-15 mins
Turn during cooking.
1.2 kg 300 W, 15 mins + 100 W, 25-30 mins
Duck 2 kg 300 W, 20 mins + 100 W, 30-40 mins Turn several times
Fish fillet, fish steak or slices 400 g 300 W, 5 mins + 100 W, 10-15 mins
Separate any defrosted
parts
Whole fish
300 g 300 W, 3 mins + 100 W, 10-15 mins
-
600 g 300 W, 8 mins + 100 W, 10-15 mins
Vegetables, e.g. peas
300 g 300 W, 10-15 mins
Stir carefully during
defrosting.
600 g 300 W, 10 mins + 100 W, 10-15 mins
Fruit, e.g. raspberries
300 g 300 W, 710 mins Stir carefully during
defrosting and separate
any defrosted parts
500 g 300 W, 8 mins + 100 W, 5-10 mins
Use
90
4.2 Defrosting, heating up or cooking
frozen food
Butter, defrosting
125 g 300 W, 1 mins + 100 W, 2-4 mins
Remove all packaging
250 g 300 W, 1 min + 100 W, 2-4 mins
Loaf of bread
500 g 300 W, 6 min + 100 W, 5-10 mins
Turn during cooking.
1 kg 300 W, 12 min + 100 W, 15-25 mins
Cakes, dry, e.g. sponge
cake
500 g 100 W, 15-20 mins Only for cakes without
icing, cream or crème
pâtissière, separate the
pieces of cake.
750 g 300 W, 5 mins + 100 W, 10-15 mins
Cakes, moist, e.g. fruit flan,
cheesecake
500 g 300 W, 5 mins + 100 W, 10-15 mins
Only for cakes without
icing, cream or gelatine
750 g 300 W, 7 mins + 100 W, 10-15 mins
Defrost Weight
Microwave power setting in watts,
cooking time in minutes
Notes
• Take ready meals out of the
packaging. They will heat up
more quickly and evenly in
microwaveable ovenware. The
different components of the meal
may not require the same
amount of time to heat up.
• Food which lies flat will cook
more quickly than food which is
piled high. You should therefore
distribute the food so that it is as
flat as possible in the ovenware.
Different foodstuffs should not be
placed in layers on top of one
another.
• Always cover the food. If you do
not have a suitable cover for
your ovenware, use a plate or
special microwave foil.
• Stir or turn the food 2 or 3 times
during cooking.
• After heating, allow the food to
stand for a further 2 to 5 minutes
so that it can achieve an even
temperature.
• Always use an oven cloth or
oven gloves when removing
plates from the oven.
• This will help the food retain its
own distinct taste, so it will
require less seasoning.

Use
91
EN
Defrosting, heating up or
cooking frozen food
Weight
Microwave power setting in
watts, cooking time in minutes
Notes
Menu, plated meal, ready meal 300-400 g 700 W, 10-15 mins
Take meal out of packaging;
cover food to heat
Soup 400-500 g 700 W, 8-10 mins Ovenware with lid
Stews
500 g 700 W, 10-15 mins
Ovenware with lid
1 kg 700 W, 20-25 mins
Slices or pieces of meat in
sauce, e.g. goulash
500 g 700 W, 15-20 mins
Ovenware with lid
1 kg 700 W, 25-30 mins
Fish, e.g. fillet steaks
400 g 700 W, 10-15 mins
Covered
800 g 700 W, 18-20 mins
Side dishes, e.g. rice, pasta
250 g 700 W, 2-5 mins
Ovenware with lid; add liquid
500g 700 W, 8-10 mins
Vegetables, e.g. peas, broccoli,
carrots
300 g 700 W, 8-10 mins
Ovenware with lid; add 1 tbsp
of water
600 g 700 W, 15-20 mins
Creamed spinach 450g 700 W, 11-16 mins Cook without additional water
Use
92
4.3 Heating food
Improper use
Risk of scalding
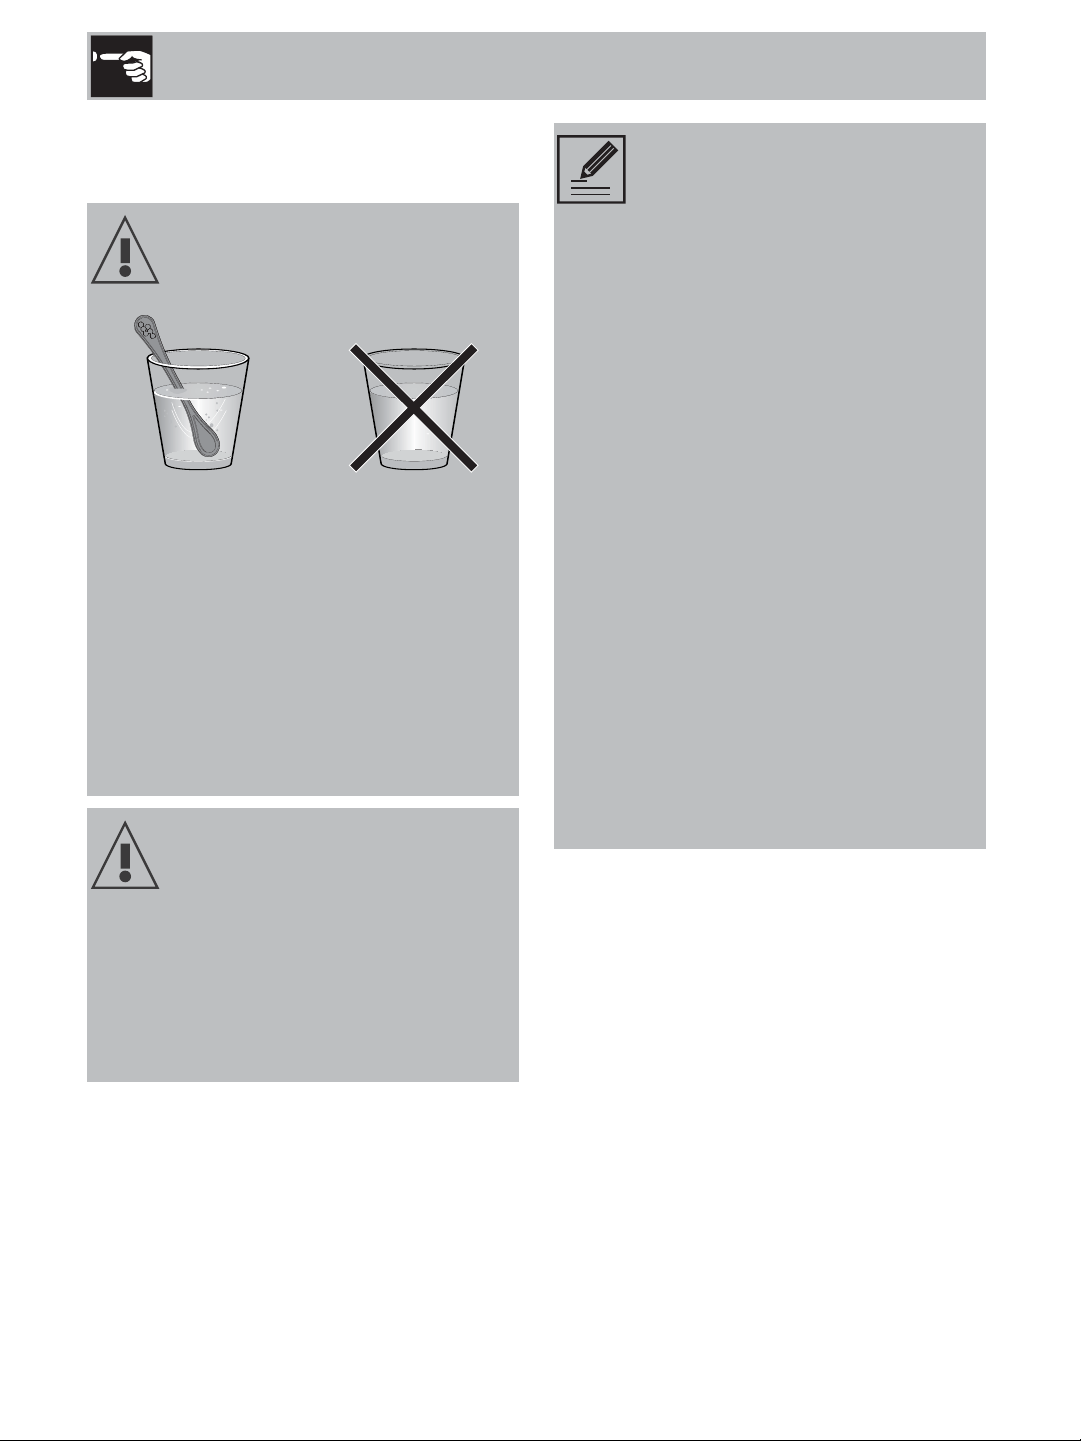
• There is a possibility of delayed boiling
when a liquid is heated.
• This means that the liquid reaches boiling
temperature without the usual steam
bubbles rising to the surface. Even if the
container only moves a little, the hot
liquid can suddenly boil over and
spatter. When heating liquids, always
place a spoon in the container. This will
prevent delayed boiling.
Creation of sparks
• Metal – e.g. a spoon in a glass – must
be kept at least 2 cm from the oven
walls and the inside of the door.
• Sparks could destroy the glass on the
inside of the door.
• Take ready meals out of the
packaging. They will heat up
more quickly and evenly in
microwaveable ovenware. The
different components of the meal
may not require the same
amount of time to heat up.
• Always cover the food. If you do
not have a suitable cover for
your container, use a plate or
special microwave foil.
• Stir or turn the food several times
during the heating time. Check
the temperature.
• After heating, allow the food to
stand for a further 2 to 5 minutes
so that it can achieve an even
temperature.
• Always use an oven cloth or
oven gloves when removing
plates from the oven.
• Place the food directly on the
turntable.

Use
93
EN
Heating food
Weight
Microwave power setting in watts,
cooking time in minutes
Notes
Menu, plated meal, ready
meal
350-500 g 700 W, 5-10 mins
Take meal out of packaging,
cover food to heat
Drinks
150 ml 900 W, 1-2 mins Caution!
Place a spoon in the glass.
Do not overheat alcoholic
drinks. Check during heating
300 ml 900 W, 2-3 mins
500 ml 900 W, 3-4 mins
Baby food, e.g. baby
bottle
50 ml 300 W, approx. 1 min Place baby bottles on the
cooking compartment floor
without the teat or lid. Shake
or stir well after heating. You
must check the temperature
100 ml 300 W, 1-2 mins
200 ml 300 W, 2-3 mins
Soup 1 cup 175 g 900 W, 2-3 mins
-2 cups 175 each 900 W, 4-5 mins
4 cups 175 each 900 W, 5-6 mins
Slices or pieces of meat in
sauce, e.g. goulash
500 g 700 W, 10-15 mins Covered
Stew
400 g 700 W, 5-10 mins
Ovenware with lid
800 g 700 W, 10-15 mins
Vegetables
150 g 700 W, 2-3 mins
Add a little liquid
300 g 700 W, 3-5 mins

Use
94
4.4 Cooking food
• Food which lies flat will cook
more quickly than food which is
piled high. You should therefore
distribute the food so that it is as
flat as possible in the ovenware.
Different foodstuffs should not be
placed in layers on top of one
another.
• Place the food directly on the
turntable.
• Cook the food in ovenware with
a lid. If you do not have a
suitable lid for your ovenware,
use a plate or special
microwave foil.
• Cook the food in ovenware with
a lid. If you do not have a
suitable lid for your ovenware,
use a plate or special
microwave foil.
• This will help the food retain its
own distinct taste, so it will
require less seasoning.
• After cooking, allow the food to
stand for a further 2 to 5 minutes
so that it can achieve an even
temperature.
• Always use an oven cloth or
oven gloves when removing
plates from the oven.
Cooking food
Weight
Microwave power setting in watts,
cooking time in minutes
Notes
Whole chicken, fresh, no
giblets
1.5 kg 700 W, 30-35 mins
Turn halfway through the
cooking time
Fish fillet, fresh 400 g 700 W, 5-10 mins -
Fresh vegetables
250 g 700 W, 5-10 mins Cut into equal-sized pieces; add
1 to 2 tbsp water per 100 g; stir
during cooking
500 g 700 W, 10-15 mins
Potatoes
250 g 700 W, 8-10 mins
Cut into equal-sized pieces; add
1 to 2 tbsp water per 100 g; stir
during cooking
500 g 700 W, 11-14 mins
750 g 700 W, 15-22 mins
Rice
125 g
700 W, 7-9 mins+ 300 W, 15-
20 mins
Add double the quantity of liquid
and use deep ovenware with a
lid
250 g
700 W, 10-12 mins + 300 W,
20-25 mins

Use
95
EN
4.5 Popcorn for the microwave
Sweet foods, e.g.
blancmange (instant)
500 ml 700 W, 7-9 mins
Stir 2 to 3 times with an egg
whisk while heating
Fruit, compote 500 g 700 W, 9-12 mins -
Cooking food
Weight
Microwave power setting in watts,
cooking time in minutes
Notes
Risk of scalding!
• Open the popcorn bag carefully as hot
steam may be released.
• Never set the microwave to full power
• Use heat-resistant, flat glass
ovenware, e.g. the lid of an
ovenproof dish, a glass plate or
a glass tray (Pyrex).
• Always place the ovenware on
the wire rack.
• Do not use porcelain or overly
curved plates.
• Make the settings as described
in the table. You can adjust the
timings according to product
and amount.
• So that the popcorn doesn't
burn, briefly take the popcorn
bag out of the oven after 1
minute and 30 seconds and
shake it. Take care as the bag
will be hot!
Weight Accessories Microwave power in watts, Cooking time in minutes
1 bag, 100 g Ovenware 700 W, 3-5 mins

Use
96
4.6 Microwave tips
4.7 Cakes and pastries
About the tables
Baking tins
You cannot find any information about the
settings for the quantity of food you have
prepared.
Increase or reduce the cooking times using the following
rule of thumb:
Double the amount = almost double the cooking time
Half the amount = half the cooking time
The food has become too dry.
Next time, set a shorter cooking time or select a lower
microwave power setting. Cover the food and add more
liquid.
When the time has elapsed, the food is not
defrosted, hot or cooked.
Set a longer time. Large quantities and food which is piled
high require longer times.
When the time has elapsed, the food is
overheated at the edge but not done in the
middle.
Stir it during the cooking time and next time, select a lower
microwave power setting and a longer cooking time.
After defrosting, the poultry or meat is defrosted
on the outside but not efrosted in the middle.
Next time, select a lower microwave power setting. If you
are defrosting a large quantity, turn it several times.
• The times given apply to food
placed in a cold oven.
• The temperature and baking
time depend on the consistency
and amount of the mixture. This is
why temperature ranges are
given in the tables. Begin with
the lower temperature and, if
necessary, use a higher setting
the next time, since a lower
temperature results in more even
browning.
• Additional information can be
found in the Baking tips section
following the tables.
• Always place the cake tin in
the centre of the lower wire
rack.
But the food with ** should be
placed in the turntable.
It is best to use dark-coloured
metal baking tins.
Use
97
EN
Baking in tins Accessories
Type of
heating
Temperature
°C
Microwave
power in watts
Cooking time in
minutes
Sponge cake, simple Ring tin/cake tin 170-180 100 40-50
Sponge cake, delicate
(e.g. sandcake)*
Ring tin/cake tin 150-170 - 70-90
Sponge flan base
Flan-base cake
tin
160-180 100 30-40
Delicate fruit flan, sponge
Springform/ring
tin
170-180 - 35-45
Sponge base, 2 eggs
Flan-base cake
tin
160-170 - 20-25
Sponge flan, 6 eggs
Dark springform
cake tin
170-180 - 35-45
Shortcrust pastry base
with crust
Dark springform
cake tin
170-190 100 30-40
Fruit tart/cheesecake with
pastry base*
Dark springform
cake tin
190-200 - 35-45
Swiss flan**
Dark springform
cake tin
170-180 - 45-55
Ring cake Ring cake tin 220-230 - 40-50
Pizza, thin base, light
topping**
Round pizza tray 200-220 - 15-25
Savoury cakes**
Dark springform
cake tin
200-220 - 50-60
Nut cake
Dark springform
cake tin
170-180 100 35-45
Yeast dough with dry
topping
Round pizza tray 160-180 - 50-60
Yeast dough with moist
topping
Round pizza tray 170-190 - 55-65
Plaited loaf with 500 g
flour
Round pizza tray 170-190 - 35-45
Use
98
Stollen with 500 g flour Round pizza tray 160-180 - 60-70
Strudel, sweet Round pizza tray 190-210 100 35-45
* Allow cake to cool in the oven for approx. 20 minutes.
**the food should be placed in the turntable
Baking in tins Accessories
Type of
heating
Temperature
°C
Microwave
power in watts
Cooking time in
minutes
Small baked items Accessories Type of heating Temperature °C
Cooking time in
minutes
Biscuits Round pizza tray 150-170 25-35
Macaroons Round pizza tray 110-130 35-45
Meringue Round pizza tray 100 80-100
Muffins
Muffin tray on wire
rack
160-180 35-40
Choux pastry Round pizza tray 200-220 35-45
Puff pastry Round pizza tray 190-200 25-35
Leavened cake Round pizza tray 200-220
Bread and bread rolls Accessories Type of heating Temperature °C
Cooking time in
minutes
Sourdough bread with 1.2 kg
flour
Round pizza tray 210-230 50-60
Flatbread Round pizza tray 220-230 25-35
Bread rolls Round pizza tray 210-230 25-35
Rolls made with sweet yeast
dough
Round pizza tray 200-220 15-25

Use
99
EN
4.8 Baking tips
You want to bake according to your own
recipe.
Use similar items in the baking tables as a guide.
Use baking tins made of silicone, glass,
plastic or ceramic materials.
The baking tin must be heat-resistant up to 250 °C. Cakes in
these baking tins will be less brown. When using the
microwave, the cooking time will be shorter than the time
shown in the table.
How to establish whether sponge cake is
baked through.
Approximately 10 minutes before the end of the baking time
specified in the recipe, poke the cake with a cocktail stick at
its highest point. If the cocktail stick comes out clean, the cake
is ready.
The cake collapses.
Use less liquid next time or set the oven temperature 10
degrees lower and extend the baking time. Observe the
specified mixing times in the recipe.
The cake has risen in the middle but is
lower around the edge.
Only grease the base of the springform cake tin. After baking,
loosen the cake carefully with a knife.
The cake is too dark.
Select a lower temperature and bake the cake for a little
longer.
The cake is too dry.
When it is done, make small holes in the cake using a
toothpick. Then drizzle fruit juice or an alcoholic beverage
over it. Next time, select a temperature 10 degrees higher
and reduce the baking time.
The bread or cake (e.g. cheesecake)
looks good, but is soggy on the inside
(sticky, streaked with water).
Use slightly less fluid next time and bake for slightly longer at
a lower temperature. When baking cakes with a moist
topping, bake the base first, cover with almonds or bread
crumbs and then add the topping. Please follow the recipe
and follow the baking times.
The cake cannot be turned out of the dish
when it is turned upside down.
After baking, allow the cake to cool for a further 5 to 10
minutes, then it will be easier to turn out of the tin. If it still sticks,
carefully loosen the cake around the edges using a knife. Turn
the cake tin upside down again and cover it several times with
a cold, wet cloth. Next time, grease the tin well and sprinkle
some bread crumbs into it.

Use
100
4.9 Roasting and grilling
About the tables
The temperature and roasting time depend
on the type and amount of food being
cooked. This is why temperature ranges are
given in the tables. Begin with the lower
temperature and, if necessary, use a higher
setting the next time.
For more information, see the section
entitled “Tips for grilling” and “Tips for
roasting” which follows the tables.
Ovenware
You may use any heatresistant ovenware
which is suitable for use in a microwave.
Metal roasting dishes are not suitable for
roasting with microwaves.
The ovenware can become very hot. Use
oven gloves to take the ovenware out of the
oven.
Place hot glass ovenware on a dry kitchen
towel after they have been removed from
the oven. The glass could crack if placed on
a cold or wet surface.
Tips for roasting
You have measured the temperature of
the oven using your own meat
thermometer and found there is a
discrepancy.
The oven temperature is measured by the manufacturer after
a specified period of time using a test rack in the centre of the
cooking compartment. Ovenware and accessories affect the
temperature measurement, so there will always be some
discrepancy when you measure the temperature yourself.
Sparks are generated between the tin
and the wire rack.
Check that the tin is clean on the outside. Change the position
of the tin in the cooking compartment. If this does not help,
continue baking but without the microwave. The baking time
will then be longer.
• Use a deep roasting dish for
roasting meat and poultry.
• Check that your ovenware fits in
the cooking compartment.
Itshould not be too big.
• Meat:
Cover approx. two thirds of the
ovenware base with liquid. Add
slightly more liquid for pot roasts.
Turn pieces of meat halfway
through the cooking time. When
the roast is ready, turn off the
oven and allow it to rest for an
additional 10 minutes. This
allows better distribution of the
meat juices.
• Poultry:
Turn the pieces of meat after 2/3
elapsed.
of the cooking time has

Use
101
EN
Tips for grilling Beef
• Always keep the oven door
closed when grilling and do not
preheat.
• As far as possible, the pieces of
food you are grilling should be
of equal thickness. Steaks should
be at least 2 to 3 cm thick.
• This will allow them to brown
evenly and remain succulent
and juicy. Do not add salt to
steaks until they have been
grilled.
• Use tongs to turn the pieces of
food you are grilling. If you
pierce the meat with a fork, the
juices will run out and it will
become dry.
• Dark meat, e.g. beef, browns
more quickly than lighter
coloured meat such as veal or
pork. When grilling light-
coloured meat or fish, these
often only brown slightly on the
surface, although they are
cooked and juicy on the inside.
• The grill element switches off
and on again automatically. This
is normal. The grill setting
determines how frequently this
will happen.
• Turn pot-roasted beef after 1/3
and 2/3 of the cooking time.
Finally, allow to stand for
approx. a further 10 minutes.
• Turn tenderloins and sirloins
halfway through the cooking
time. Finally, allow to stand for
approx. a further 10 minutes.
• Turn steaks after 2/3 of the
cooking time.
Use
102
Veal
Beef Accessories
Type of
heating
Temperature in
°C, grill setting
Microwave
power in watts
Cooking time in
minutes
Pot-roasted beef,
approx. 1 kg*
Ovenware with lid 180-200 - 120-143
Fillet of beef, medium,
approx. 1 kg
Ovenware without
lid
180-200 100 30-40
Sirloin, medium,
approx. 1 kg
Ovenware without
lid
210-230 100 30-40
Steak, medium, 3 cm
thick**
Higher wire rack - 3
each side:
10-15
* Lower wire rack
** Higher wire rack
Turn joints and knuckle of veal
halfway through the cooking time.
Finally, allow to stand for approx. a
further 10 minutes.
Veal Accessories
Type of
heating
Temperature in
°C, grill setting
Microwave
power in
watts
Cooking time in
minutes
Joint of veal,
approx. 1 kg*
Ovenware
without lid
180-200 - 110-130
Knuckle of veal,
approx. 1.5 kg
Ovenware
without lid
200-220 - 120-130
* Lower wire rack
Use
103
EN
Pork
• Turn joints and knuckle of veal
halfway through the cooking
time. Finally, allow to stand for
approx. a further 10 minutes.
• Turn the neck of pork after 2/3
of the cooking time.
• Place the joint in the ovenware
rind-side up. Score the rind. Do
not turn the joint. Finally, allow to
stand for approx. a further 10
minutes.
• Do not turn pork fillets or pork
chops. Finally, allow to stand for
approx. a further 5 minutes.
Pork Accessories
Type of
heating
Temperature in
°C, grill setting
Microwave
power in watts
Cooking time in
minutes
Joint without rind (e.g. neck),
approx. 750 g*
Ovenware
with lid
220-230 10 40-50
Joint with rind (e.g. shoulder)
approx. 1.5 kg*
Ovenware
with lid
190-210 - 130-150
Fillet of pork, approx. 500 g*
Ovenware
with lid
220-230 100 25-30
Joint of pork, lean,
approx. 1 kg*
Ovenware
with lid
210-230 100 60-80
Smoked pork on the bone,
approx. 1 kg*
Ovenware
without lid
- - 300 45-50
Neck of pork, 2 cm thick**
3-
1st side:
approx. 15-20
2nd side:
approx. 10-15
* Lower wire rack
** Higher wire rack
Use
104
Lamb
Miscellaneous
Turn the leg of lamb halfway
through the cooking time.
Lamb Accessories
Type of
heating
Temperature in
°C, grill setting
Microwave
power in watts
Cooking time in
minutes
Saddle of lamb on the
bone, approx. 1 kg*
Ovenware
without lid
210-230 40-50
Leg of lamb, boned,
medium, approx. 1.5 kg*
Ovenware
with lid
190-210 90-95
* Lower wire rack
** Higher wire rack
Finally, allow the meat loaf to stand
for approx. a further 10 minutes.
Turn the sausages after 2/3 of the
cooking time.
Miscellaneous Accessories
Type of
heating
Temperature in
°C, grill setting
Microwave
power in watts
Cooking time
in minutes
Meat loaf, approx. 1 kg*
Ovenware
without lid
180-200 700 W + 100 W -
4 to 6 sausages for
grilling
approx. 150 g each**
3-
each side:
10-15
* Lower wire rack
** Higher wire rack

Use
105
EN
Poultry
• Place whole chickens and
chicken breasts breast-side
down. Turn after 2/3 of the
cooking time.
• Place poulard breast-side down.
Turn after 30 minutes and set the
microwave power to 180 watts.
• Turn the duck and goose breast
skin-side up. Do not turn.
• Turn goose thighs halfway
through the cooking time. Prick
the skin.
• Place turkey breast and thighs
skin-side down. Turn after 2/3
of the cooking time.
Poultry Accessories
Type of
heating
Temperature in
°C, grill setting
Microwave
power in watts
Cooking time
in minutes
Chicken, whole,
approx. 1.2 kg*
Ovenware with
lid
220-230 300 35-45
Poulard, whole,
approx. 1.6 kg*
Ovenware with
lid
220-230
300
100
30
20-30
Chicken, halves, 500 g
each*
Ovenware
without lid
180-200 300 30-35
Chicken portions,
approx. 800 g*
Ovenware
without lid
210-230 300 20-30
Chicken breast with skin
and bones,
2 pieces, approx. 350-
450 g*
Ovenware
without lid
190-210 100 30-40
Duck breast with skin, 2
pieces,
300-400 g each**
Ovenware
without lid
100 100 20-30
Goose breast, 2
pieces, 500 g each*
Ovenware
without lid
100 100 25-30
Use
106
Fish
Goose legs, 4 pieces,
approx. 1.5 kg*
Ovenware
without lid
100 100 30-40
Turkey breast, approx.
1 kg*
Ovenware with
lid
- - 90-100
Turkey drumsticks,
approx. 1.3 kg*
Ovenware with
lid
100 100 50-60
* Lower wire rack
** Higher wire rack
Poultry Accessories
Type of
heating
Temperature in
°C, grill setting
Microwave
power in watts
Cooking time
in minutes
For grilling, place the whole fish,
e.g. trout, onto the middle of the
higher wire rack..
Grease the wire rack with oil
beforehand.
Fish Accessories Type of heating
Temperature in °C, grill
setting
Cooking time in
minutes
Fish steak, e.g. salmon, 3 cm thick,
grilled
Higher wire rack 3 20-25
Whole fish, 23 pieces, 300 g
each, grilled
Higher wire rack 3 20-30

Use
107
EN
4.10 Tips for roasting and grilling
The table does not contain
information for the weight of the
joint.
For small roasts, select a higher temperature and a shorter cooking
time. For larger roasts, select a lower temperature and a longer
cooking time.
How to tell when the roast is
ready.
Use a meat thermometer (available from specialist shops) or carry out
a “spoon test”.
Press down on the roast with a spoon. If it feels firm, it is ready. If the
spoon can be pressed in, it needs to be cooked for a little longer.
The roast looks good but the juices
are burnt.
Next time, use a smaller roasting dish or add more liquid.
The roast looks good but the juices
are too clear and watery.
Next time, use a larger roasting dish and add less liquid.
The roast is not well-done enough.
Carve the roast. Prepare the gravy in the roasting dish and place the
slices of roast meat in the gravy. Finish cooking the meat using the
microwave only.
Use
108
4.11 Bakes, gratins, toast with
toppings
• The values in the table apply to
food placed in a cold oven.
• For bakes, potato gratins and
lasagne, use a microwaveable,
heat-resistant ovenproof dish 4
to 5 cm deep.
• Place the bake on the lower
wire rack.
• Leave bakes and gratins to cook
in the oven for a further 5
minutes after switching off.
• Cheese on toast:
Pre-toast slices of bread.
Bakes, gratin, toasts Accessories
Type of
heating
Temperature in
°C, grill setting
Microwave
power in watts
Cooking time in
minutes
Bake, sweet,
approx. 1.5 kg*
Ovenware
without lid
140-160 300 25-35
Savoury bake, made with
cooked ingredients, approx.
1 kg*
Ovenware
without lid
150-160 700 20-25
Lasagne, fresh*
Ovenware
without lid
200-220 300 25-35
Potato gratin made from raw
ingredients, approx. 1.1 kg*
Ovenware
without lid
180-200 700 25-30
Toast with topping, 4
slices**
3 - 8-10
* Lower wire rack
** Higher wire rack
Use
109
EN
4.12 Convenience products, frozen
• Observe the instructions on the
packaging.
• The values in the table apply to
food placed in a cold oven.
• Do not lay chips, croquettes or
potato röstis on top of each
other.
• Turn half way through the
cooking time.
• Place the food directly on the
turntable.
Convenience products Accessories
Type of
heating
Temperature
°C
Microwave
power in watts
Cooking time in
minutes
Pizza with thin base*
Turntable 220-230 - 10-15
Pizza with deep-pan base
Turntable
-
220-230
700
-
3
13-18
Mini pizza*
Turntable 220-230 - 10-15
Pizza baguette*
Turntable
-
220-230
700
-
2
13-18
Chips
Turntable 220-230 - 8-13
Croquettes*
Turntable 210-220 - 13-18
Rösti, stuffed potato pockets
Turntable 200-220 - 25-30
Part-cooked rolls or
baguette
Lower wire rack 170-180 - 13-18
Fish fingers
Turntable 210-230 - 10-20
Chicken goujons, nuggets
Turntable 200-220 - 15-20
Lasagne, approx. 400 g**
Lower wire rack 220-230 700 12-17
*Preheat the cooking compartment for 5 minutes.
**Place the food in suitable, heat-resistant ovenware.

Cleaning and maintenance
110
5 Cleaning and maintenance
With careful care and cleaning your
microwave oven will retain its looks and
remain good order. We will explain here
how you should care for and clean your
appliance correctly.
5.1 Cleaning agents
To ensure that the different surfaces are not
damaged by using the wrong cleaning
agent, observe the information in the table.
Do not use:
• sharp or abrasive cleaning agents,
• metal or glass scrapers to clean the glass
in the appliance door.
• metal or glass scrapers to clean the door
seal,
• hard scouring pads and sponges,
• cleaning agents with high concentrations
of alcohol.
Wash new sponge cloths thoroughly before
use.
Allow all surfaces to dry thoroughly before
using the appliance again.
Risk of electric shock!
Penetrating moisture may cause an electric
shock. Do not use any high-pressure
cleaners or steam cleaners.
Risk of burns!
Never clean the appliance immediately
after switching off. Let the appliance cool
down.
Risk of serious damage to health!
Microwave energy may escape if the
cooking compartment door or the door
seal is damaged. Never use the appliance
if the cooking compartment door or the
door seal is damaged. Contact the after-
sales service.
• Slight differences in colour on
the front of the appliance are
caused by the use of different
materials, such as glass, plastic
and metal.
• Shadows on the door panel
which look like streaks, are
caused by reflections made by
the oven light.
• Unpleasant odours, e.g. after
fish has been prepared, can be
removed very easily. Add a few
drops of lemon juice to a cup of
water. Place a spoon into the
container as well, to prevent
delayed boiling. Heat the water
for 1 to 2 minutes at maximum
microwave power.

Cleaning and maintenance
111
EN
Area Cleaning agents
Appliance front
Hot soapy water:
Clean with a dish cloth and dry with a soft cloth. Do not use glass cleaners or
metal or glass scrapers for cleaning.
Appliance front with stainless
steel
Hot soapy water:
Clean with a dish cloth and dry with a soft cloth. Remove flecks of limescale,
grease, starch and albumin (e.g. egg white) immediately. Corrosion can form
under such residues. Special stainless steel cleaning agents can be obtained
from the after-sales service or from specialist shops. Do not use glass cleaners
or metal or glass scrapers for cleaning.
Cooking compartment
Hot soapy water or a vinegar solution:
Clean with a dish cloth and dry with a soft cloth.
If the oven is very dirty: Do not use oven spray or other aggressive oven
cleaners or abrasive materials. Scouring pads, rough sponges and pan
cleaners are also unsuitable. These items scratch the surface. Allow the interior
surfaces to dry thoroughly.
Recess in cooking
compartment
Damp cloth:
Ensure that no water seeps through the turntable drive into the appliance
interior.
Wire racks
Hot soapy water:
Clean using stainless steel cleaning agent or in the dishwasher.
Door panels
Glass cleaner:
Clean with a dish cloth. Do not use a glass scraper.
Seal
Hot soapy water:
Clean with a dish cloth, do not scour. Do not use a metal or glass scraper for
cleaning.
Cleaning and maintenance
112
5.2 Malfunction table
Malfunctions often have simple
explanations. Please refer to the malfunction
table before calling the after-sales service.
If a meal does not turn out exactly as you
wanted, refer to the Expert Cooking Guide
section, where you will find plenty of
cooking tips and tricks.
Malfunction table
Risk of electric shock!
Incorrect repairs are dangerous. Repairs
may only be carried out by one of our
trained after-sales engineers.
Problem Possible cause Remedy/information
The appliance does not work.
Faulty circuit breaker.
Look in the fuse box and
check that the circuit breaker
for the appliance is in working
order.
Plug not plugged in. Plug in the plug.
Power cut
Check whether the kitchen
light works.
The appliance does not work.
appears in the display panel.
Childproof lock is active.
Deactivate the childproof lock
(see section:“Childproof
lock”).
0:00 is in the display panel. Power cut Reset the clock.
The microwave does not switch on. Door not fully closed.
Check whether food residue
or debris is trapped in the
door.
It takes longer than before for the
food to heat up in the microwave
The selected microwave power level is too
low.
Select a higher power level.
A larger amount than usual has been
placed in the appliance.
Double the amount = almost
double the cooking time.
The food was colder than usual.
Stir or turn the food during
cooking.
Turntable grates or grinds.
Dirt or debris in the area around the
turntable drive.
Clean the rollers under the
turntable and the recess in the
oven floor thoroughly.

Cleaning and maintenance
113
EN
5.3 Acrylamide in foodstuffs
Which foods are affected?
Acrylamide is mainly produced in grain and
potato products that are heated to high
temperatures, such as potato crisps, chips,
toast, bread rolls, bread, fine baked goods
(biscuits, gingerbread, cookies).
A particular operating mode or
power level cannot be set.
The temperature, power level or combined
setting is not possible for this operating
mode.
Choose permitted settings.
E1
appears in the display panel.
The thermal safety switch-off function has
been activated.
Call the after-sales service.
E4
appears in the display panel.
The thermal safety switch-off function has
been activated.
Call the after-sales service.
E11
appears in the display
panel.
Moisture in the control panel. Allow the control panel to dry.
E17
appears in the display panel. Rapid heating has failed. Call the after-sales service.
Problem Possible cause Remedy/information
Tips for keeping acrylamide to a minimum when preparing food
General
Keep cooking times to a minimum. Cook meals until they are golden
brown, but not too dark. Large, thick pieces of food contain less
acrylamide.
Baking biscuits
Oven chips
Max. 200 °C in Top/bottom heating or max. 180 °C in 3D hot air or
hot air mode. Max.
190° C in Top/bottom heating or max. 170 °C in 3D hot air or hot air
mode. Egg white and egg yolk reduce the formation of acrylamide.
Distribute thinly and evenly over the baking tray. Cook at least 400 g at
once on a baking tray so that the chips do not dry out.

Installation
114
6 Installation
6.1 Fitted units
• This appliance is only intended to be
fully fitted in a kitchen
• This appliance is not designed to be
used as a tabletop appliance or inside a
cupboard.
• The fitted cabinet must not have a back
wall behind the appliance.
• A gap of at least 45 mm must be
maintained between the wall and the
base or back panel of the unit above.
• The fitted cabinet must have a ventilation
opening of 250 cm
2
on the front. To
achieve this, cut back the base panel or
fit a ventilation grille.
• Ventilation slots and intakes must not be
covered.
• The safe operation of this appliance can
only be guaranteed if it has been
installed in accordance with these
installation instructions.
• The fitter is liable for any damage
resulting from incorrect installation.
• The units into which the appliance is fitted
must be heatresistant up 90 °C.
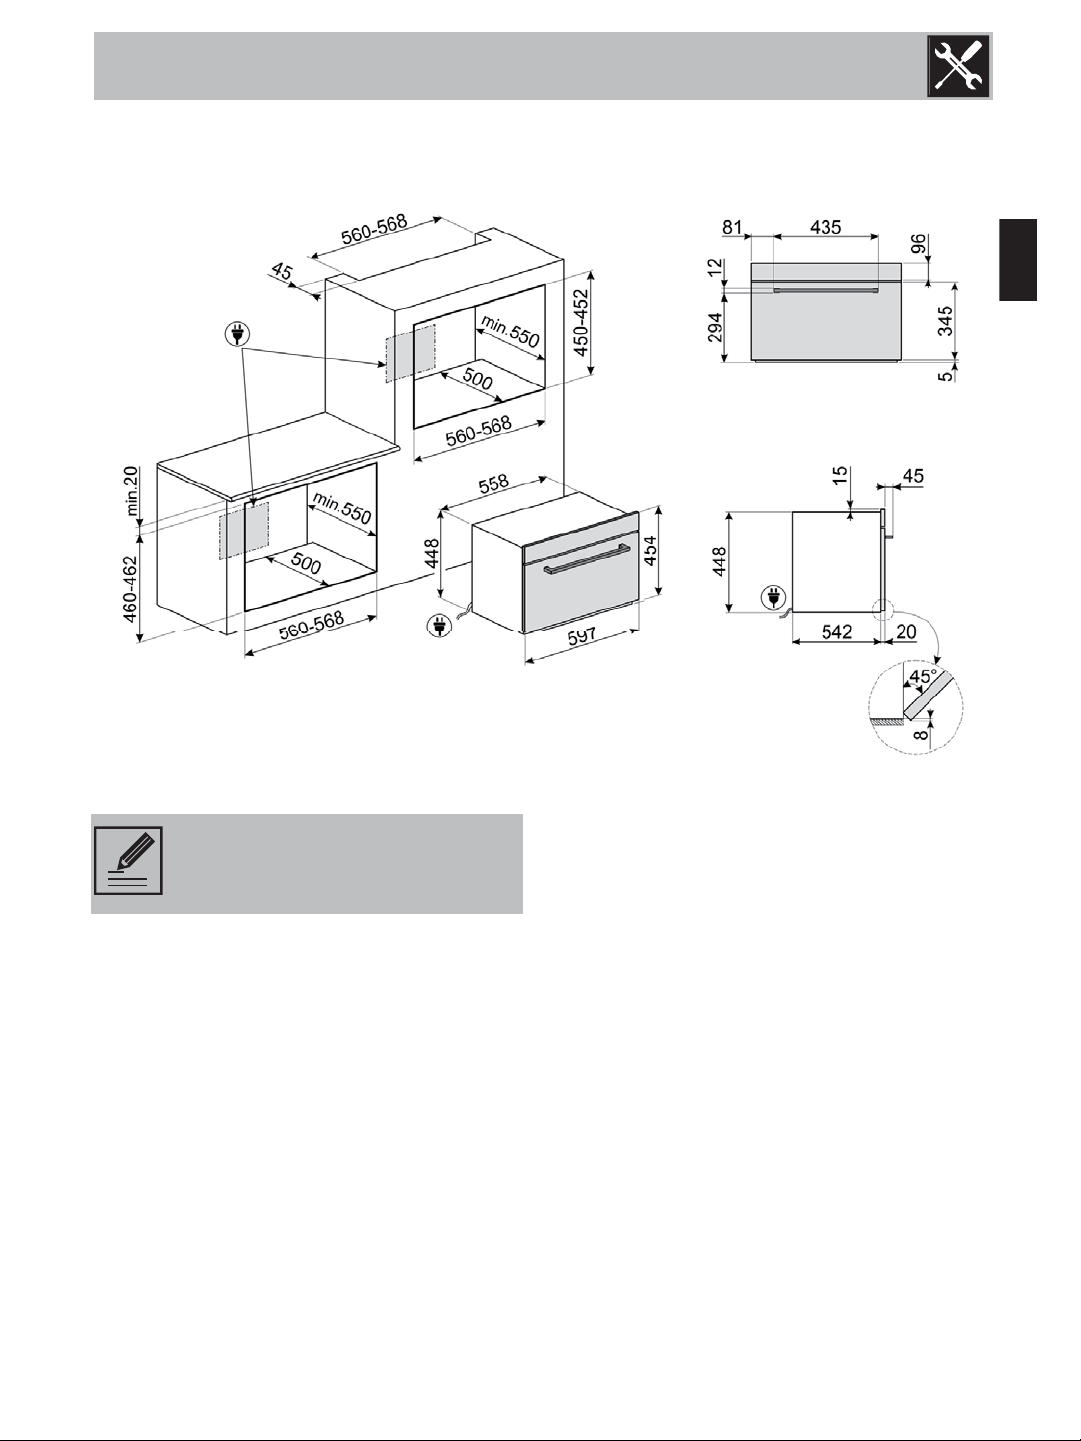
Installation
115
EN
6.2 Installation dimensions
There should be gap above the
oven.
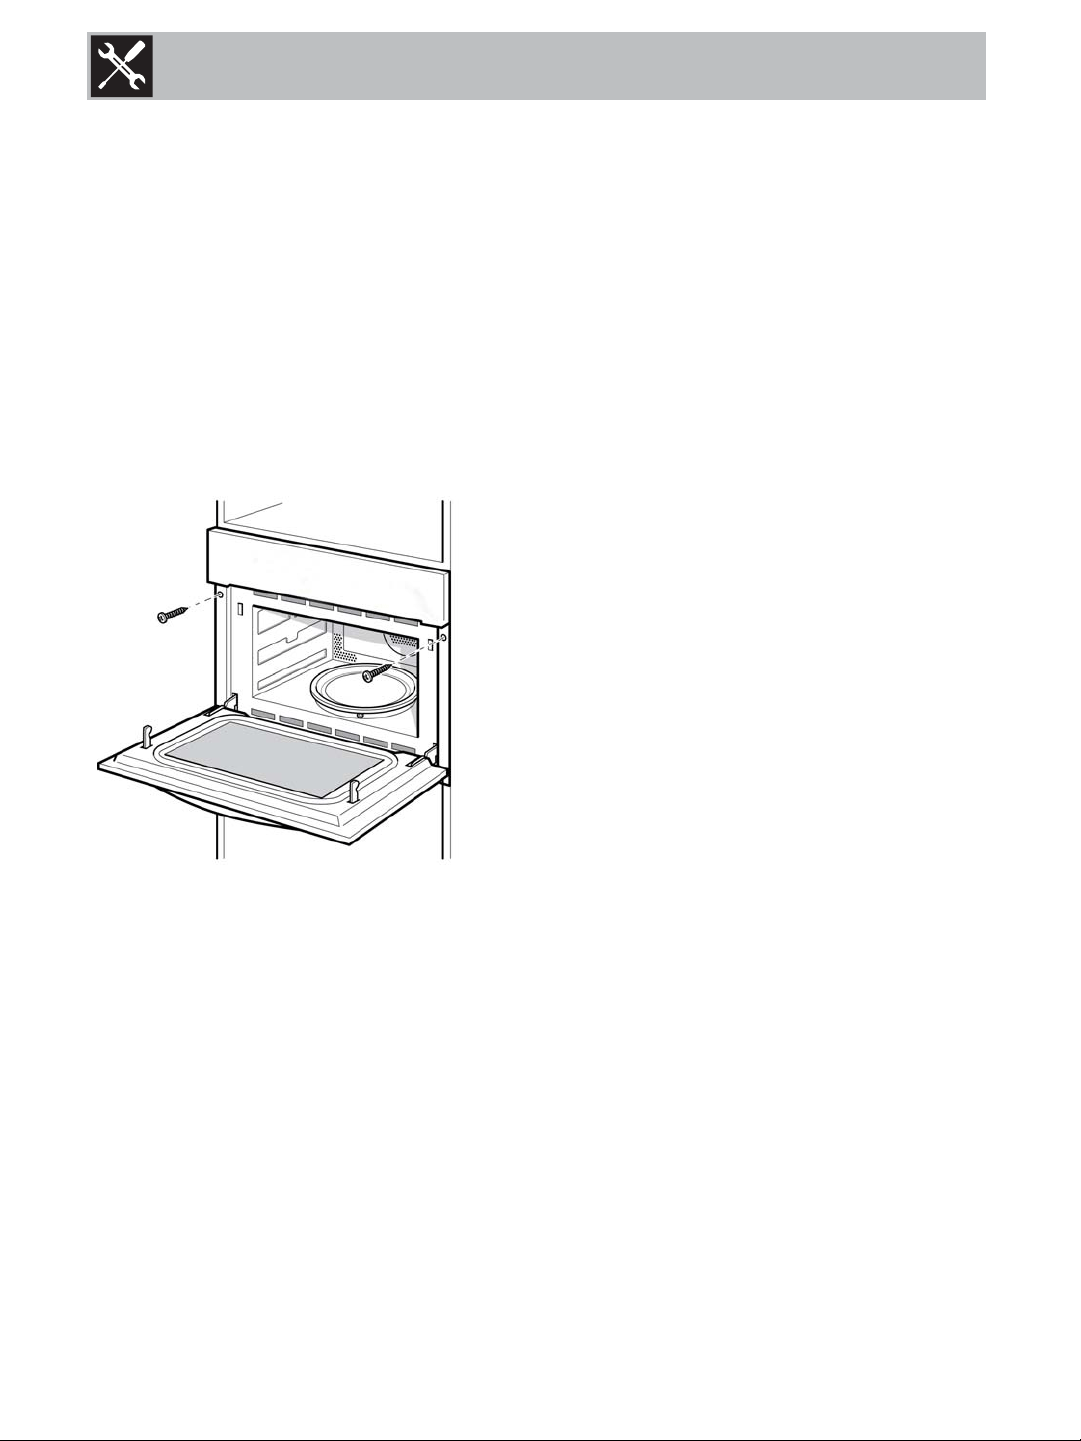
Installation
116
Building in
Do not hold or carry the appliance by the
door handle. The door handle cannot hold
the weight of the appliance and may
break off.
1. Carefully push the microwave into the
box, making sure that it is in the centre.
2. Open the door and fasten the
microwave with the screws that were
supplied
• Fully insert the appliance and centre it.
• Do not kink the connecting cable.
• Screw the appliance into place.
• The gap between the worktop and the
appliance must not be closed by
additional battens.

Installation
117
EN
6.3 Important information
The appliance is designed to permanently
installed with a three-pin power cord and
may only be connected by a licensed
expert in accordance with the connection
diagram.
Only a qualified electrician who takes the
relevant regulations into account may
replace the power cord.
Do not use multiple plugs, power strips or
extensions. Overloading causes a risk of
fire.
If the connection is no longer accessible
following installation, an all-pin isolating
switch with a contact gap of at least 3 mm
must be provided.
Connect the wires of the mains power
cord in accordance with the following
colour coding:
Green and yellow
Earth wire (E)
Blue Neutral wire (N)
Brown Live (L)

118

Il costruttore si riserva di apportare senza preavviso tutte le modifiche che riterrà utili al miglioramento dei propri
prodotti. Le illustrazioni e le descrizioni contenute in questo manuale non sono quindi impegnative ed hanno solo
valore indicativo.
The manufacturer reserves the right to make any changes deemed useful for improvement of its products without prior
notice. The illustrations and descriptions contained in this manual are therefore not binding and are merely indicative.
Le fabricant se réserve la faculté d'apporter, sans préavis, toutes les modifications qu'il jugera utiles pour l'amélioration
de ses produits. Les illustrations et les descriptions figurant dans ce manuel ne sont pas contraignantes et n'ont qu'une
valeur indicative.
Der Hersteller behält sich vor, ohne vorherige Benachrichtigung alle Änderungen vorzunehmen, die er zur
Verbesserung seiner Produkte für nützlich erachtet. Die in diesem Handbuch enthaltenen Illustrationen und
Beschreibungen sind daher unverbindlich und dienen nur zur Veranschaulichung.
De fabrikant behoudt zich het recht voor zonder waarschuwing alle wijzigingen aan te brengen die hij nodig acht om
zijn producten te verbeteren. De afbeeldingen en de beschrijvingen die aanwezig zijn in deze handleiding zijn niet
bindend, en hebben enkel een aanduidende waarde.
El fabricante se reserva el derecho a aportar sin aviso previo todas las modificaciones que considere útiles para la
mejora de sus propios productos. Las ilustraciones y las descripciones contenidas en este manual no comprometen,
por tanto, al fabricante y tienen un valor meramente indicativo.
O fabricante reserva-se o direito de efetuar, sem aviso prévio, qualquer modificação que vise o melhoramento dos
respetivos produtos. As ilustrações e descrições contidas neste manual, não são, por isso, vinculativas e possuem
apenas valor indicativo.
Производитель оставляет за собой право вносить без предупреждения все изменения, которые посчитает
полезными для улучшения собственной продукции. Рисунки и описания, содержащиеся в данном Руководстве
по эксплуатации, не имеют обязательств и имеют ознакомительный характер.
Producent zastrzega sobie prawo do nanoszenia, bez uprzedniego powiadomienia, wszelkich zmian, które uzna za
stosowne w celu ulepszania swoich produktów. Rysunki i opisy zawarte w niniejszej instrukcji nie są zobowiązujące i
mają charakter przykładowy.

SMEG S.p.A.
Via Leonardo Da Vinci, 4
42016 San Girolamo di
Guastalla (RE)
ITALY
www.smeg.com