
Loading ...
Loading ...
Loading ...
8
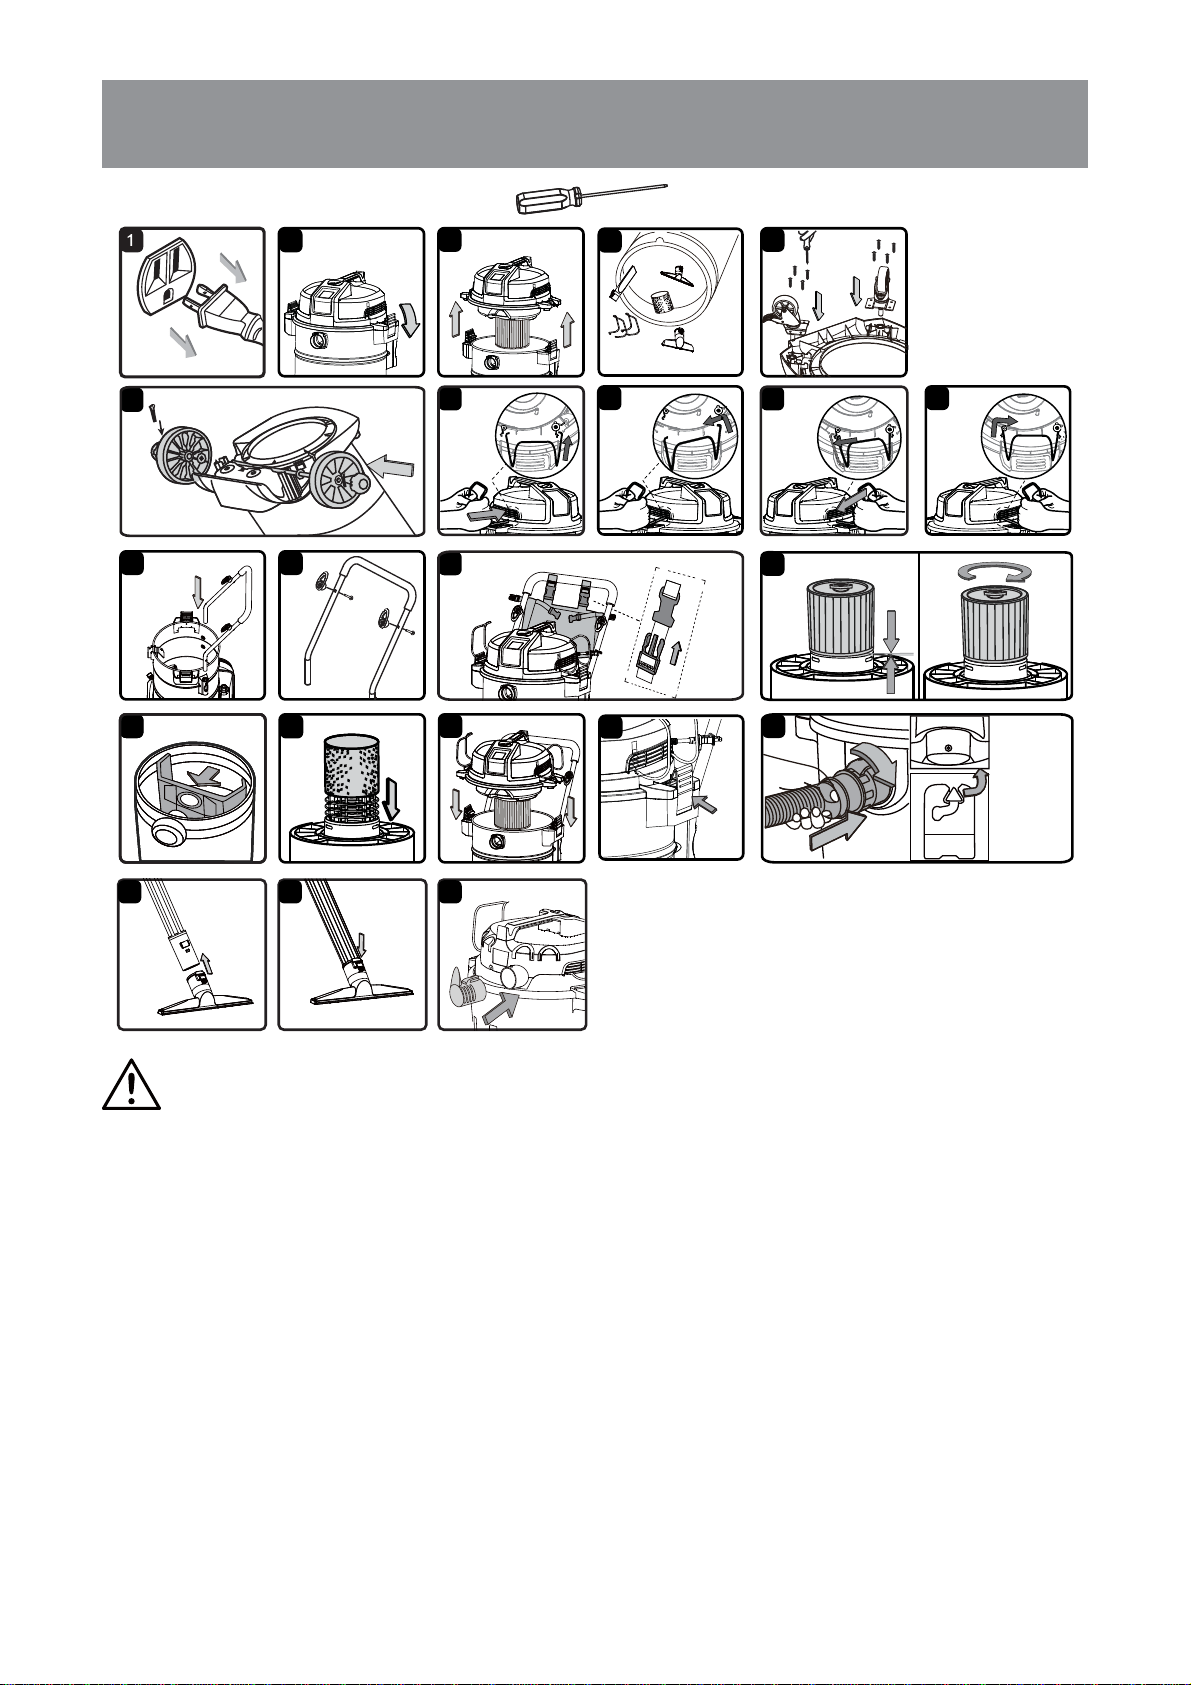
GENERAL ASSEMBLY INSTRUCTIONS
A Phillips head screwdriver is required.
1212
7b
2
5
3
4
7a
8
6
12
9
11
11
10
7d
7c
13
16
14
15
17 18 19
UNPACKING YOUR WET/DRY VACUUM & GENERAL ASSEMBLY
9HULI\WKDWWKHSRZHUFRUGLVGLVFRQQHFWHGIURPWKHRXWOHW)LJ
8QGRWKHODWFKHV)LJ
/LIWWKHSRZHUKHDGRIIWKHFROOHFWLRQWDQN)LJ
4. Remove the contents from inside the collection tank. Make sure you have all contents as listed
RQSDJH)LJ
5. Turn the collection tank on its side and insert the two casters into the sockets on the bottom of
the base and tighten with supplied screws. Verify that the casters are mounted correctly. Do not
RYHUWLJKWHQVFUHZV)LJ
6. Insert the wheel axle into the rear wheel housing on the vacuum base. Insert a washer onto the
axle followed by a rear-wheel and insert another washer. Insert the locking pin into the hole on
the end of the axle to lock the wheel. Snap the hub cap onto the wheel. Repeat the same steps
DWWKHRWKHUHQGRIWKHD[OH)LJ
7. Position the hose storage rack as illustrated. Fully insert one end of the hose storage rack into
the slot illustrated by the arrow, then pull the other end of the hose storage rack to align with the
FRUUHVSRQGLQJDUURZDQGLQVHUWLQWRWKHVORWXQWLOLWLVVHFXUHGLQSODFH)LJDG
WARNING:
DO NOT PLUG THE POWER CORD INTO A POWER OUTLET. MAKE
SURE THE PLUG IS DISCONNECTED BEFORE ASSEMBLING THE WET/DRY VACUUM.
TO REDUCE THE RISK OF ELECTRIC SHOCK, DO NOT EXPOSE TO RAIN.
Loading ...
Loading ...
Loading ...