Loading ...
Loading ...
Loading ...
CUSTOMER RESPONSIBILITIES
Fillin dates as you complete Before After Every Ever_ Yeerly Service
regularservioe Use Use 15min.;5hrs, Dates
Check for damagediwom parts p,, p,, j,,,
Check for loose fasteners/pads p- v,,
Check chain tension P,, _'
Check chain sharpness P," v"
Check guide ber p,, I," _"
Cleon unit & labels ,_
GENERAL RECOMMENDATIONS
The warranty on this unit does not cov-
er items that have been subjected to
operator abuse or negligence. To re-
ostve fulJvalue from the warranty, the
operator must maintain unitas instruct-
ed inthis manual. Vadous adjustments
will need to be made periodically to
propedy maintain your unit.
• Once a year, check guide bar and
chain forwear.
WARNING: Disconnect the power
source before performing maintenance.
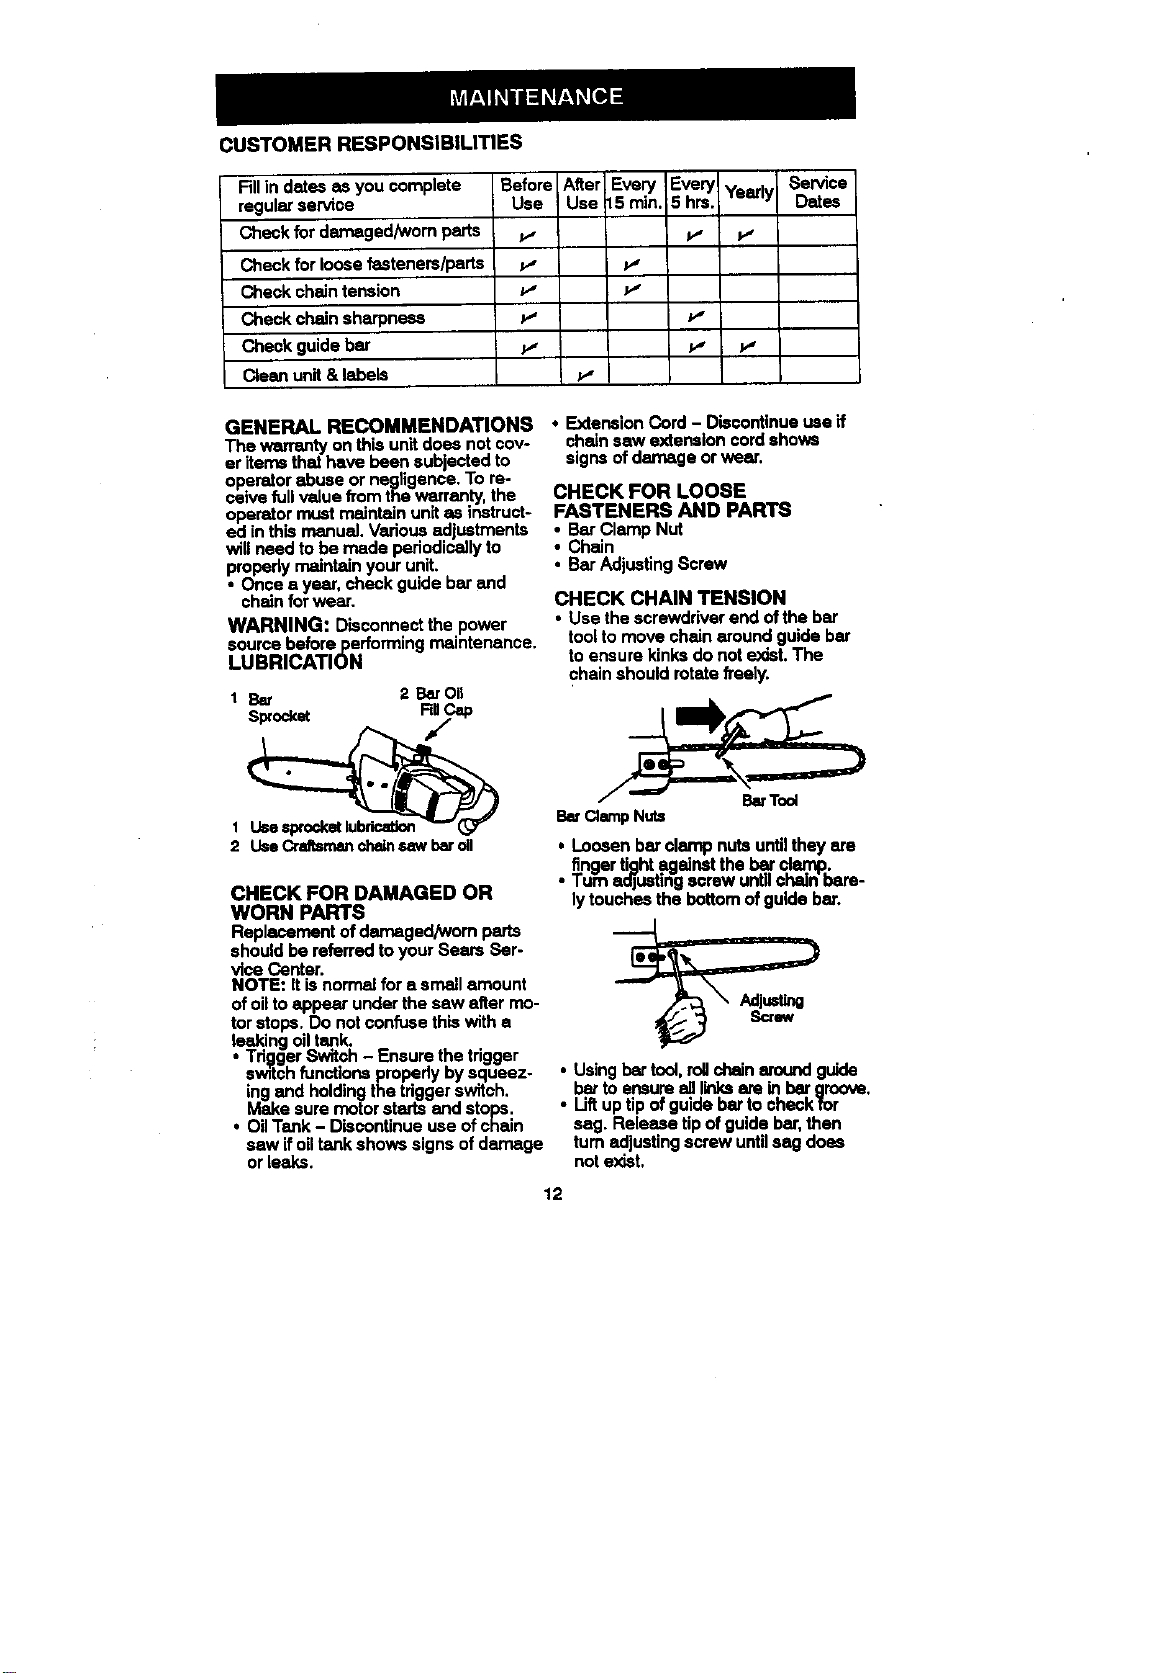
LUBRICATION
I Bar 2 Bar oil
Sprocket RUCap
2 UseCraflsrnanchalnsawbaroil
CHECK FOR DAMAGED OR
WORN PARTS
Replacement of damaged/worn parts
should be referred to your Bears Ser-
vice Center.
NOTS: tt isnorrnaJfor a small amount
ofoil to appear under the sew after mo-
tor stops. Do notconfuse this with e
leaking oil tank.
• Tdgger Switch - Ensure the trigger
switchfunctions propedy by squeez-
ing and holding the tdgger switch.
Make sure motorstarts and stops.
• Oil Tank - Discontinue use of chain
saw ifoil tank shows signs of damage
or leaks.
• Extension Cord - Discontinue use if
chain saw extension cord shows
signs ofdamage or wear.
CHECK FOR LOOSE
FASTENERS AND PARTS
• BarClamp Nut
• Chain
• BarAdjustingScrew
CHECK CHAIN TENSION
• Use the screwdriver end of the bar
tool to move chain around guide bar
to ensure k|nk,5do not exist. The
chain should rotate freely.
_ BarTool
BarC_p Nuts
• Loosen bar clamp nuts untilthey ere
• finger tight against the _ d mpR.
/um aa|usung screw unttlChainoere-
fytouches the bottom ofguide bar.
• Usingbartool,rollchainaroundguide
bartoensurealllinksereinbargroove
• Liftuptp ofguidebartocheckfor
sag, Releasetipofguidebar,then
tom adjustingscrewuntilsag does
note:_st.
12
Loading ...
Loading ...
Loading ...