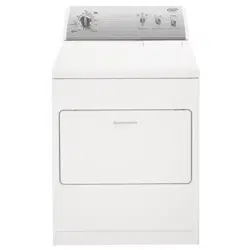
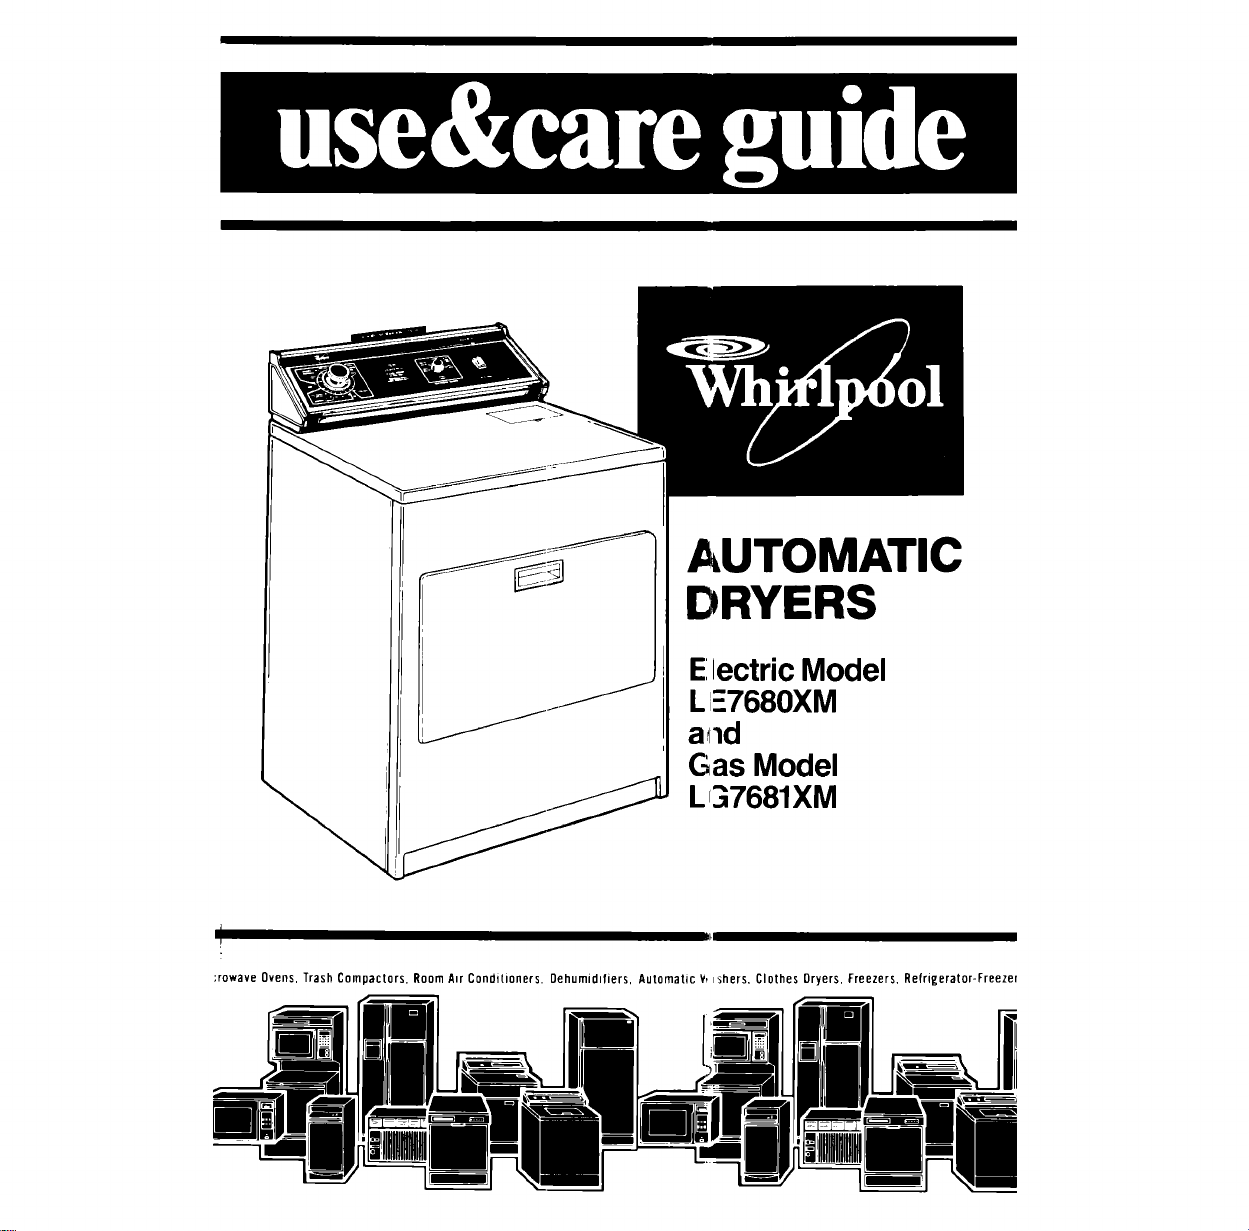
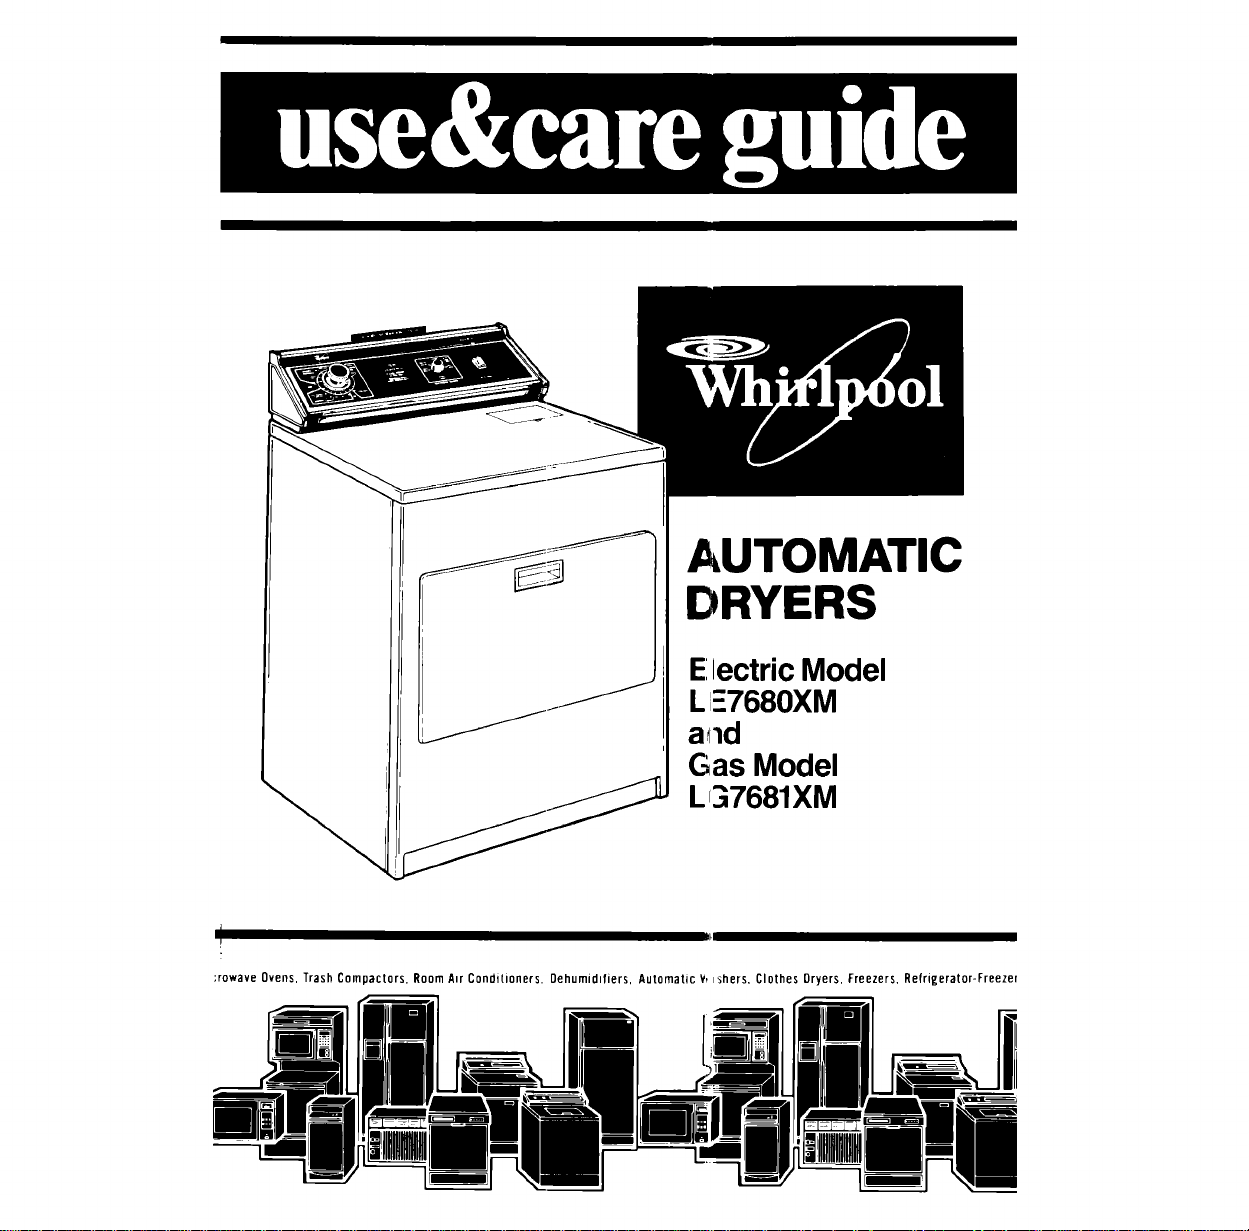
AUTOMATIC
DRYERS
LI._7681XM
E:lectric Model
LI-7680XM
a,11d
Gas Model
!
;rowave Ovens, Trash Compactors, Room A_r Conditioners. Oehumid=fiers, Automatic V, _shers, Clothes Oryers, Freezers, Refrigerator-Freezer
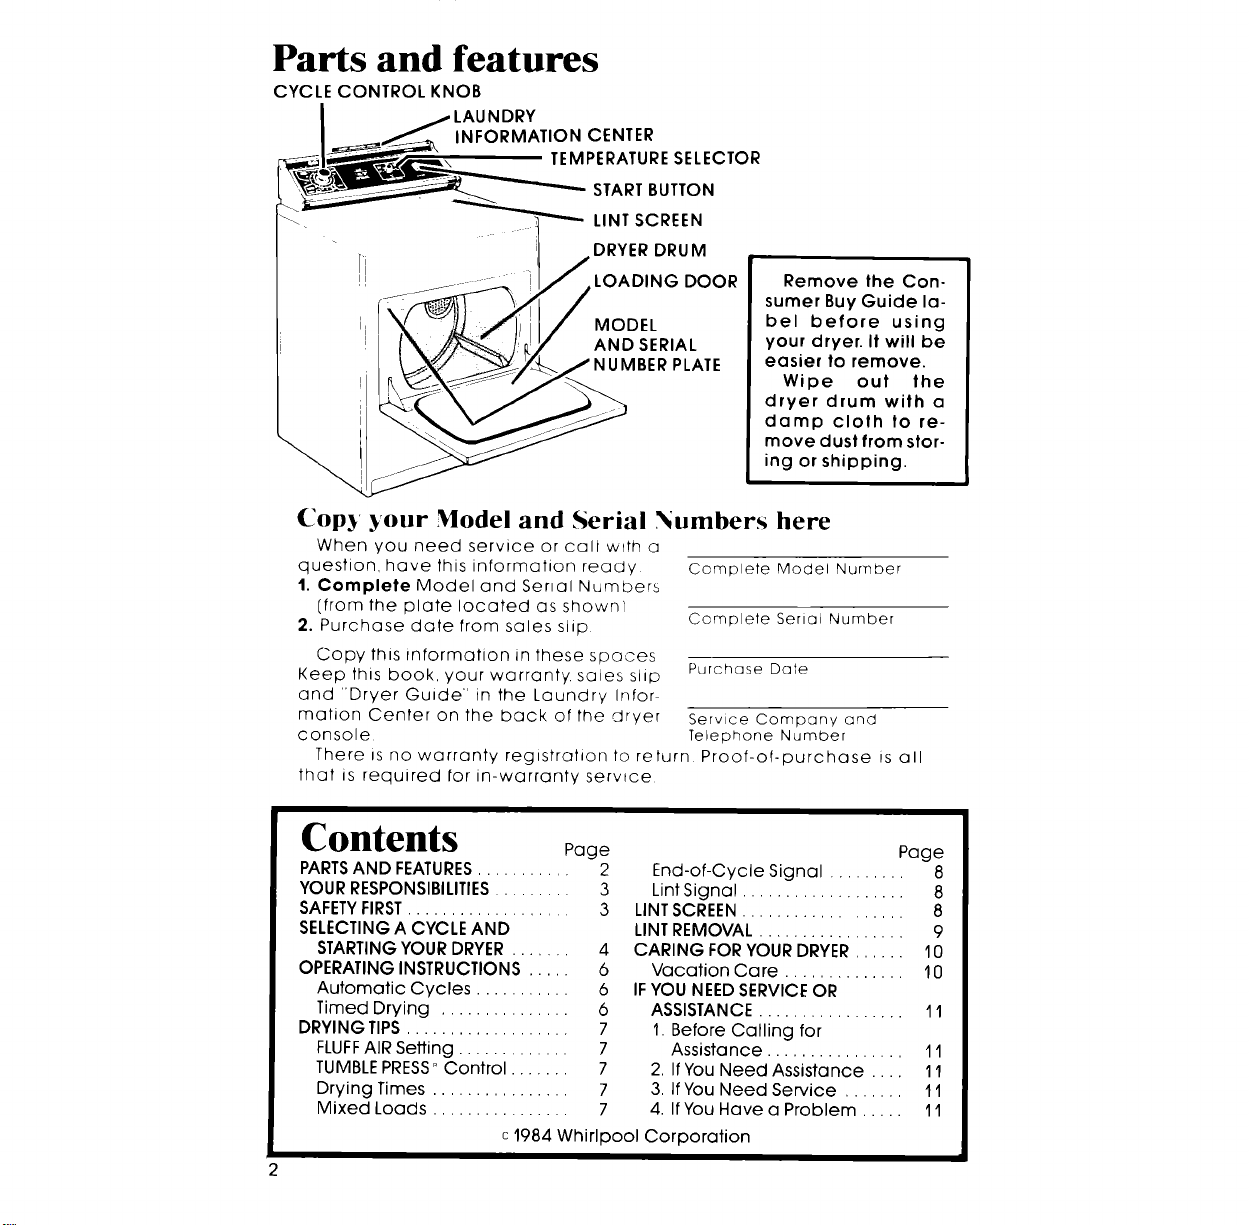
Parts and features
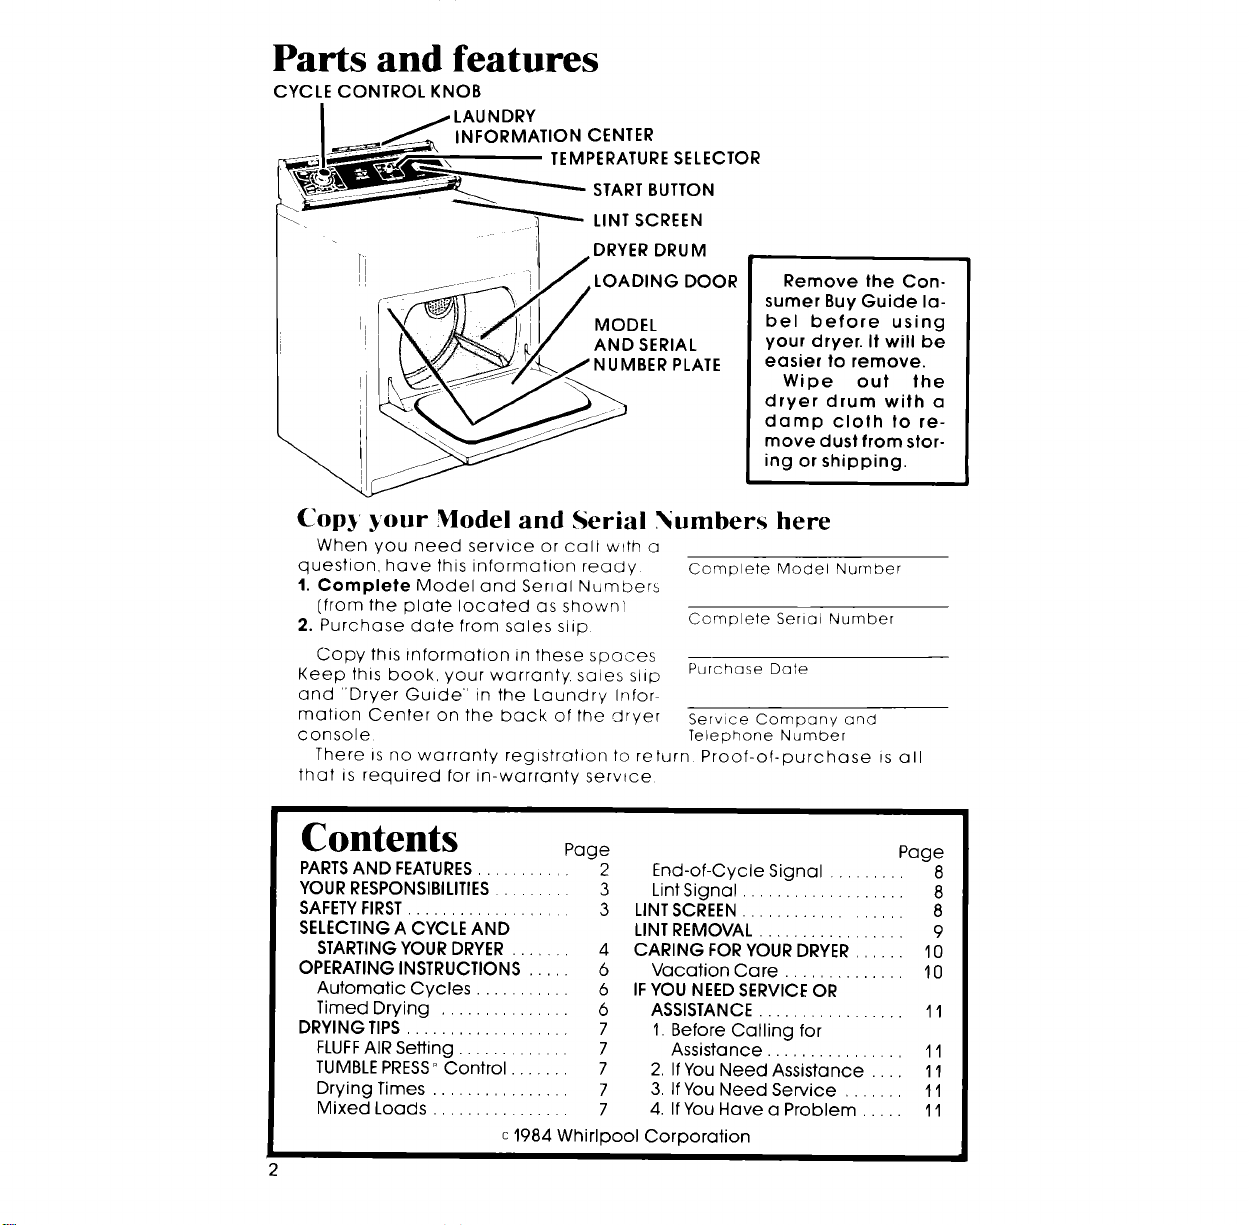
CYCLE CONTROL KNOB
I _ LAUNDRY
___ INFORMATION CENTER
__ _\ TEM PERATURESELECTOR
;_'""'"_"'-START BUTTON
_,,_w- _ LINT SCREEN
[_ " 1 DRYER DRUM
LOADING DOOR
MODEL
AND SERIAL
PLATE
Remove the Con-
sumer Buy Guide la-
bel before using
your dryer. It will be
easier to remove.
Wipe out the
dryer drum with a
damp cloth to re-
move dust from stor-
ing or shipping.
Cop) )our Model and Serial Numbers here
When you need service or call with a
question, have this information ready
1. Complete Model and Serial Numbers
[from the plate located as shown/
2. Purchase date from salesslip
Copy this information in these spaces
Keep this book, your warranty, sales slip
and "Dryer Guide" in the Laundry Infor
marion Center on the back of the dryer Service Company and
console Telephone Number
There is no warranty registration to return Proof-of-purchase is all
that is required tar in-warranty service
Complete Model Number
Complete Serial Number
Purchase Date
Contents Page
PARTSAND FEATURES........... 2
YOUR RESPONSIBILITIES......... 3
SAFETYFIRST................... 3
SELECTING A CYCLE AND
STARTINGYOUR DRYER ....... 4
OPERATING INSTRUCTIONS ..... 6
Automatic Cycles ........... 6
Timed Drying ............... 6
DRYING TIPS................... 7
FLUFFAIR Setting ............. 7
TUMBLEPRESS_Control ....... 7
Drying Times ................ 7
Mixed Loads ................ 7
Page
End-of-Cycle Signal ......... 8
LintSignal ................... 8
LINTSCREEN .................. 8
LINTREMOVAL ................. 9
CARING FORYOUR DRYER...... 10
Vacation Ca re .............. 10
IF YOU NEEDSERVICE OR
ASSISTANCE ................. 11
I. Before Calling for
Assistance ................ 11
2, If You Need Assistance .... 11
3, If You Need Service ....... 11
4. IfYou Have a Problem ..... 11
c 1984 Whirlpool Corporation
Your
Responsibilities
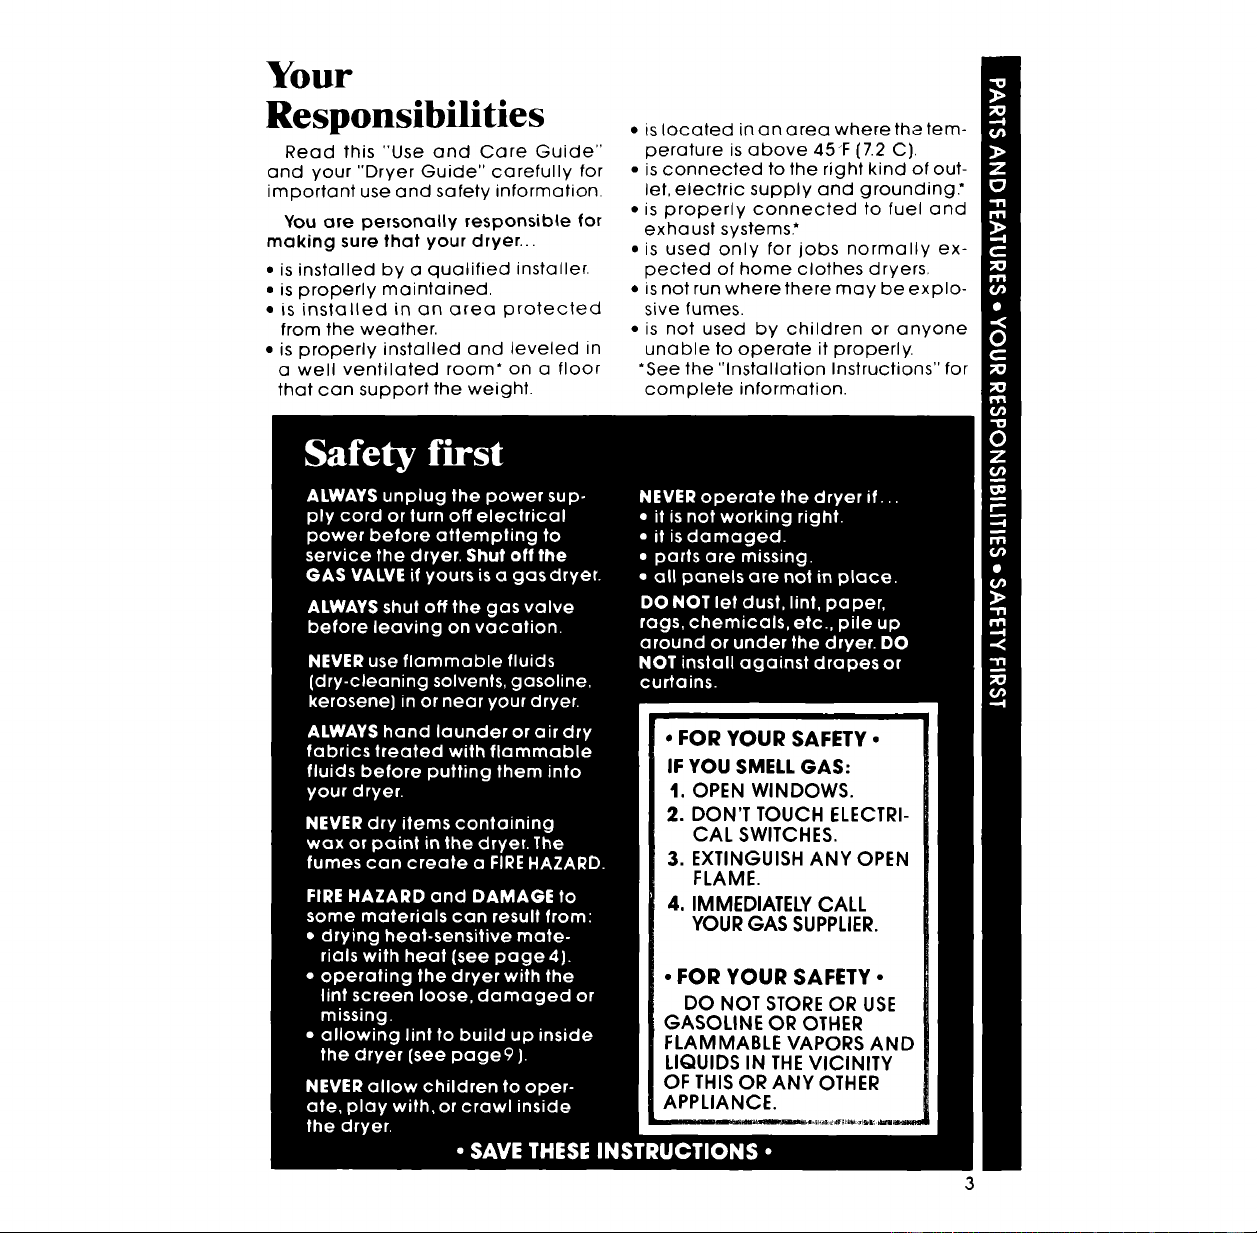
Read this "Use and Care Guide"
and your "Dryer Guide" carefully for
important use and safety information.
You are personally responsible for
making sure that your dryer...
• isinstalledby a qualified installer.
• isproperly maintained,
• is installed in an area protected
from the weather.
• is properly installed and leveled in
a well ventilated room* on a floor
that can support the weight.
• is located in an area where the tem-
perature is above 45"F (7.2 C).
• is connected to the right kind of out-
let, electric supply and grounding."
• is properly connected to fuel and
exhaust systems.*
• is used only for jobs normally ex-
pected of home clothes dryers.
• is not run where there may be explo-
sive fumes.
• is not used by children or anyone
unable to operate it properly.
"See the "Installation Instructions" for
complete information.
Selecting a cycle
and starting
your dryer
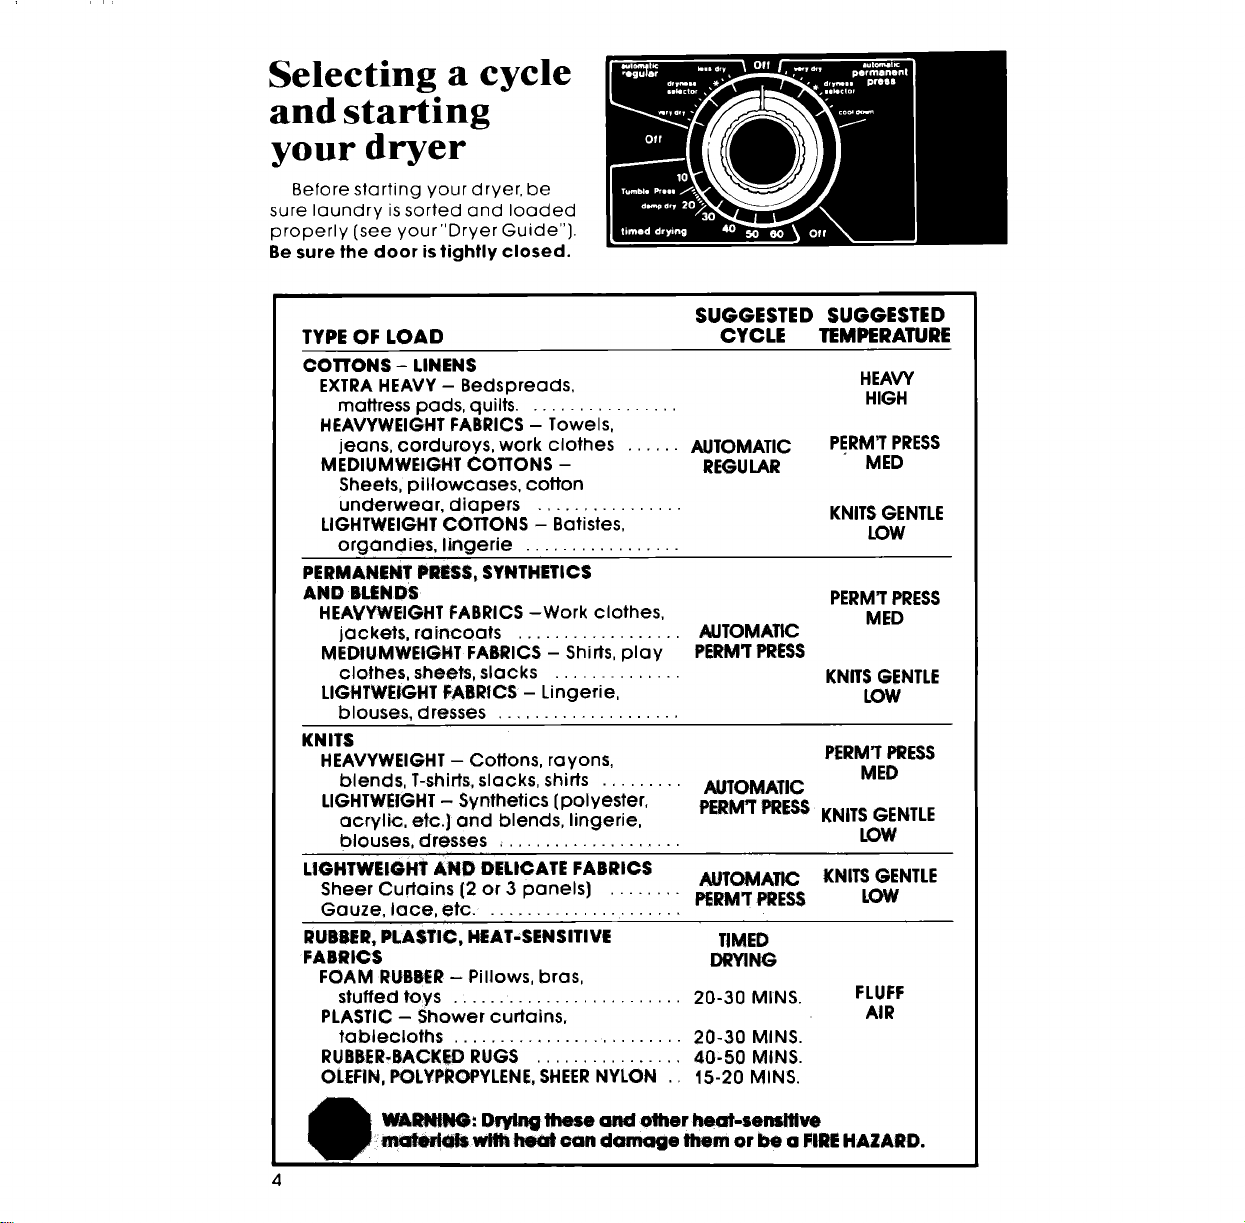
Before starting your dryer, be
sure laundry is sorted and loaded
properly [see your "Dryer Guide"].
Be sure the door is tightly closed.
4
SUGGESTED SUGGESTED
TYPE OF LOAD CYCLE TEMPERATURE
COTTONS - LINENS
EXTRA HEAVY - Bedspreads,
mattress pads, quilts .................
HEAVYWEIGHT FABRICS - Towels,
jeans, corduroys, work clothes ...... AUTOMATIC
MEDIUMWEIGHT COTTONS - REGULAR
Sheets, pillowcases, cotton
underwear, diapers ................
LIGHTWEIGHT COTTONS - Batistes,
organdies, lingerie .................
PERMANENT PRESS, SYNTHETICS
AND BLENDS
HEAVYWEIGHT FABRICS -Work clothes,
jackets, raincoats .................. AUTOMATIC
MEDIUMWEIGHT FABRICS - Shirts, play PERM'TPRESS
clothes, sheets, slacks ..............
LIGHTWE|GHT FABRICS- Lingerie,
blouses, dresses ....................
HEAVY
HIGH
PERM'TPRESS
MED
KNITSGENTLE
LOW
PERM'TPRESS
MED
KNITSGENTLE
LOW
KNITS
HEAVYWEIGHT - Cottons, rayons,
blends, T-shirts, slacks, shirts .........
LIGHTWEIGHT - Synthetics [polyester,
acrylic, etc.)and blends, lingerie,
blouses, dresses ....................
LIGHTWEIGHT AND DELICATE FABRICS
Sheer Curtains (2or 3 panels] AUTOMATIC
........ PERM'r PRESS
Gauze, lace, etc. .....................
RUBBER, PLASTIC, HEAT,SENSITIVE TIMED
FABRICS DRYING
FOAM RUBBER - Pillows, bras,
stuffed toys . : .... ................... 20-30 MINS.
PLASTIC - Shower curtains,
tablecloths ......................... 20-30 MINS.
RUBBER+BACKED RUGS ................ 40,50 MINS.
OLEFIN, POLYPROPYLENE, SHEERNYLON .. 15-20 MINS.
PERM'[PRESS
MED
AUTOMATIC
PERM'TPRESSKNITSGENTLE
LOW
KNITSGENTLE
LOW
FLUFF
AIR
WARNING: Drvlngthese and onmr heat-sensltlve
_wtth heat can damage lhem or be a FIREHAZARD.
Select a
1. CYCLE
Set TEMPERATURE
2. SELECTOR
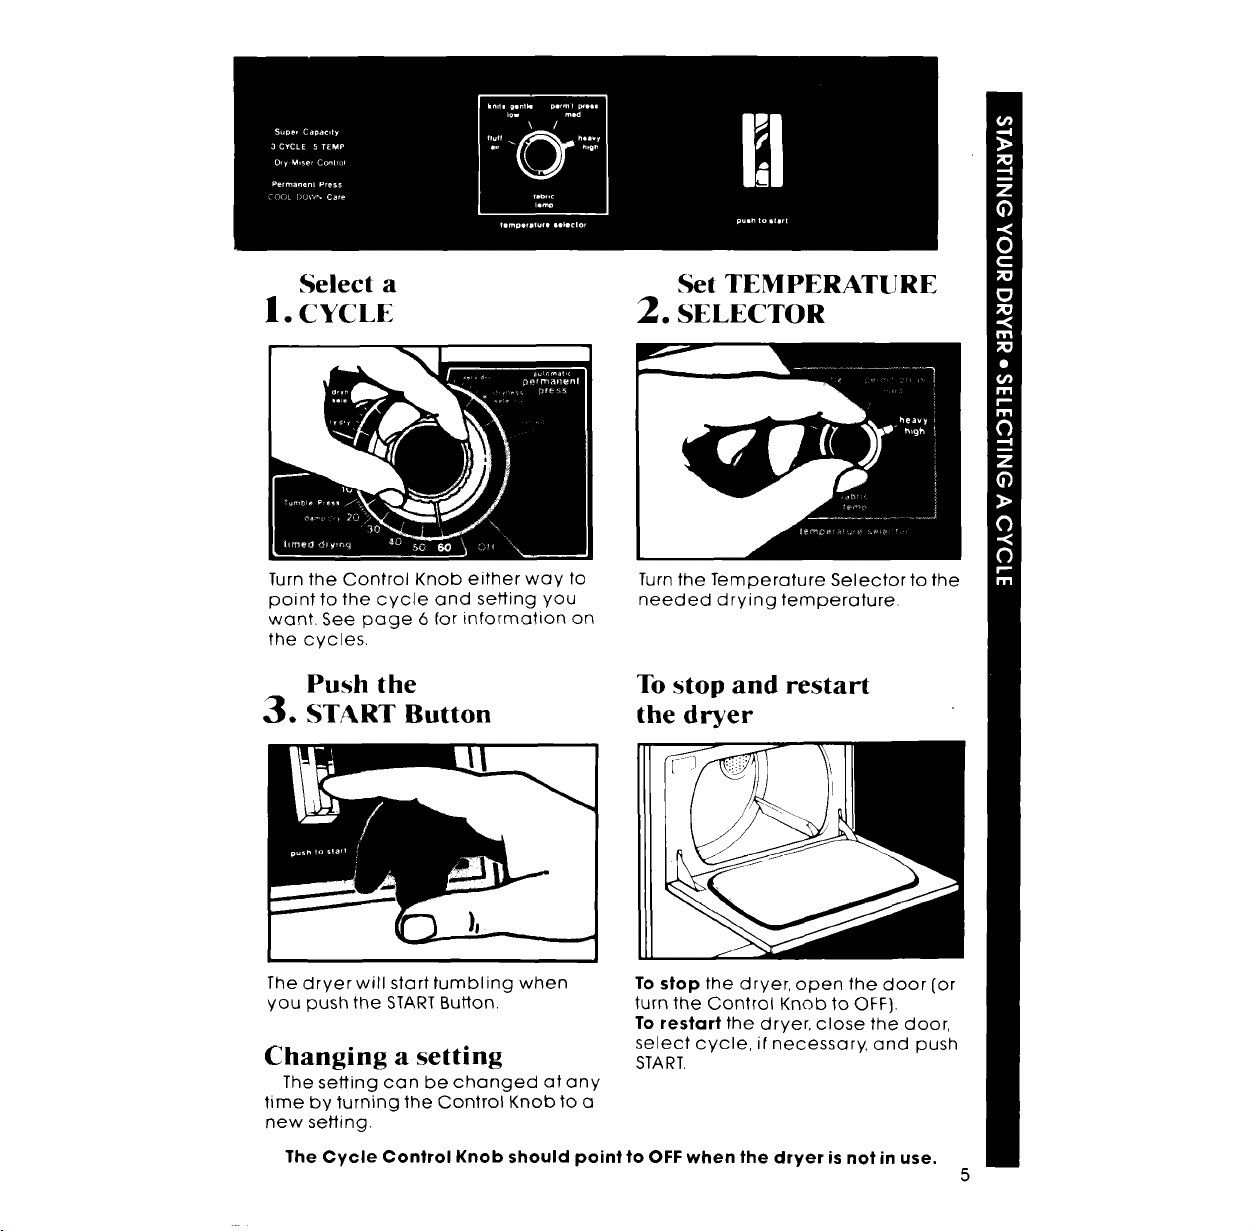
Turn the Control Knob either way to
point to the cycle and setting you
want. See page 6 for information on
the cycles.
Push the
3. START Button
Turn the Temperature Selector to the
needed drying temperature.
To stop and restart
the dryer
The dryer will start tumbling when
you push the START Button.
Changing a setting
The setting can be changed at any
time by turning the Control Knob to a
new setting.
To stop the dryer, open the door [or
turn the Control Knob to OFF].
To restart the dryer, close the door,
select cycle, if necessary, and push
START.
The Cycle Control Knob should point to OFF when the dryer is not in use.
5
Operating instructions
The automatic cycles
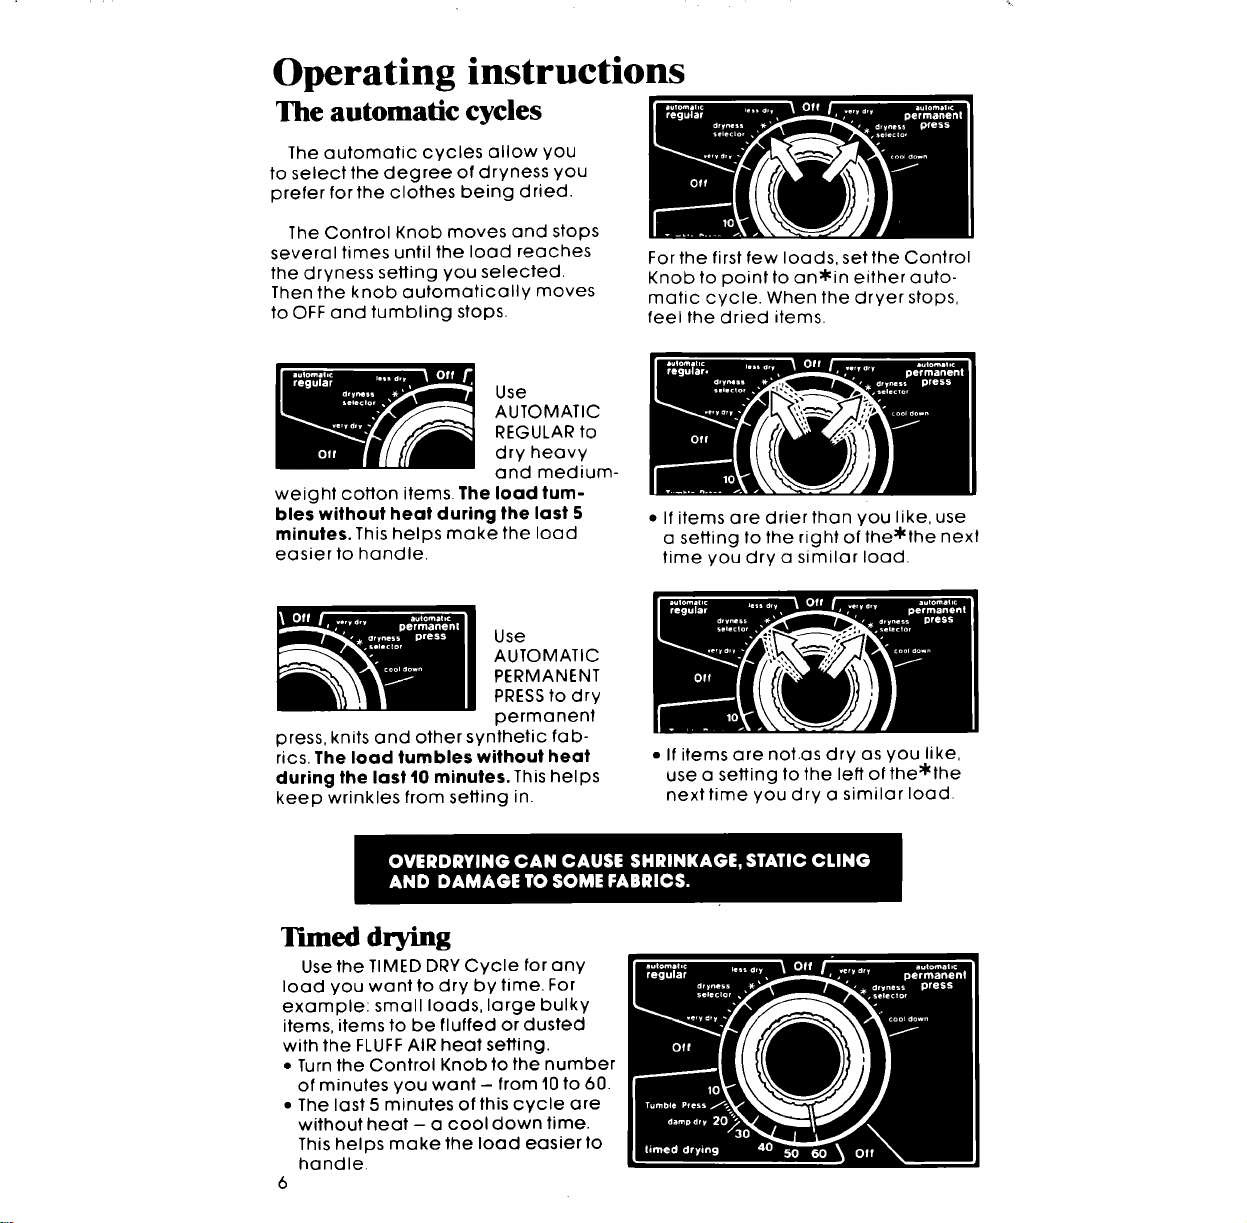
The automatic cycles allow you
to select the degree of dryness you
prefer for the clothes being dried.
The Control Knob moves and stops
several times until the load reaches
the dryness setting you selected.
Then the knob automatically moves
to OFF and tumbling stops.
For the first few loads, set the Control
Knob to point to an*in either auto-
matic cycle. When the dryer stops,
feel the dried items.
Use
AUTOMATIC
REGULAR to
dry heavy
and medium-
weight cotton items, the load tum-
bles without heat during the last 5
minutes. This helps make the load
easier to handle.
• If items are drier than you like, use
a setting to the right of the*the next
time you dry a similar load.
Use
AUTOMATIC
PERMANENT
PRESSto dry
permanent
press, knits and other synthetic fab-
rics. The load tumbles without heat
during the last 10 minutes. Thishelps
keep wrinkles from setting in.
• If items are not.as dry as you like,
use a setting to the left of the*the
next time you dry a similar load.
Timed drying
Use the TIMED DRY Cycle for any
load you want to dry by time. For
example: small loads, large bulky
items, items to be fluffed or dusted
with the FLUFF AIR heat setting.
• Turn the Control Knob to the number
of minutes you want- from 10 to 60.
• The last 5 minutes of this cycle are
without heat - a cool down time.
This helps make the load easier to
handle.
6
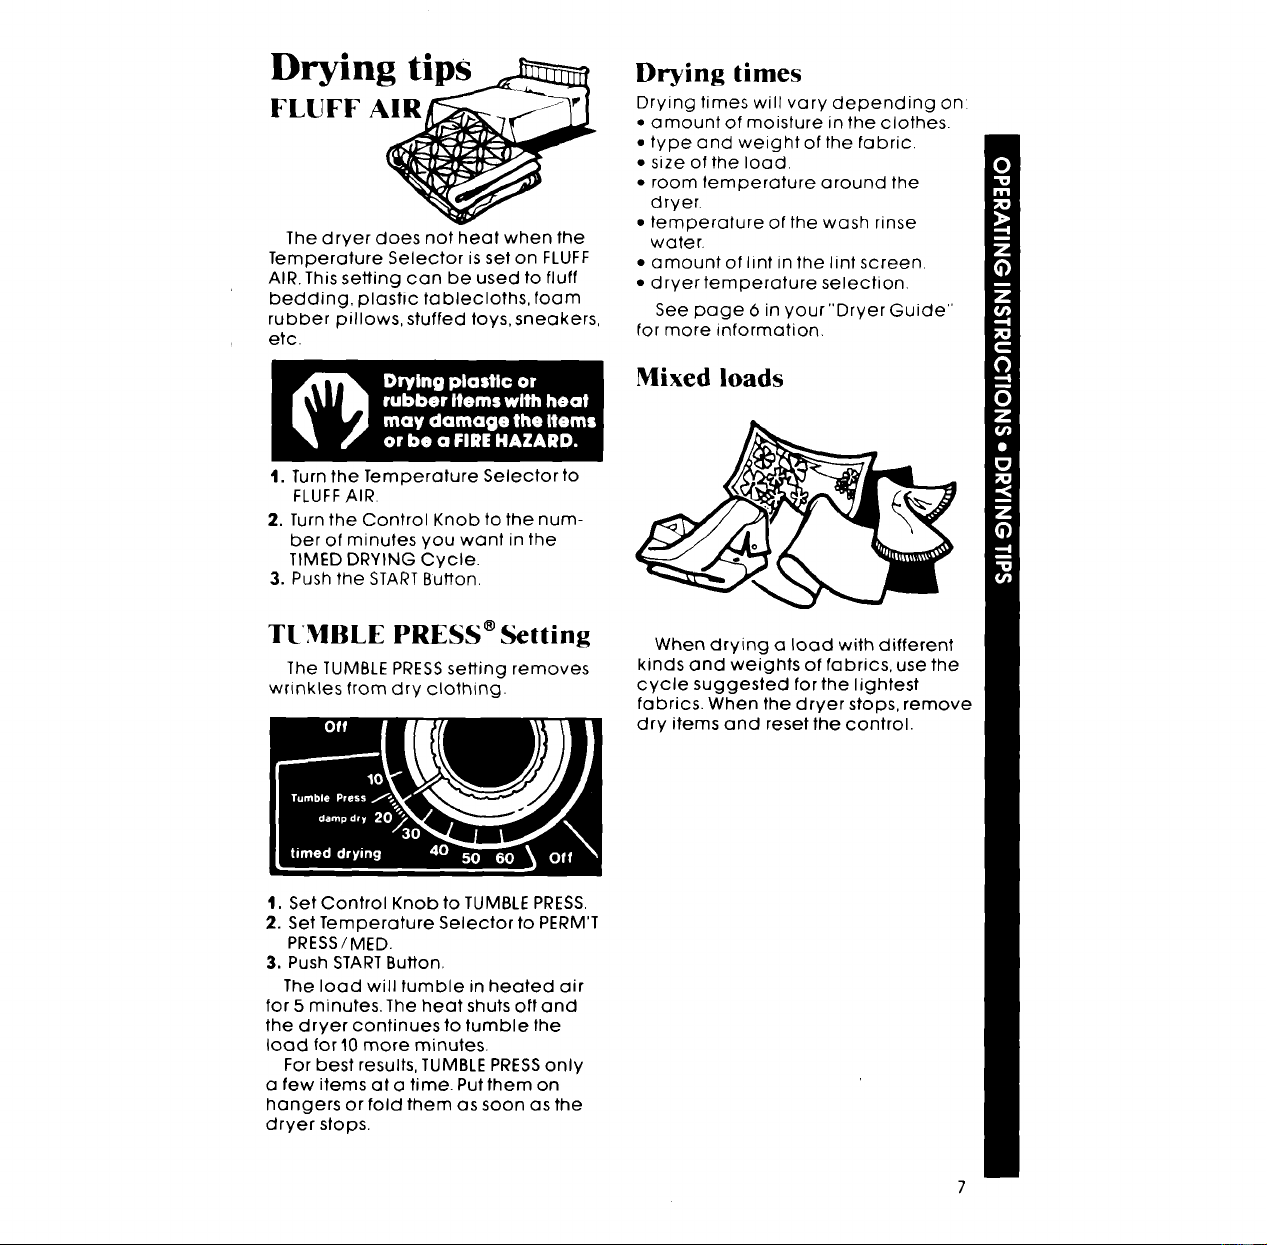
Drying
FLUFF A_
The dryer does not heat when the
Temperature Selector is set on FLUFF
AIR. This setting can be used to fluff
bedding, plastic tablecloths, foam
rubber pillows, stuffed toys, sneakers,
etc.
1. Turn the Temperature Selector to
FLUFFAIR.
2. Turn the Control Knob to the num-
ber of minutes you want in the
TIMED DRYING Cycle.
3. Push the START Button.
TUMBLE PRESS ®Setting
The TUMBLE PRESS setting removes
wrinkles from dry clothing.
Drying times
Drying times will vary depending onl
• amount of moisture in the clothes.
• type and weight of the fabric.
• size of the load.
• room temperature around the
dryer.
• temperature of the wash rinse
water.
• amount of lint in the lint screen.
• dryer temperature selection.
See page 6 in your "Dryer Guide"
for more information,
Mixed loads
When drying a load with different
kinds and weights of fabrics, use the
cycle suggested for the lightest
fabrics. When the dryer stops, remove
dry items and reset the control.
t. Set Control Knob to TUMBLEPRESS,
2. Set Temperature Selector to PERM'T
PRESS/MED.
3. Push STARTButton,
The load will tumble in heated air
for 5 minutes. The heat shuts art and
the dryer continues to tumble the
load for 10 more minutes.
For best results, TUMBLE PRESSonly
a few items at a time. Put them on
hangers or fold them as soon as the
dryer stops.
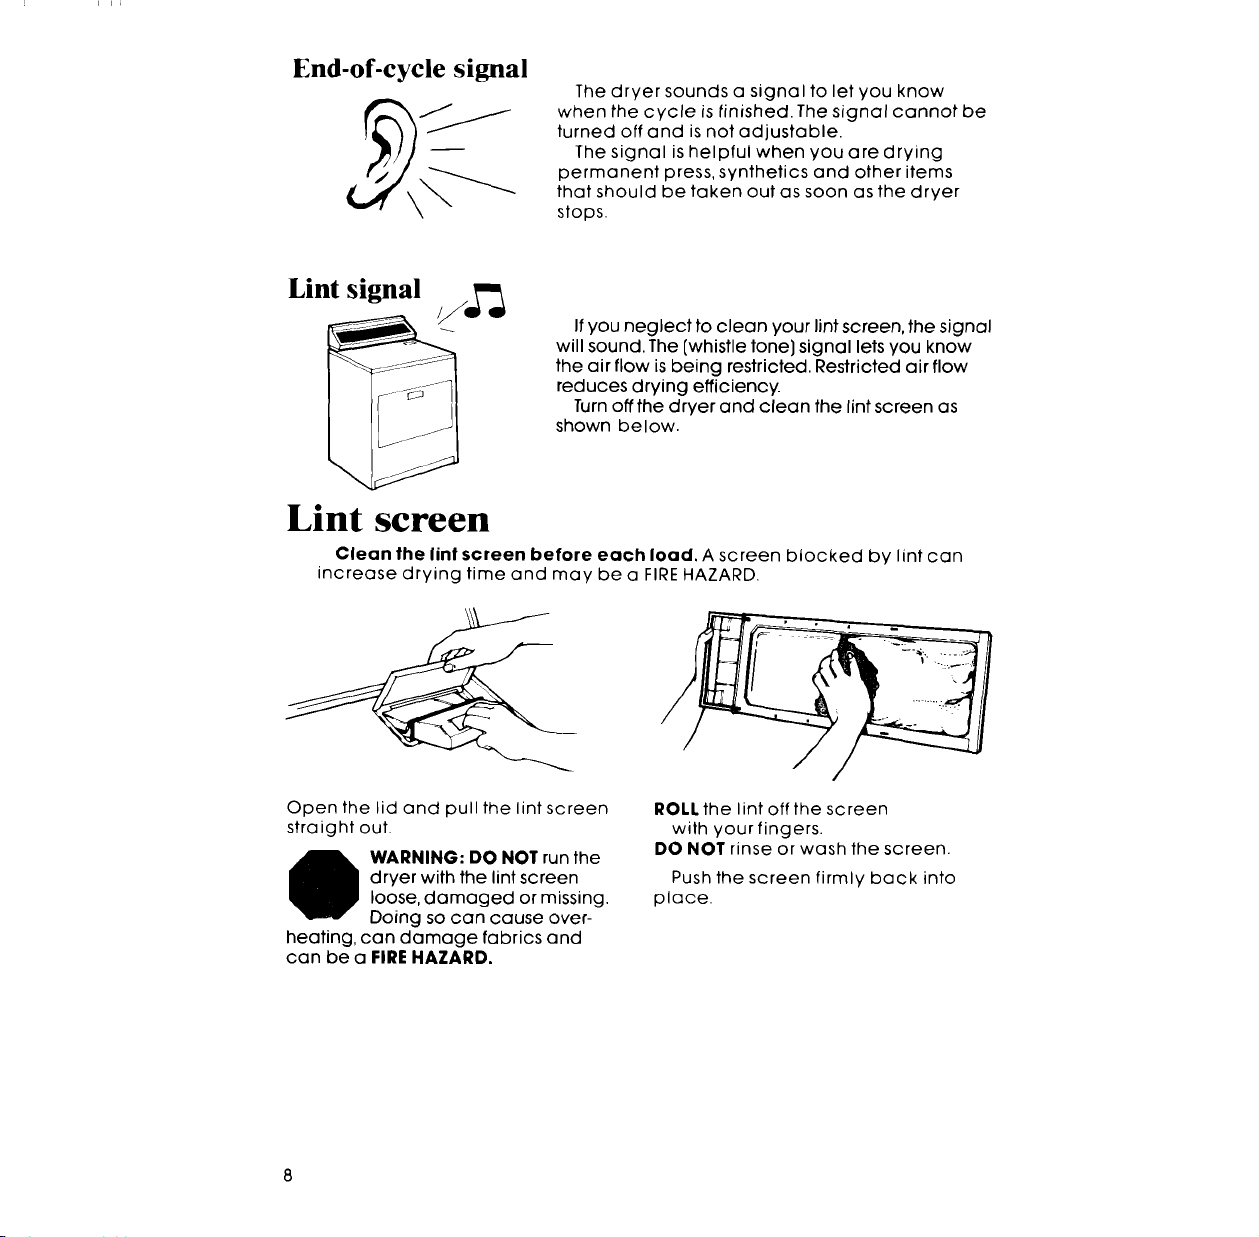
End-of-cycle signal
The dryer sounds a signal to let you know
when the cycle is finished. The signal cannot be
turned off and is not adjustable.
The signal is helpful when you are drying
permanent press, synthetics and other items
that should be taken out as soon as the dryer
stops.
Lint signal
Ifyou neglect to clean your lint screen, the signal
will sound. The [whistle tone] signal lets you know
the air flow is being restricted. Restricted air flow
reduces drying efficiency.
Turn off the dryer and clean the lint screen as
shown below.
Lint screen
Clean the lint screen before each load. A screen blocked by lint can
increase drying time and may be a FIREHAZARD.
Open the lid and pull the lint screen
straight out.
t ARNING: DO NOT run the
dryer with the lint screen
loose, damaged or missing.
Doing so can cause over-
heating, can damage fabrics and
can be a FIRE HAZARD.
ROLL the lint off the screen
with your fingers.
DO NOT rinse or wash the screen.
Push the screen firmly back into
place.
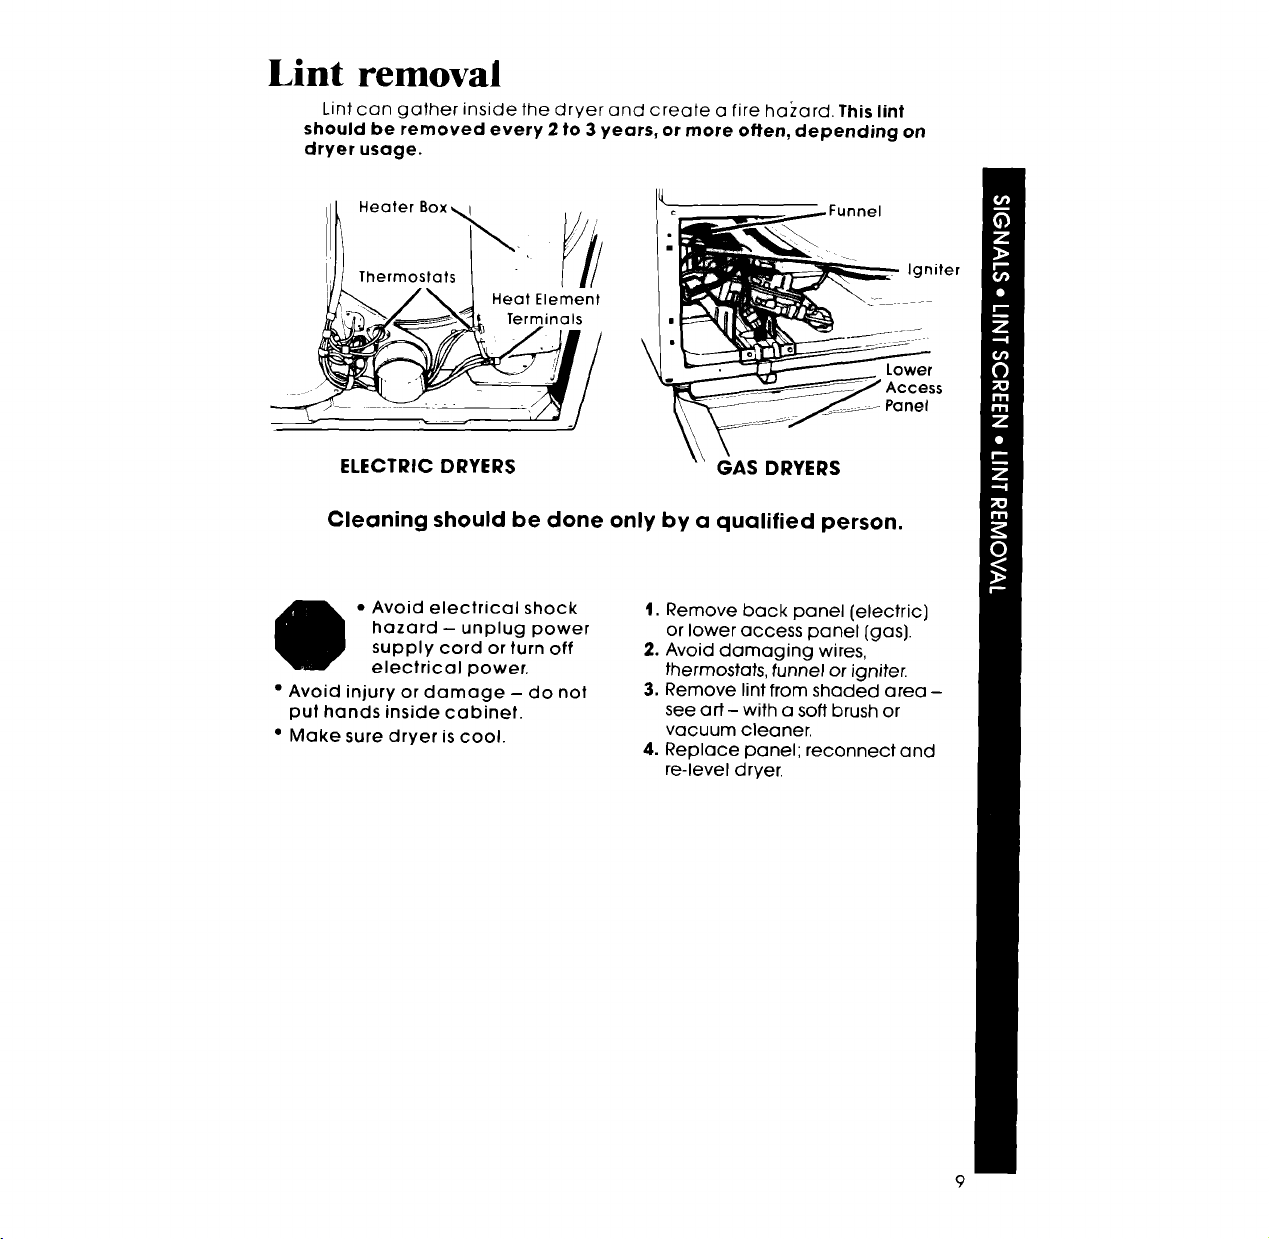
Lint removal
Lint can gather inside the dryer and create a fire hazard. Thislint
should be removed every 2 to 3 years, or more often, depending on
dryer usage.
Heater
Heat Element
Terminals
\
Igniter
Lower
Panel
ELECTRIC DRYERS GAS DRYERS
Cleaning should be done only by a qualified person.
e • Avoid electrical shock
hazard - unplug power
supply cord or turn off
electrical power.
• Avoid injury or damage- do not
put hands inside cabinet.
• Make sure dryer is cool.
t. Remove back panel (electric)
or lower access panel (gas).
2. Avoid damaging wires,
thermostats, tunnel or igniter.
3. Remove lint from shaded area -
see art- with a soft brush or
vacuum cleaner.
4. Replace panel; reconnect and
re-level dryer.
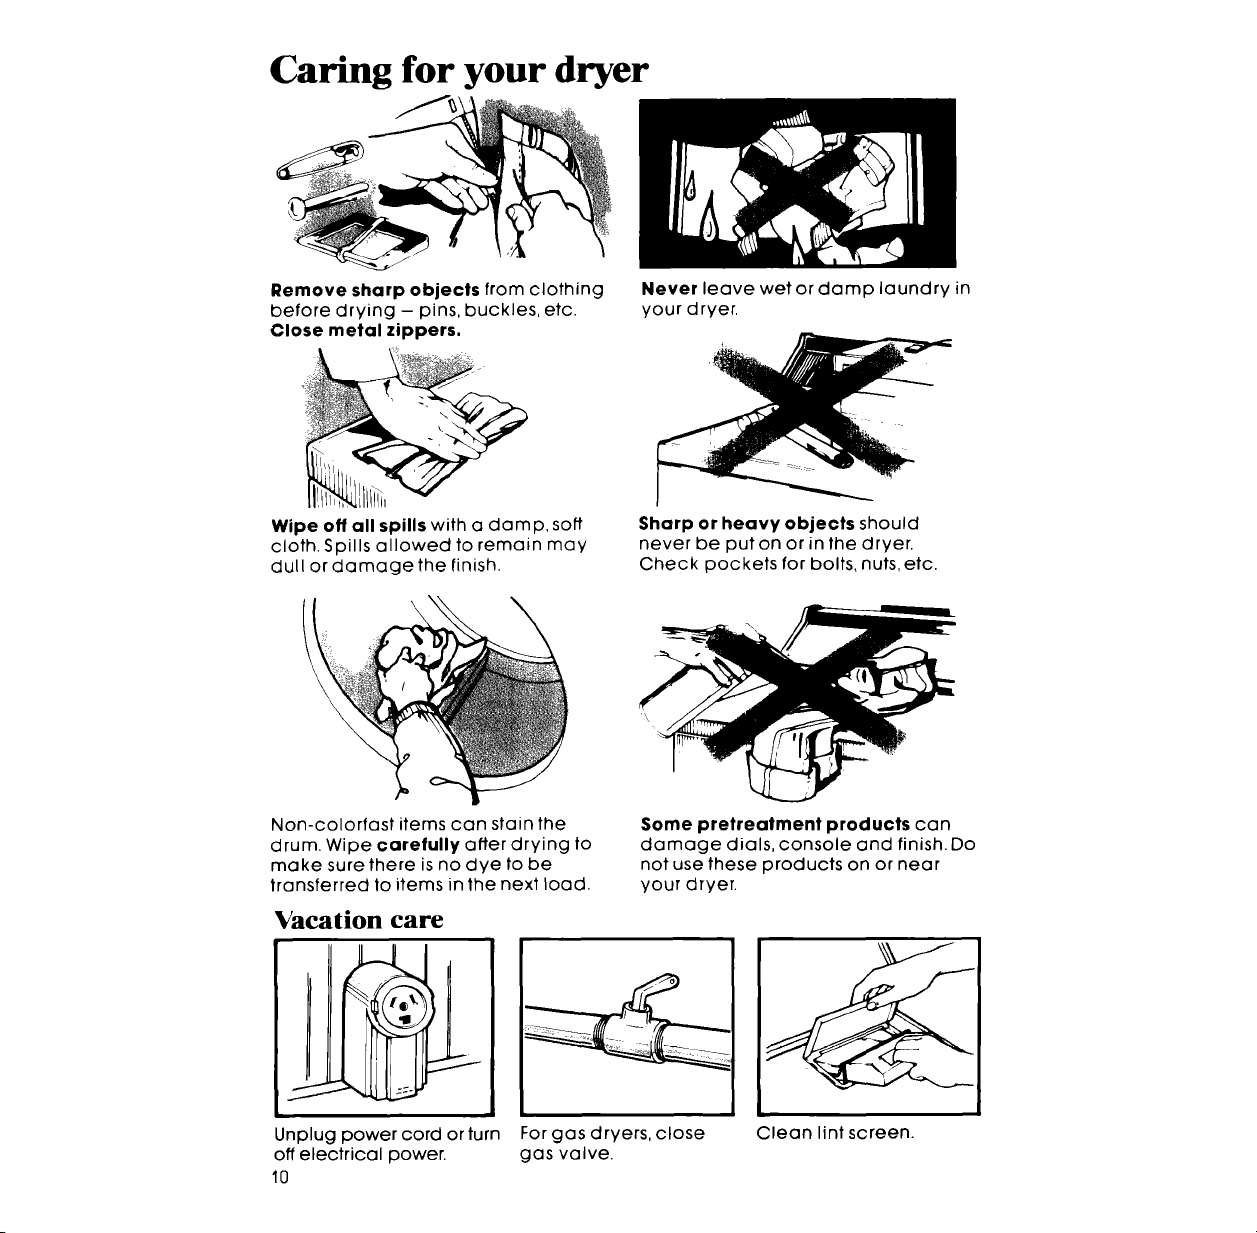
Caring for your dryer
Remove sharp objects from clothing
before drying - pins, buckles, etc.
Close metal zippers.
Never leave wet or damp laundry in
your dryer.
I
Wipe of/all spills with a damp, soft
cloth. Spills allowed to remain may
dull or damage the finish.
Sharp or heavy objects should
never be put on or in the dryer.
Check pockets for bolts, nuts, etc.
Non-colorfast items can stain the
drum. Wipe carefully after drying to
make sure there is no dye to be
transferred to items in the next load.
Some pretreatment products can
damage dials, console and finish. Do
not use these products on or near
your dryer.
Vacation care
Unplug power cord or turn For gas dryers, close
off electrical power, gas valve.
10
Clean lint screen.
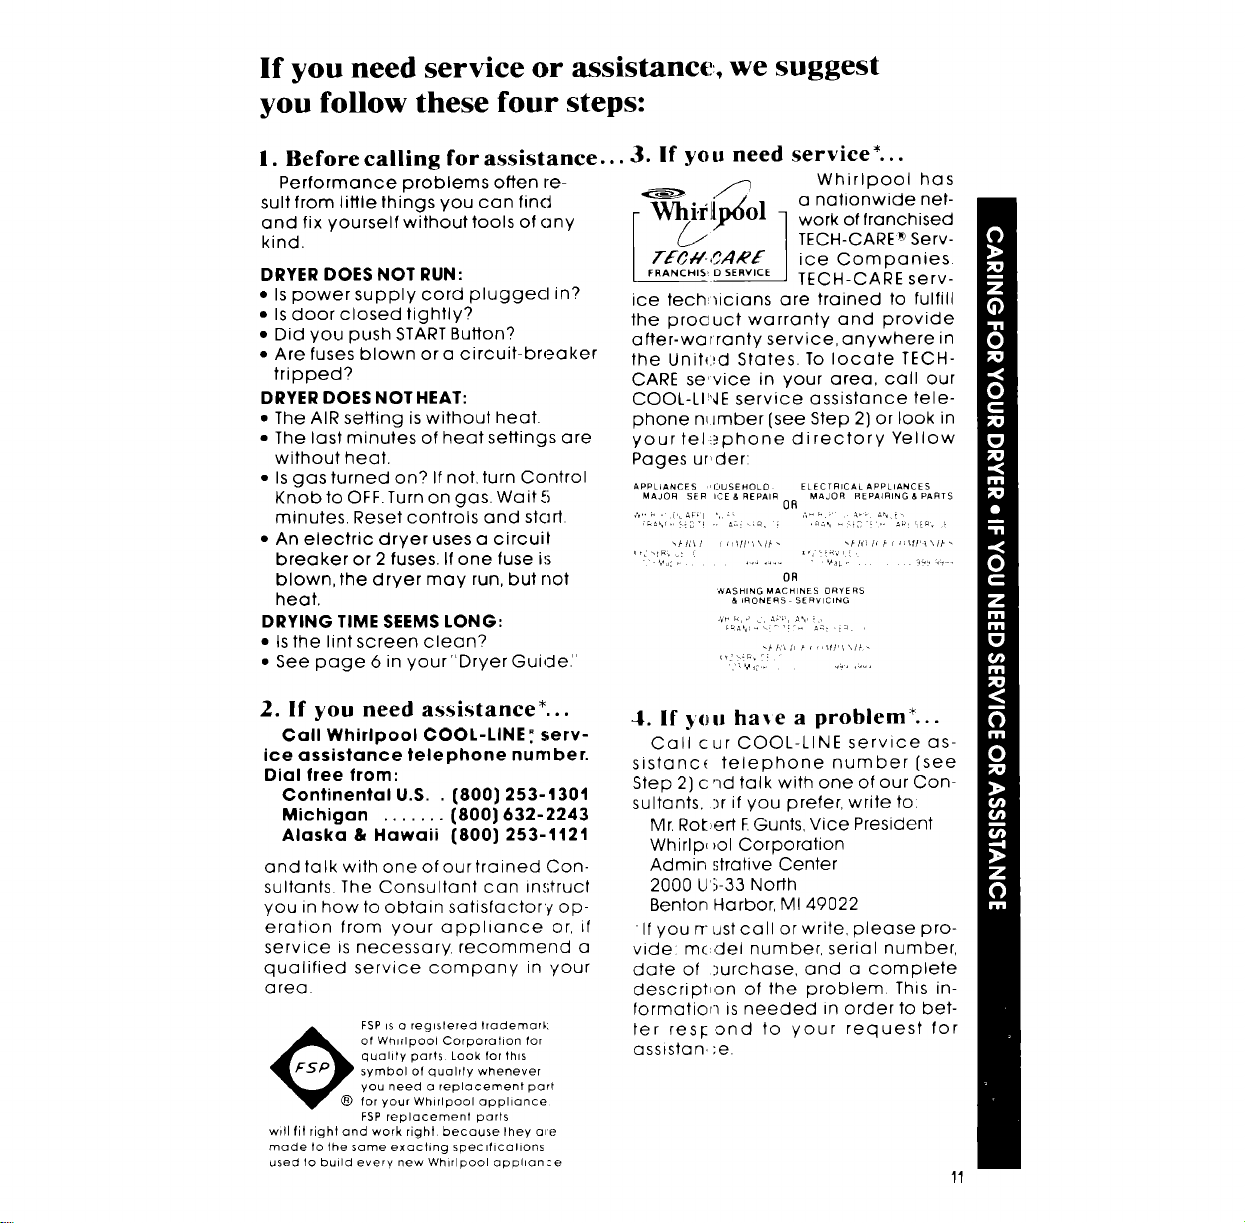
If you need service or assistance, we suggest
you follow these four steps:
I. Before calling for assistance...
Performance problems often re-
sult from little things you can find
and fix yourself without tools of any
kind.
DRYER DOES NOT RUN:
• Is power supply cord plugged in?
• Is door closed tightly?
• Did you push START Button?
• Are fuses blown era circuit-breaker
tripped?
DRYER DOES NOT HEAT:
• The AIR setting is without heat.
• The last minutes of heat settings are
without heat.
• Is gas turned on? If not, turn Control
Knob to OFF. Turn on gas. Wait 5
minutes. Reset controls and start.
• An electric dryer uses a circuit
breaker or 2 fuses. If one fuse is
blown,the dryer may run, but not
heat.
DRYING TIME SEEMS LONG:
• Is the lint screen clean?
• See page 6 in your "DryerGuidei'
3. If you need service*...
Whirlpool has
"_" _ a nationwide net-
TECH-CARE _ Serv-
e F£_//-,_..4R[ ice Companies.
/ F.ANCH,S,:OSE.V,CE TECH-CARE serv-
ice tech_icians are trained to fulfill
the procuct warranty and provide
after-warranty service, anywhere in
the Unihl_d States. To locate TECH-
CARE se,vice in your area, call our
COOL-LI_',IE service assistance tele-
phone nLimber [see Step 2] or look in
yourtel_._phone directory Yellow
Pages ur,der:
APPLIANCES ,'OUSEHOLD ELECTRICAL APPLIANCES
MAJOR SER ICE & REPAIA MAJOR REPAIRING & PARTS
0R
OR
WASHING MACHINES DRYERS
& bRONE!_S SERVICING
2. If you need assistance*...
Call Whirlpool COOL-LiNE ."serv-
ice assistance telephone number.
Dial free from:
Continental U.S.. {800] 253-130'I
Michigan ....... (800] 632-2243
Alaska & Hawaii (800) 253-1121
and talk with one of our trained Con-
sultants. The Consultant can instruct
you in how to obtain satistactory op-
eration from your appliance or, if
service is necessary, recommend a
qualified service company in ,/our
area.
FSP Is a reglslered trademark
of Whvlpool Corporation for
quality parts Look for this
symbol of qualify whenever
you need a replacement part
for your Whirlpool appliance
FSP replacement parts
wi!l tit right and work right becauselheya_e
made to the same exacting speclficalions
used to build every new Whirlpool apphan:e
4. if )'(_,u haxe a problem*...
Call cur COOL-LINE service as-
sistanc_ telephone number [see
Step 2] c nd talk with one of our Con-
sultants, )r if you prefer, write to:
Mr. Robert EGunts, Vice President
Whirlp, _ol Corporation
Admin strative Center
2000 U':;-33 North
Benton Harbor, MI 49022
If you n ust call or write, please pro-
vide: model number, serial number,
date of :;urchase, and a complete
descript,un of the problem This in-
formatior_ is needed in order to bet-
ter res!:ond to your request for
assistan, ;e.
11
Whir l ool
Making your world a little easier.
Part No. 693681
'.c;,1984Whirlpool Corporation
Printed in U.S.A.
;matie Washers, Clothes Oryers, Freezers, Refrigerator-Freezers, Ice Makers, Dishwashers, Built-In Ovens and Su'rfaceUnits, Ranges, Mi(
AUTOMATIC
DRYERS
LI._7681XM
E:lectric Model
LI-7680XM
a,11d
Gas Model
!
;rowave Ovens, Trash Compactors, Room A_r Conditioners. Oehumid=fiers, Automatic V, _shers, Clothes Oryers, Freezers, Refrigerator-Freezer
Parts and features
CYCLE CONTROL KNOB
I _ LAUNDRY
___ INFORMATION CENTER
__ _\ TEM PERATURESELECTOR
;_'""'"_"'-START BUTTON
_,,_w- _ LINT SCREEN
[_ " 1 DRYER DRUM
LOADING DOOR
MODEL
AND SERIAL
PLATE
Remove the Con-
sumer Buy Guide la-
bel before using
your dryer. It will be
easier to remove.
Wipe out the
dryer drum with a
damp cloth to re-
move dust from stor-
ing or shipping.
Cop) )our Model and Serial Numbers here
When you need service or call with a
question, have this information ready
1. Complete Model and Serial Numbers
[from the plate located as shown/
2. Purchase date from salesslip
Copy this information in these spaces
Keep this book, your warranty, sales slip
and "Dryer Guide" in the Laundry Infor
marion Center on the back of the dryer Service Company and
console Telephone Number
There is no warranty registration to return Proof-of-purchase is all
that is required tar in-warranty service
Complete Model Number
Complete Serial Number
Purchase Date
Contents Page
PARTSAND FEATURES........... 2
YOUR RESPONSIBILITIES......... 3
SAFETYFIRST................... 3
SELECTING A CYCLE AND
STARTINGYOUR DRYER ....... 4
OPERATING INSTRUCTIONS ..... 6
Automatic Cycles ........... 6
Timed Drying ............... 6
DRYING TIPS................... 7
FLUFFAIR Setting ............. 7
TUMBLEPRESS_Control ....... 7
Drying Times ................ 7
Mixed Loads ................ 7
Page
End-of-Cycle Signal ......... 8
LintSignal ................... 8
LINTSCREEN .................. 8
LINTREMOVAL ................. 9
CARING FORYOUR DRYER...... 10
Vacation Ca re .............. 10
IF YOU NEED SERVICE OR
ASSISTANCE ................. 11
I. Before Calling for
Assistance ................ 11
2, If You Need Assistance .... 11
3, If You Need Service ....... 11
4. IfYou Have a Problem ..... 11
c 1984 Whirlpool Corporation
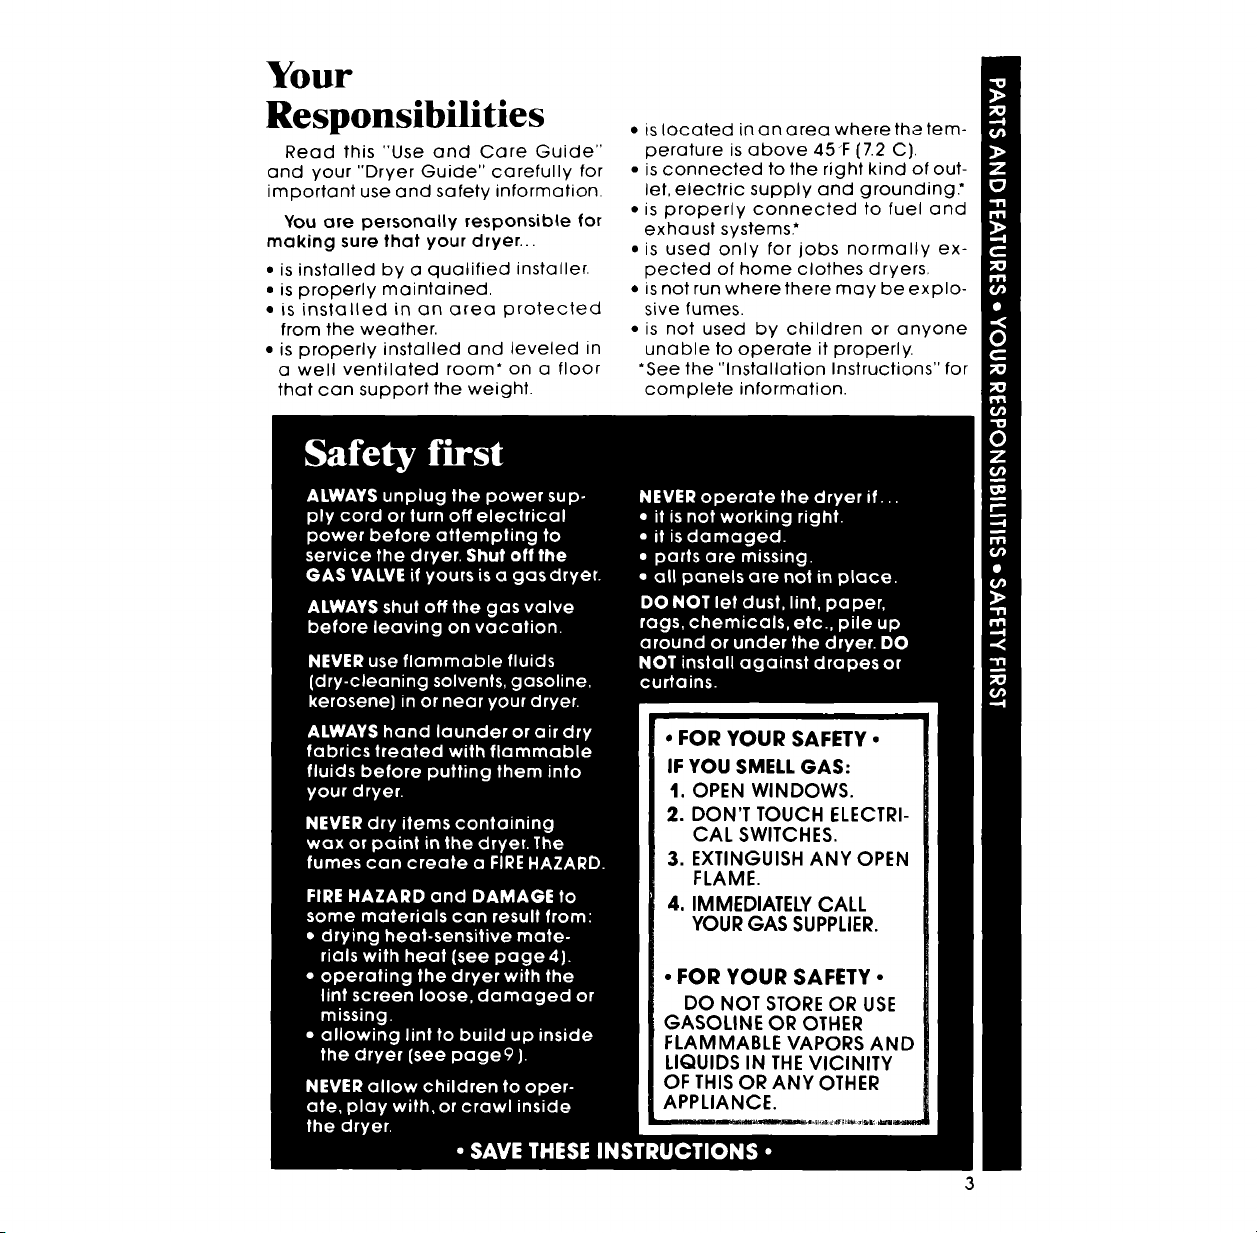
Your
Responsibilities
Read this "Use and Care Guide"
and your "Dryer Guide" carefully for
important use and safety information.
You are personally responsible for
making sure that your dryer...
• isinstalledby a qualified installer.
• isproperly maintained,
• is installed in an area protected
from the weather.
• is properly installed and leveled in
a well ventilated room* on a floor
that can support the weight.
• is located in an area where the tem-
perature is above 45"F (7.2 C).
• is connected to the right kind of out-
let, electric supply and grounding."
• is properly connected to fuel and
exhaust systems.*
• is used only for jobs normally ex-
pected of home clothes dryers.
• is not run where there may be explo-
sive fumes.
• is not used by children or anyone
unable to operate it properly.
"See the "Installation Instructions" for
complete information.
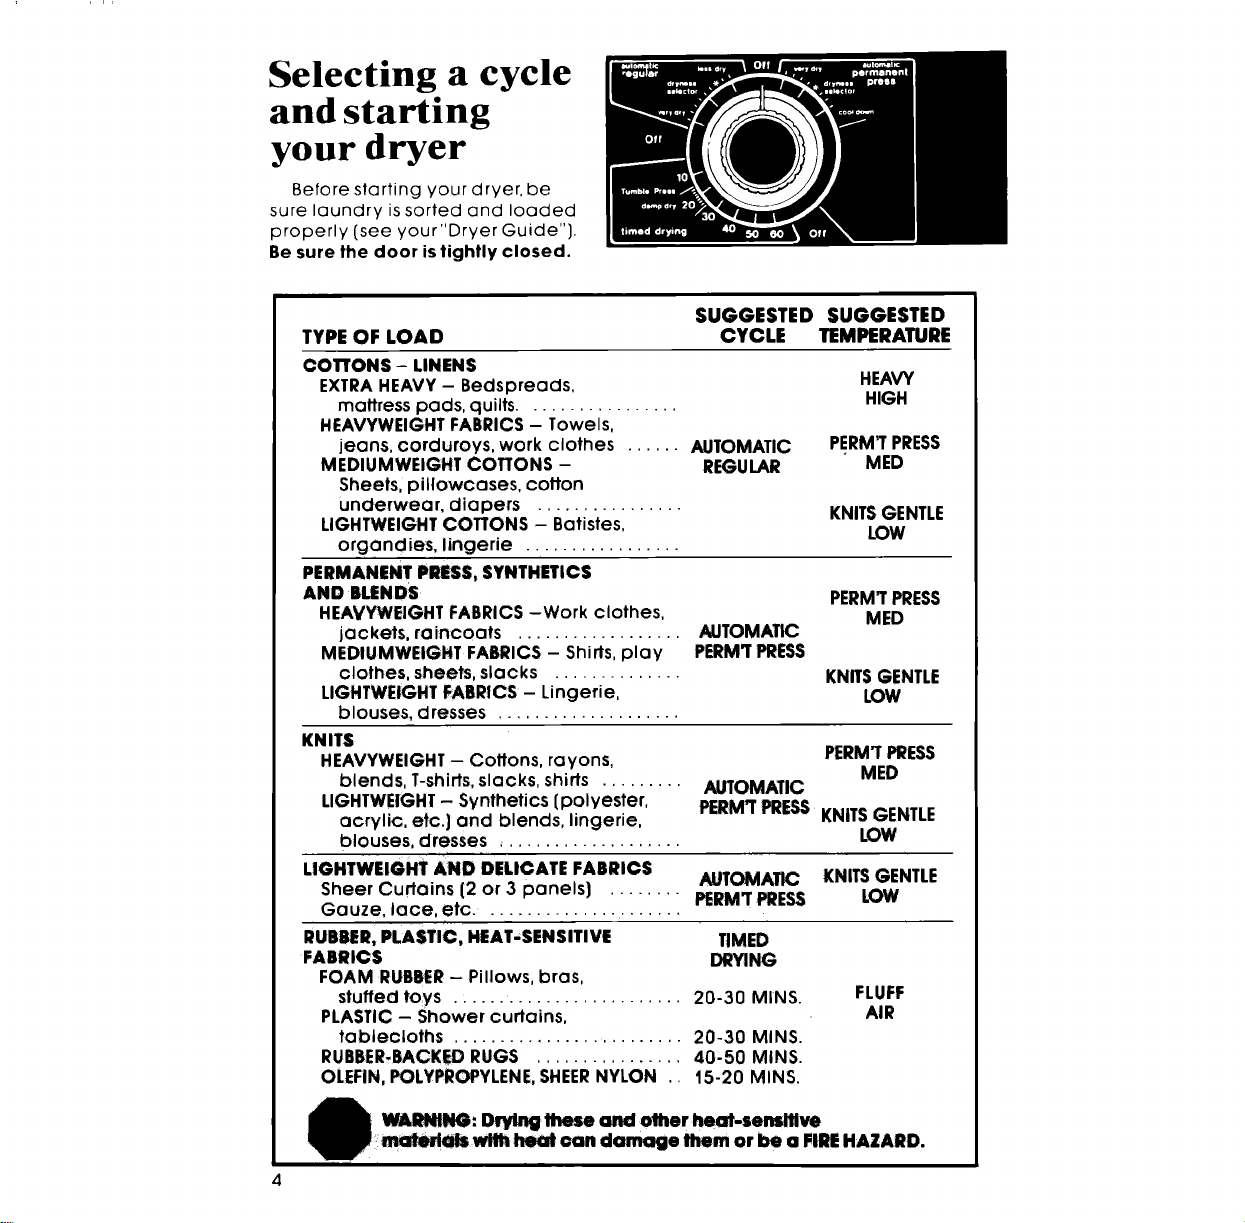
Selecting a cycle
and starting
your dryer
Before starting your dryer, be
sure laundry is sorted and loaded
properly [see your "Dryer Guide"].
Be sure the door is tightly closed.
4
SUGGESTED SUGGESTED
TYPE OF LOAD CYCLE TEMPERATURE
COTTONS - LINENS
EXTRA HEAVY - Bedspreads,
mattress pads, quilts .................
HEAVYWEIGHT FABRICS - Towels,
jeans, corduroys, work clothes ...... AUTOMATIC
MEDIUMWEIGHT COTTONS - REGULAR
Sheets, pillowcases, cotton
underwear, diapers ................
LIGHTWEIGHT COTTONS - Batistes,
organdies, lingerie .................
PERMANENT PRESS, SYNTHETICS
AND BLENDS
HEAVYWEIGHT FABRICS -Work clothes,
jackets, raincoats .................. AUTOMATIC
MEDIUMWEIGHT FABRICS - Shirts, play PERM'TPRESS
clothes, sheets, slacks ..............
LIGHTWE|GHT FABRICS- Lingerie,
blouses, dresses ....................
HEAVY
HIGH
PERM'TPRESS
MED
KNITSGENTLE
LOW
PERM'TPRESS
MED
KNITSGENTLE
LOW
KNITS
HEAVYWEIGHT - Cottons, rayons,
blends, T-shirts, slacks, shirts .........
LIGHTWEIGHT - Synthetics [polyester,
acrylic, etc.)and blends, lingerie,
blouses, dresses ....................
LIGHTWEIGHT AND DELICATE FABRICS
Sheer Curtains (2or 3 panels] AUTOMATIC
........ PERM'r PRESS
Gauze, lace, etc. .....................
RUBBER, PLASTIC, HEAT,SENSITIVE TIMED
FABRICS DRYING
FOAM RUBBER - Pillows, bras,
stuffed toys . : .... ................... 20-30 MINS.
PLASTIC - Shower curtains,
tablecloths ......................... 20-30 MINS.
RUBBER+BACKED RUGS ................ 40,50 MINS.
OLEFIN, POLYPROPYLENE, SHEERNYLON .. 15-20 MINS.
PERM'[PRESS
MED
AUTOMATIC
PERM'TPRESSKNITSGENTLE
LOW
KNITSGENTLE
LOW
FLUFF
AIR
WARNING: Drvlngthese and onmr heat-sensltlve
_wtth heat can damage lhem or be a FIREHAZARD.
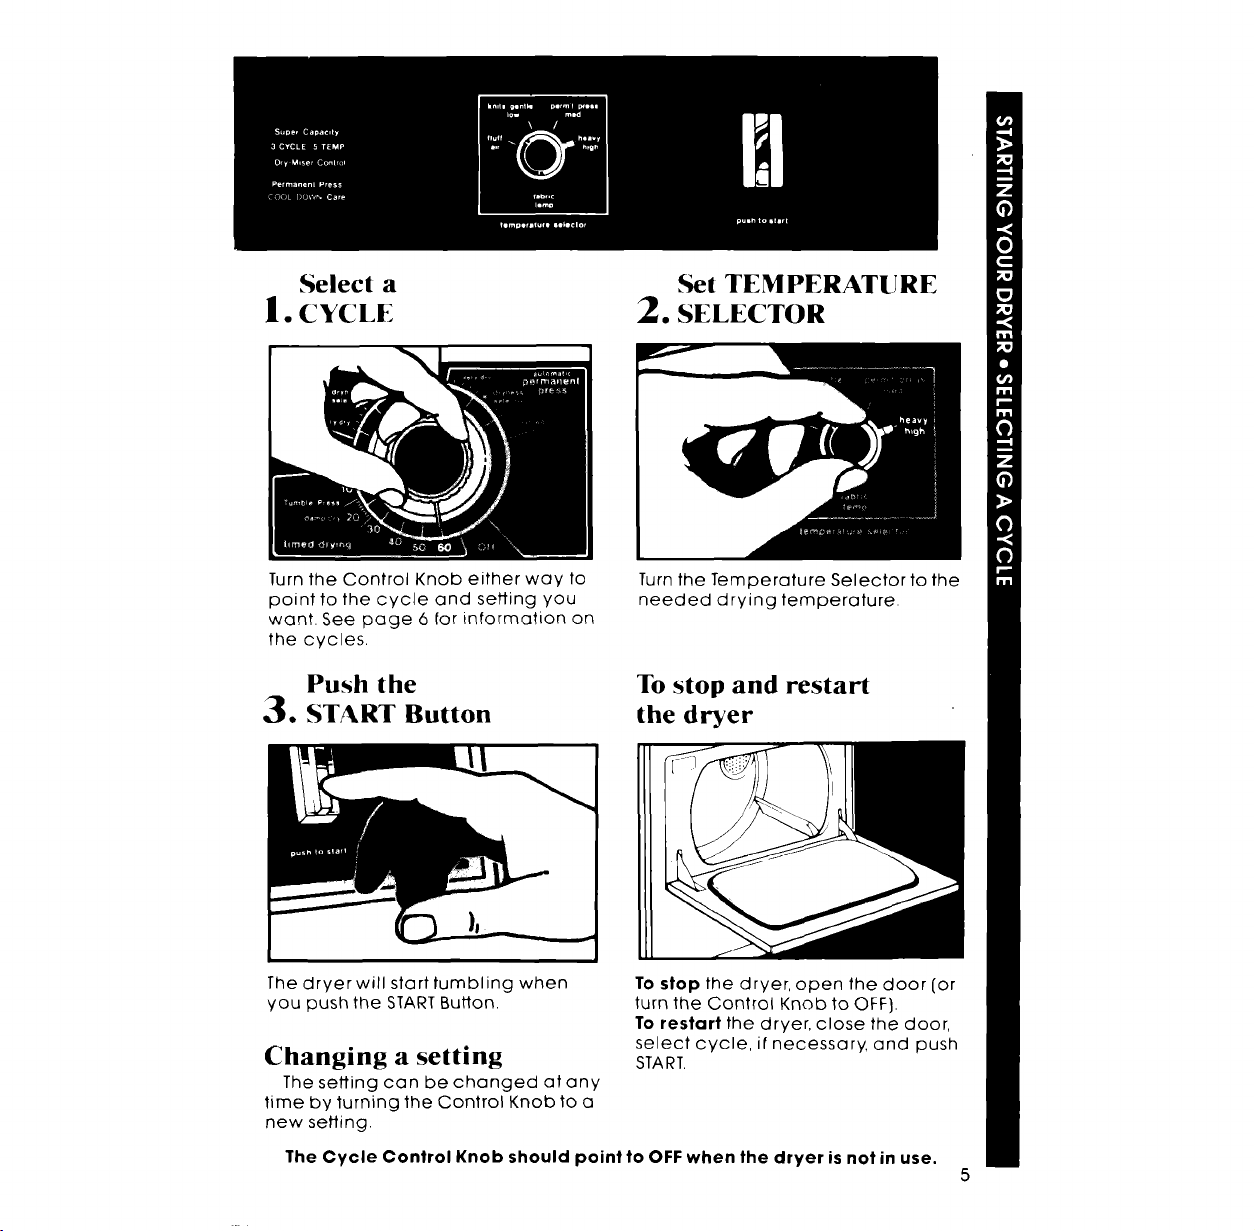
Select a
1. CYCLE
Set TEMPERATURE
2. SELECTOR
Turn the Control Knob either way to
point to the cycle and setting you
want. See page 6 for information on
the cycles.
Push the
3. START Button
Turn the Temperature Selector to the
needed drying temperature.
To stop and restart
the dryer
The dryer will start tumbling when
you push the START Button.
Changing a setting
The setting can be changed at any
time by turning the Control Knob to a
new setting.
To stop the dryer, open the door [or
turn the Control Knob to OFF].
To restart the dryer, close the door,
select cycle, if necessary, and push
START.
The Cycle Control Knob should point to OFF when the dryer is not in use.
5
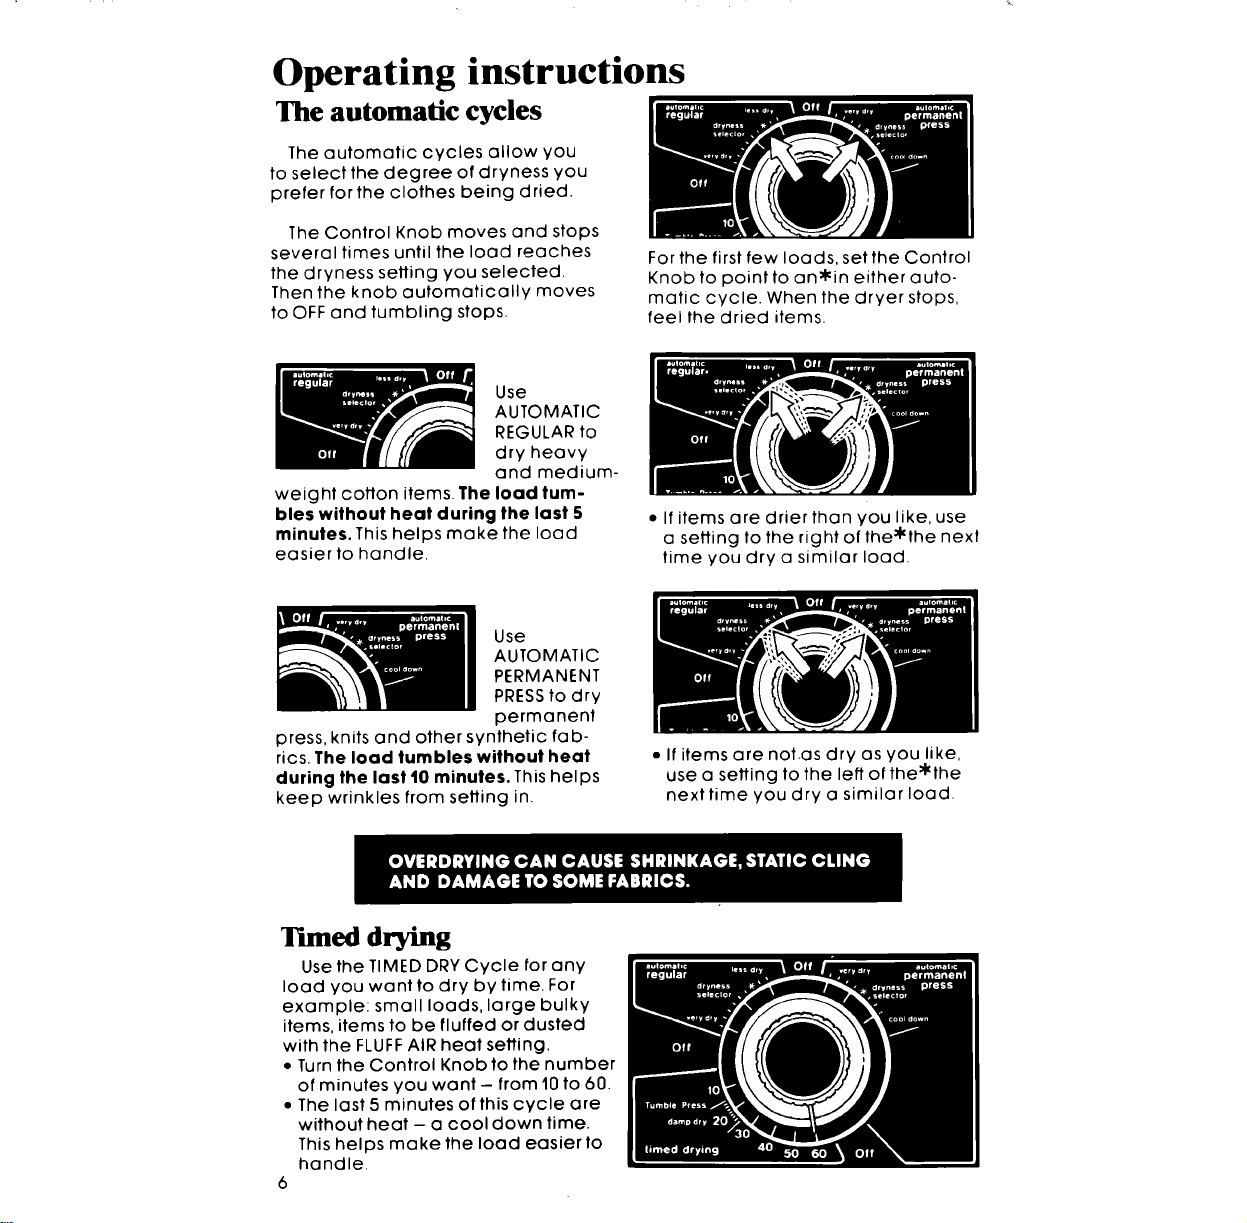
Operating instructions
The automatic cycles
The automatic cycles allow you
to select the degree of dryness you
prefer for the clothes being dried.
The Control Knob moves and stops
several times until the load reaches
the dryness setting you selected.
Then the knob automatically moves
to OFF and tumbling stops.
For the first few loads, set the Control
Knob to point to an*in either auto-
matic cycle. When the dryer stops,
feel the dried items.
Use
AUTOMATIC
REGULAR to
dry heavy
and medium-
weight cotton items, the load tum-
bles without heat during the last 5
minutes. This helps make the load
easier to handle.
• If items are drier than you like, use
a setting to the right of the*the next
time you dry a similar load.
Use
AUTOMATIC
PERMANENT
PRESSto dry
permanent
press, knits and other synthetic fab-
rics. The load tumbles without heat
during the last 10 minutes. Thishelps
keep wrinkles from setting in.
• If items are not.as dry as you like,
use a setting to the left of the*the
next time you dry a similar load.
Timed drying
Use the TIMED DRY Cycle for any
load you want to dry by time. For
example: small loads, large bulky
items, items to be fluffed or dusted
with the FLUFF AIR heat setting.
• Turn the Control Knob to the number
of minutes you want- from 10 to 60.
• The last 5 minutes of this cycle are
without heat - a cool down time.
This helps make the load easier to
handle.
6
Drying
FLUFF A_
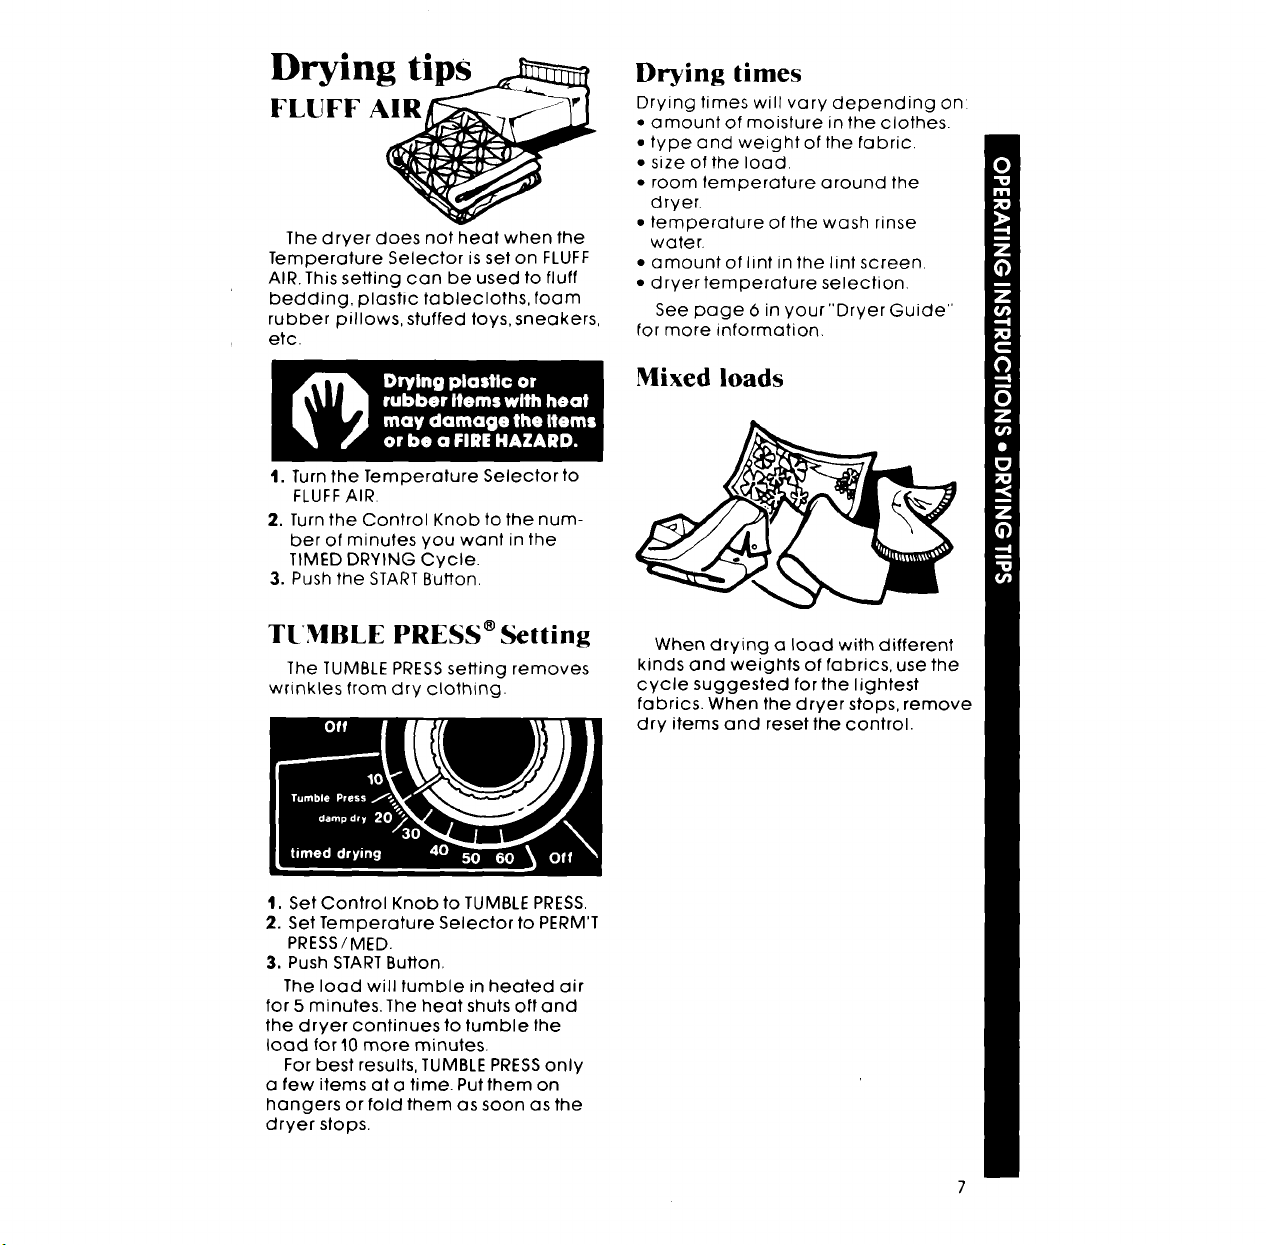
The dryer does not heat when the
Temperature Selector is set on FLUFF
AIR. This setting can be used to fluff
bedding, plastic tablecloths, foam
rubber pillows, stuffed toys, sneakers,
etc.
1. Turn the Temperature Selector to
FLUFFAIR.
2. Turn the Control Knob to the num-
ber of minutes you want in the
TIMED DRYING Cycle.
3. Push the START Button.
TUMBLE PRESS ®Setting
The TUMBLE PRESS setting removes
wrinkles from dry clothing.
Drying times
Drying times will vary depending onl
• amount of moisture in the clothes.
• type and weight of the fabric.
• size of the load.
• room temperature around the
dryer.
• temperature of the wash rinse
water.
• amount of lint in the lint screen.
• dryer temperature selection.
See page 6 in your "Dryer Guide"
for more information,
Mixed loads
When drying a load with different
kinds and weights of fabrics, use the
cycle suggested for the lightest
fabrics. When the dryer stops, remove
dry items and reset the control.
t. Set Control Knob to TUMBLEPRESS,
2. Set Temperature Selector to PERM'T
PRESS/MED.
3. Push STARTButton,
The load will tumble in heated air
for 5 minutes. The heat shuts art and
the dryer continues to tumble the
load for 10 more minutes.
For best results, TUMBLE PRESSonly
a few items at a time. Put them on
hangers or fold them as soon as the
dryer stops.
End-of-cycle signal
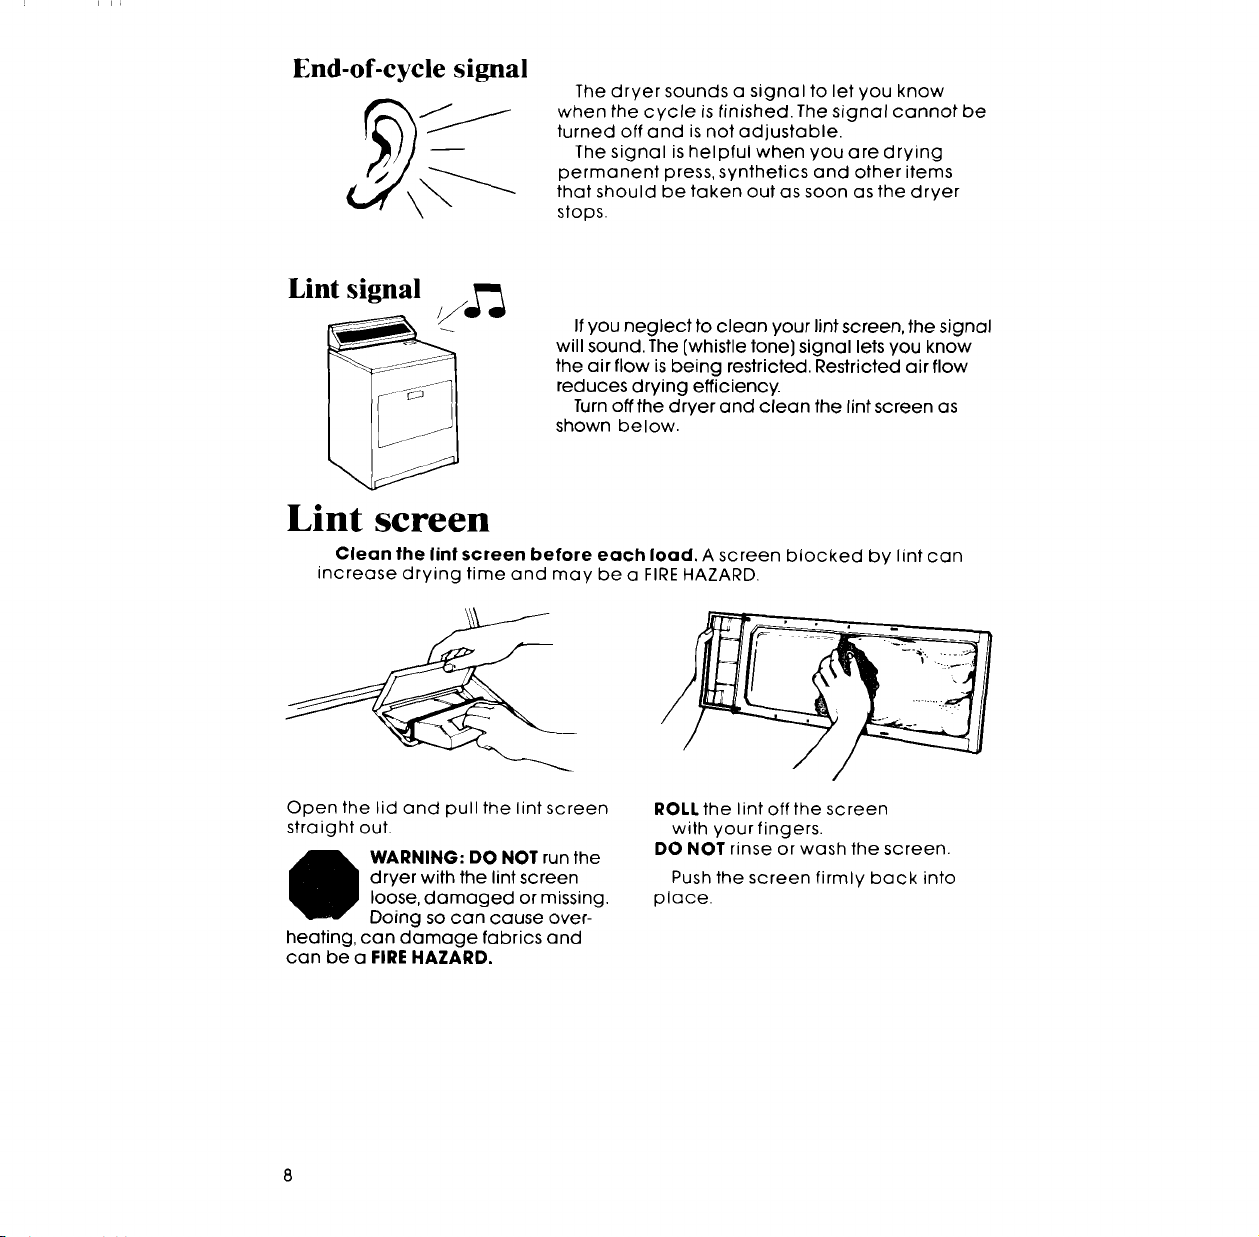
The dryer sounds a signal to let you know
when the cycle is finished. The signal cannot be
turned off and is not adjustable.
The signal is helpful when you are drying
permanent press, synthetics and other items
that should be taken out as soon as the dryer
stops.
Lint signal
Ifyou neglect to clean your lint screen, the signal
will sound. The [whistle tone] signal lets you know
the air flow is being restricted. Restricted air flow
reduces drying efficiency.
Turn off the dryer and clean the lint screen as
shown below.
Lint screen
Clean the lint screen before each load. A screen blocked by lint can
increase drying time and may be a FIREHAZARD.
Open the lid and pull the lint screen
straight out.
t ARNING: DO NOT run the
dryer with the lint screen
loose, damaged or missing.
Doing so can cause over-
heating, can damage fabrics and
can be a FIRE HAZARD.
ROLL the lint off the screen
with your fingers.
DO NOT rinse or wash the screen.
Push the screen firmly back into
place.
Lint removal
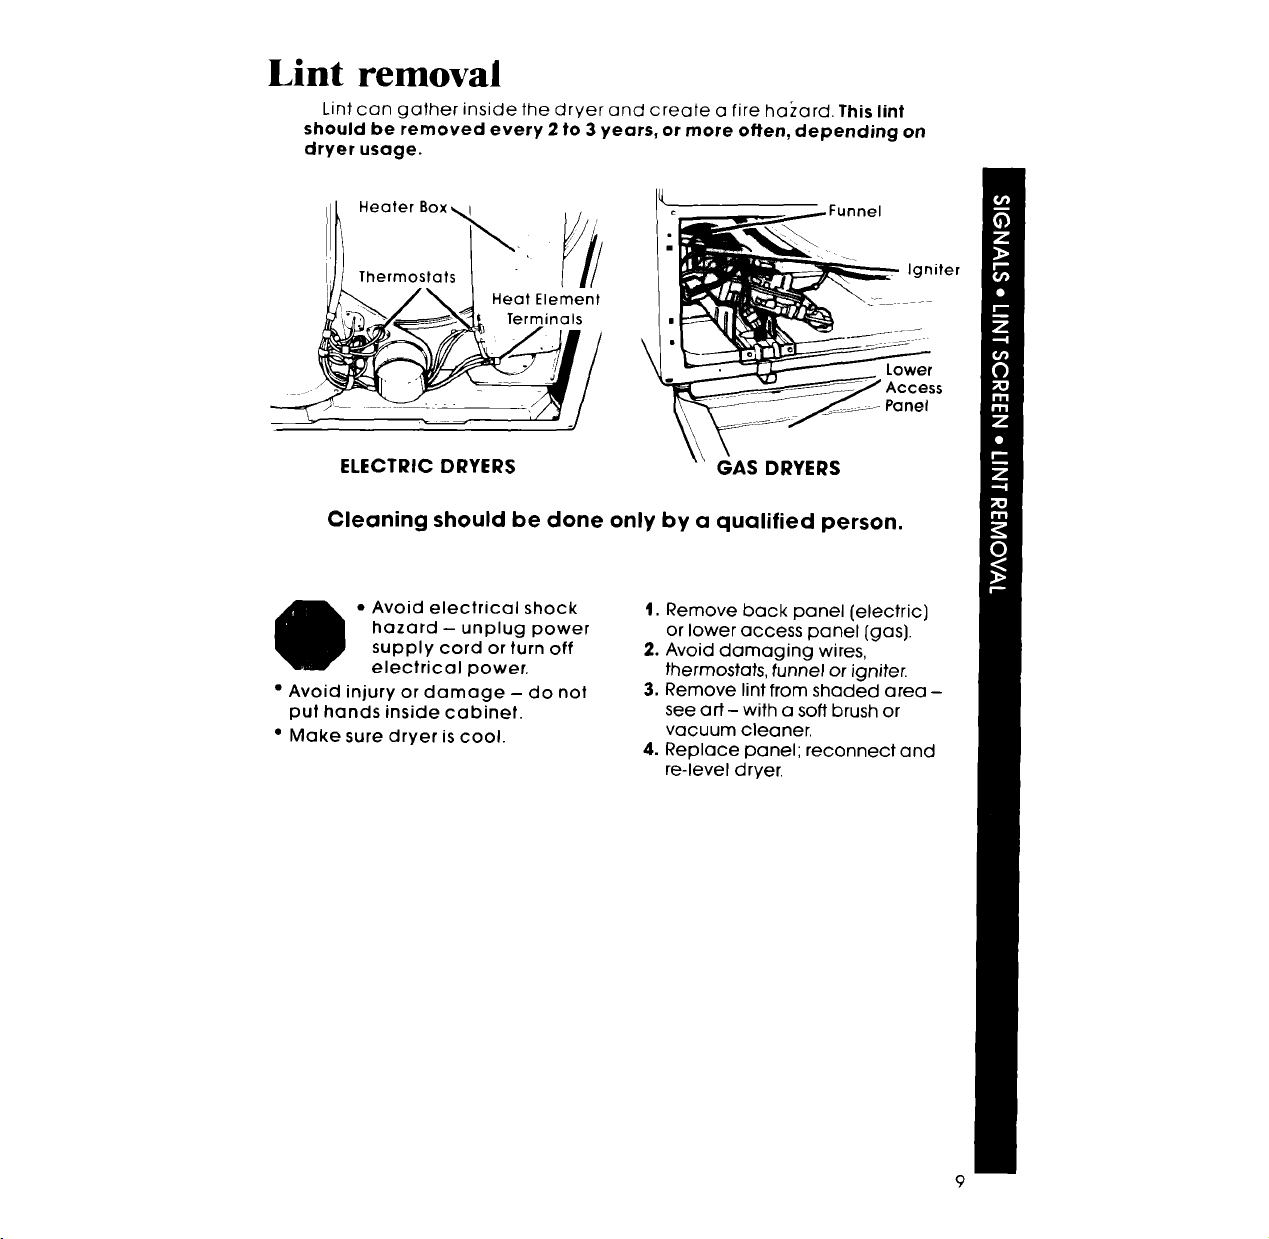
Lint can gather inside the dryer and create a fire hazard. Thislint
should be removed every 2 to 3 years, or more often, depending on
dryer usage.
Heater
Heat Element
Terminals
\
Igniter
Lower
Panel
ELECTRIC DRYERS GAS DRYERS
Cleaning should be done only by a qualified person.
e • Avoid electrical shock
hazard - unplug power
supply cord or turn off
electrical power.
• Avoid injury or damage- do not
put hands inside cabinet.
• Make sure dryer is cool.
t. Remove back panel (electric)
or lower access panel (gas).
2. Avoid damaging wires,
thermostats, tunnel or igniter.
3. Remove lint from shaded area -
see art- with a soft brush or
vacuum cleaner.
4. Replace panel; reconnect and
re-level dryer.
Caring for your dryer
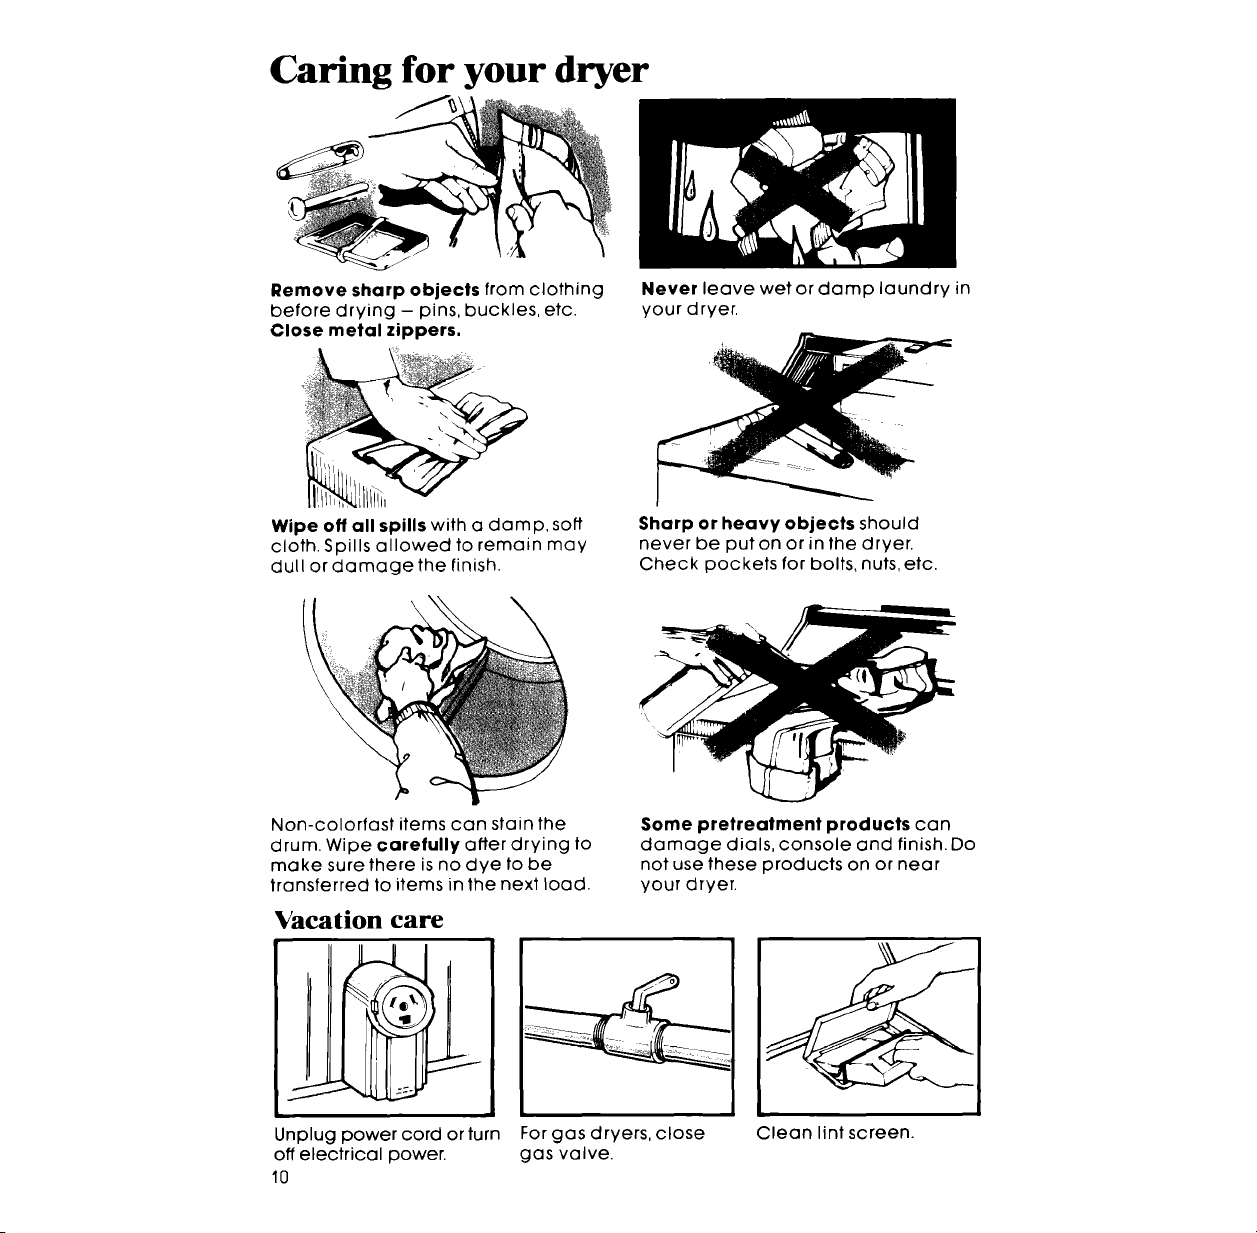
Remove sharp objects from clothing
before drying - pins, buckles, etc.
Close metal zippers.
Never leave wet or damp laundry in
your dryer.
I
Wipe of/all spills with a damp, soft
cloth. Spills allowed to remain may
dull or damage the finish.
Sharp or heavy objects should
never be put on or in the dryer.
Check pockets for bolts, nuts, etc.
Non-colorfast items can stain the
drum. Wipe carefully after drying to
make sure there is no dye to be
transferred to items in the next load.
Some pretreatment products can
damage dials, console and finish. Do
not use these products on or near
your dryer.
Vacation care
Unplug power cord or turn For gas dryers, close
off electrical power, gas valve.
10
Clean lint screen.
If you need service or assistance, we suggest
you follow these four steps:
I. Before calling for assistance...
Performance problems often re-
sult from little things you can find
and fix yourself without tools of any
kind.
DRYER DOES NOT RUN:
• Is power supply cord plugged in?
• Is door closed tightly?
• Did you push START Button?
• Are fuses blown era circuit-breaker
tripped?
DRYER DOES NOT HEAT:
• The AIR setting is without heat.
• The last minutes of heat settings are
without heat.
• Is gas turned on? If not, turn Control
Knob to OFF. Turn on gas. Wait 5
minutes. Reset controls and start.
• An electric dryer uses a circuit
breaker or 2 fuses. If one fuse is
blown,the dryer may run, but not
heat.
DRYING TIME SEEMS LONG:
• Is the lint screen clean?
• See page 6 in your "DryerGuidei'
3. If you need service*...
Whirlpool has
"_" _ a nationwide net-
TECH-CARE _ Serv-
e F£_//-,_..4R[ ice Companies.
/ F.ANCH,S,:OSE.V,CE TECH-CARE serv-
ice tech_icians are trained to fulfill
the procuct warranty and provide
after-warranty service, anywhere in
the Unihl_d States. To locate TECH-
CARE se,vice in your area, call our
COOL-LI_',IE service assistance tele-
phone nLimber [see Step 2] or look in
yourtel_._phone directory Yellow
Pages ur,der:
APPLIANCES ,'OUSEHOLD ELECTRICAL APPLIANCES
MAJOR SER ICE & REPAIA MAJOR REPAIRING & PARTS
0R
OR
WASHING MACHINES DRYERS
& bRONE!_S SERVICING
2. If you need assistance*...
Call Whirlpool COOL-LiNE ."serv-
ice assistance telephone number.
Dial free from:
Continental U.S.. {800] 253-130'I
Michigan ....... (800] 632-2243
Alaska & Hawaii (800) 253-1121
and talk with one of our trained Con-
sultants. The Consultant can instruct
you in how to obtain satistactory op-
eration from your appliance or, if
service is necessary, recommend a
qualified service company in ,/our
area.
FSP Is a reglslered trademark
of Whvlpool Corporation for
quality parts Look for this
symbol of qualify whenever
you need a replacement part
for your Whirlpool appliance
FSP replacement parts
wi!l tit right and work right becauselheya_e
made to the same exacting speclficalions
used to build every new Whirlpool apphan:e
4. if )'(_,u haxe a problem*...
Call cur COOL-LINE service as-
sistanc_ telephone number [see
Step 2] c nd talk with one of our Con-
sultants, )r if you prefer, write to:
Mr. Robert EGunts, Vice President
Whirlp, _ol Corporation
Admin strative Center
2000 U':;-33 North
Benton Harbor, MI 49022
If you n ust call or write, please pro-
vide: model number, serial number,
date of :;urchase, and a complete
descript,un of the problem This in-
formatior_ is needed in order to bet-
ter res!:ond to your request for
assistan, ;e.
11
Whir l ool
Making your world a little easier.
Part No. 693681
'.c;,1984Whirlpool Corporation
Printed in U.S.A.
;matie Washers, Clothes Oryers, Freezers, Refrigerator-Freezers, Ice Makers, Dishwashers, Built-In Ovens and Su'rfaceUnits, Ranges, Mi(