Loading ...
Loading ...
Loading ...
14
• For the best mulching performance, set the cutting height
to remove approximately one third of the grass length,
ideally no more than 1.5 in. at one time. If the grass is
overgrown, it may be necessary to increase the cut height
to make it easier to mow and to prevent overloading
the motor. Slow your cutting pace in tall or thick grass
conditions. For mulching extremely thick or tall grass, it is
advisable to rst cut at a high cut-height setting, and then
re-cut to the nal cut height. Otherwise, make narrower
cuts and mow slowly. ALWAYS MAKE SURE THAT THE
BLADE IS SHARP.
Maintenance + Care
m
WARNING! Before cleaning, repairing or inspecting the
mower, stop the machine, remove the batteries and the safety
key. Verify that all moving parts have come to a complete stop.
General
• Always keep the mower clean and free of grass, dirt or
other debris.
• Keep the handles dry, clean and free of oil and grease.
• After each cutting session, remove accumulated grass
clippings and debris using either a dry cloth or handbrush.
You may also clean the equipment with a damp cloth and
some soft, non-abrasive soap. Do not use cleaning agents
or harsh solvents as they may damage the equipment's
plastic components. Make sure that no water penetrates
the equipment's interior as intake of water can destroy the
switch mechanism and the electric motor.
• Do not clean the lawn mower with running water,
particularly with high-pressure water.
• Check all nuts, bolts and screws for proper tightness
before each use.
• Frequently inspect the grass collection bag assembly for
signs of wear and replace immediately with a genuine part
if damage is found.
• Replace excessively worn or damaged parts immediately.
• To maximize your mower's longevity, all screwed parts,
including the wheels and axles, should be cleaned and
lubricated. There are no parts inside the equipment which
require additional maintenance or lubrication.
Blade Maintenance
IMPORTANT: The mower blade is sharp and can cause severe
personal injury if handled incorrectly. Wrap the blade or wear
protective gloves, and use extra caution when handling.
The steel blade is designed to provide a ne cut in long or
tough grass. Deterioration in the quality of cut indicates blade
wear or damage. Follow these steps to determine if the blade
needs to be resharpened or replaced:
1. Disconnect the power supply to the mower by removing
the batteries and the safety key.
2. Turn the mower on its side to expose the underside of the
blade housing.
3. Check the blade.
a. If the blade is blunt or has minor wear, then resharpen.
b. If the blade shows signs of major wear or damage
(i.e. gouged, bent), replace.
mWARNING! An excessively vibrating mower indicates
that the blade is not properly balanced or has become
deformed from striking an object. In this case, the blade must
be repaired or replaced. Please follow the proper maintenance
procedures for blade care.
Blade Replacement
IMPORTANT: Only use original replacement parts specied
for this mower. The use of parts that do not meet the original
equipment specications may lead to improper performance
of the lawn mower, may compromise operator safety.
1. Remove the batteries and the safety key from the mower.
2. Turn the mower on its side to expose the underside of the
blade housing.
3. Use a cloth to grip the blade or wear heavy-duty gloves.
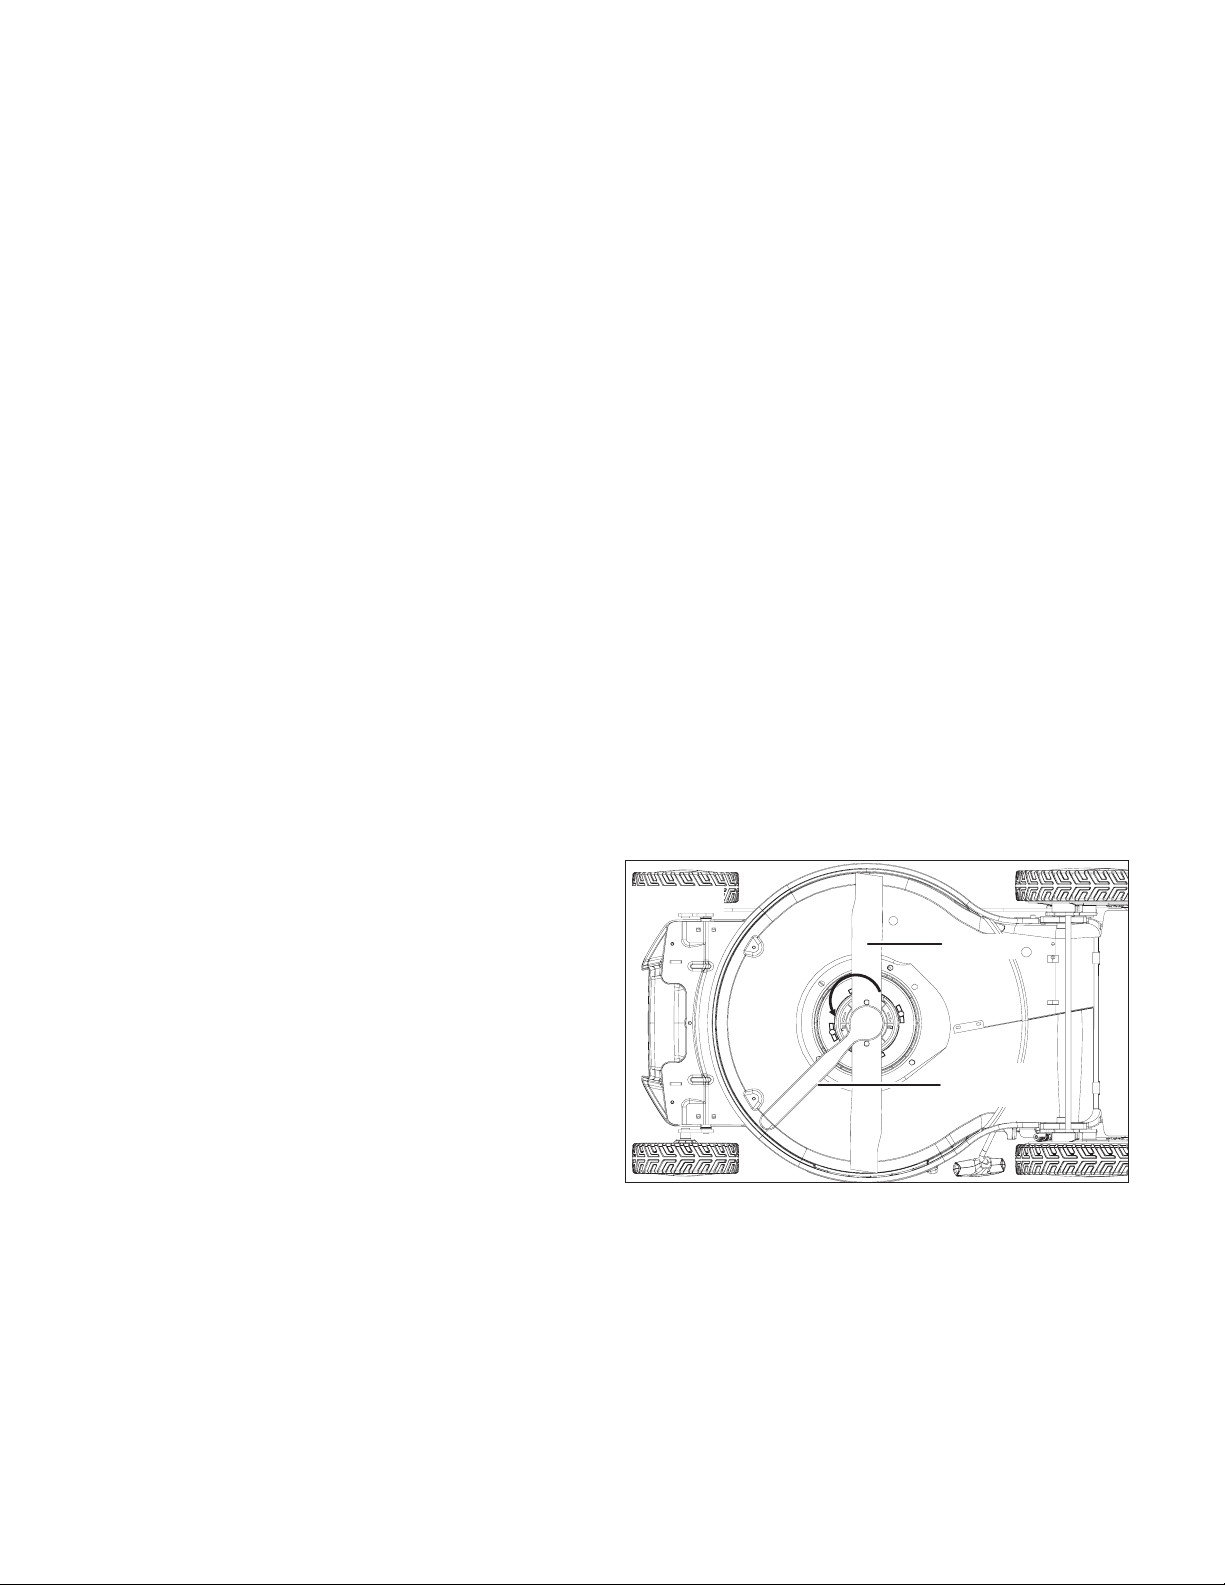
4. Using a 27 mm lug wrench (not provided), remove
the lug nut securing the blade by turning the lug nut
counterclockwise, then carefully remove the blade
(Figs. 16 to 17).
Fig. 16
Blade
27 mm lug
wrench
Loading ...
Loading ...
Loading ...