
Loading ...
Loading ...
Loading ...
12
Installing and Removing the Dust
Canister
Your sander is supplied with a dust canister to
help you keep the working area clean. The dust
canister is ideal for smaller jobs. For maximum
efciency, the dust canister should be emptied
frequently during operation.
WARNING
Always disconnect the plug
from the power source
before installing or removing the dust canister.
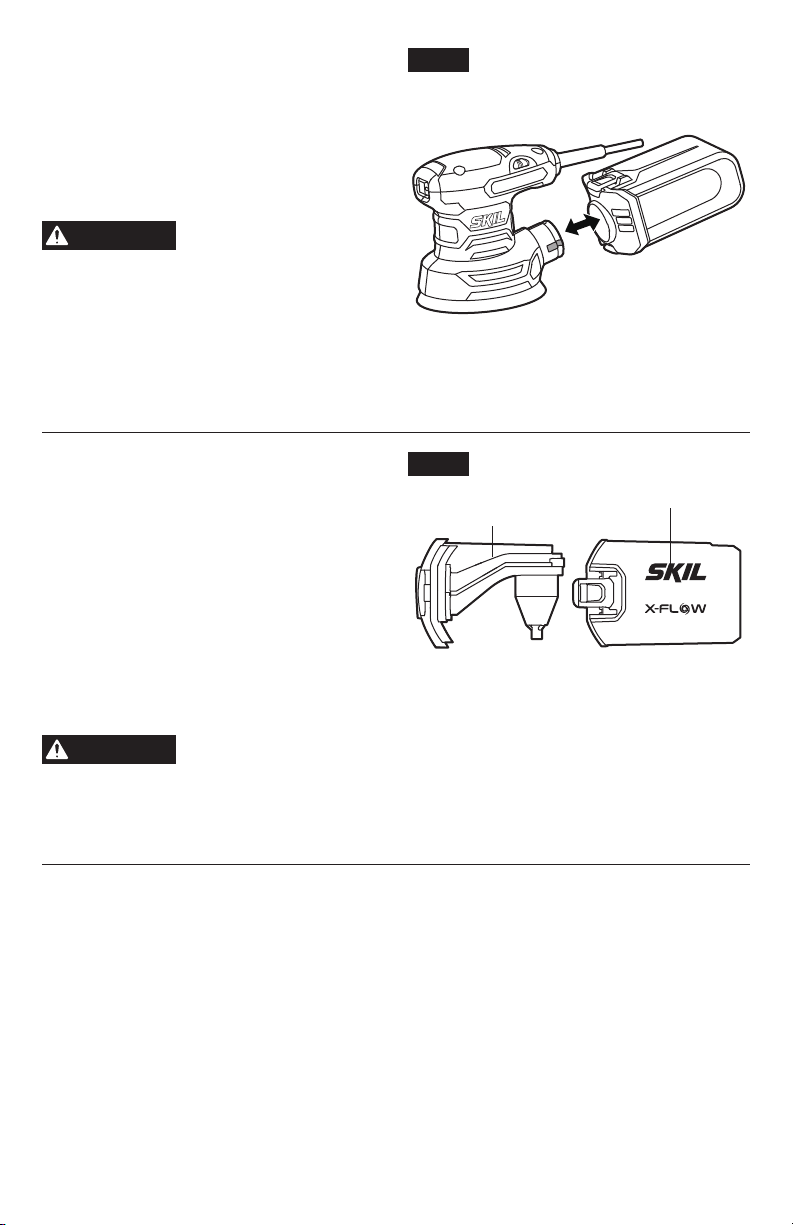
To install the dust canister, align the slot on
the dust canister with the rib on the tool, and
then push the dust canister onto the tool until it
locks into place. To remove the dust canister,
simply pull the dust canister away from the tool
(Fig. 5).
Cleaning and Emptying the Dust
Canister
Remove the dust canister from the sander and
shake out the dust. For a more thorough clean-
ing of the dust canister, remove the housing of
the dust canister from the lter and shake out
the dust (Fig. 6).
You may remove dust with a soft brush (not in-
cluded). You may notice that all the dust does
not come out of the dust canister. This will not
affect sanding performance, but will reduce
dust-collection efciency.
WARNING
Be extremely careful of dust
disposal; materials in ne
particle form may be explosive. Do not throw sanding dust on an open re. Combustion from
mixture of varnishes, lacquers, polyurethane, oil or water with dust particles can occur if there
is a static discharge, a spark introduced in the canister, or excessive heat.
Fig. 5
Fig. 6
Filter
Housing
Loading ...
Loading ...
Loading ...