
Loading ...
Loading ...
Loading ...
English
10
20
12
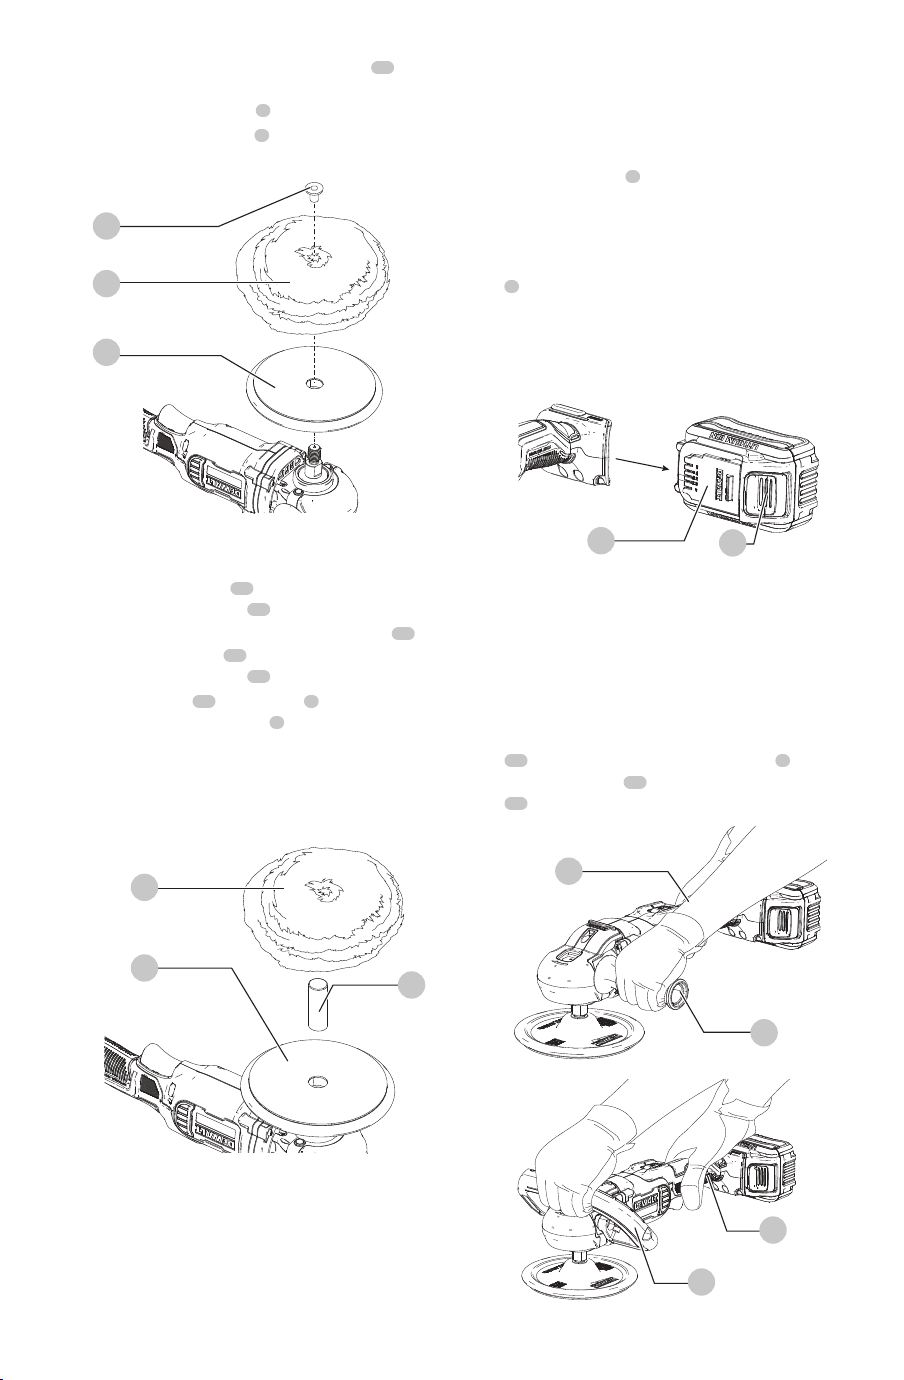
Fig.F
7
20
Proper Hand Position (Fig. F)
WARNING: To reduce the risk of serious personal
injury, ALWAYS use proper hand position as shown.
WARNING: To reduce the risk of serious personal
injury, ALWAYS hold securely in anticipation of a
suddenreaction.
Proper hand position requires one hand on the main
handle
20
and one hand on the auxiliary handle
7
or one
hand on the main handle
20
and one hand on the bail
handle
12
.
Fig.E
2
1
OPERATION
WARNING: To reduce the risk of serious personal
injury, turn unit off and remove the battery pack
before making any adjustments or removing/
installing attachments or accessories. An
accidental start-up can causeinjury.
Fig. D
18
19
17
To Attach Polishing Pad with Hook and
Loop Backing Pad (Fig. A, D)
1. Insert the centering tube
17
into the center hole in the
hook and loop backing pad
19
.
2. Line up the center hole on the hook and loop pad
18
with the centering tube
17
and attach the pad to the
hook and loop backing pad
19
.
3. Screw backing pad
19
onto spindle
8
, while
depressing spindle lock button
6
.
To Remove Pads
Turn them by hand in the opposite direction from normal
rotation to allow lock button to engage spindle, then
unscrew pads in normal direction for right-handthread.
Fig. C
15
14
16
2. Engage the hexagonal hole in the backing pad
16
.
Holding the three pieces firmly together, place the
assembly on the tool spindle
8
.
3. Hold the spindle lock button
6
while turning the pads
clockwise to thread them completely on thespindle.
Installing and Removing the Battery Pack
(Fig. E)
nOTE: For best results, make sure your battery pack is
fullycharged.
To install the battery pack
1
into the tool handle, align the
battery pack with the rails inside the tool’s handle and slide
it into the handle until the battery pack is firmly seated in
the tool and ensure that it does notdisengage.
To remove the battery pack from the tool, press the release
button
2
and firmly pull the battery pack out of the tool
handle. Insert it into the charger as described in the charger
section of thismanual
Loading ...
Loading ...
Loading ...