Loading ...
Loading ...
Loading ...
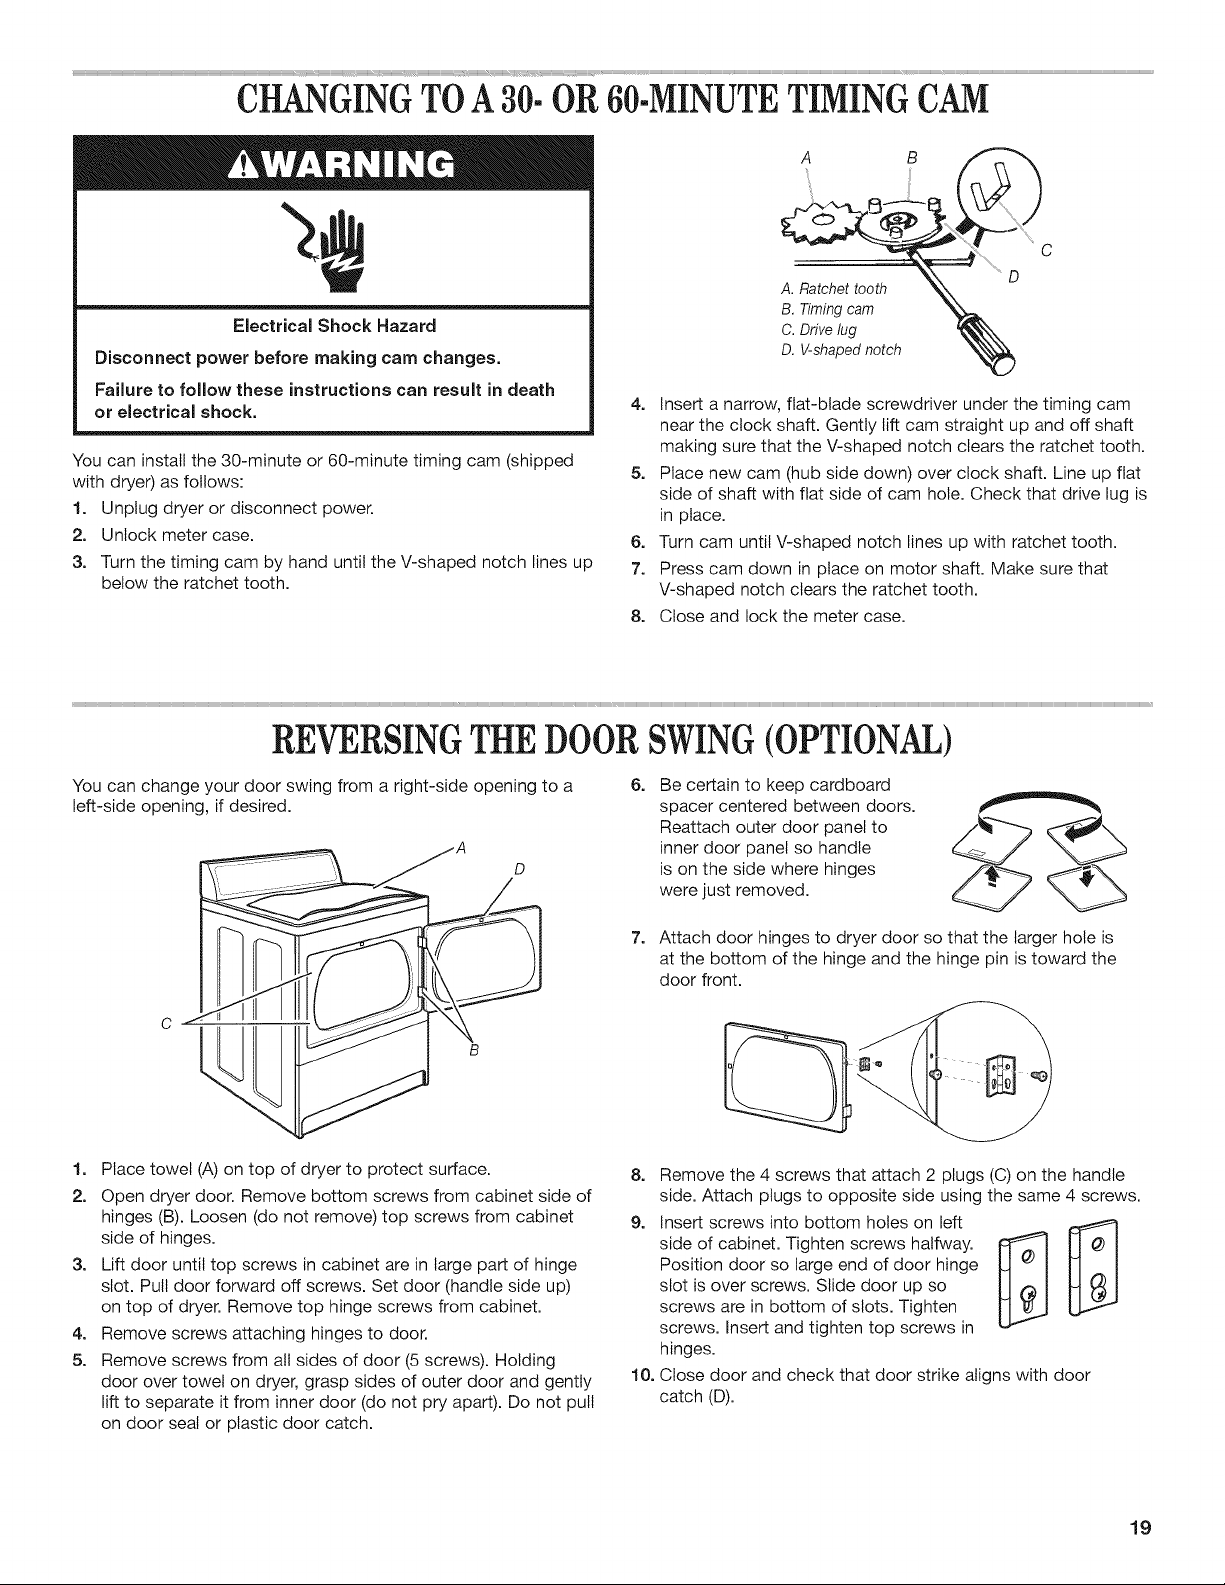
CHANGINGTOA30-OR 60-MINUTETIMINGCAM
Electrical Shock Hazard
Disconnect power before making cam changes.
Failure to follow these instructions can result in death
or electrical shock.
You can install the 30-minute or 60-minute timing cam (shipped
with dryer) as follows:
1. Unplug dryer or disconnect power.
2. Unlock meter case.
3. Turn the timing cam by hand until the V-shaped notch lines up
below the ratchet tooth.
.............. _ D
A. Ratchettooth _.\
B. Timir_gcam
c D ivelug k%\\\
D. V-shapednotch _X_
,<j
4. Insert a narrow, flat-blade screwdriver under the timing cam
near the clock shaft. Gently lift cam straight up and off shaft
making sure that the V-shaped notch clears the ratchet tooth.
5. Place new cam (hub side down) over clock shaft. Line up flat
side of shaft with flat side of cam hole. Check that drive lug is
in place.
6. Turn cam until V-shaped notch lines up with ratchet tooth.
7. Press cam down in place on motor shaft. Make sure that
V-shaped notch clears the ratchet tooth.
8. Close and lock the meter case.
REVERSINGTHE DOORSWING(OPTIONAL)
You can change your door swing from a right-side opening to a
left-side opening, if desired.
D
c
6=
Be certain to keep cardboard
spacer centered between doors.
Reattach outer door panel to
inner door panel so handle
is on the side where hinges
were just removed.
7=
Attach door hinges to dryer door so that the larger hole is
at the bottom of the hinge and the hinge pin is toward the
door front.
1. Place towel (A) on top of dryer to protect surface.
2. Open dryer door. Remove bottom screws from cabinet side of
hinges (B). Loosen (do not remove) top screws from cabinet
side of hinges.
3. Lift door until top screws in cabinet are in large part of hinge
slot. Putt door forward off screws. Set door (handle side up)
on top of dryer. Remove top hinge screws from cabinet.
4. Remove screws attaching hinges to door.
5. Remove screws from all sides of door (5 screws). Holding
door over towel on dryer, grasp sides of outer door and gently
lift to separate it from inner door (do not pry apart). Do not pull
on door seal or plastic door catch.
8. Remove the 4 screws that attach 2 plugs (C) on the handle
side. Attach plugs to opposite side using the same 4 screws.
9. Insert screws into bottom holes on left
side of cabinet. Tighten screws halfway.
Position door so large end of door hinge
slot is over screws. Slide door up so
screws are in bottom of slots. Tighten
screws. Insert and tighten top screws in
hinges.
10. Close door and check that door strike aligns with door
catch (D).
19
Loading ...
Loading ...
Loading ...