Loading ...
Loading ...
Loading ...
14
English
(4) When charging is completed
○
The USB power indicator lamp will not go out when a
USB device has been completely charged.
To verify charge status, check the USB device.
○
Turn the USB power switch OFF and unplug the power
cord from the electrical outlet. (Fig. 9)
○
Remove the battery from the charger and place the
rubber cover over the USB port.
BEFORE USE
WARNING
To avoid serious accident, ensure the switch is in
the OFF position, and pull out the battery.
1. Check the work area environment
Check the work area to make sure that it is clear of
debris and clutter.
Clear the area of unnecessary personnel. Ensure that
lighting and ventilation is adequate.
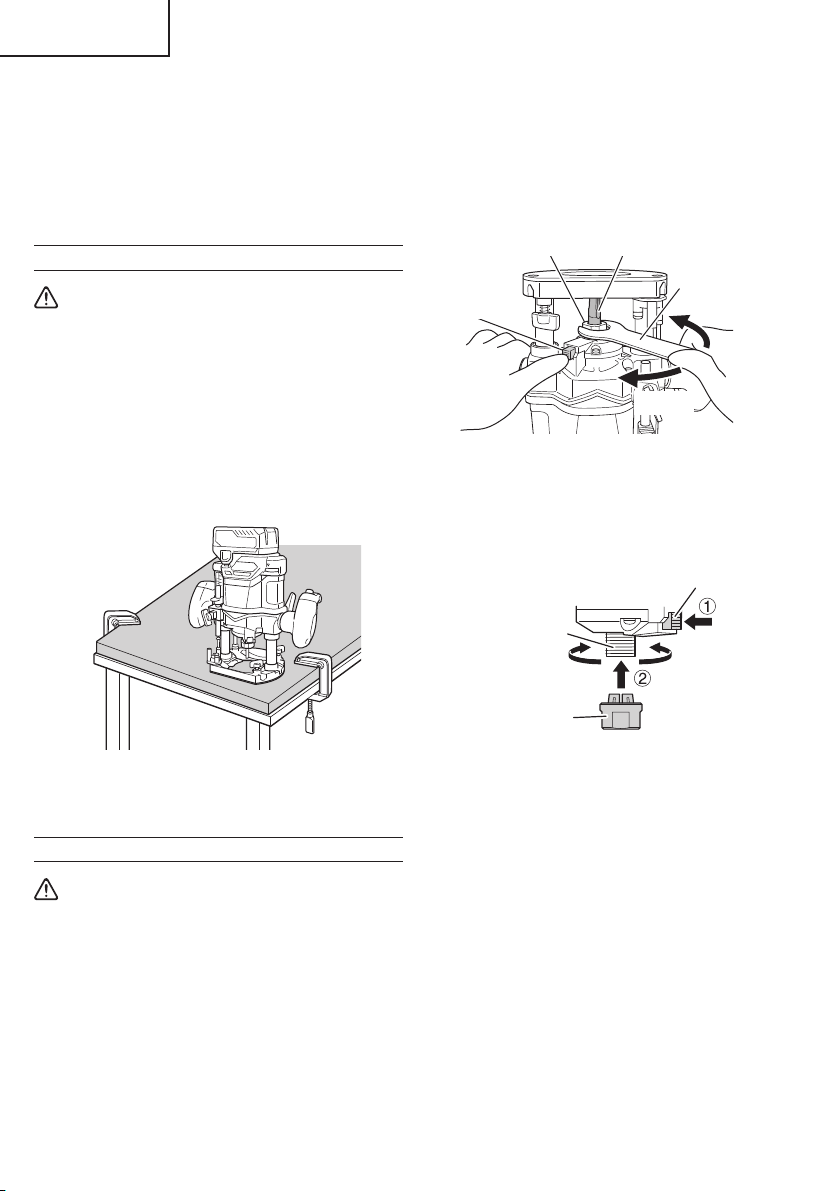
2. Secure the material with a vice to ensure that both
hands are free to hold and operate the power tool.
(Fig. 10)
Fig. 10
3. Power switch
Ensure that the switch is in the OFF position.
INSTALLING AND REMOVING BITS
WARNING
To avoid serious accident, ensure the switch is in
the OFF position, and pull out the battery.
Use the included 23 mm wrench to tighten the
collet chuck.
Use of tools other than the included can result in
over or under-tightening which may cause injury.
1. Installing bits
(1) Loosen the lock lever (Fig. 2), raise the tool to the
maximum stroke position and return the lock lever to
the tightening position.
(2) Clean and insert shank of bit into the collet chuck until
shank bottoms, then back it out approximately 1/16"
(approx. 2 mm).
(3) With the bit inserted and pressing the lock pin holding
the shaft, use the 23 mm wrench to fi rmly tighten the
collet chuck in a clockwise direction (viewed from
under the router). (Fig. 11)
Lock pin
23 mm Wrench
Loosen
Collet chuck
Bit
Tighten
Fig. 11
When using the 1/4" (6.35 mm) diameter shank bit, replace
the equipped collet chuck with the one for 1/4" (6.35 mm)
diameter shank bit which is provided as the standard
accessory. (Fig. 12)
Lock pin
Tighten
Shaft
Collet chuck
Loosen
Fig. 12
NOTE
○
Ensure that the collet chuck is fi rmly tightened
after inserting a bit. The collet chuck may become
deformed if the collet chuck is tightened without a bit
set in place.
○
Ensure that the lock pin is not inserted into the shaft
after tightening the collet chuck. Failure to do so will
result in damage to the collet chuck, lock pin and
shaft.
○
Use only router bits of which the maximum speed, as
indicated on the bit, does exceed the maximum speed
of the router.
2. Removing bits
(1) Loosen the lock lever, raise the tool to the maximum
stroke position and return the lock lever to the
tightening position.
(2) Pressing the lock pin, loosen the collet chuck with the
included 23 mm wrench to pull out the bit.
00BookM3612DANA.indb1400BookM3612DANA.indb142020/11/189:52:382020/11/189:52:38
Loading ...
Loading ...
Loading ...