CC
BASE HITTING NET INSTRUCTIONS
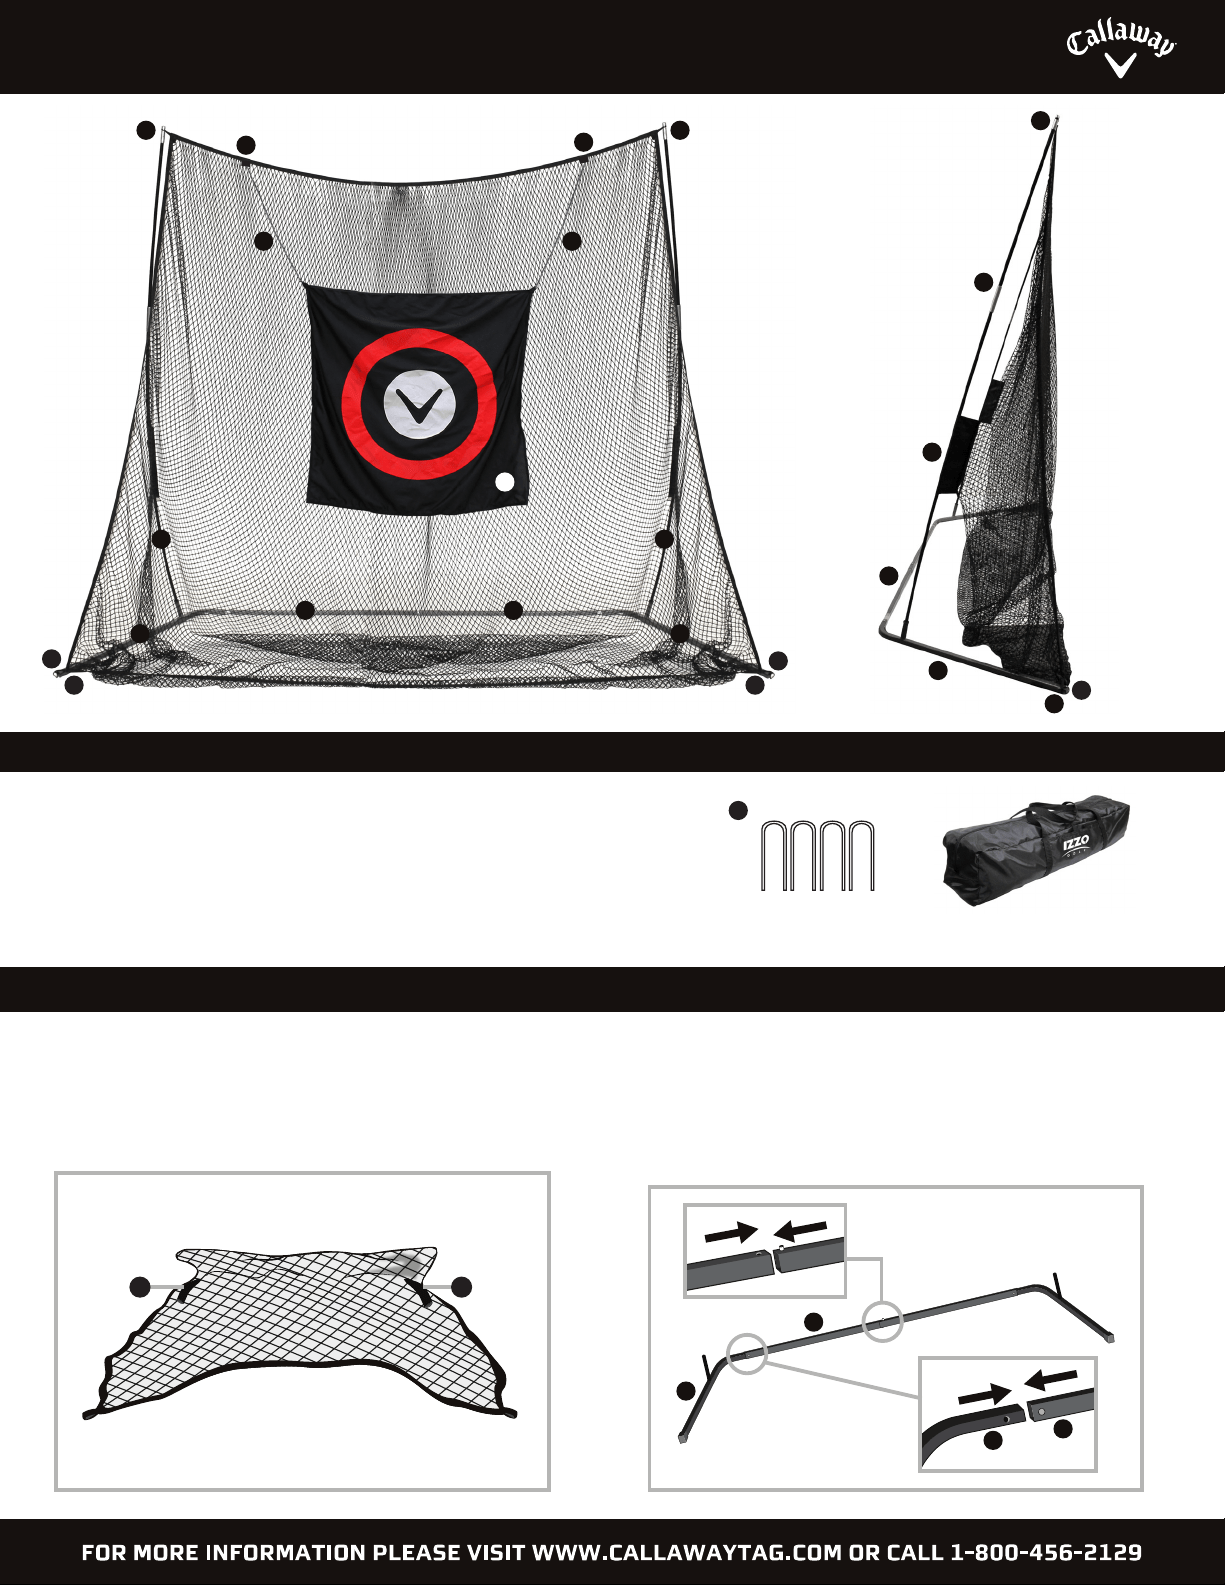
KEY: INCLUDES:
A. Hitting Target
B. Vertical Frame Poles (2)
C. Side Securing Sleeves (2)
D. Straight Base Poles (2)
E. Angled Base Poles
F. Top Securing Loops
G. Base Hooks
H. Bottom Securing Loops
I. Sewn-In Tabs
J. Black Threaded Cord
K. Spring Loaded Holder
L. Ground Stakes
Carry Case
A
G
B
D D
C
E
BB
D
E
G
FF
G
F
H H
H
E
setup instructions
Lay hitting net with Side Securing Sleeves (C) facing
ceiling. The 2 corners with gray strap will become bottom
of hitting net.
step 1
Connect the 2 Straight Base Poles (D) by pushing spring lock
button in. Line button up with hole & push until you hear a click.
Locate the 2 Angled Base Poles (E) & connect to each end of
connected straight base poles. The base hooks at the end of
each angled base pole indicate the front of net.
step 2
E
D
E
D
L
I
I
J J
B
C
B
F
B
B
G
H
E
K
FIG. 1
A
FIG. 2
L
J
I
Connect the Vertical Frame Poles (B) & slide through
the Side Securing Sleeve (C) making sure the silver
notched adapter is pointing toward the top of the net.
Repeat on the other side.
step 3
Connect Top Securing Loops (F) at top of net to the
silver adapter on the Vertical Frame Poles (B). Repeat
on the other side.
step 4
Secure Vertical Frame Poles (B) to base by sliding end into
opening on the Angled Base Poles (E). Make sure Side
Securing Sleeve (C) are facing away from Base Hooks (G)
located at the end of the Angled Base Poles (E).
step 5
Attach Hitting Target (A) to net by locating the
Sewn-In Tabs (I) at top of net. Run the Black
Threaded Cord (J) through the Sewn-In Tab (I)
on each side of the net. Then loop the Black
Threaded Cord (J) through the hole in the
Spring Loaded Holder (K) to create a loop.
step 7 (FIG. 1)
Locate Bottom Securing Loops (H) at bottom corner
of net & connect to the Base Hooks (G) located at the
end of the Angled Base Poles (E). Repeat on other side.
step 6
E
For outdoor use, place “U” shaped Ground
Stakes (L) around each base pole. Press
firmly into ground to secure.
step 8 (FIG. 2)