Loading ...
Loading ...
Loading ...
ENGLISH
8
installing attachments or accessories. An accidental
start-up can causeinjury.
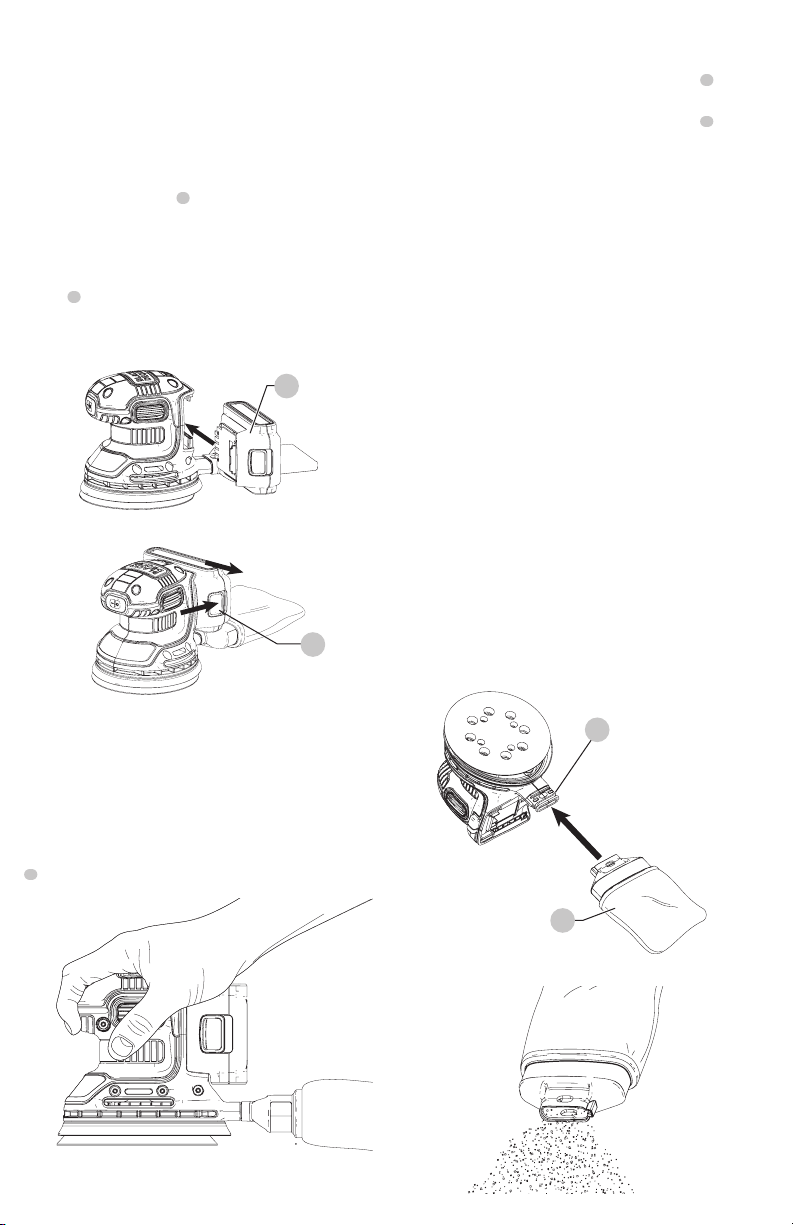
Installing and Removing the Battery Pack
(Fig. C, D)
NOTE: For best results, make sure your battery pack is
fullycharged.
To install the battery pack
7
into the tool handle, align the
battery pack with the rails inside the tool’s handle and slide
it into the handle until the battery pack is firmly seated in the
tool and ensure that it does notdisengage.
To remove the battery pack from the tool, press the release
button
8
and firmly pull the battery pack out of the tool
handle. Insert it into the charger as described in the charger
section of thismanual.
Fig. C
7
Fig. D
8
Proper Hand Position (Fig. E)
WARNING: To reduce the risk of serious personal injury,
ALWAYS use proper hand position as shown.
WARNING: To reduce the risk of serious personal injury,
ALWAYS hold securely in anticipation of a sudden
reaction.
Proper hand position requires one hand on the main handle
1
as shown in figure E.
Fig. E
On/Off Switch
• To switch the tool on, depress the on/off switch
2
at the
“I” position.
• To switch the tool off, depress the on/off switch
2
at
the”O” position.
Operation
WARNING: Let the tool work at its own pace. Do
not overload.
Grasp the sander and turn it ON. Move it in long, sweeping
strokes along the surface, letting it do the work. Pushing
down on the tool while sanding actually slows the removal
rate and produces an inferior quality finish.
Check your work often. This sander is capable of removing
material rapidly.
Dust Collection (Fig. F, G)
WARNING: Collected sanding dust from sanding
surface coatings (polyurethane, linseed oil, etc.)
can selfignite in sander dust bag or elsewhere
and cause fire. To reduce risk, empty bag frequently
and strictly follow sander manual and coating
manufacturer’s instructions.
• The dust bag should be emptied after every 10 minutes
of sanding.
• Slide the dust bag onto the dust port and make sure that
it is securely attached
as shown in Figure F.
• To remove the dust bag, pull it off and away from the
back of the tool.
• To empty the dust bag, remove it from the dust port
and dump the sanding debris into an appropriate trash
receptacle Figure G.
Fig. F
4
5
Fig. G
Loading ...
Loading ...
Loading ...