Loading ...
Loading ...
Loading ...
14 31-5000473 Rev. 0
ENGLISH
INSTALLATION INSTRUCTIONS
Drain Test
Test the drainpipe to confirm that there are no leaks or other issues with the drainpipe.
• Turn on cooling operation and add water to check for drainage after system is fully
installed and power is applied.
• Check for proper pump operation by filling the pump reservoir with water and
powering up equipment.
Tubing Permissible Length and Height Difference:
Please refer to the Haier MRV selection software.
Tubing Materials and Specifications:
Please refer to the manual of the outdoor unit.
Additional Refrigerant Charge:
Add refrigerant according to the installation manual of outdoor unit. The addition of R410A refrigerant must be performed
with a digital scale to ensure the specified amount is added. Not following this can potentially cause efficiency issues or
compressor failure.
Connecting Procedures of Refrigerant Tubing:
Connect all the refrigerant tubes via flare connections.
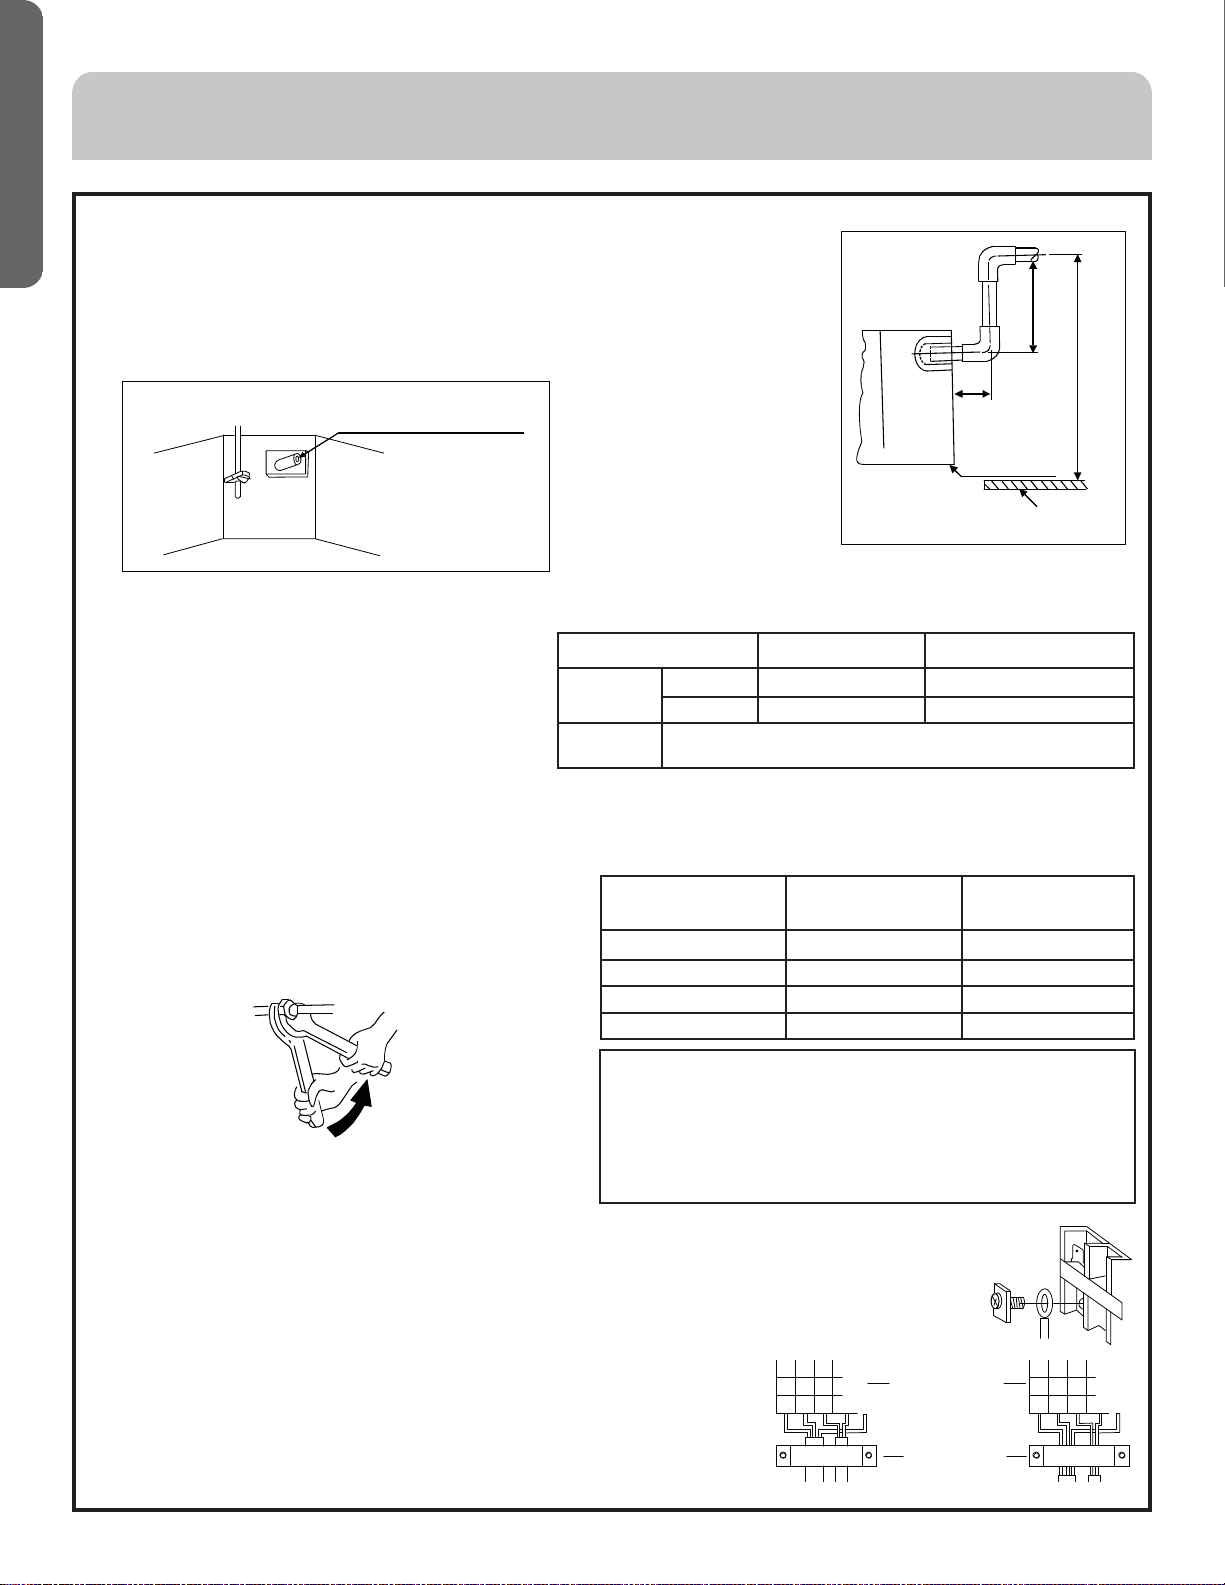
• Dual wrenches must be used in the connection of indoor
unit tubing.
• For tightening torque refer to the right table.
Wire Connections:
1. Connecting ring terminals:
The method of using circular terminal is shown in the figure. Take off the
screw, connect it to the terminal after placing it through the ring at the end
of the lead and tighten it down.
2. Connecting using straight terminals:
The method of using straight terminals is shown as follows: loosen the screw
before putting the wire into the terminal block, tighten the screw and confirm
it has been tightened by pulling the line gently.
3. Clamp the wires:
Secure the wires with the strain relief clips.
Joint of drainpipe
Under the ceiling
3.9in
(100mm)
below
Lifting 23.6in (600mm) below
Lifting 14in
(360mm) below
Model AB07VMRERAB AB09~48VMRERAB
Tubing Size
in(mm)
Gas Pipe Ø1/2 (Ø12.7) Ø5/8 (Ø15.88)
Liquid Pipe Ø1/4 (Ø6.35) Ø3/8 (Ø9.52)
Tubing
Material
R-410a rated copper tubing
Outer Diameter of
Tubing in(mm)
Mounting Torque
lb-in (N-m)
Flare Torque
Spec ft-lb (N-m)
Ø1/4 (Ø6.35) 104.4 (11.8) 13 (18)
Ø3/8 (Ø9.52) 216.8 (24.5) 30 (40)
Ø1/2 (Ø12.7) 443.7 (49.0) 43 (59)
Ø5/8 (Ø15.88) 693.9 (78.4) 76 (103)
Wrench
Cutting and Enlarging
• Cut the tube to the needed length.
• Ream the cut to remove shoulder. Do this with the tube
facing down to help fillings fall out.
• Add supplied flare nut to tube.
• Use 45° flare tool to create flare.
Connecting
circular
terminals
Terminal tier
Pressing clip
Correct pressing Wrong pressing
Loading ...
Loading ...
Loading ...