Loading ...
Loading ...
Loading ...
12 31-5000473 Rev. 0
ENGLISH
INSTALLATION INSTRUCTIONS
NOTE: Select an installation location according to
the piping and wiring in the ceiling, and determine the
direction of the piping before actually suspending the unit.
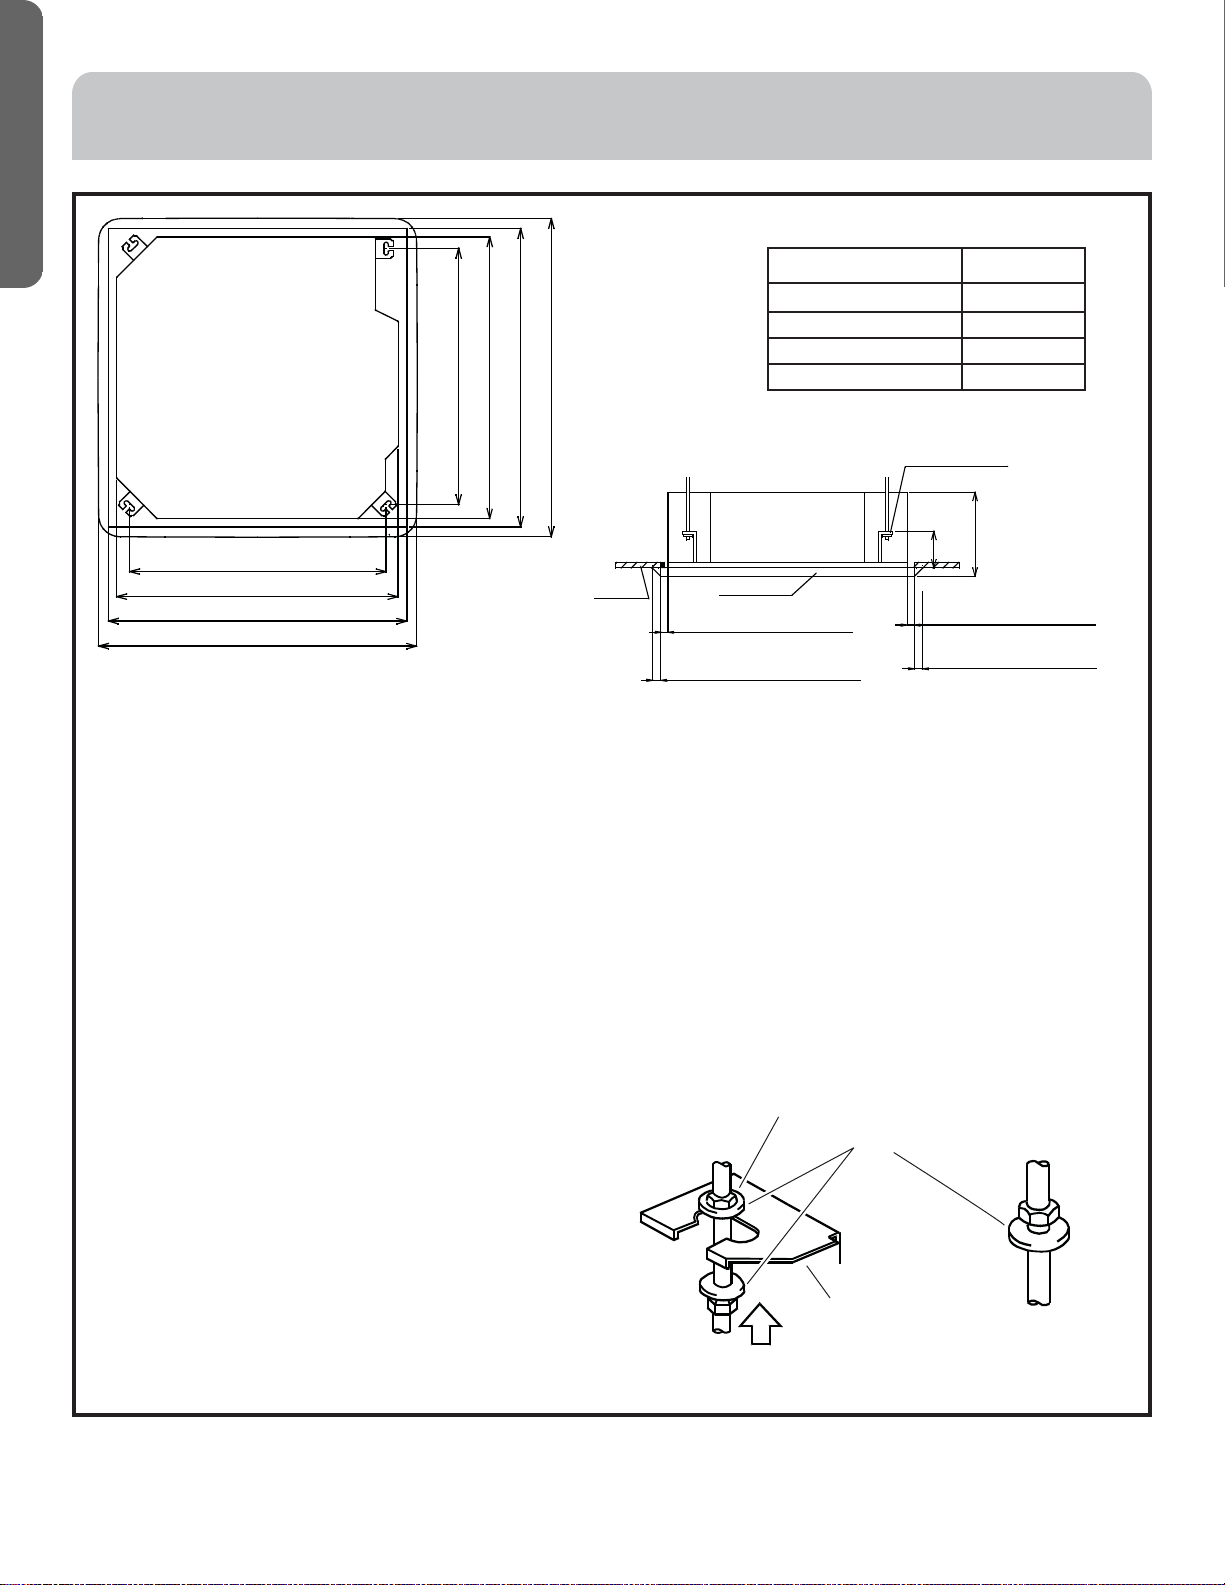
Hanging Unit
1. Mark the location using the cardboard template.
2. Install 3/8in threaded rods to structure using appropriate fasteners.
3. Add nuts and washers at approximate height.
4. Lift the cassette and position the threaded rods into the 4 mounting clips on each corner of the cassette unit.
5. Adjust the height of the unit so that bottom surface is recessed 1 inch from ceiling surface.
6. Using a level, adjust the nuts on the threaded rods to obtain a level reading across the bottom of the cassette unit.
7. Tighten the top nuts to lock unit into place. An additional nut on top and bottom of bracket may be added to jam against
the installation nuts to prevent them from loosening due to unit vibration.
Tighten the nut on the washer
• Check to be sure the indoor unit is level and that the
plastic drain tubes allow water to drain.
• Check the opening in the ceiling for proper size before
installing the unit frame. Frame should be secure and level.
• Fasten the screws to make the height difference between
the two sides of the indoor unit less than 0.2in(5mm).
Tightening (dual nuts)
[Secure Hoisting Foot]
Hoisting Foot
Washer
[Secure Washer Foot]
Nut (provided on site)
Model H
AB07VMRERAB 236
AB09~15VMRERAB 257
AB18~30VMRERAB 299
AB36~48VMRERAB 341
Gap between studs 31in (765mm)
Indoor unit 34in (850mm)
Ceiling 36in (890mm)
Decorated board 38in (950mm)
Gap between studs 31in (765mm)
Indoor unit 34in (850mm)
Ceiling 36in (890mm)
Decorated board 38in (950mm)
Hanger bracket
Distance between indoor unit
and ceiling 0.8in (20mm)
Overlap between ceiling and
trim panel 1.2in (30mm)
Distance between indoor unit
and ceiling 0.8in (20mm)
Overlap between ceiling and
trim panel 1.2in (30mm)
Trim panel
Ceiling
H
130
Loading ...
Loading ...
Loading ...