Loading ...
Loading ...
Loading ...
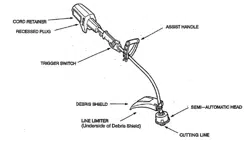
i ,i ii i ,,,IHIII iiiiiiiii ii • i i ,11,,,111 Ul
• SERVICE AND ADJUSTMENTS
TAL i iiiiiiiii HHII,,,,HH,,,I, I
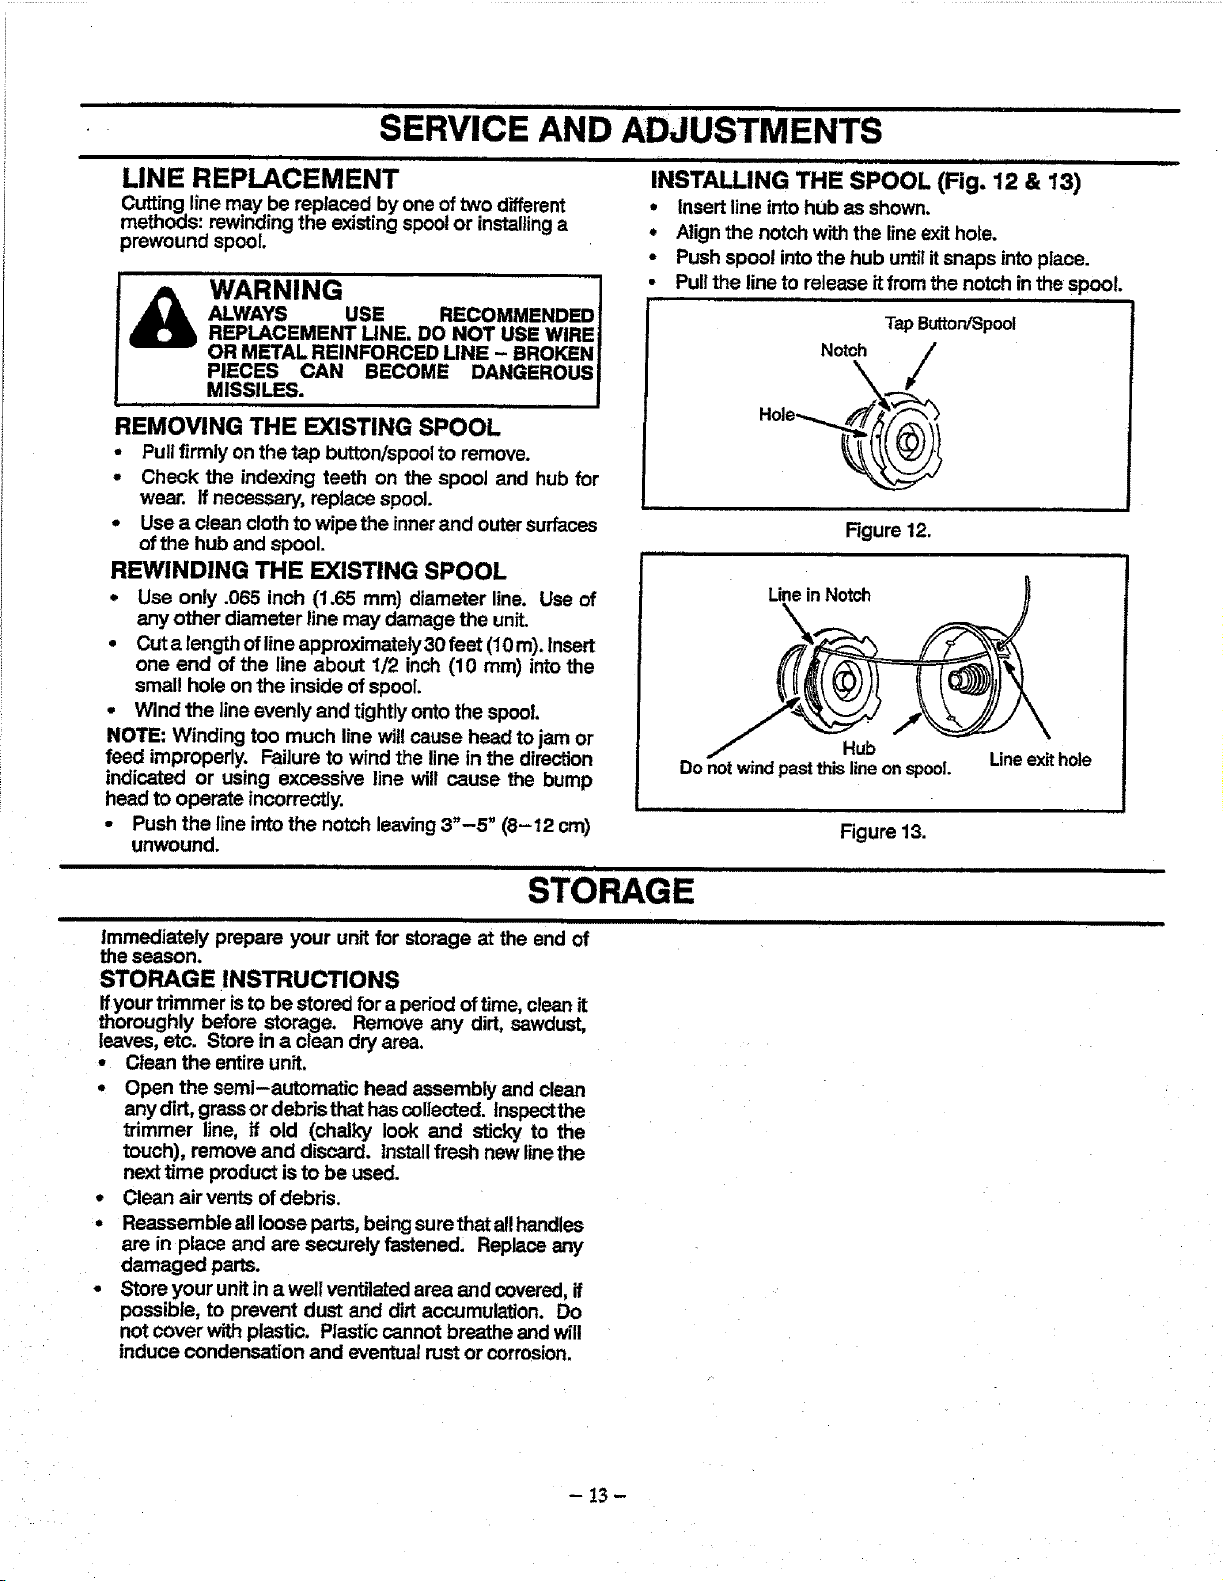
INS LING THE SPOOL (Fig. 12 & 13)
* Insert line into hub as shown.
* Alignthe notch with the lineexithole.
- Push spool intothe hub untilitsnaps intoplace.
• Pullthe line to release itfrom the notch inthe spool.
LINE REPLACEMENT
Cutting linemay be replaced by one of two different
methods: rewindingthe existing spoolor installinga
prewound spool.
WARNING I
ALWAYS USE RECOMMENDED I
REPLACEMENT LINE. DO NOT USE WIRE J
OR METAL REINFORCED LINE - BROKEN l
PIECES CAN BECOME DANGEROUS I
MISSILES. J
REMOVING THE EXISTING SPOOL
- Pullfirmly on the tap button/spoolto remove.
- Check the indexing teeth on the spool and hub for
wear. Ifnecessary, replace spool.
o Use a clean cloth to wipe the inner and outersurfaces
ofthe hub and spool.
REWINDING THE EXISTING SPOOL
• Use only .065 inch (1.65 ram) diameter line. Use of
any other diameter line may damage the unit.
• Cut a length of lineapproximately30 feet (10 m). Insert
one end of the line about 1/2 inch (10 ram) into the
small hole on the inside of spool.
• Wind the line evenly and tightlyonto the spoof.
NOTE: Winding too much line witl cause head to jam or
feed improperly. Failure to wind the line in the direction
indicated or using excessive line will cause the bump
head to operate incorrectly.
• Push the line into the notch leaving3"-5" (8-12 cm)
unwound.
STORAGE
ii
Immediately prepare your unit for storage at the end of
theseason.
STORAGE INSTRUCTIONS
Ifyour trimmer isto be stored for a period oftime, clean it
thoroughly before storage. Remove any dirt, sawdust,
leaves, etc. Store in a clean dry area.
• Clean the entire unit.
° Open the semi-automatic head assembly and clean
any dirt, grassor debristhat hascollected, tnspectthe
trimmer fine, ff old (chalky look and sticky to the
touch), remove and discard. Installfresh new linethe
next time product isto be used.
° Clean air vents ofdebris.
° Reassemble all loose parts,being surethatall handles
are in place and are securely fastened. Replace any
damaged parts.
° Store your unitin a well ventilated area and covered, if
possible, to prevent dust and dirtaccumulation. Do
not cover with plastic. Plastic cannot breathe and will
induce condensation and eventualrust or corrosion.
TapButtorJSpool
Notch /
Figure 12.
H
LineinNotch
Hub
Donotwindpastthislineonspool.
Lineexit hole
Figure 13.
i i L I I
- t3 -
Loading ...
Loading ...
Loading ...